- Company Articles
- Products and Technology
- Installation And Maintenance
- Saddle Pipe Clamps for Vertical vs. Horizontal Pipe Runs: Installation Differences

Saddle Pipe Clamps for Vertical vs. Horizontal Pipe Runs: Installation Differences
Related Product
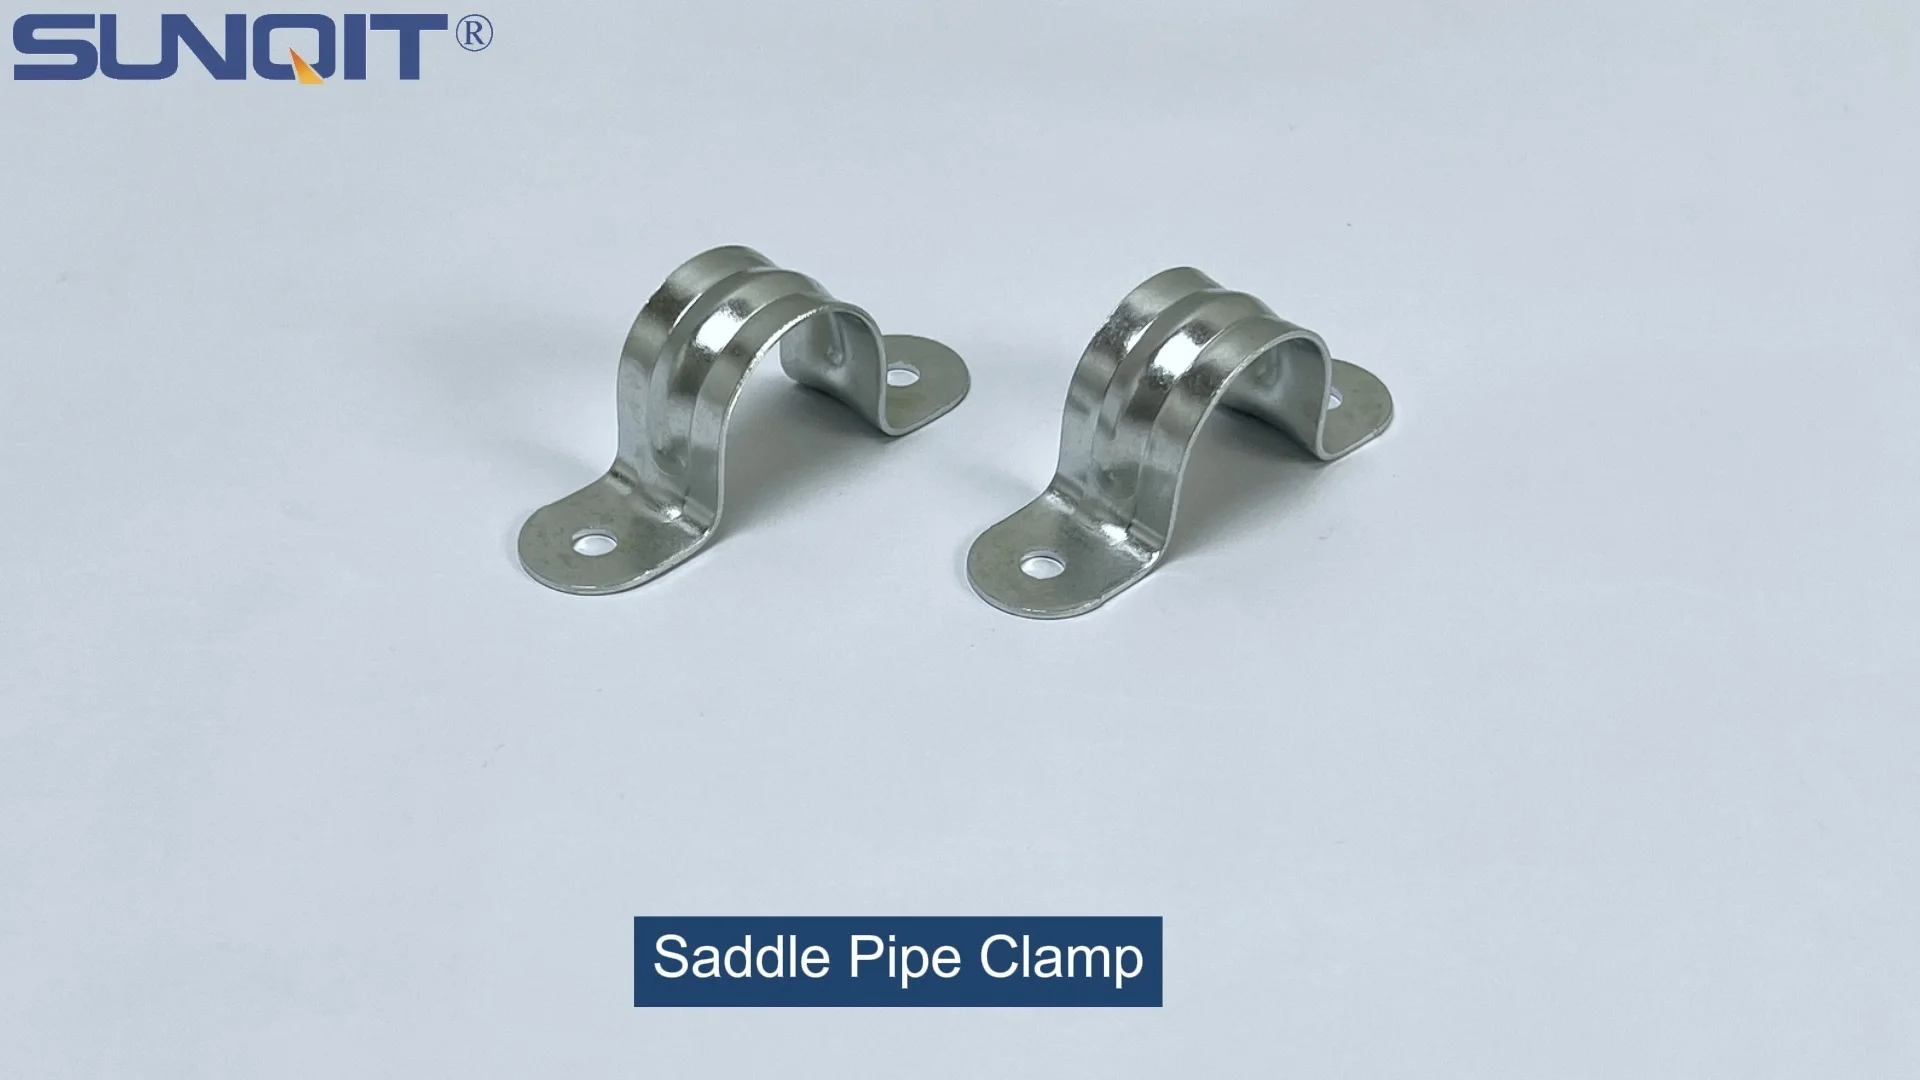
Saddle Pipe Clamp
Saddle pipe clamp, used for board connect with pipe, usually for table top installation.
In the world of manufacturing, warehousing, or even workshop setups, it's often the small, unassuming components that keep everything running smoothly. Take saddle pipe clamps, for example. These simple yet vital tools are the unsung heroes holding pipes in place, whether they're part of a lean production line, a material handling system, or the framework of a workbench. But here's the thing: installing a saddle pipe clamp on a vertical pipe run (think pipes stretching from floor to ceiling) isn't the same as mounting one on a horizontal run (pipes running along walls or overhead). The forces at play, the tools needed, and even the potential pitfalls vary significantly. In this article, we'll break down these differences, share practical installation tips, and help you avoid common mistakes—because getting it right the first time saves time, money, and headaches down the line.
What Are Saddle Pipe Clamps, Anyway?
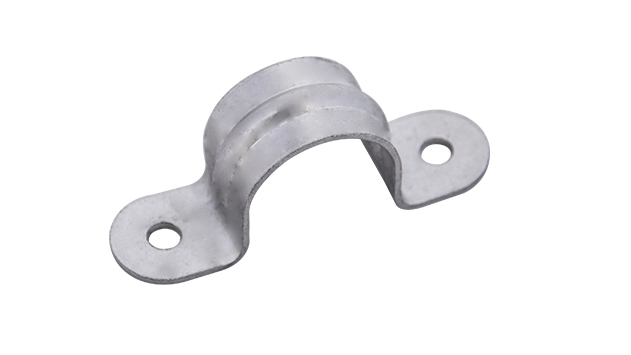
Before diving into the installation nuances, let's make sure we're all on the same page. Saddle pipe clamps are U-shaped or half-circular fasteners designed to secure pipes to walls, ceilings, floors, or other support structures. They typically consist of a curved "saddle" that wraps around the pipe, two mounting holes (for bolts or screws), and sometimes a rubber or plastic lining to protect the pipe's surface and reduce vibration. You'll find them in almost every industry where pipes are used—from carrying fluids in a factory to supporting the aluminum profile frames of a workbench or even holding roller track systems in place for material transport.
What makes saddle clamps so versatile is their simplicity. Unlike rigid brackets, they're adjustable (to fit different pipe diameters) and relatively easy to install. But that simplicity can be misleading. Installing them incorrectly—say, using a horizontal clamp setup for a vertical pipe—can lead to loose pipes, sagging structures, or even safety hazards. So, let's start by understanding the key differences between vertical and horizontal pipe runs.
Vertical vs. Horizontal Pipe Runs: What's the Big Deal?
At first glance, vertical and horizontal pipes might seem like they just point in different directions. But in reality, they face completely different challenges once installed:
- Gravity: Vertical pipes fight against gravity pulling them downward. A loose clamp here could mean the pipe slips or even falls. Horizontal pipes, on the other hand, are prone to sagging over time, especially if they're long or carry heavy loads. The clamp's job here is to prevent that sag.
- Weight Distribution: Vertical pipes often support downward loads (like a pipe carrying water from an upper tank to a lower one). Horizontal pipes might carry lateral loads (like materials sliding along a roller track) or simply their own weight over a span.
- Accessibility: Installing a clamp 10 feet up a vertical wall is trickier than mounting one at eye level on a horizontal beam. This affects the tools you use and the safety precautions you need to take.
These differences mean that even if you're using the same type of saddle clamp, the way you install it will vary. Let's break down each installation process step by step.
Installing Saddle Pipe Clamps on Vertical Pipe Runs
Vertical pipe runs are common in settings like production lines, where pipes might carry compressed air from ceiling-mounted tanks down to workstations, or in storage racks where vertical supports need to be secured to the floor. Here's how to approach installation:
Tools You'll Need
Gather these before you start to avoid climbing up and down ladders mid-project:
- Saddle pipe clamps (matched to your pipe diameter—measure twice, buy once!)
- Drill and drill bits (masonry bits if mounting to concrete, wood bits for studs)
- Socket wrench or screwdriver (depending on bolt/screw type)
- Level (to ensure the pipe stays straight)
- Pencil or marker (to mark drill points)
- Stud finder (if mounting to drywall or wooden walls)
- Rubber mallet (to gently tap clamps into place if needed)
- Safety gear: gloves, goggles, and a sturdy ladder or step stool
Step-by-Step Installation Guide
1. Plan Your Layout: First, mark where the pipe will run. Use a level to draw a straight vertical line on the wall or support structure—this ensures your pipe won't lean to one side. Space your clamps evenly; for vertical runs, aim for one clamp every 3–4 feet (closer if the pipe is heavy or carries fluid). Pro tip: If the pipe is particularly long, add an extra clamp near the top to counteract downward pressure.
2. Prep the Mounting Surface: If you're mounting to drywall, use a stud finder to locate wall studs—drywall alone can't support the weight of a vertical pipe. For concrete or brick walls, mark drill points and pre-drill holes (use a masonry bit and hammer drill for best results). For metal supports (like aluminum profile frames), use a metal drill bit and lubricate it with cutting oil to prevent overheating.
3. Position the Pipe and Clamp: Have a helper hold the pipe against the wall along your marked line (safety first—don't try to hold a heavy pipe and drill at the same time!). Slide the saddle clamp over the pipe so the mounting holes align with your pre-drilled marks. Make sure the clamp's rubber lining (if included) is in contact with the pipe—this prevents scratches and reduces noise from vibration.
4. Secure the Clamp: insert bolts or screws through the clamp's mounting holes and into the wall/support. Tighten them gradually, alternating between bolts (like you would with a car tire) to ensure even pressure. Don't over-tighten—you could warp the clamp or damage the pipe. A good rule of thumb: tighten until the clamp is snug, then give it a quarter-turn more.
5. Check for Stability: Once all clamps are installed, gently shake the pipe to test for movement. If it wobbles, check if the clamps are tight or if the mounting surface is secure. For vertical runs, even a small amount of play can get worse over time, so err on the side of tightness (but not too tight!).
Common Challenges with Vertical Installation
Uneven Surfaces: If your wall or support isn't perfectly flat, the clamp might not sit flush against the pipe. Fix this by adding a thin shim (like a piece of rubber or metal) between the clamp and the wall to fill gaps.
Pipe Slippage: Over time, gravity can cause vertical pipes to slowly slide downward, loosening clamps. To prevent this, use clamps with serrated edges or a rubber lining—these grip the pipe better. You can also add a small "stop" bracket at the bottom of the pipe (like a lean pipe joint welded to the floor) to block downward movement.
Limited Access: Installing clamps near the ceiling or in tight corners can be tricky. Use a magnetic level (to free up your hands) or extendable drill bits to reach high spots safely.

Installing Saddle Pipe Clamps on Horizontal Pipe Runs
Horizontal pipe runs are everywhere: think overhead pipes in a warehouse, handrails along a walkway, or the roller track systems that move boxes from one station to another. Unlike vertical runs, horizontal pipes have to fight sagging over time—especially if they're long or carry heavy loads. Here's how to install their clamps correctly:
Tools You'll Need
Most tools are similar to vertical installation, but you'll want to add a few extras:
- String line or laser level (to ensure the pipe is perfectly horizontal)
- Spacing gauge (to measure equal distance between clamps)
- Channel locks or pipe wrenches (to hold the pipe steady while tightening clamps)
- Anti-sag brackets (for long spans over 6 feet)
Step-by-Step Installation Guide
1. Plan for Sag: Horizontal pipes naturally sag in the middle over time, so your clamps need to support them evenly. For most applications, space clamps every 4–5 feet (closer for heavy pipes or spans over 8 feet). If you're installing a roller track system (common in warehouses for sliding materials), the clamps must be perfectly aligned to keep the rollers moving smoothly—even a small dip can cause jams.
2. Mark the Level Line: Use a string line or laser level to mark a horizontal line on the ceiling or wall. Unlike vertical runs, even a tiny slope here can cause problems (e.g., materials sliding backward on a roller track). Double-check with a bubble level to be sure.
3. Mount the Clamps: Pre-drill holes as with vertical runs, but pay extra attention to ceiling joists or overhead supports—they need to bear the full weight of the pipe and any load it carries. For horizontal runs along walls, consider using "J-hook" saddle clamps (which wrap under the pipe) instead of standard U-clamps—they provide better upward support against sagging.
4. Secure the Pipe: Place the pipe in the clamps and tighten the bolts. For horizontal runs, it's critical to leave a tiny bit of "give" in the clamp—pipes expand and contract with temperature changes, and a too-tight clamp can cause stress cracks. A good test: you should be able to rotate the pipe slightly in the clamp (but not slide it back and forth).
5. Add Support for Long Spans: If your horizontal pipe runs longer than 8 feet, install an anti-sag bracket in the middle. These are small, T-shaped brackets that bolt to the ceiling or wall and cradle the pipe from below, preventing mid-span drooping. This is especially important for roller track systems, where a sag could derail products mid-transport.
Common Challenges with Horizontal Installation
Sagging Over Time: Even with proper spacing, pipes can sag if the clamps loosen. Check them quarterly and retighten as needed. For critical systems (like roller tracks), use spring-loaded clamps that automatically adjust for minor sagging.
Uneven Weight Distribution: If the pipe carries materials (e.g., a horizontal pipe supporting a workbench shelf), the weight might not be spread evenly. Add extra clamps near heavy loads to prevent bending.
Overhead Installation Hazards: Working above your head increases the risk of tools or debris falling. Always wear a hard hat, and use a tool belt to keep screws and drills within reach—never balance them on the ladder!

Vertical vs. Horizontal Installation: A Side-by-Side Comparison
| Aspect | Vertical Pipe Runs | Horizontal Pipe Runs |
|---|---|---|
| Primary Concern | Gravity pulling the pipe downward; risk of slippage | Sagging in the middle; uneven weight distribution |
| Clamp Spacing | Every 3–4 feet (closer for heavy pipes) | Every 4–5 feet (closer for spans over 8 feet) |
| Best Clamp Type | U-clamps with rubber lining (for grip); fixed-mount brackets | J-hook clamps (upward support); adjustable clamps for expansion |
| Mounting Surface | Must be load-bearing (studs, concrete, metal supports) | Overhead joists or wall studs; anti-sag brackets for long spans |
| Tightening Torque | Snug (prevents slippage); avoid over-tightening | Slightly loose (allows for thermal expansion); firm but not rigid |
| Common Mistakes | Mounting to drywall alone; uneven clamp spacing | Ignoring sag; spacing clamps too far apart |
| Example Applications | Vertical support beams for workbenches; fluid-carrying pipes | Roller track systems; overhead material transport pipes |
Material Matters: Choosing the Right Clamps for Your Pipes
So far, we've focused on installation steps, but the material of your saddle clamps and pipes plays a big role too. For example, if you're working with aluminum profile frames (common in lean manufacturing setups or lightweight workbenches), you'll want clamps that won't corrode the aluminum. Aluminum is lightweight and resistant to rust, but it's softer than steel—so avoid overly tight clamps that could dent the metal.
For steel pipes (often used in heavy-duty applications), stainless steel saddle clamps are a good choice—they resist corrosion and can handle higher torque. If your pipes are carrying chemicals or are in a damp environment, look for clamps with a plastic or rubber coating to prevent rust. And if you're installing a lean pipe system (used in production lines for flexibility), pair your saddle clamps with a lean pipe joint for added stability—these joints connect pipes at angles, and the clamps secure them to the support structure.
Real-World Examples: When Installation Gets Practical
Let's put this all into context with a couple of real-world scenarios:
Scenario 1: Building a Workbench with Aluminum Profile
Suppose you're assembling a workbench using aluminum profile frames. The vertical pipes will serve as legs, and horizontal pipes will support the tabletop. For the vertical legs, you'll use U-clamps secured to the floor (concrete, so pre-drill holes!) with 3 clamps per leg (top, middle, bottom) to prevent wobbling. For the horizontal tabletop supports, J-hook clamps spaced 4 feet apart will keep the aluminum profile from sagging under tools or materials. The key here? Ensuring the vertical clamps are tight enough to resist side-to-side movement, while the horizontal clamps are just snug enough to allow for minor expansion of the aluminum on hot days.
Scenario 2: Installing a Roller Track System
A warehouse needs a roller track system to slide boxes from the loading dock to the storage area. The track runs horizontally along the ceiling, supported by steel pipes. Here, horizontal installation is critical—even a 1-degree slope could slow down box movement, and sag in the middle could cause jams. You'll use anti-sag brackets every 6 feet, J-hook clamps with rubber linings (to protect the track), and a laser level to ensure perfect alignment. After installation, test the track with a few boxes to check for smooth movement—if they get stuck, adjust the clamps until it's right.
Maintenance Tips to Keep Your Clamps (and Pipes) Happy
Installing saddle pipe clamps isn't a "set it and forget it" job. A little maintenance goes a long way:
- Inspect Quarterly: Check clamps for looseness, especially after temperature changes (pipes expand and contract, loosening bolts).
- Clean Regularly: Wipe down clamps with a damp cloth to remove dust and debris—this prevents rust and keeps the rubber linings intact.
- replace Worn Parts: If the rubber lining is cracked or the bolts are rusted, replace the clamp. A $5 clamp isn't worth risking a $500 pipe falling.
- Lubricate Bolts: For outdoor or high-moisture environments, apply a small amount of anti-seize lubricant to clamp bolts to prevent them from seizing up.
Final Thoughts: It's All About Attention to Detail
At the end of the day, installing saddle pipe clamps for vertical vs. horizontal runs comes down to understanding the forces at play and planning accordingly. Vertical runs need to fight gravity with tight, secure clamps, while horizontal runs require careful spacing and anti-sag support. Whether you're building a workbench, installing a roller track system, or setting up a lean production line, taking the time to get the installation right will save you from costly repairs and safety issues later.
Remember: the best installations are the ones you barely notice. A well-clamped pipe stays in place, supports its load, and lets you focus on the work that matters—whether that's assembling products, moving materials, or keeping your workshop running like a well-oiled machine. So grab your level, your clamps, and get to work—you've got this!