- Company Articles
- Products and Technology
- Installation And Maintenance
- Step-by-Step Guide: Installing Aluminum Pipe with Tray Holder Systems

Step-by-Step Guide: Installing Aluminum Pipe with Tray Holder Systems
Related Product
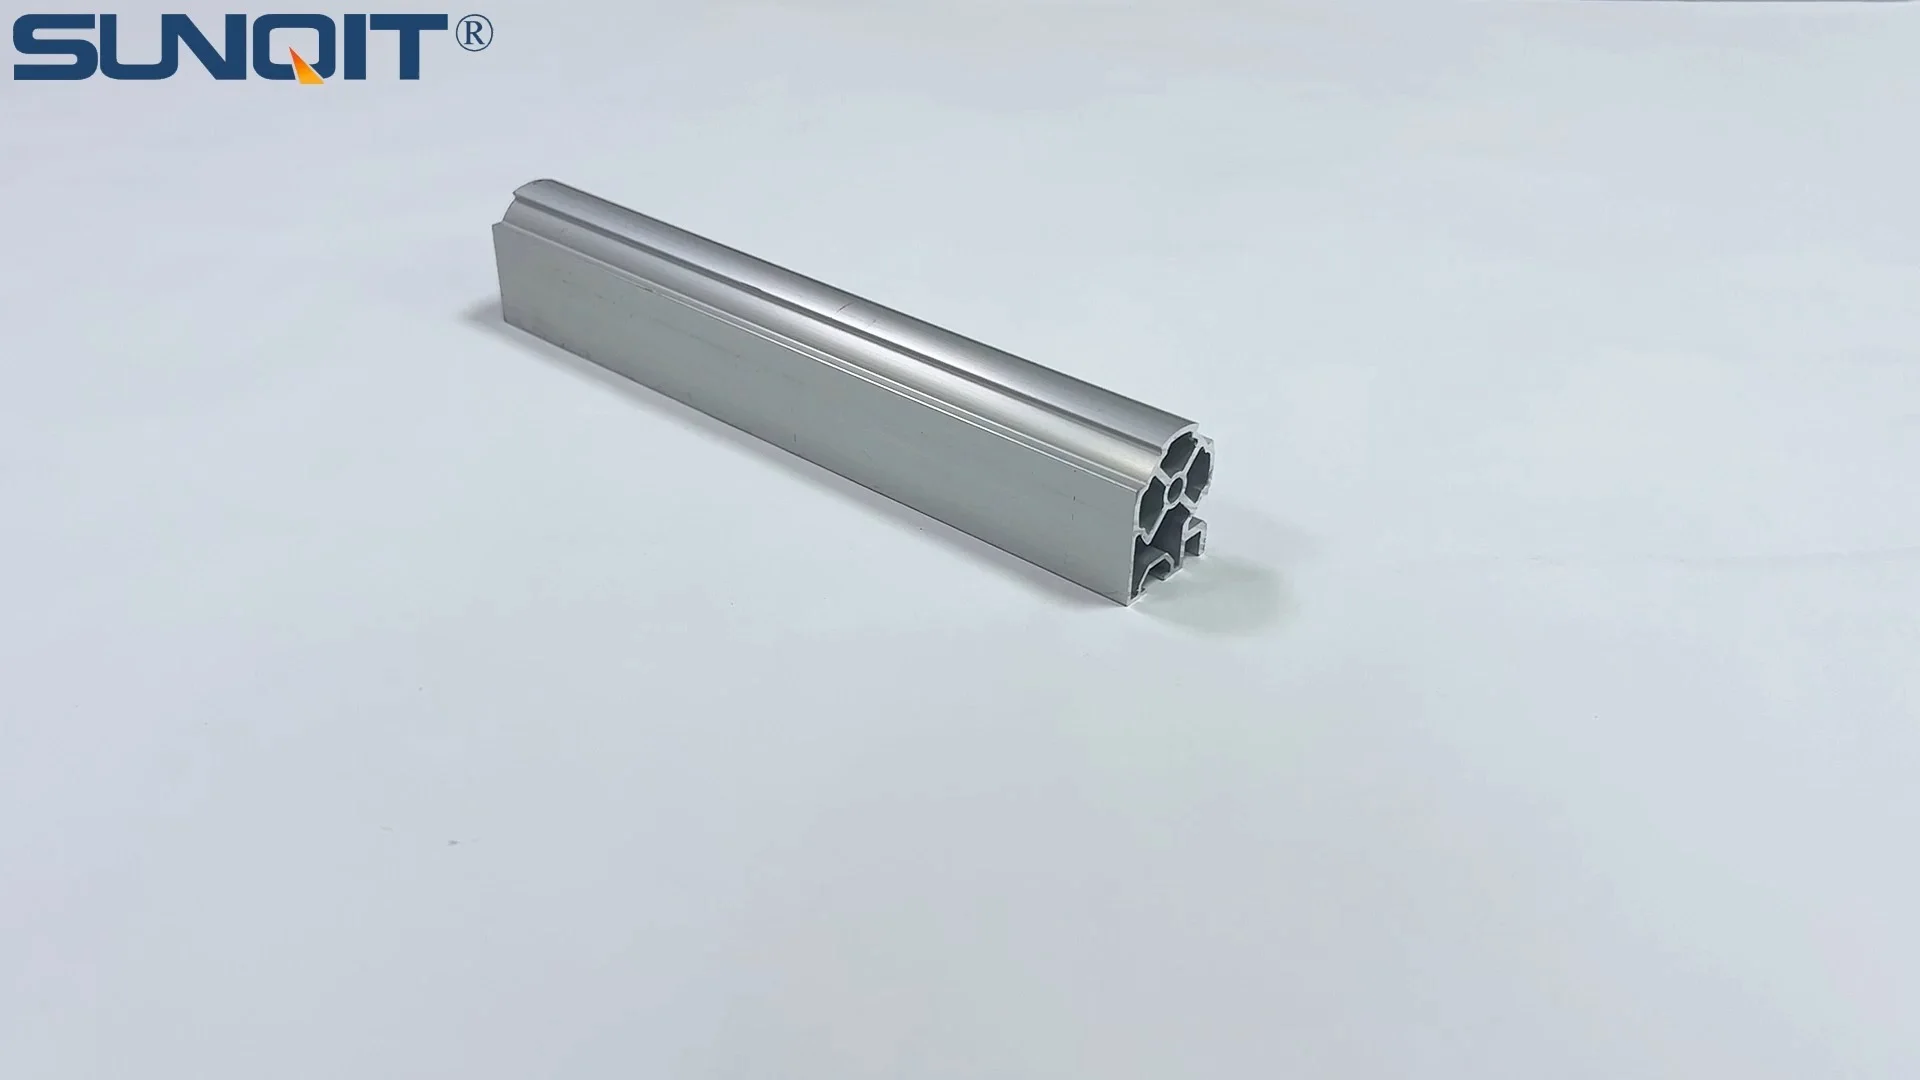
Aluminum Pipe with Tray Holder
Aluminum pipe with tray holder,the pipe one side connected by a joint, the other side with a slot which can hold a tray or a aluminum pannel.
What Are Aluminum Pipe with Tray Holder Systems, Anyway?
If you've ever walked through a well-organized workshop, factory floor, or even a garage, you've probably seen them: sleek, modular structures holding tools, parts, or materials, built from lightweight metal pipes and topped with handy trays. Those are aluminum pipe with tray holder systems—and they're about to become your new favorite organizational sidekick.
At their core, these systems are simple: aluminum pipes (lightweight, rust-resistant, and surprisingly strong) connected by clever aluminum pipe accessories like joints, brackets, and clamps, with a tray holder mounted to the frame to keep items secure and within arm's reach. But don't let their simplicity fool you—they're incredibly versatile. Need a workbench for assembling small parts? A material rack for storing inventory? A mobile cart to move supplies between stations? This system can do all that and more, making it a staple in lean systems where efficiency and adaptability are key.
The best part? You don't need to be a DIY expert to put one together. Most aluminum pipe systems are designed for tool-free (or minimal-tool) assembly, and with a little planning, you can have a custom setup ready in an afternoon. Let's dive in!
Tools and Materials You'll Need
Before you start, let's gather your supplies. You'll need a mix of tools (most of which you might already have in your garage) and materials (the star players: aluminum pipe, aluminum pipe accessories, and the tray holder itself). Here's a handy breakdown:
| Item | Purpose |
|---|---|
| Aluminum pipes (pre-cut or custom length) | The "bones" of your frame—choose diameter based on weight needs (common sizes: 20mm, 30mm, or 40mm). |
| Aluminum pipe accessories | Joints (90°, 135°, straight, or three-way), brackets, screws, and end caps to connect pipes and secure the tray. |
| Tray holder (with brackets) | The platform for holding materials—metal, plastic, or wood; choose based on what you'll store. |
| Measuring tape & pencil | To map out your layout and ensure pipes are cut (if needed) to the right length. |
| Hacksaw or pipe cutter | For trimming aluminum pipes to size (skip if you bought pre-cut pipes). |
| Rubber mallet | Gently tapping joints into place without damaging the aluminum. |
| Level (2-foot or longer) | To make sure your frame and tray are straight—no wobbly shelves here! |
| Hex key set (Allen wrenches) | Most aluminum pipe accessories use hex screws to tighten joints. |
| Work gloves | To protect your hands from sharp pipe edges or metal burrs. |
| Optional: Casters (with brakes) | Add mobility if you want your system to roll (great for lean systems where workflow changes often). |
Pro tip:
Check your aluminum pipe accessories kit first! Many kits include basic tools like a hex key, so you might not need to buy one separately. Also, if you're unsure about pipe length, buy a little extra—you can always cut it shorter, but you can't add length back!

Safety First: Pre-Installation Tips
Before you start assembling, let's talk safety. These systems are low-risk, but a few simple steps will keep things smooth:
- Wear gloves: Aluminum pipes can have sharp edges from cutting or manufacturing—gloves prevent scrapes.
- Clear your workspace: Make sure you have a flat, clean area to work (a garage floor or sturdy table works). Remove clutter to avoid tripping.
- Inspect parts: Check your aluminum pipes and accessories for dents, cracks, or bent joints. Damaged parts can weaken the frame, so swap them out if needed.
- Measure twice, cut once: If you're cutting pipes, double-check measurements before slicing—aluminum is easy to cut, but mistakes mean wasted material!

Step-by-Step Installation Process
Step 1: Plan Your Layout (Yes, This Matters!)
Before you start screwing pipes together, take 10 minutes to plan. Ask yourself: What will this system hold? (Tools? Boxes of screws? Heavy machinery parts?) Where will it live? (Against a wall? In the middle of the workshop? Under a workbench?) Do I need it to move? (If yes, add casters!)
Sketch a rough diagram on paper or use a free app like SketchUp to map it out. For example, if you're building a material rack for a lean system, you might want 3 rows and 3 floors (sound familiar?) to separate different parts. If it's a workbench, you'll need a flat top (the tray holder) at waist height, with maybe a lower shelf for storage.
Measure the space where the system will go, and note the height, width, and depth. This will tell you how long your aluminum pipes need to be. For example, a 4-foot wide workbench might need two 4-foot vertical pipes for the legs, two 2-foot horizontal pipes for the front/back, and a 4-foot pipe across the top to mount the tray holder.
Step 2: Cut Aluminum Pipes (If Needed)
If your pipes are pre-cut to your measurements, skip to Step 3! If not, it's time to cut. Here's how:
- Mark your cut line: Use a measuring tape and pencil to mark where you'll cut. Wrap a piece of masking tape around the pipe at the mark—it helps the pencil line stay visible and prevents the saw from slipping.
- Secure the pipe: Clamp the pipe to a workbench (or have a helper hold it steady) so the cut line hangs off the edge. This keeps the pipe from vibrating while you cut.
- Cut slowly and straight: Use a hacksaw with a fine-tooth blade (aluminum is soft, so coarse teeth can tear it) or a pipe cutter. For a hacksaw, keep the blade perpendicular to the pipe and saw in short, smooth strokes. Let the blade do the work—pushing too hard can bend the pipe.
- Smooth the edges: After cutting, use a file or sandpaper to remove burrs (sharp metal bits) from the cut end. This prevents snags and makes it easier to insert into joints.
Pro tip:
If you're cutting multiple pipes to the same length, use the first cut pipe as a "template" to mark the others. This ensures all pipes are identical—no lopsided frames!
Step 3: Assemble the Frame with Aluminum Pipe Accessories
Now the fun begins: building the frame! Aluminum pipe accessories are the magic here—they turn plain pipes into a sturdy structure. Let's start with the basics:
Choose your joints: Most systems use joints that slide onto the pipe and tighten with a set screw (a small screw that presses against the pipe to hold it in place). Common types include:
- 90° joints: For corners (e.g., connecting vertical legs to horizontal rails).
- Straight joints: To extend pipe length (e.g., making a longer horizontal rail).
- Three-way joints: For T-shapes (e.g., adding a middle shelf).
- Internal rotary joints: Let you swivel pipes (handy for adjustable shelves).
Start with the base: If you're building a stationary system, start with the vertical legs. Attach 90° joints to the bottom of each leg—these will connect to the horizontal base rails. Slide the horizontal pipes into the joints, then tighten the set screws with a hex key. Do this for the front, back, and sides to form a rectangle (the base frame).
Add vertical supports: If your system has multiple shelves or a tall frame, add vertical pipes at the corners (connecting the base frame to the top frame). Use straight joints to extend the legs upward, or three-way joints to add cross-braces for stability (diagonal pipes between corners prevent wobbling).
Check for square: Once the frame is up, measure the diagonals (from corner to corner). If they're equal, the frame is "square" (no twists). If not, gently push/pull the corners until the diagonals match.
Step 4: Attach the Tray Holder
Now it's time to add the star of the show: the tray holder! Most tray holders come with brackets that bolt or clamp to the aluminum frame. Here's how to mount it:
- Position the tray: Hold the tray holder against the frame where you want it (e.g., the top of a workbench, the middle shelf of a material rack). Use a level to make sure it's straight—you don't want items sliding off!
- Mark bracket locations: If the tray has pre-drilled holes for brackets, mark where these holes line up on the frame. If not, use the brackets to mark where to attach them.
- Secure the brackets: Attach the brackets to the frame using the included screws or clamps. For aluminum pipe, most brackets use U-bolts (curved bolts that wrap around the pipe) or clamp-on designs—tighten them just enough to hold, but don't overdo it (you can adjust later).
- Mount the tray: Once the brackets are secure, set the tray onto them. Use screws or clips (included with the tray) to attach the tray to the brackets. Give it a gentle tug to make sure it's locked in place.
Pro tip: If your tray is heavy or will hold weight, add extra brackets—better safe than sorry! For example, a 4-foot tray might need 4 brackets (one at each corner) instead of 2.
Step 5: Add Optional Features (Casters, Side Guards, etc.)
Now that the basic system is done, let's make it work for your needs:
- Casters for mobility: If you want the system to roll, attach casters to the bottom of the legs. Use caster mounting plates (aluminum pipe accessories designed for this) and secure them with screws. Opt for casters with brakes—you don't want your rack rolling away mid-use!
- Side guards: For trays holding small parts (like screws or washers), add aluminum side guards to prevent spills. These clip onto the tray edges or bolt to the frame.
- Labels: Stick labels on the tray or frame to mark what's inside (e.g., "Screwdrivers" or "Part #1234"). This is a lean system win—no more hunting for items!
Step 6: Test and Adjust
You're almost done! Now it's time to put your system to the test:
- Shake test: Gently push the frame from all sides. If it wobbles, check for loose joints—tighten them with the hex key. If it still wobbles, add diagonal braces (pipes connecting corners) for extra stability.
- Weight test: Put some items in the tray (simulating what it will actually hold). Does the tray sag? If yes, reinforce the brackets or add a center support under the tray.
- Level check: Use your level again to ensure the tray is flat and the frame isn't leaning. If it is, adjust the legs (add shims under shorter legs or use adjustable leveling feet, another handy aluminum pipe accessory).
Troubleshooting Common Issues
Even with careful planning, hiccups happen. Here's how to fix the most common problems:
- Loose joints: If joints slip after assembly, the set screws might not be tight enough. Try tightening them with the hex key (but don't strip the screw!). If they still slip, wrap a tiny piece of electrical tape around the pipe where the joint sits—this adds friction and helps the screw grip.
- Misaligned tray: If the tray is crooked, loosen the bracket screws, realign the tray with a level, and retighten. If brackets are bent, replace them—bent brackets can't hold the tray straight.
- Frame is too short/tall: Oops, wrong pipe length! If it's too short, add a straight joint and a new pipe section. If it's too tall, cut the legs shorter (measure carefully this time!).
Maintenance Tips to Keep It Running Smoothly
Your aluminum pipe system is tough, but a little care will make it last for years:
- Clean regularly: Wipe down pipes and the tray with a damp cloth to remove dust, grease, or spills. Aluminum resists rust, but grime can make it look dull.
- Tighten joints: Every few months, go around and snug up the set screws on joints—vibration from daily use can loosen them over time.
- Inspect for wear: Check brackets, joints, and casters for cracks or bent parts. replace worn accessories ASAP—they're cheap, and a broken bracket could mean a falling tray.
- Reconfigure as needed: One of the best things about aluminum pipe systems is they're modular! If your needs change (e.g., you need more shelf space), take it apart and rebuild—no tools required.
Final Thoughts: Your Custom System Awaits!
There you have it—your step-by-step guide to building an aluminum pipe with tray holder system. From planning to assembly, it's a project anyone can tackle, and the payoff is huge: a custom, durable setup that keeps your space organized, your workflow efficient (hello, lean system!), and your sanity intact.
Remember, this is just the starting point. Mix and match aluminum pipe accessories, add more trays, or even connect multiple systems together—sky's the limit. So grab your pipes, your accessories, and get building. Your future (organized) self will thank you!