- Company Articles
- Products and Technology
- Installation And Maintenance
- Step-by-Step Installation Guide for 2020 Aluminum Profile End Caps

Step-by-Step Installation Guide for 2020 Aluminum Profile End Caps
Related Product
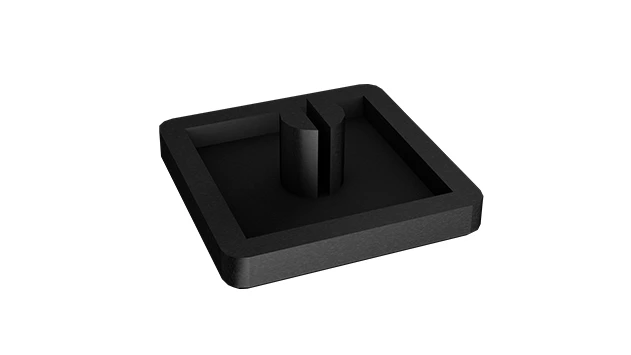
2020 Aluminum Profile End Cap
The aluminum profile end cap adds a finishing touch to your project and closes off profile ends to limit dust and debris buildup, also it can avaid some scratch for material and labor during the assemble work.
Introduction: The Unsung Hero of Aluminum Profile Assembly
When it comes to building functional, durable structures—whether it's a workbench for your garage, a material rack for a warehouse, or a production line workstation—aluminum extrusion profiles are the backbone of modern modular design. Lightweight yet surprisingly strong, resistant to corrosion, and endlessly customizable, these profiles have revolutionized how we approach everything from DIY projects to industrial manufacturing. But if you've ever worked with aluminum profiles, you know that the little details matter just as much as the big ones. Enter the 2020 aluminum profile end cap: a small accessory that plays a huge role in safety, aesthetics, and long-term durability.
At first glance, end caps might seem like an afterthought. After all, isn't the real work done by the profiles, joints, and brackets? While those components are critical, end caps are the finishing touch that turns a "functional" structure into a "polished, professional" one. Think about it: the raw end of an aluminum extrusion profile, fresh from the saw, can be sharp enough to catch on clothing, scratch skin, or even damage tools. Over time, dust, moisture, and debris can seep into the open T-slots at the ends, corroding the aluminum from the inside or gumming up the channels that make the profiles so versatile. End caps solve all these problems—and they do it quietly, without fanfare.
In this guide, we're zeroing in on one of the most common and widely used profiles: the 2020 aluminum profile. Named for its 20mm x 20mm cross-section, this profile is a staple in small to medium-duty applications. You'll find it in everything from compact workbenches (like the aptly named Workbench E, a single-deck model without casters) to Material Rack B, a 3-row, 3-floor storage solution, and even in lightweight turnover trolleys. Its popularity stems from its balance of strength and maneuverability—strong enough to support tools and materials, but not so bulky that it's hard to handle. And where there's a 2020 profile, there's a need for a 2020 aluminum profile end cap.
Whether you're a seasoned manufacturer ordering bulk aluminum profile accessories for a production line or a weekend DIYer putting together your first aluminum structure, this guide will walk you through everything you need to know about installing 2020 end caps. We'll cover why they matter, what tools you'll need, a step-by-step installation process, troubleshooting common issues, and even maintenance tips to keep your end caps (and profiles) in top shape. Let's dive in.
Why 2020 Aluminum Profile End Caps Matter: More Than Just a "Finishing Touch"
Before we get our hands dirty with installation, let's take a moment to appreciate why end caps are non-negotiable. It's easy to dismiss them as a minor accessory, but their impact on safety, functionality, and longevity is significant. Here's why you shouldn't skip this step:
Safety First: No More Sharp Edges
Aluminum extrusion profiles are cut to length using saws, whether it's a high-precision industrial saw or a DIY miter saw. Even with the sharpest blade, the cut end of an aluminum profile can leave tiny burrs, rough edges, or sharp corners. These might not look dangerous at first glance, but run your finger along an un-capped profile end, and you'll quickly feel why they're a hazard. A small burr can catch on fabric, leaving a tear in your sleeve or pants. A sharper edge could scratch skin, especially if you're moving a heavy structure like a material rack or trolley. In a busy workshop or factory, where workers are handling profiles daily, these small injuries add up—they slow down productivity, increase frustration, and even create liability risks.
End caps act as a buffer, covering those raw edges with a smooth, rounded surface. Most 2020 aluminum profile end caps are made from durable plastic (like PVC or polypropylene) or soft rubber, which is far gentler on skin and fabrics. Even better, the snug fit of a well-installed end cap means it won't slip off easily, ensuring long-term safety.
Protecting Your Investment: Keeping Profiles Clean and Corrosion-Free
Aluminum is naturally resistant to corrosion, thanks to a thin oxide layer that forms on its surface. But that doesn't make it invincible—especially when the ends are left open. Dust, dirt, and even small debris can fall into the open T-slots at the profile ends, accumulating over time. In humid environments, moisture can seep in, too, leading to internal corrosion or mold growth. This isn't just unsightly; it can compromise the structural integrity of the profile. For example, if debris builds up in the T-slot, it might prevent you from sliding in a bracket or fastener later on, limiting the profile's modularity.
End caps seal off these open ends, creating a barrier against the elements. Think of them as tiny "lids" for your profiles, keeping the inside clean and dry. This is especially important for profiles used in garages, workshops, or warehouses where dust and humidity are constants. Over the years, this simple protection can extend the life of your aluminum structures by years.
Aesthetics: Polishing the Look of Your Project
Let's be honest: a structure with raw, unfinished profile ends looks unprofessional. Whether it's a workbench in your home garage or a material rack in a customer-facing retail backroom, those exposed ends stick out like a sore thumb. They make the project feel "unfinished," even if every other part is perfectly assembled. End caps, on the other hand, give your structure a clean, cohesive look. They come in a range of colors—most commonly black, white, or gray—to match or complement your aluminum profiles. Some manufacturers even offer custom colors, so you can coordinate with your brand or workspace decor.
For businesses, this polish matters. A well-finished workstation or storage rack signals attention to detail, which can boost employee pride in the workspace or impress clients who visit your facility. For DIYers, it's the difference between a "homemade" project and one that looks like it came from a professional supplier.
Preserving Functionality: Keeping T-Slots Clear
The T-slots along the length of aluminum profiles are what make them so versatile. They let you attach brackets, shelves, tools, and accessories anywhere along the profile, no pre-drilled holes required. But if the ends of the profile are open, those T-slots are vulnerable at their weakest point. Debris can get stuck in the corners of the slots, making it hard to slide in a nut or bolt later. In extreme cases, a foreign object might even bend or distort the slot, rendering that section of the profile unusable. End caps prevent this by closing off the ends, ensuring your T-slots stay clear and functional for years to come.

Gathering Your Tools: What You'll Need for a Smooth Installation
Installing 2020 aluminum profile end caps is a straightforward process—no specialized training or industrial equipment required. In fact, you might already have most of the tools you need lying around your workshop or garage. Here's a list of essentials to gather before you start:
1. 2020 Aluminum Profile End Caps (The Right Ones!)
First and foremost: make sure you have the correct end caps. Not all end caps are created equal, and size matters. A 2020 profile requires a 2020 end cap—one designed to fit snugly into a 20mm x 20mm opening. If you're ordering from a supplier, double-check the product name: it should explicitly say "2020 aluminum profile end cap" or include dimensions like "20mm x 20mm end cap." Avoid the temptation to "make do" with a larger or smaller cap—too small, and it will fall off; too large, and it won't fit at all (or might crack when forced).
Most end caps are sold in packs, ranging from 10 to 100 pieces, depending on whether you're buying for a single project or bulk use. If you're unsure how many you need, count the number of profile ends in your structure. For example, a simple workbench with 4 vertical legs and 4 horizontal rails has 16 ends (4 legs x 2 ends each + 4 rails x 2 ends each), so you'd need at least 16 caps (plus a few extras, just in case).
2. Rubber Mallet (or a Soft-Faced Hammer)
While some end caps are designed to be press-fit by hand, a rubber mallet is your best friend for ensuring a snug, secure fit. The key here is "rubber" or "soft-faced"—avoid metal hammers, which can dent, scratch, or crack the plastic end cap (or the aluminum profile itself). A 12- to 16-ounce rubber mallet is ideal; it's heavy enough to tap the cap into place without being so heavy that you risk overdoing it.
If you don't have a rubber mallet, you can improvise with a regular hammer and a soft buffer, like a folded dish towel or a piece of scrap wood. Place the buffer over the end cap, then tap gently with the hammer. The buffer absorbs the impact, protecting the cap from damage.
3. Fine-Grit Sandpaper (Optional, but Recommended)
Even with a clean cut, aluminum profile ends can have tiny burrs or rough spots. These can make it harder to install the end cap or create gaps between the cap and the profile. A sheet of 220-grit sandpaper (fine grit) will help smooth out these imperfections. Fold the sandpaper into a small square and gently sand the end of the profile in a circular motion until the edge feels smooth to the touch. Wipe away any aluminum dust with a dry cloth afterward—you don't want that dust getting trapped between the cap and the profile.
4. Isopropyl Alcohol or Mild Soap and Water
Cleanliness is key for a tight, long-lasting fit. Dust, oil, or fingerprints on the inside of the end cap or the outside of the profile end can create a barrier, preventing the cap from seating properly. A quick wipe with isopropyl alcohol (on a lint-free cloth) will remove grease and grime. If you don't have alcohol, mild soap and water work too—just make sure to dry the profile end thoroughly before installing the cap (moisture and aluminum don't mix well, even temporarily).
5. Lint-Free Cloth or Paper Towels
You'll need these for cleaning the profile ends (after sanding and before installation) and for wiping away any excess alcohol or water. Avoid fuzzy cloths that leave lint behind—you don't want stray fibers stuck between the cap and the profile.
6. Optional: Calipers or a Ruler (for Double-Checking Sizes)
If you're unsure whether your end caps are the right size (or if your profile is truly 2020—measurements can vary slightly between manufacturers), a pair of digital calipers or a small ruler can help. Measure the inside width and height of the profile end; it should be roughly 20mm x 20mm (give or take 0.5mm, depending on tolerance). Then measure the outer dimensions of the end cap—it should be slightly larger (by 0.1mm to 0.3mm) to create an interference fit, ensuring it stays in place.
7. Optional: Adhesive (for Extra Security, in Rare Cases)
Most end caps don't require adhesive—they're designed to stay in place via friction. But if you're installing end caps in a high-vibration environment (like a production line with heavy machinery) or if the profile end is slightly worn (making the fit looser than ideal), a tiny drop of adhesive can help. Use a cyanoacrylate glue (like super glue) sparingly—apply a small dot to the inside of the cap, then press it into place. Be careful not to use too much; excess glue can squeeze out and mar the profile's finish.

Step-by-Step Installation: How to Install 2020 Aluminum Profile End Caps
Now that you have your tools and materials ready, let's walk through the installation process. We'll break it down into 6 simple steps, with tips to ensure a perfect fit every time. Remember: patience is key here—rushing can lead to misaligned caps, cracked plastic, or a loose fit.
Step 1: Prepare the Aluminum Profile Ends
Before installing the end cap, the profile end needs to be clean, smooth, and dry. Start by inspecting the end of the 2020 aluminum extrusion profile. Run your finger along the edge—if you feel any burrs, rough spots, or sharp edges, grab your fine-grit sandpaper. Hold the sandpaper at a 45-degree angle to the end and sand gently in circular motions. Focus on the corners and the inner edges of the T-slots, where burrs are most likely to hide. Sand until the edge feels smooth, then wipe away any aluminum dust with a lint-free cloth dampened with isopropyl alcohol. Let the profile dry completely—even a small amount of moisture can prevent the end cap from seating properly.
Pro tip: If you're working with multiple profiles, lay them out on a flat surface (like a workbench) and prep all ends first. This way, you can install the caps in one go without stopping to sand mid-process.
Step 2: Inspect the End Cap for Defects
Before installing, take a moment to check the end cap itself. Look for cracks, chips, or warping—even small defects can affect the fit. If the cap has a lip or a flange (some designs do, to help with alignment), make sure it's not bent or misshapen. Also, confirm that the cap is the correct size: it should have a snug, but not tight, fit when you hold it up to the profile end. If the cap is visibly too small or too large, set it aside and grab a new one—using a defective or ill-fitting cap is a recipe for frustration later.
Most 2020 end caps are symmetrical, but some might have a "top" and "bottom" (for example, if they have a logo or textured surface). If yours has a design, make sure you orient it correctly—you don't want the logo upside down! A quick mark with a pencil (on the inside of the cap, so it's hidden) can help if you're unsure.
Step 3: Align the End Cap with the Profile End
Hold the end cap in one hand and the profile in the other. Position the cap so that its edges are parallel with the profile's edges—no twists or angles. The goal is to seat the cap evenly, so that all four sides of the cap make contact with the profile at the same time. If the cap has a flange, align the flange with the outer edge of the profile (the flange should sit flush against the profile's surface once installed).
If you're having trouble aligning, try this trick: place the profile upright on a flat surface (like the floor or a table), with the end facing up. Then set the end cap on top of the profile, letting gravity help hold it in place. This keeps your hands free to adjust the alignment without worrying about dropping the cap.
Step 4: Press or Tap the End Cap into Place
Now comes the moment of truth: installing the cap. For most end caps, you can start by pressing firmly with your thumbs. Apply even pressure to all four sides of the cap—don't push harder on one side than the other, as this can misalign the cap. If the cap starts to go in but feels stuck, stop pressing and grab your rubber mallet.
Hold the mallet loosely (you want control, not force) and tap the top of the end cap gently. Start with light taps, focusing on the center of the cap to avoid bending it. After a few taps, check the alignment—if one side is sitting lower than the others, tap the higher side gently to even it out. Continue tapping in small increments until the cap is flush with the end of the profile. You'll feel a slight "give" when it's fully seated, and the cap should no longer move when you wiggle it with your fingers.
Pro tip: If the cap is very tight, warm it up slightly first. Hold it in your hand for a minute (body heat works) or run it under warm (not hot!) water for 10 seconds. The plastic will expand slightly, making it easier to press into place. Just dry it thoroughly before installing to avoid slipping.
Step 5: Verify the Fit
Once the cap is installed, give it a quick inspection. Check that it's flush with the profile end—no part of the cap should stick out, and there should be no gaps between the cap and the profile. Try to wiggle the cap with your fingers; it should feel secure, with no movement. If it slides or rotates easily, it's not seated properly—tap it again with the mallet, focusing on the loose side.
Also, check the edges for cracks. If the cap cracked during installation, remove it (gently pry with a flathead screwdriver, if needed) and replace it with a new one. Cracks compromise the cap's ability to seal the profile and protect against debris, so don't try to "make it work" with a cracked cap.
Step 6: Repeat for All Ends
Installing one end cap is just the start—now repeat the process for every open end on your structure. Take your time, and don't rush through the prep work (sanding and cleaning) for subsequent caps. Consistency is key here: a well-installed end cap on one end and a sloppy one on another will stand out, defeating the purpose of a polished finish.
Once all caps are installed, take a step back and admire your work. Those once-rough, open ends are now smooth, clean, and protected. You've not only improved the safety and functionality of your structure—you've also given it a professional, finished look.
Troubleshooting Common Issues: When End Caps Don't Behave
Most of the time, installing 2020 aluminum profile end caps is a breeze. But occasionally, you'll run into snags—end caps that won't fit, pop out, or crack. Don't panic! These issues are common, and they're almost always fixable. Here's how to troubleshoot the most frequent problems:
Issue 1: The End Cap Is Too Loose (Falls Out Easily)
If the end cap slides out with minimal effort, it's too loose. This is usually caused by one of two things: either the cap is the wrong size (too small for the profile) or the profile end is worn or damaged (e.g., from repeated cap removal/installations, or a poor initial cut).
Solution: First, confirm the cap size—double-check the product label to ensure it's a 2020 cap. If it is, the profile end might be the culprit. Use your sandpaper to gently sand the inner edges of the profile end (the part that contacts the cap). This removes any minor dents or wear, creating a tighter fit. If sanding doesn't work, try a small drop of cyanoacrylate glue (super glue) on the inside of the cap before reinstalling. Apply only a tiny amount—excess glue can squeeze out and damage the profile's finish.
Issue 2: The End Cap Is Too Tight (Won't Seat Fully)
A cap that won't press or tap into place is frustrating, but it's rarely a lost cause. This usually happens when the cap is slightly oversized (due to manufacturing variance) or the profile end has burrs or debris that's blocking the way.
Solution: Start by re-checking the profile end—did you sand it thoroughly? Use a flashlight to look for hidden burrs or debris in the corners. If the end is clean, try warming the cap: hold it in your hand for 2–3 minutes or run it under warm water for 10 seconds. The plastic will expand slightly, making it more pliable. Dry it, then try installing again with gentle taps. If it's still too tight, you can sand the outer edges of the cap very lightly with 400-grit sandpaper (the finest grit you have). Sand in small, circular motions, checking the fit after every few strokes—you don't want to sand too much and make it loose!
Issue 3: The End Cap Cracks During Installation
Cracks are usually caused by excessive force or misalignment. Tapping too hard with the mallet, or tapping one side much harder than the others, can stress the plastic and cause it to crack. Low-quality caps (made from brittle plastic) are also more prone to cracking.
Solution: If the cap cracks, remove it immediately—don't try to use it. To remove a cracked cap, gently pry it out with a flathead screwdriver (wrap the tip in tape to avoid scratching the profile). Dispose of the cracked cap and grab a new one. This time, take it slower: align the cap carefully, tap with lighter force, and stop if you feel resistance. If multiple caps crack, the issue might be with the caps themselves—consider switching to a higher-quality brand (look for caps made from durable, flexible plastic like PP or PVC).
Issue 4: The End Cap Wobbles or Rotates After Installation
A cap that moves or spins when you touch it is usually due to uneven seating. If one side of the cap is seated deeper than the other, it can create a "tilt" that allows rotation.
Solution: Remove the cap (pry gently with a screwdriver) and re-install it, paying closer attention to alignment. When tapping, alternate between the four sides to ensure even seating. If the profile end is slightly out of square (common with DIY cuts), sand the high corner of the profile end to level it out before reinstalling the cap.
Maintaining Your End Caps: Keeping Them Looking and Functioning Like New
Installing end caps is just the first step—with a little maintenance, they'll protect your aluminum profiles for years to come. Here's how to keep them in top shape:
Regular Cleaning: Wipe Away Dust and Grime
End caps (and aluminum profiles) collect dust, oil, and fingerprints over time, especially in busy workshops. A quick wipe with a damp cloth every few months will keep them looking clean. For stubborn grime (like oil or grease), use a mild soap and water solution—avoid harsh chemicals like bleach or acetone, which can discolor or damage the plastic. Dry the caps thoroughly after cleaning to prevent water spots.
Check for Looseness During Routine Inspections
Vibration, temperature changes, and general wear can cause end caps to loosen over time. Make it a habit to inspect them during your regular equipment checks (e.g., when you're tightening bolts on a workbench or cleaning a material rack). If you find a loose cap, tap it gently with a rubber mallet to re-seat it. If it won't stay tight, add a drop of glue as described in the troubleshooting section.
replace Damaged Caps Promptly
If a cap cracks, chips, or becomes too loose to re-seat, replace it immediately. A damaged cap can't protect the profile from debris or sharp edges, so don't delay. Keep a few extra caps on hand (you should have bought extras during installation!) so you're not scrambling to find a replacement when you need one.
Avoid Extreme Temperatures
Plastic end caps can become brittle in extreme cold or warp in extreme heat. If your structure is stored outdoors or in an unheated/uncooled space, keep an eye on the caps during temperature swings. In very cold weather, avoid tapping or handling the caps roughly—they're more prone to cracking when cold. In very hot weather, check for warping (bulging or misshapen caps) and replace them if needed.
FAQs: Answers to Common Questions About 2020 Aluminum Profile End Caps
Even with a detailed guide, you might still have questions. Here are answers to some of the most common ones we've heard from users:
Q: Can I reuse end caps if I disassemble my structure?
A: In most cases, yes! If the end caps are still in good condition (no cracks, no excessive wear), you can remove them and reuse them on the same or another structure. To remove a cap, gently pry it out with a flathead screwdriver (wrap the tip in tape to avoid scratching the profile). Clean the cap and the new profile end before reinstalling. Note: Caps that were installed with glue are harder to reuse—you might need to scrape off old glue residue, and the cap might be slightly stretched from the first installation.
Q: My profile is 20mm x 40mm (not 20x20). Will 2020 end caps work?
A: No. End caps are designed for specific profile sizes. A 20x40 profile requires a 20x40 end cap, not a 20x20 cap. Using the wrong size will result in a loose or ill-fitting cap. Always check the profile dimensions before ordering end caps—common sizes include 2020, 3030, 4040, 2040, and 3060, each with their own matching end caps.
Q: Do end caps come in different colors? Can I paint them?
A: Yes, end caps come in a variety of colors! The most common are black, white, and gray (to match standard aluminum profiles), but some suppliers offer blue, red, or yellow for color-coding projects. If you can't find the color you want, you can paint end caps—just use a plastic-safe spray paint. Clean the cap thoroughly, sand it lightly with 400-grit sandpaper to help the paint adhere, and apply 2–3 thin coats. Let each coat dry completely before adding the next.
Q: Are metal end caps available for 2020 profiles? When would I need them?
A: Yes, metal end caps (usually aluminum or stainless steel) are available for heavy-duty applications. They're more durable than plastic caps and better suited for environments with high impact, extreme temperatures, or chemical exposure (like industrial factories or outdoor use). However, they're also more expensive and harder to install (they often require screws or press-fit tools). For most DIY projects, workshops, or light industrial use, plastic end caps are more than sufficient.
Q: How many end caps do I need for a typical project?
A: It depends on the number of profile ends! A simple structure like a square workbench with 4 legs and 4 rails has 16 ends (each profile has 2 ends). A Material Rack B (3 rows, 3 floors) might have dozens of ends, depending on how many vertical and horizontal profiles it uses. As a rule of thumb, count the number of profiles in your design, multiply by 2 (since each profile has 2 ends), and add 10% extra for spares. For example, 20 profiles x 2 ends = 40 caps + 4 spares = 44 caps total.
Final Thoughts: Small Accessory, Big Impact
Installing 2020 aluminum profile end caps might seem like a minor step in the grand scheme of building an aluminum structure, but as we've explored, it's a step that delivers outsized benefits. From protecting against sharp edges and debris to giving your project a professional, polished look, end caps are an essential part of any aluminum profile system.
Whether you're a manufacturer sourcing aluminum profile accessories for a production line or a DIYer building a workbench in your garage, the process is the same: prep the profile, align the cap, tap it into place, and verify the fit. With the right tools and a little patience, you can install end caps quickly and confidently, knowing that you're extending the life of your profiles and making your structure safer and more functional.
So the next time you're assembling an aluminum structure—whether it's a Workbench E, a Material Rack B, or something entirely custom—don't overlook the end caps. They might be small, but they're mighty. And when you step back to admire your finished project, you'll be glad you took the time to do it right.