- Company Articles
- Products and Technology
- Installation And Maintenance
- Step-by-Step Installation Guide for End Support for Roller Track Placon Mount with Stop

Step-by-Step Installation Guide for End Support for Roller Track Placon Mount with Stop
Related Product
End Support for Roller Track Placon Mount with Stop
Roller track placon mount work as a connector for roller track and pipe or aluminum profile in rack syetem, it is a necessary parts in rack system which widely used in industrial plant and logistic,warehouse storage.
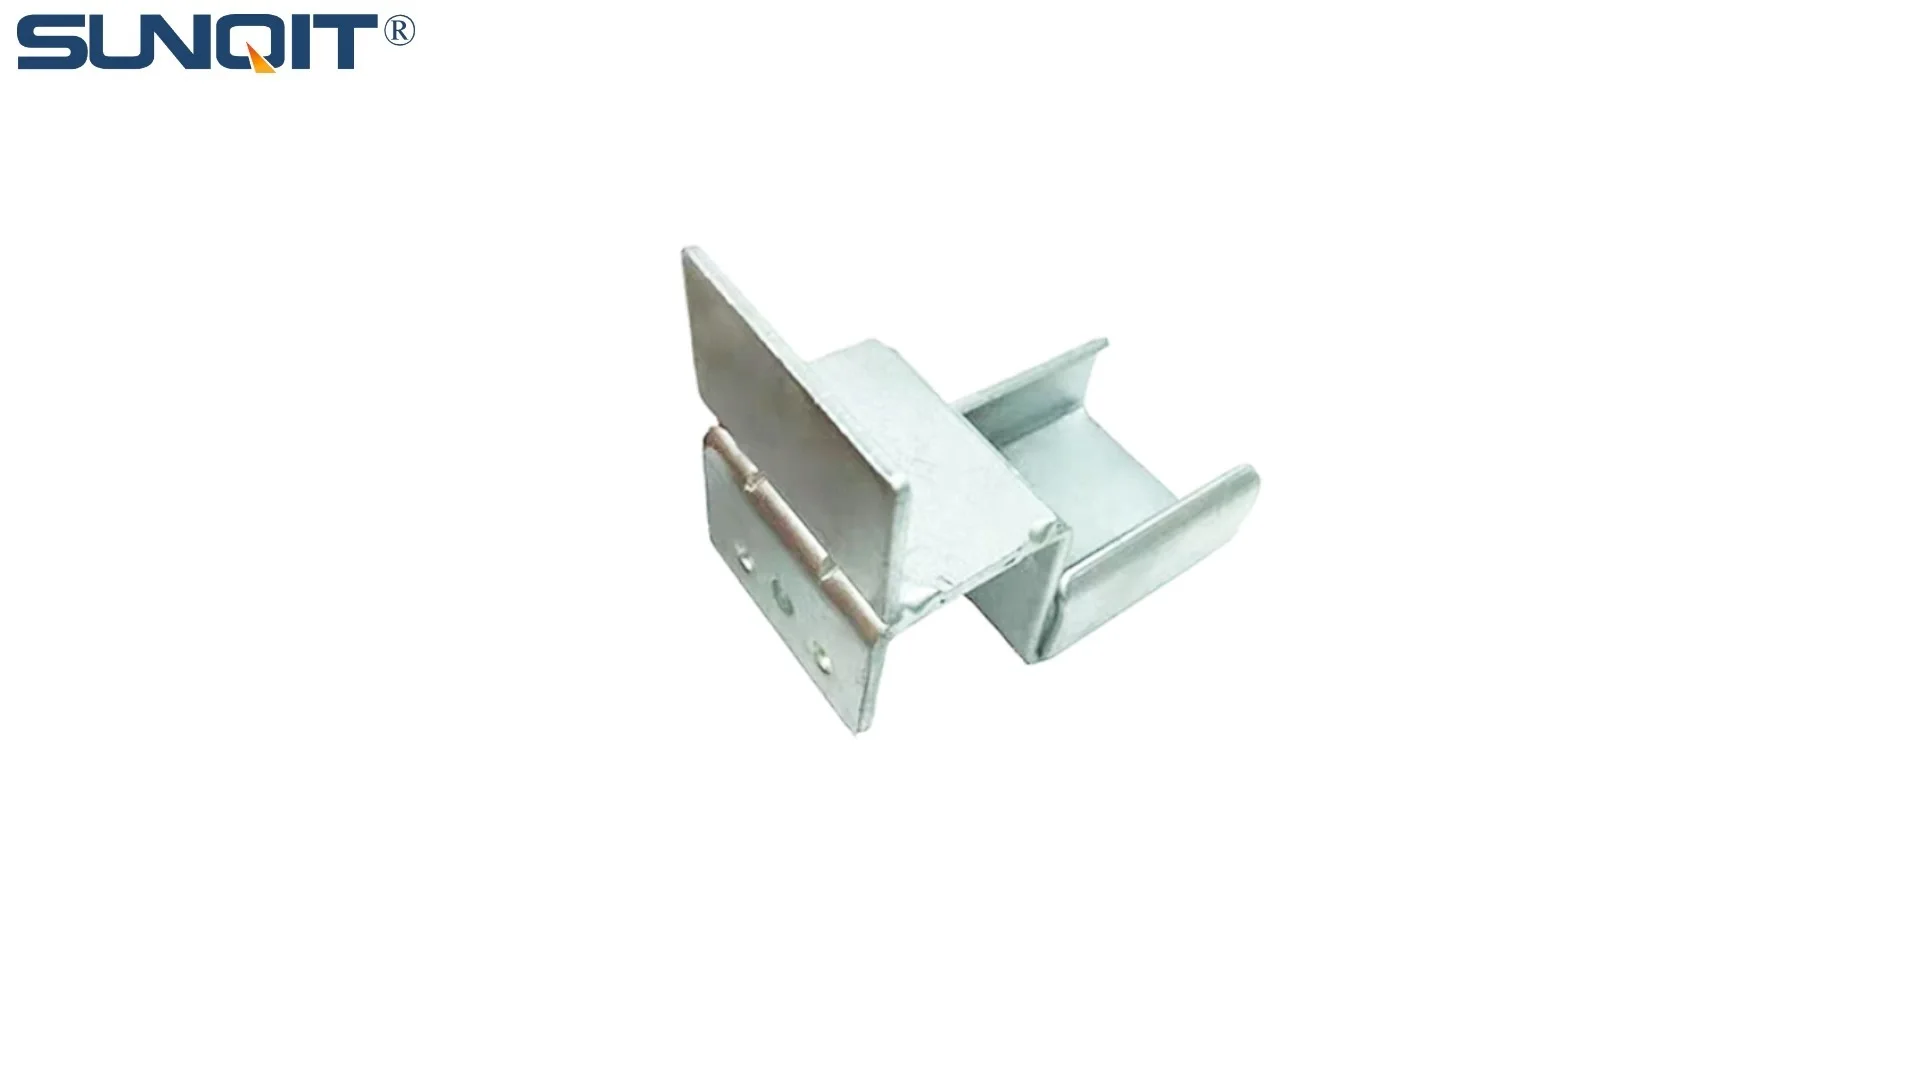
If you've ever worked with a roller track system in a manufacturing or warehouse setting, you know how crucial stability is. Even the most durable roller tracks (like the ones in your lean system) can wobble or shift over time if not properly supported—especially when moving heavy loads in production assemble lines. That's where the
End Support for Roller Track Placon Mount with Stop
comes in. This small but mighty component is the unsung hero of your roller track setup, keeping everything aligned, secure, and ready to handle the daily grind of your workflow.
Whether you're setting up a new lean pipe workbench, expanding a conveyor line, or upgrading an existing flow rack, installing this end support correctly will save you from headaches down the line. Think of it as the foundation of your roller track's reliability: get this right, and your entire system runs smoother, safer, and more efficiently. Let's dive into how to install it properly, step by step.
Whether you're setting up a new lean pipe workbench, expanding a conveyor line, or upgrading an existing flow rack, installing this end support correctly will save you from headaches down the line. Think of it as the foundation of your roller track's reliability: get this right, and your entire system runs smoother, safer, and more efficiently. Let's dive into how to install it properly, step by step.
⚠️ Safety First: What You Need to Know Before Starting
Before we pick up a single tool, let's talk safety. Installing hardware might seem straightforward, but rushing or cutting corners can lead to accidents—like a loose roller track slipping or a heavy component falling. Here's what to keep in mind:
- Wear protective gear: Safety glasses to shield your eyes from metal shavings, work gloves to protect your hands from sharp edges on aluminum profile parts, and closed-toe shoes (no sandals!).
- Clear the workspace: Make sure the area around your installation site is free of clutter. If you're working near a conveyor or existing machinery, power it down and lock it out to avoid accidental startup.
- Check for damaged parts: Before installing, inspect the end support, placon mounts, and any aluminum profile accessories (like screws or brackets) for cracks, bends, or missing pieces. A damaged part won't hold properly, and it's better to replace it now than after installation.
- Ask for help if needed: Some roller track components can be heavy, especially if you're installing on a tall flow rack. Grab a coworker to help hold parts in place while you secure them—it's safer and makes the job easier.
️ What You'll Need: Tools and Parts Checklist
Let's gather your supplies. Having everything ready before you start will save you trips to the toolbox (and keep your frustration level low). Here's what you'll need:
Tools You'll Need
- A power drill with a Phillips-head bit (or a manual Phillips screwdriver if you prefer old-school control)
- An Allen wrench set (most aluminum profile accessories use Allen screws, so check the size on your parts!)
- A level (to make sure the end support is straight—no one wants a lopsided roller track)
- A tape measure (for double-checking distances between supports)
- A rubber mallet (for gently tapping parts into place without damaging them)
- A pencil or marker (to mark drill points on the aluminum profile)
Parts Included in Your End Support Kit
Every kit might vary slightly, but here's the typical lineup. If something's missing, reach out to your lean pipe supplier—they'll hook you up with replacements!
| Part Name | Quantity | What It Does |
|---|---|---|
| End Support Bracket (with Stop) | 1 | The main support structure that attaches to the end of the roller track. |
| Placon Mount (for Aluminum Profile) | 2 | Connects the end support to your aluminum profile (like the frame of your workbench or rack). |
| M5 x 16mm Socket Head Cap Screws | 4-6 | Secures the placon mount to the aluminum profile. |
| M6 x 20mm Hex Screws | 2 | Attaches the end support bracket to the placon mounts. |
| Lock Washers (M5 and M6 sizes) | 6-8 | Prevents screws from loosening due to vibration (critical for conveyor or production lines!) |
| Stop Block | 1 | The small "bump" at the end that prevents items from sliding off the roller track. |
Pro Tip:
Lay out all parts on a clean, flat surface (like a lean pipe workbench) and group them by step. This way, you won't fumble around looking for a screw when you're halfway through installation.

Step-by-Step Installation: Let's Get This Support Secured
Now that you're prepped and safe, let's install that end support. We'll break this down into simple, actionable steps—no confusing technical jargon, just clear instructions you can follow even if you're new to assembling aluminum profile systems.
Step 1: Identify Your Mounting Location on the Aluminum Profile
First, you need to figure out
where
to mount the end support. This depends on your roller track setup: Are you attaching it to a flow rack, a conveyor frame, or the side of a lean pipe workbench?
Start by measuring the length of your roller track. The end support should sit flush with the very end of the track, so mark that spot on your aluminum profile (the vertical or horizontal frame that will hold the support). Use your tape measure to double-check—even a 1cm mistake here can throw off the alignment of the entire roller track.
If you're installing multiple end supports (for a longer roller track), space them evenly—typically every 1.5 to 2 meters, depending on the weight of the loads you'll be moving. For example, if your track is 4 meters long, install supports at both ends and one in the middle.
Start by measuring the length of your roller track. The end support should sit flush with the very end of the track, so mark that spot on your aluminum profile (the vertical or horizontal frame that will hold the support). Use your tape measure to double-check—even a 1cm mistake here can throw off the alignment of the entire roller track.
If you're installing multiple end supports (for a longer roller track), space them evenly—typically every 1.5 to 2 meters, depending on the weight of the loads you'll be moving. For example, if your track is 4 meters long, install supports at both ends and one in the middle.
Step 2: Attach the Placon Mounts to the Aluminum Profile
The placon mounts are the "bridge" between the end support bracket and your aluminum profile. Here's how to secure them:
1. Take one placon mount and align its slots with the T-slots on your aluminum profile. The T-slots are those long, narrow grooves running along the profile—they're designed to hold screws and brackets securely.
2. insert an M5 screw through the placon mount's hole, then add a lock washer (the wavy metal disc) before threading it into the T-slot. Pro tip: Don't tighten it all the way yet! Leave it loose enough that you can slide the placon mount back and forth—this makes aligning the second mount easier.
3. Repeat with the second placon mount, placing it about 5-10cm away from the first (the exact distance depends on the size of your end support bracket—check the bracket's holes to match spacing).
4. Once both mounts are in place, use your level to ensure they're straight (side-to-side and up-and-down). If they're crooked, the end support will be too, and your roller track might tilt. Adjust the mounts as needed, then tighten the screws snugly (but not so tight you strip the threads!).
1. Take one placon mount and align its slots with the T-slots on your aluminum profile. The T-slots are those long, narrow grooves running along the profile—they're designed to hold screws and brackets securely.
2. insert an M5 screw through the placon mount's hole, then add a lock washer (the wavy metal disc) before threading it into the T-slot. Pro tip: Don't tighten it all the way yet! Leave it loose enough that you can slide the placon mount back and forth—this makes aligning the second mount easier.
3. Repeat with the second placon mount, placing it about 5-10cm away from the first (the exact distance depends on the size of your end support bracket—check the bracket's holes to match spacing).
4. Once both mounts are in place, use your level to ensure they're straight (side-to-side and up-and-down). If they're crooked, the end support will be too, and your roller track might tilt. Adjust the mounts as needed, then tighten the screws snugly (but not so tight you strip the threads!).
Step 3: Mount the End Support Bracket to the Placon Mounts
Now it's time to attach the main bracket. This is the part that will hold the roller track and stop block, so getting it aligned is key.
1. Hold the end support bracket up to the placon mounts. The bracket should have pre-drilled holes that line up with the holes on the mounts. If they don't align, double-check that your placon mounts are spaced correctly (you might need to loosen them and slide them a bit).
2. insert an M6 screw through each hole in the bracket, add a lock washer, and thread it into the placon mount. Again, start with loose screws—you'll tighten them fully after alignment.
3. Use your level again to check the bracket: Is it vertical? Is it sitting straight, or does it lean to one side? If it's off, gently tap the bracket with a rubber mallet to adjust (don't hit it hard—aluminum profile parts can bend!).
4. Once the bracket is level, tighten the M6 screws. Go slow and alternate between screws (like tightening lug nuts on a car wheel) to avoid pulling the bracket out of alignment. Tighten until the bracket feels solid—no wiggle when you push on it gently.
1. Hold the end support bracket up to the placon mounts. The bracket should have pre-drilled holes that line up with the holes on the mounts. If they don't align, double-check that your placon mounts are spaced correctly (you might need to loosen them and slide them a bit).
2. insert an M6 screw through each hole in the bracket, add a lock washer, and thread it into the placon mount. Again, start with loose screws—you'll tighten them fully after alignment.
3. Use your level again to check the bracket: Is it vertical? Is it sitting straight, or does it lean to one side? If it's off, gently tap the bracket with a rubber mallet to adjust (don't hit it hard—aluminum profile parts can bend!).
4. Once the bracket is level, tighten the M6 screws. Go slow and alternate between screws (like tightening lug nuts on a car wheel) to avoid pulling the bracket out of alignment. Tighten until the bracket feels solid—no wiggle when you push on it gently.
Step 4: Install the Stop Block
The stop block is what prevents items from sliding off the end of the roller track—super important if you're moving small parts or heavy boxes!
1. Locate the small, rectangular stop block in your parts. It should have a hole or slot for mounting to the end support bracket.
2. Position the stop block at the very end of the bracket, where the roller track will terminate. The block should stick up slightly above the roller track (about 1-2cm) to catch items—too low, and things might slide over it; too high, and it could jam the flow of goods.
3. Use the provided screw (usually an M4 or M5) to secure the stop block to the bracket. Tighten it firmly, but be careful not to overtighten—plastic stop blocks can crack if you crank the screw too hard!
4. Give the stop block a gentle tug to make sure it's secure. If it wobbles, check the screw or try a larger washer to distribute the pressure.
1. Locate the small, rectangular stop block in your parts. It should have a hole or slot for mounting to the end support bracket.
2. Position the stop block at the very end of the bracket, where the roller track will terminate. The block should stick up slightly above the roller track (about 1-2cm) to catch items—too low, and things might slide over it; too high, and it could jam the flow of goods.
3. Use the provided screw (usually an M4 or M5) to secure the stop block to the bracket. Tighten it firmly, but be careful not to overtighten—plastic stop blocks can crack if you crank the screw too hard!
4. Give the stop block a gentle tug to make sure it's secure. If it wobbles, check the screw or try a larger washer to distribute the pressure.
Step 5: Attach the Roller Track to the End Support
Now it's time to connect the roller track to the support. This is where everything comes together!
1. Slide the end of your roller track into the slot or bracket on the end support. Most roller tracks have a groove or lip that fits into the support—you should feel it "lock" into place when aligned correctly.
2. If your roller track uses screws to secure it to the support (common in heavy-duty setups), insert them through the pre-drilled holes in the support and into the track. Again, start with loose screws, adjust the track to be straight, then tighten.
3. Once attached, give the roller track a gentle shake. It should feel solid—no movement or creaking. If it wobbles, check the placon mount screws or the track-to-support connection.
1. Slide the end of your roller track into the slot or bracket on the end support. Most roller tracks have a groove or lip that fits into the support—you should feel it "lock" into place when aligned correctly.
2. If your roller track uses screws to secure it to the support (common in heavy-duty setups), insert them through the pre-drilled holes in the support and into the track. Again, start with loose screws, adjust the track to be straight, then tighten.
3. Once attached, give the roller track a gentle shake. It should feel solid—no movement or creaking. If it wobbles, check the placon mount screws or the track-to-support connection.
Step 6: Test the System (and Celebrate!)
You're almost done! Now it's time to test if your end support is doing its job.
1. Place a test load on the roller track—a box, a part, or something similar to what you'll be moving in your workflow. Slide it along the track toward the stop block. It should glide smoothly and stop gently against the block (no slamming or bouncing!).
2. Push down lightly on the end of the roller track. The end support should absorb the pressure without bending or shifting. If it moves, go back and tighten the placon mount or bracket screws.
3. Check for gaps: Make sure there's no space between the roller track and the end support. Gaps can cause items to get stuck or the track to wear unevenly over time.
If everything passes these tests—congratulations! You've successfully installed the End Support for Roller Track Placon Mount with Stop. Pat yourself on the back—your roller track is now safer, more stable, and ready to handle whatever your production assemble line throws at it.
1. Place a test load on the roller track—a box, a part, or something similar to what you'll be moving in your workflow. Slide it along the track toward the stop block. It should glide smoothly and stop gently against the block (no slamming or bouncing!).
2. Push down lightly on the end of the roller track. The end support should absorb the pressure without bending or shifting. If it moves, go back and tighten the placon mount or bracket screws.
3. Check for gaps: Make sure there's no space between the roller track and the end support. Gaps can cause items to get stuck or the track to wear unevenly over time.
If everything passes these tests—congratulations! You've successfully installed the End Support for Roller Track Placon Mount with Stop. Pat yourself on the back—your roller track is now safer, more stable, and ready to handle whatever your production assemble line throws at it.

Troubleshooting: Common Issues and How to Fix Them
Even with careful installation, things can go wrong. Here are the most common problems and how to solve them:
Q: The end support feels loose after installation. What's wrong?
A: Looseness usually comes from one of three places: (1) The placon mount screws aren't tight enough—try tightening them with a bit more force (but don't strip!). (2) The lock washers are missing or damaged—replace them to add friction and prevent screws from backing out. (3) The aluminum profile has worn T-slots—if the profile is old or bent, the screws might not grip. In that case, you may need to replace the profile or use larger screws.
Q: The stop block keeps breaking. How can I make it more durable?
A: If you're using a plastic stop block and moving heavy loads, consider upgrading to a metal stop block (many lean system suppliers offer these as optional extras). You can also add a rubber pad to the block to absorb impact, reducing stress on the plastic.
Q: The roller track is tilted—items slide to one side. How do I fix alignment?
A: This is usually due to uneven placon mounts. Loosen the mounts, use your level to adjust them so they're perfectly horizontal, then retighten. If the aluminum profile itself is bent (common in older setups), you may need to straighten it or replace the section.
Q: I can't get the placon mounts to fit into the T-slots. What's the trick?
A: T-slots can get clogged with dust or debris over time—use a small brush or compressed air to clean them out. If the placon mount is still stuck, check if the T-slot nuts (the small metal pieces inside the profile) are misaligned—you can adjust them with a screwdriver or Allen wrench to line up with the mount's holes.

Maintenance Tips: Keep Your End Support (and Roller Track) in Top Shape
Installing the end support is just the first step—maintaining it will ensure it lasts for years. Here's how to keep it (and your entire roller track system) running smoothly:
- Inspect monthly: Check the end support, placon mounts, and screws for signs of wear—like rust, cracks, or looseness. Tighten any loose screws and replace damaged parts immediately.
- Lubricate moving parts: If your roller track has wheels or bearings, add a drop of machine oil every few months to reduce friction. This keeps items sliding smoothly and reduces stress on the end support.
- Clean regularly: Wipe down the end support and roller track with a damp cloth to remove dust, grease, or debris. Built-up grime can cause the track to stick or the stop block to jam.
- Adjust for wear: Over time, even the best aluminum profile accessories can shift. If you notice the roller track tilting or the stop block wearing down, recheck the alignment and tighten screws as needed.
Installing an End Support for Roller Track Placon Mount with Stop might seem like a small task, but it's a big deal for the safety and efficiency of your lean system. By following these steps, you've not only secured your roller track—you've invested in a smoother workflow, fewer breakdowns, and a more reliable production assemble line.
Remember, even the most well-installed components need a little love. Check in on your end support regularly, and don't hesitate to reach out to your lean pipe supplier if you need replacement parts or extra guidance. After all, a strong support system isn't just about hardware—it's about keeping your team, your products, and your operations moving forward.
Now go out there and let that roller track shine!