- Company Articles
- Products and Technology
- Installation And Maintenance
- Step-by-Step Installation Guide for Single Side Aluminum Pipe Lean Systems

Step-by-Step Installation Guide for Single Side Aluminum Pipe Lean Systems
Related Product
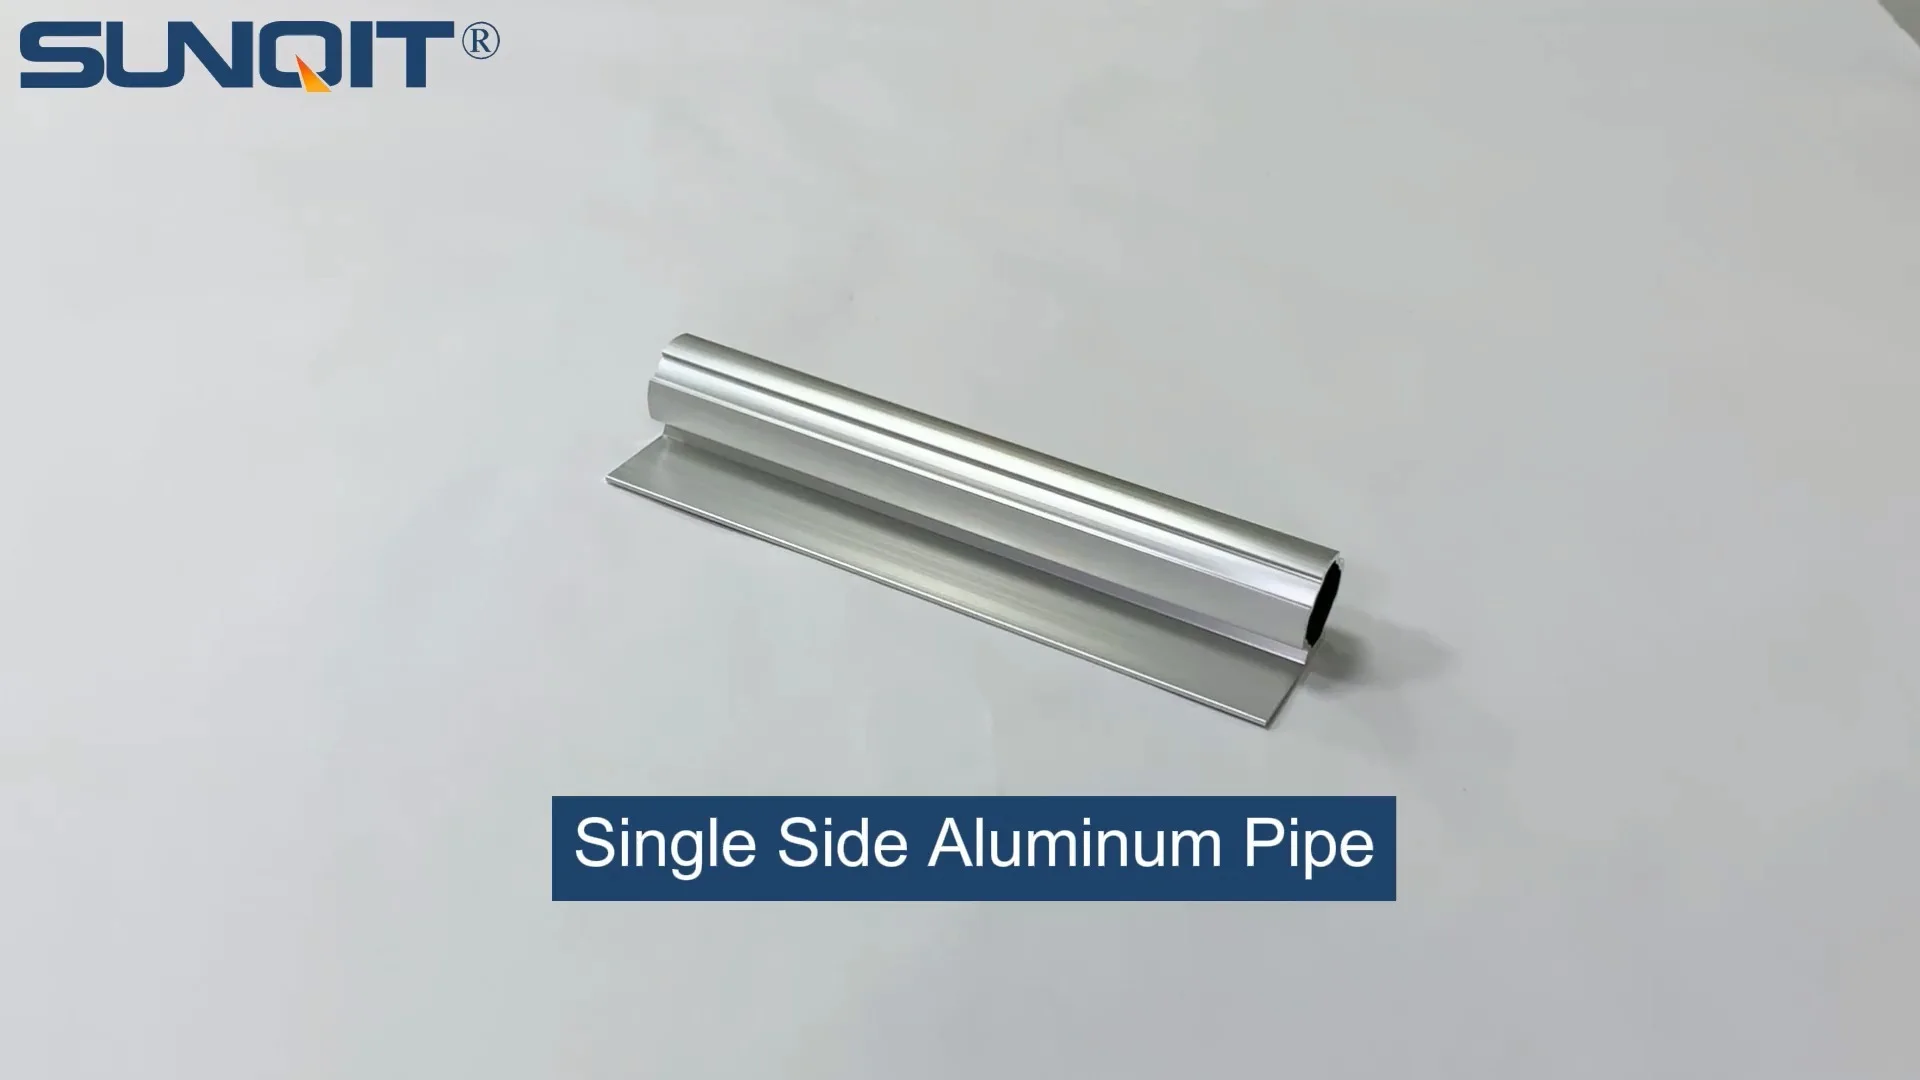
Single Side Aluminum Pipe
The single-sided plane can be installed with a back-mounted material box, and can also be used as a sidewall or partition.
Introduction: Why Aluminum Pipe Lean Systems Matter
If you've ever walked into a well-organized workshop or production line, chances are you've seen a lean system at work—those sleek, modular setups that make workflows feel almost effortless. Today, we're diving into one of the most versatile stars of this category: the single side aluminum pipe lean system. Unlike traditional rigid workbenches or fixed racks, these systems are built around flexibility, using lightweight yet durable aluminum lean pipe and clever aluminum profile accessories to adapt to your team's unique needs.
Whether you're setting up a small home workshop, a bustling factory floor, or a lab space that needs frequent reconfiguration, this guide will walk you through installing your own single side aluminum pipe lean system. No prior experience? No problem. We'll keep things simple, conversational, and focused on the hands-on steps that actually matter. By the end, you'll have a custom workbench or material rack that's sturdy, mobile (if you want it to be), and ready to boost your team's efficiency.
Tools & Materials: Gather What You'll Need
Before we dive into the "how," let's make sure you've got everything handy. Skipping this step is like trying to bake a cake without checking if you have flour—frustrating and messy. Here's your checklist:
| Tools | Materials |
|---|---|
| Allen wrench set (most aluminum profile accessories use metric sizes, so 2mm–8mm should cover it) | Aluminum lean pipe (choose length based on your design—common sizes are 1m, 2m, or 3m) |
| Tape measure (a 5m/16ft one works for most setups) | Aluminum profile accessories (end caps, T-slot nuts, and brackets—check your system's specs!) |
| Spirit level (bubble level, 2ft/60cm is ideal for checking straightness) | Lean pipe joints (90°, straight, or swivel—get a mix if your design has angles) |
| Rubber mallet (for gently tapping joints into place without scratching the aluminum) | Caster wheels (optional, but great if you want your system to roll—look for ones with brakes!) |
| Pencil or marker (for marking pipe cuts, if needed) | Workbench surface (plywood, MDF, or pre-cut aluminum deck—we'll use "Workbench E (single deck-without caster)" as our example) |
| Hacksaw or pipe cutter (only if you need to trim aluminum lean pipe to length) | Anti-slip foot pads (for stationary setups to prevent sliding) |
Pro Tip: Lay out all materials on a clean, flat surface before starting. This helps you spot missing parts early—nothing kills momentum like realizing you're short a lean pipe joint halfway through assembly!

Step 1: Plan Your Layout (Yes, This Includes Measuring Twice!)
"Measure twice, cut once" isn't just a cliché—it's the golden rule of DIY projects. Before you start screwing anything together, take 10 minutes to sketch your ideal setup. Ask yourself:
- Will this be a workbench (like Workbench E) or a material rack?
- How tall does it need to be? Standard workbench height is 80cm–90cm (31in–35in), but adjust for your team's comfort.
- Do you need shelves? If so, how many, and how far apart?
- Will it stay in one spot, or do you want to add caster wheels later?
Once you have a rough sketch, grab your tape measure and mark the dimensions on the floor (masking tape works great for this). For example, if you're building a 120cm wide x 60cm deep workbench, mark a rectangle that size. This visual guide will keep you from building something that's too big for your space (we've all been there—oops).
Quick Check: If you're adding a workbench surface, make sure the frame is slightly smaller than the surface (e.g., a 120cm surface needs a frame that's 118cm wide). This prevents the edges from overhanging and weakening the structure.

Step 2: Build the Frame—Start with the "Bones"
Now, let's start assembling the frame. Think of this as building the skeleton of your system—strong, but not too rigid. We'll use aluminum lean pipe and lean pipe joints for this. Most joints are designed to slide onto the pipe and tighten with a setscrew, so they're surprisingly intuitive.
2.1: Connect the Vertical and Horizontal Pipes
Grab your first vertical pipe (the "legs" of your system) and a 90° lean pipe joint. Slide the joint onto the top of the vertical pipe until it's about 2cm from the end—this leaves room for the horizontal pipe to connect. Now, take a horizontal pipe (the "arms" that will support the workbench or shelves) and slide its end into the open side of the 90° joint. It should fit snugly, but not so tight that you need to force it.
Once the pipes are aligned, use your Allen wrench to tighten the setscrew on the joint. Go slow here—over-tightening can strip the threads or warp the aluminum. You want it tight enough that the pipes don't wiggle, but still easy to loosen later if you need to adjust.
2.2: Square Up the Frame (No Wobbly Tables Allowed!)
After connecting two vertical and two horizontal pipes, you'll have a rectangle (the front or back of your frame). Now, check if it's square—diagonals should be equal. Measure from corner to corner: if one diagonal is longer than the other, gently push the "long" corner inward until both measurements match. A wobbly frame now means a wobbly workbench later, and no one wants their tools sliding off mid-project.
Repeat this for the opposite side (if building a workbench, you'll have two rectangles: front and back) and then connect them with horizontal "crossbars" for stability. These crossbars go between the vertical pipes, usually halfway up and near the bottom, to keep the frame from twisting.

Step 3: Attach Accessories—Make It Work for You
Now comes the fun part: adding aluminum profile accessories to turn your frame into a functional system. This is where you customize it—shelves, tool hooks, or even a cable management tray. Let's focus on the basics first:
3.1: Add the Workbench Surface
If you're building a workbench (like the "Workbench E (single deck-without caster)" model), now's the time to attach the top. Lay the workbench surface (plywood, MDF, or pre-cut aluminum) on top of the horizontal frame bars. Center it so there's an even overhang on all sides (about 1cm–2cm is perfect).
To secure it, use T-slot nuts (part of your aluminum profile accessories) and screws. Slide the T-slot nuts into the grooves of the aluminum lean pipe, position them under the workbench surface, and drill pilot holes through the surface into the nuts. Then, screw in wood screws (or machine screws if using metal) until the surface feels solid—no bouncing or creaking!
3.2: Install Caster Wheels (If You Want Mobility)
Love the idea of rolling your workbench out of the way when not in use? Caster wheels are a game-changer. Flip the frame upside down (ask a friend to help—frames can be awkwardly heavy!) and attach the caster mounting plates to the bottom of the vertical pipes using your Allen wrench. Then, screw the caster wheels into the plates. Pro tip: Use two locking casters (with brakes) and two regular ones—this keeps the bench from rolling away when you're working.
Stand the frame back up and give it a gentle push. It should roll smoothly, and the brakes should lock firmly. If a caster wobbles, check that the mounting plate is tight—loose screws here are a common culprit.
Step 4: Fine-Tune and Test—Make It Perfect
You're almost there! Now, let's make sure your system is safe, sturdy, and ready for action. Grab your spirit level and check the workbench surface (if you added one)—it should be perfectly flat. If one corner is higher than the others, adjust the caster wheels (if using) or add anti-slip foot pads under the low legs.
Next, give everything a good shake. Yep, really—grab the frame and wiggle it gently. Any loose joints? Tighten them with your Allen wrench. Any pipes that feel like they might slip out of their lean pipe joints? Double-check the setscrews—they might need a quarter-turn more.
Finally, load-test it. Place some tools or materials on the workbench (about the weight you expect to use daily) and let it sit for an hour. No sagging? No creaking? Great—you're good to go!
Troubleshooting: Oops, That Didn't Work—Now What?
Even with the best plans, hiccups happen. Here are fixes for the most common issues:
Problem: The frame is wobbly, even after tightening all joints.
Solution: Check if your crossbars are installed. Crossbars add lateral stability—without them, frames act like a slinky. Add a few more horizontal pipes between the vertical legs, especially near the middle.
Problem: The workbench surface is uneven.
Solution: Use shims (small pieces of wood or plastic) under the low spots, or adjust the caster wheels if they're height-adjustable. A quick pass with sandpaper can also smooth out minor bumps in wooden surfaces.
Problem: Aluminum profile accessories keep slipping.
Solution: Make sure T-slot nuts are fully seated in the pipe grooves—they should click into place. If they still slip, add a drop of thread locker (blue, not red—red is permanent!) to the setscrews.
Maintenance: Keep It Looking (and Working) Like New
Your single side aluminum pipe lean system is built to last, but a little care goes a long way. Here's how to keep it in top shape:
- Clean the aluminum: Wipe down the pipes and aluminum profile accessories with a damp cloth every month—dust and grease can build up and make joints sticky.
- Lubricate caster wheels: If you added casters, put a drop of oil on the axles every 3 months to keep them rolling smoothly.
- Tighten joints seasonally: Temperature changes can loosen setscrews, so do a quick check every 6 months and tighten any that feel loose.
- replace worn parts: Lean pipe joints or caster wheels that start to crack? Swap them out—most suppliers sell replacement parts individually, so you don't need a whole new system.
Final Thoughts: You Did It!
Pat yourself on the back—you've just built a custom single side aluminum pipe lean system! What started as a pile of pipes and aluminum profile accessories is now a tool that will make your workflow faster, safer, and more efficient. The best part? If your needs change (and they will!), you can easily reconfigure it—add a shelf, extend the frame, or swap out the workbench for a material rack. That's the beauty of lean systems: they grow with you.
So, go ahead—load it up, start creating, and enjoy the satisfaction of knowing you built something that works for your team, not against them. And if you ever need to build another one? You've got this guide (and your newfound DIY skills) to thank.