- Company Articles
- Products and Technology
- Installation And Maintenance
- Step-by-Step Installation Guide for Suction Cup Anti-Slip Foot Adjusters

Step-by-Step Installation Guide for Suction Cup Anti-Slip Foot Adjusters
Related Product
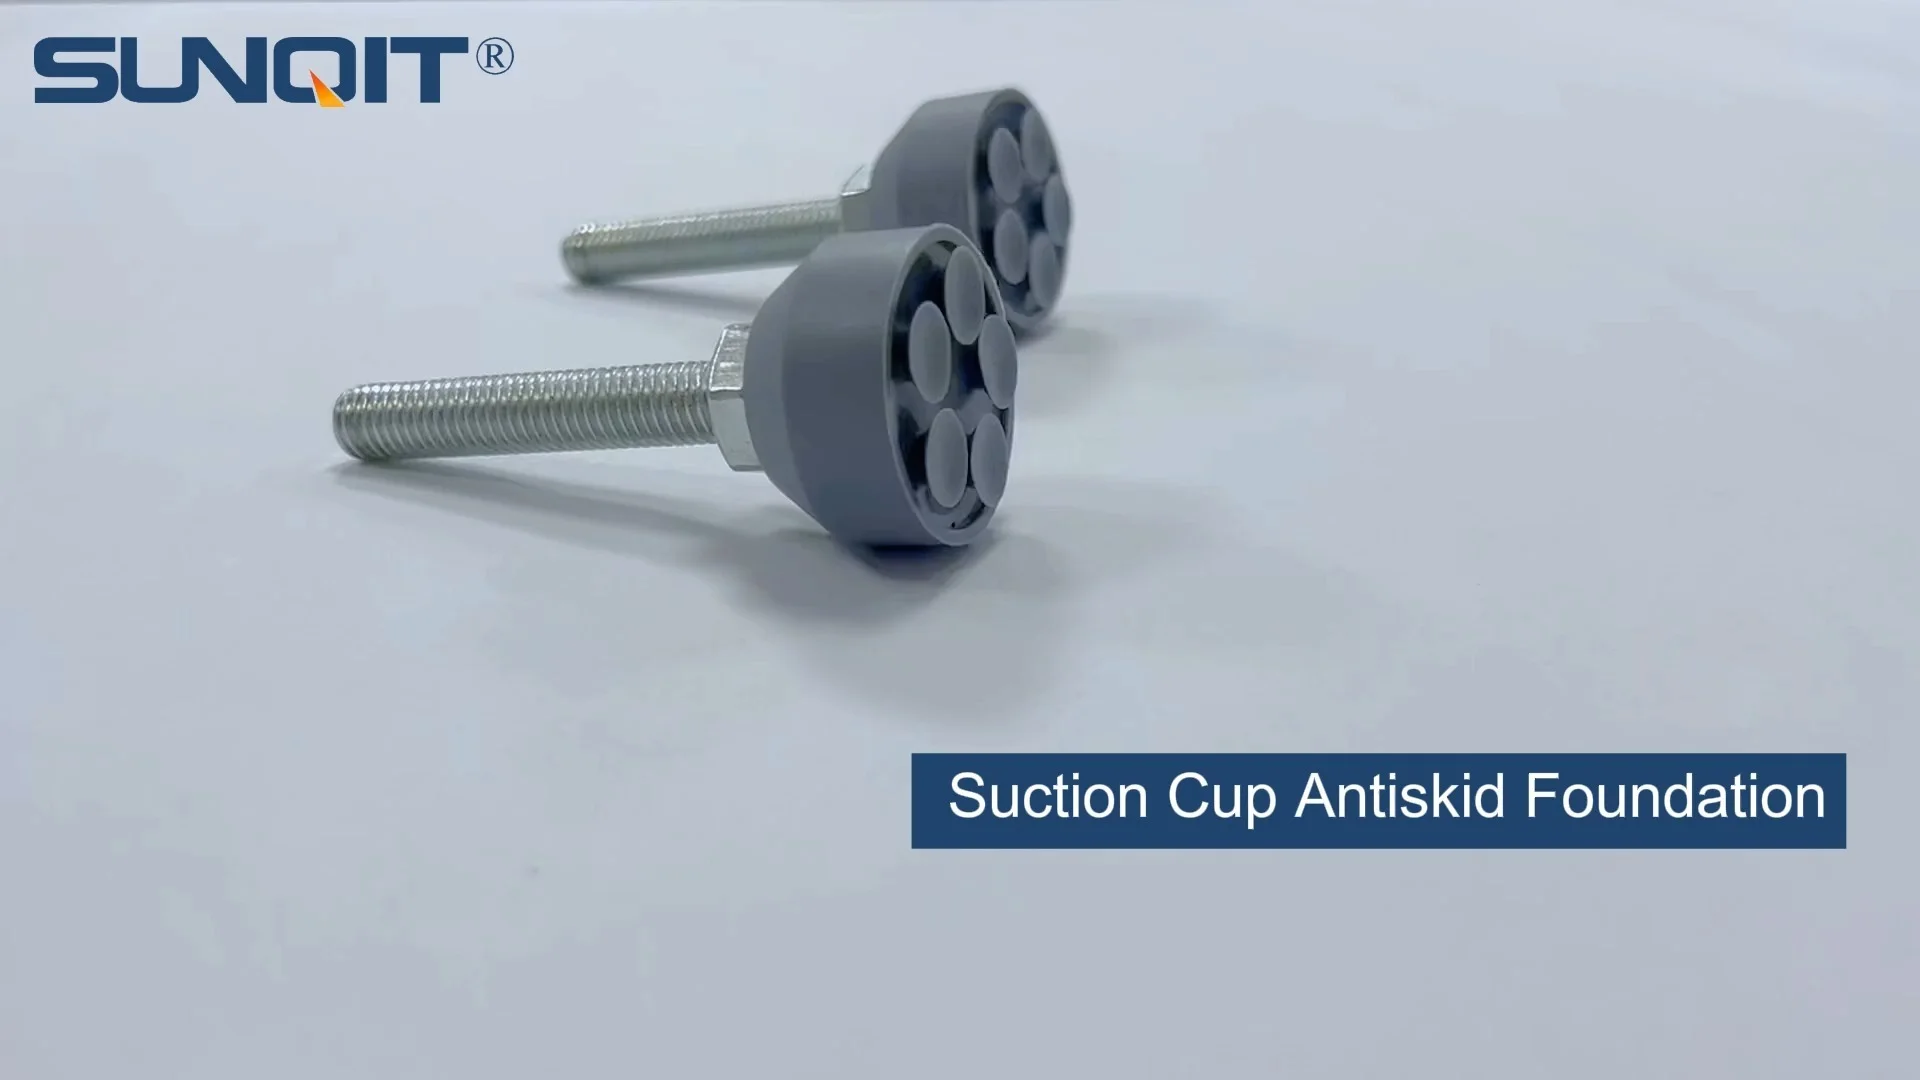
Suction Cup Anti-slip Foot Adjuster
D=35mm suction cup anti-slip foot adjusterï¼screw M10*55ï¼with a blot, used for workbench, flowrack pipe contact with groud.
Introduction: Why Suction Cup Anti-Slip Foot Adjusters Matter
If you've ever spent hours assembling a piece of equipment only to have it wobble the first time you use it, you know how frustrating instability can be. Whether you're setting up a lean pipe workbench in a factory, a lab station, or a home workshop, the foundation of your workspace matters more than you might think. A wobbly surface doesn't just disrupt workflow—it can compromise precision, damage tools, and even create safety hazards. That's where suction cup anti-slip foot adjusters come in.
Unlike standard adjustable leveling feet, these specialized components combine three key features: height adjustability to compensate for uneven floors, a suction cup base for unbeatable grip, and anti-slip materials that prevent lateral movement. They're designed to turn even the shakiest workbench into a rock-solid platform, making them a must-have for anyone serious about efficiency and safety. In this guide, we'll walk you through installing these foot adjusters on a typical lean pipe workbench, from unboxing to final testing. Let's dive in.
Tools You'll Need: Gather These Before You Start
Before you begin, having the right tools on hand will save you time and frustration. Most installations require only basic equipment, but double-checking now will prevent mid-project trips to the toolbox. Here's what you'll need:
| Tool Name | Purpose |
|---|---|
| Measuring tape (10ft/3m minimum) | To mark precise installation points on the workbench legs |
| Hex key set (metric, typically 4mm–8mm) | To tighten bolts on the foot adjuster mounting brackets |
| Rubber mallet | To gently seat foot adjusters into mounting brackets (if needed) |
| Spirit level (2ft/60cm or longer) | To check if the workbench is level after installation |
| Lint-free cloth | To clean workbench legs and floor surface (dust/oil ruins suction!) |
| Optional: Thread locker (medium-strength) | To prevent bolts from loosening over time (ideal for high-vibration environments) |
| Optional: Pencil or masking tape | To mark drill points (if your workbench requires drilling) |
Pro Tip: If your lean pipe workbench has aluminum profile legs, confirm the bracket size before starting—some foot adjusters are designed to fit T-slots in aluminum profiles, while others use universal clamps.

Step 1: Unbox and Inspect the Foot Adjusters
Start by unboxing your suction cup anti-slip foot adjusters. Most kits include 4–6 adjusters (one per leg), mounting brackets, bolts, and a hex key. Lay everything out on a clean surface and inspect each part for damage: check that the suction cups are free of cracks, the threads on the adjustable stems are smooth, and the brackets aren't bent.
If any components are missing or damaged, contact your lean pipe supplier immediately—using faulty parts will compromise the installation. For reference, a standard kit should look like this: [suction cup base (rubber or silicone), threaded stem (typically M10 or M12), mounting bracket (metal or heavy-duty plastic), and locking nut].
Quick Check: Spin the adjustable stem by hand. It should turn smoothly without sticking—if it's seized, apply a drop of lubricant (WD-40 works) and twist gently to free it.

Step 2: Prepare the Workbench and Workspace
2.1 Clean the Workbench Legs and Floor
Suction cups rely on airtight contact to grip surfaces, so any dust, oil, or debris will ruin their effectiveness. Use a lint-free cloth to wipe down the bottom of each workbench leg—pay special attention to mounting areas where brackets will attach. Next, clean the floor where the foot adjusters will sit: sweep away dirt, mop up spills, and dry thoroughly. For concrete floors, a quick pass with isopropyl alcohol (on the cloth) will remove stubborn grease.
2.2 Flip the Workbench (If Needed)
If your workbench is already assembled, you'll need to access the bottom of the legs. Enlist a helper to flip the workbench onto its top (place a soft blanket or cardboard underneath to protect the surface). If it's unassembled, lay the frame on its side so the legs are exposed. For lean pipe workbenches with aluminum profile frames, the legs are usually attached to the frame with T-slot bolts—no need to disassemble them entirely.
Safety First: Never flip a loaded workbench! Remove all tools, materials, and accessories before moving it. If the bench is heavy, use a dolly or ask for help to avoid injury.

Step 3: Mark Installation Points on the Legs
Even if your workbench legs have pre-drilled holes, taking time to mark installation points ensures the foot adjusters are aligned evenly. Misaligned adjusters can cause the bench to rock, defeating the purpose of the upgrade. Here's how to do it:
For pre-drilled legs: Use the mounting bracket as a template to confirm hole positions. Hold the bracket against the leg (the flat side should face the floor) and check that the bolt holes line up. If they don't, you may need to drill new holes (see below).
For undrilled legs (aluminum profile or steel): Measure 1–2 inches up from the bottom of each leg and mark a horizontal line with a pencil. This ensures all foot adjusters sit at the same height initially. If your workbench has four legs, mark each leg at the same distance from the floor—consistency is key!
If drilling is required: Use a drill bit slightly smaller than the bolts (e.g., 5mm bit for M6 bolts) to create pilot holes. Drill straight into the leg—tilting will make bracket alignment harder. Clean metal shavings with your cloth before proceeding.
Step 4: Attach the Mounting Brackets
Now it's time to secure the mounting brackets to the workbench legs. The method depends on your workbench's design—most lean pipe workbenches use either bolt-on brackets or T-slot brackets for aluminum profiles. Let's cover both scenarios:
4.1 Bolt-On Brackets (Steel or Wood Legs)
1. Place the bracket against the leg, aligning the holes with your marks/drilled pilot holes.
2. insert the bolts through the bracket and into the leg. Hand-tighten them first to avoid cross-threading.
3. Use the hex key to fully tighten the bolts—turn clockwise until snug, but don't overtighten (this can strip threads).
4. Repeat for all legs. Double-check that each bracket is flush against the leg (no gaps).
4.2 T-Slot Brackets (Aluminum Profile Legs)
1. Slide the T-slot nut into the aluminum profile's groove (align it with the bracket hole).
2. Place the bracket over the nut, then insert the bolt through the bracket and into the nut.
3. Tighten with the hex key—stop when the bracket is secure but still allows minor adjustments (you'll fine-tune later).
4. Repeat for all legs. T-slot brackets are forgiving, so don't stress if alignment is slightly off yet.
Pro Move: If using thread locker, apply a small drop to the bolt threads before tightening. Let it dry for 5–10 minutes before moving to the next step.
Step 5: Install the Suction Cup Foot Adjusters
With the brackets in place, it's time to attach the foot adjusters themselves. This is where the "adjustable" part comes in—each foot has a threaded stem that screws into the bracket, letting you raise or lower it to level the workbench.
1. Screw the foot adjuster into the mounting bracket by hand. Turn clockwise until the stem is fully engaged (you'll feel resistance after 3–4 rotations).
2. Leave 2–3 inches of stem exposed initially—this gives you room to adjust height later. Don't tighten the locking nut yet!
3. Repeat for all legs. At this point, all foot adjusters should be loosely attached, with the suction cups hanging just above the floor.
If your adjusters have a swivel joint (common in heavy-duty models), ensure the suction cup is facing straight down—twisting it now will make leveling harder.
Step 6: Level the Workbench (The Most Critical Step!)
Now comes the moment of truth: making sure your workbench is perfectly level. Even a 1-degree tilt can cause tools to roll or materials to shift, so take your time here. Follow these steps:
6.1 Position the Spirit Level
Place the spirit level on the workbench surface, aligned with the front edge (left to right). Check the bubble—if it's off-center, the bench is tilted. Now rotate the level 90 degrees (front to back) and check again. Note which direction the bubble leans (e.g., "left side low" or "back corner high").
6.2 Adjust the Foot Adjusters
1. Start with the lowest corner (the one causing the bubble to lean). To raise it, turn the foot adjuster's stem counterclockwise (this extends the stem, lifting the leg). For small adjustments, turn 1/4 rotation at a time.
2. Recheck the level after each adjustment. Once the bubble is centered left-to-right, move to front-to-back and repeat.
3. For stubborn unevenness (e.g., a floor with a dip), adjust two adjacent legs together. For example, if the back-left corner is low, raise both the back-left and back-right adjusters slightly.
4. Once the bench is level in both directions, tighten the locking nut on each adjuster (turn clockwise against the bracket) to lock the height in place.
Patience Pays Off: It may take 5–10 minutes of tweaking to get it right. Walk away for a minute if you get frustrated—fresh eyes help!
Step 7: Engage the Suction Cups and Test Stability
Leveling is done, but we're not finished yet. The suction cups need to make full contact with the floor to activate their grip. Here's how to ensure they stick:
7.1 Activate the Suction Cups
Stand at the corner of the workbench and gently push down on the surface—this applies pressure to the suction cups, forcing air out and creating a vacuum seal. Do this for all four corners, then walk around the bench and press down firmly on each side. You should hear a faint "snap" as the cups adhere—this means they're working!
7.2 Test for Stability
Shake Test: Grip the workbench edge and shake gently from side to side. There should be no wobble—if it moves, check if a suction cup popped loose (re-seal it by pressing down again).
Weight Test: Place a heavy object (e.g., a 50lb toolbox) on one corner. The bench shouldn't tilt, and the suction cup under that corner should stay sealed.
Slide Test: Push the bench horizontally with moderate force. The suction cups should prevent sliding—if it moves, the floor might be too smooth (try cleaning again with alcohol).
If the bench still slides, check the suction cup condition—cracks or tears mean it's time for a replacement. Contact your supplier for spare parts (most carry suction cup refills).
Troubleshooting: Common Issues and Fixes
Even with careful installation, problems can pop up. Here's how to solve the most common issues:
- Suction cup won't stick: Clean the cup and floor with alcohol (oil/grease is the enemy!). If the floor is porous (e.g., concrete with cracks), the cup may never seal—try placing a thin rubber mat under the adjusters.
- Workbench still wobbles: Check if all four adjusters are making contact. If one leg is off the floor, raise that adjuster until it touches. Recheck the level afterward.
- Bolts keep loosening: Apply thread locker (we told you it was optional but useful!). If threads are stripped, replace the bolt with a larger size (e.g., M10 instead of M8) or use a helicoil repair kit.
- Adjuster stem is stuck: Spray with lubricant and let sit for 10 minutes. Grip the stem with pliers (wrap in cloth to avoid scratches) and twist gently.
Maintenance: Keep Your Foot Adjusters Working Like New
To ensure your suction cup anti-slip foot adjusters last, a little maintenance goes a long way. Add these tasks to your monthly workspace checklist:
- Clean the suction cups: Wipe them with a damp cloth to remove dust and debris. For tough grime, use mild soap and water—avoid harsh chemicals that can degrade rubber.
- Check tightness: Use the hex key to retighten bracket bolts and locking nuts—vibration from daily use can loosen them over time.
- Inspect for wear: Look for cracks in the suction cups, bent stems, or rust on brackets. replace any damaged parts immediately—don't wait for a failure!
- Re-level annually: Floors can shift slightly over time. Recheck the level and adjust stems as needed to keep the bench stable.
Pro Maintenance: If you live in a humid area, apply a thin coat of talcum powder to the suction cups every 3 months—this prevents them from sticking to the floor when not in use.
Conclusion: Enjoy Your Stable, Slip-Free Workspace
Congratulations! You've successfully installed suction cup anti-slip foot adjusters on your lean pipe workbench. Take a step back and admire your handiwork—what was once a wobbly surface is now a stable, secure platform ready for whatever tasks come your way. Whether you're assembling electronics, woodworking, or running a production line, the peace of mind that comes with a level, slip-free workspace is priceless.
Remember, these adjusters aren't just a one-time upgrade—they're an investment in safety and efficiency. With proper care, they'll keep your workbench stable for years to come. And if you ever need replacement parts or have questions, your lean pipe supplier is just a call away. Happy building!