- Company Articles
- Products and Technology
- Installation And Maintenance
- Step-by-Step Installation Guide for Two Way Lean Pipe Joint

Step-by-Step Installation Guide for Two Way Lean Pipe Joint
Related Product
Two Way Lean Pipe Joint
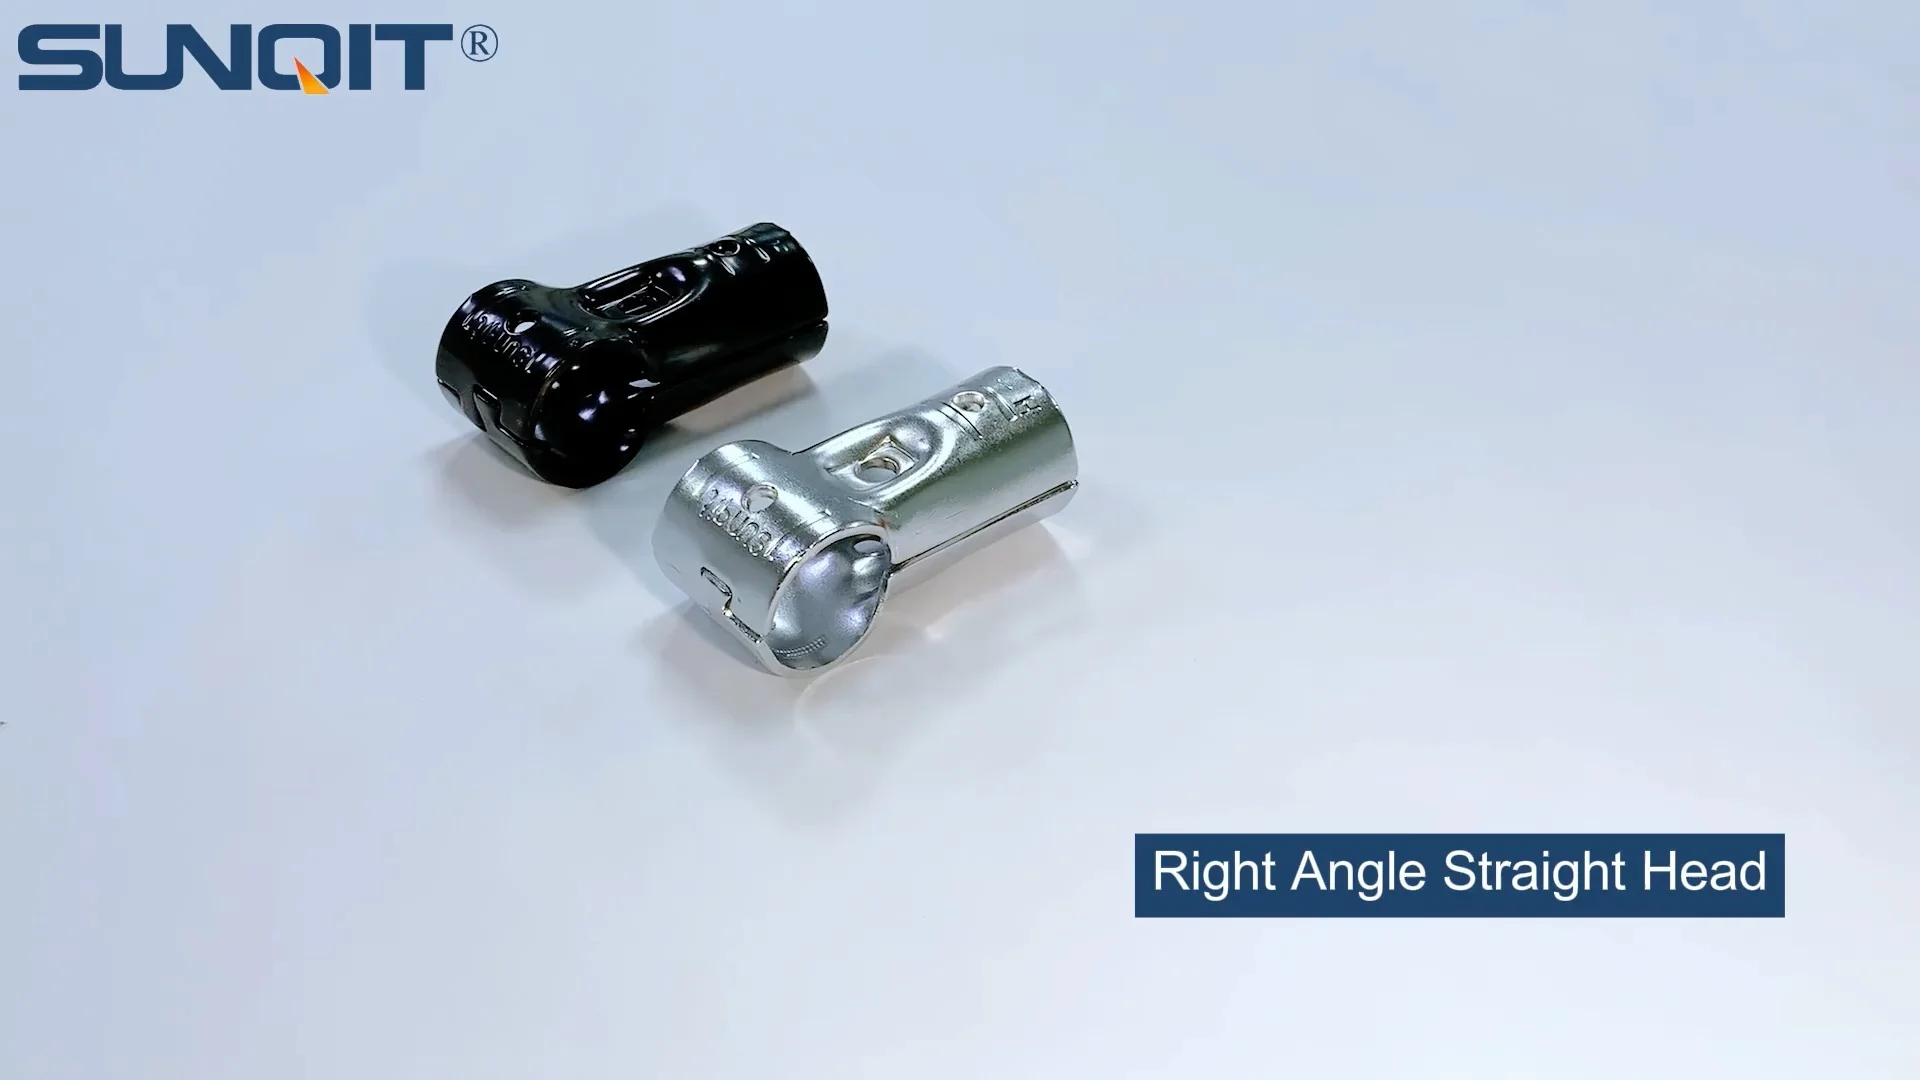
Two way lean pipe joint for 2 pcs 28MM lean pipe connection in straight angle, which used widely in workbench, flow rack, hand trolley frame connection.
Introduction: What Is a Two Way Lean Pipe Joint, and Why Does It Matter?
If you've ever walked through a well-organized factory floor, a bustling warehouse, or even a small workshop focused on efficiency, you've probably seen it: sleek, modular structures made of metal pipes and connectors, holding tools, materials, or products in a way that just makes sense . These setups—often part of a broader lean system—are designed to minimize waste, streamline workflows, and keep everything within easy reach. At the heart of many of these structures is a humble but critical component: the two way lean pipe joint.
A two way lean pipe joint, as the name suggests, is a connector that joins two lean pipes at a specific angle (usually 90 degrees, though some designs offer flexibility). Think of it as the "hinge" that turns individual pipes into functional systems—whether it's a simple material rack, a dynamic lean pipe workbench, or a custom conveyor frame. Without a reliable joint, those pipes are just pieces of metal; with it, they become the backbone of a lean operation.
But why does this small component deserve so much attention? In lean manufacturing and logistics, every second counts. A loose joint can lead to wobbly workbenches, causing tools to slip or materials to shift. A misaligned joint might disrupt the flow of products on a roller track, slowing down production. And over time, a poorly installed joint can wear out faster, leading to unexpected downtime and replacement costs. In short, getting the two way lean pipe joint installation right isn't just about "putting parts together"—it's about building a foundation for efficiency, safety, and long-term reliability.
In this guide, we're going to walk you through everything you need to know to install a two way lean pipe joint like a pro. Whether you're setting up your first lean workbench, upgrading an existing system, or just replacing a worn-out joint, we'll cover the tools, the steps, the common pitfalls to avoid, and even how to maintain your joint for years to come. Let's dive in.
Pre-Installation Preparation: Get Ready to Succeed
Before you pick up a wrench or even unpack your lean pipe and joint, take a few minutes to prepare. Rushing into installation without the right tools or a clear plan is a recipe for frustration (and potentially faulty work). Let's break down what you'll need to do first.
Tools You'll Need: Gather These Before You Start
You don't need a fully equipped machine shop, but having the right tools on hand will make the process smoother and more precise. Here's a quick checklist:
| Tool | Purpose | Pro Tip |
|---|---|---|
| Adjustable wrench or hex key (size depends on joint type) | Tightening the joint's locking mechanism (e.g., bolts, set screws) | Use a wrench with a rubber grip to avoid slipping—your hands will thank you! |
| Tape measure | Measuring pipe lengths and ensuring alignment | Opt for a retractable tape with clear markings; 25 feet is usually enough for most projects. |
| Permanent marker or pencil | Marking where pipes will insert into the joint | Use a fine-tip marker to avoid smudging—precision here prevents misalignment later. |
| Bubble level (2-foot or longer) | Checking if pipes are straight and level after installation | A magnetic bubble level can stick to metal pipes, leaving your hands free to adjust. |
| Deburring tool or sandpaper (fine-grit) | Removing sharp edges from cut pipes (if you're cutting your own) | Even if your pipes come pre-cut, a quick sand check ensures no burrs scratch your hands or damage the joint. |
| Rubber mallet | Gently tapping pipes into place (if they're tight fitting) | Avoid metal hammers—they can dent or damage the pipe's coating (like the PE coating on many lean pipes). |
| Work gloves | Protecting hands from sharp edges or rough pipe surfaces | Choose gloves with good grip—you'll need to hold pipes steady while tightening joints. |
Safety First: Don't Skip These Steps
Installing a two way lean pipe joint isn't inherently dangerous, but a few simple safety habits can prevent headaches (or worse). Here's what to keep in mind:
- Wear gloves: Even if the pipes and joints feel smooth, burrs or sharp edges (from manufacturing or shipping) can cause cuts. A pair of work gloves adds a layer of protection.
- Clear your workspace: Installing joints requires space to lay out pipes and move freely. Remove clutter, tools, or debris that could trip you up or get in the way of alignment.
- Check for damaged parts: If a pipe is bent, a joint is cracked, or a locking mechanism is rusted, don't use it. A faulty component is a safety risk—replace it before starting.
- Use proper lifting technique: If you're working with long or heavy pipes, lift with your legs, not your back. Ask for help if a pipe is too awkward to handle alone.
Inspecting Your Components: What to Look For
Before you start assembling, take 5 minutes to inspect the lean pipe and two way joint you'll be using. This step might seem trivial, but it can save you from headaches later. Here's what to check:
For the lean pipe: Look for dents, cracks, or signs of corrosion, especially if the pipe is made of steel or stainless steel. Even small dents can make it harder to insert into the joint, leading to a loose fit. If the pipe has a coating (like PE or aluminum), ensure it's intact—scratches or peeling might expose the metal to rust. Also, check the ends: they should be straight and clean (no jagged edges).
For the two way lean pipe joint: Examine the inner diameter where the pipe inserts—there should be no debris, rust, or bent metal that could block the pipe. Check the locking mechanism (bolts, set screws, or clamp plates) to make sure they move freely and aren't stripped. If the joint has threads, ensure they're clean and not cross-threaded. Finally, confirm that the joint is the right size for your pipe: a 28mm joint won't work with a 30mm pipe, even if it feels "close enough."
Pro Tip:
If you're buying new parts, always source them from a reputable lean pipe supplier. A quality supplier will ensure their joints are precision-manufactured, with consistent sizing and durable materials—something that's hard to guarantee with generic, off-brand components. Look for suppliers who specify load capacities, material grades, and testing standards for their joints.
Step-by-Step Installation Process: Let's Build Something Solid
Now that you're prepared, it's time to install the two way lean pipe joint. We'll break this down into 6 clear steps, with tips to ensure each one goes smoothly. Take your time—rushing through steps 2-4 is the most common cause of misaligned or loose joints.
Step 1: Unpack and Lay Out Your Components
Start by unpacking the lean pipe(s) and the two way joint, and laying them out on a flat, clean surface. A workbench or even a large table works well here—you want enough space to handle the pipes without them rolling away. If you're working on the floor, lay down a sheet of cardboard or a towel to protect the pipe coating from scratches.
If your project requires cutting the pipe to length (e.g., for a custom workbench height), now's the time to do it (we'll cover measuring in Step 2). If the pipe is already pre-cut to your specifications, skip to the next step.
Step 2: Measure and Mark the Pipe Insertion Depth
One of the biggest mistakes beginners make is inserting the pipe into the joint "as far as it goes" without measuring. This can lead to uneven lengths, misaligned structures, or even pipes popping out of the joint under load. Instead, take a moment to measure and mark how deep the pipe should go into the joint.
First, check the joint's specifications (either from the supplier or the product manual) for the recommended insertion depth. Most two way joints require the pipe to insert 30-50mm into the joint for a secure fit, but this can vary by design. If you don't have specs, a good rule of thumb is to insert the pipe until it hits the internal stop inside the joint (you'll feel a slight resistance when it's fully seated).
Once you know the depth, use your tape measure and marker to mark the pipe at that length from the end. For example, if the recommended depth is 40mm, make a clear line 40mm from the pipe's end. This mark will be your guide—when installing, you'll push the pipe into the joint until the mark is flush with the joint's outer edge.
Pro Tip:
If you're installing two pipes into the same joint (e.g., a vertical and horizontal pipe), mark both pipes separately. Even if they're the same length, small variations in cutting or insertion can add up!
Step 3: Align the Pipes with the Two Way Joint
Now it's time to position the pipes and joint together. Start by inserting one pipe into the first opening of the joint, stopping when your marked line is flush with the joint's edge (as we marked in Step 2). Hold it steady with one hand—you don't need to tighten anything yet; just get it seated correctly.
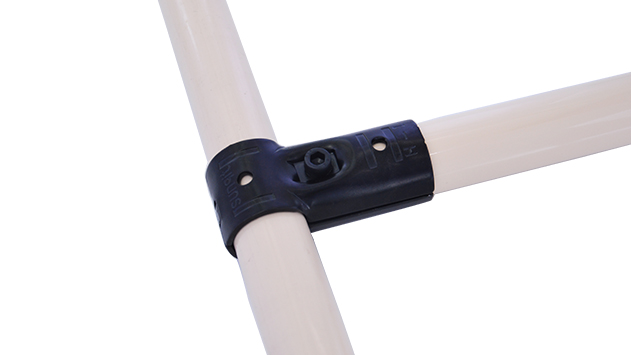
Next, take the second pipe and insert it into the joint's second opening, again aligning it with your mark. Now, here's the critical part: check the angle between the two pipes. For most two way joints, this angle is fixed at 90 degrees (like the corner of a square), but some adjustable joints let you set angles between 45-180 degrees. Use your bubble level or a square tool to ensure the angle is exactly what you need—even a 5-degree misalignment can throw off your entire structure later.
If the pipes feel wobbly or hard to hold in place, ask a helper to steady them while you proceed to the next step. Alternatively, prop the pipes against a wall or clamp them lightly to your workbench (just don't overtighten the clamps—you don't want to dent the pipe).
Step 4: Secure the Joint (Tighten, Don't Over-Tighten)
With the pipes aligned, it's time to lock them into place using the joint's locking mechanism. This is where patience and precision matter most—over-tightening can strip threads or crack the joint, while under-tightening leads to looseness. Let's break this down based on the type of joint you're using (most two way lean pipe joints fall into one of these categories):
Type 1: Bolt-on or set screw joints. These joints have one or more bolts (usually hex-head) that tighten against the pipe to hold it in place. To secure them:
- Start by hand-tightening the bolt(s) until they just touch the pipe—this helps keep the pipe from shifting.
- Use your adjustable wrench or hex key to tighten the bolt(s) gradually, alternating between bolts if there are multiple (e.g., top and bottom). Aim for firm resistance, but stop before you feel the bolt "give" or hear a creaking sound (that's a sign of over-tightening).
- After tightening, gently tug on the pipes to test for movement—there should be none. If they shift, loosen the bolts slightly, realign the pipes, and retighten.
Type 2: Clamp-style joints. These joints use a metal clamp that wraps around the pipe, secured by a single bolt. For clamp joints:
- Open the clamp fully, insert the pipe to your marked line, then close the clamp around the pipe.
- Hand-tighten the bolt until the clamp grips the pipe, then use a wrench to tighten 1-2 more turns—just enough to compress the clamp against the pipe without deforming it.
- Check that the clamp is centered over the pipe's mark—if it's off, loosen, reposition, and retighten.
Type 3: Threaded joints. Less common for two way designs, but some joints have internal threads that screw onto threaded pipe ends. For these:
- Apply a small amount of thread locker (like Loctite) to the pipe's threads (optional but recommended for vibration-prone setups).
- Screw the pipe into the joint until it reaches your mark, turning clockwise. Use a pipe wrench to tighten 1/4 turn past hand-tight—over-tightening can strip threads!
No matter the joint type, the goal is a snug, movement-free fit. After tightening, give each pipe a gentle twist and pull—if they move even a little, repeat the alignment and tightening steps.
Step 5: Test Stability and Make Adjustments
You've tightened the joint—now it's time to put it to the test. A stable joint should hold the pipes firmly, even under light pressure. Here's how to test it:
Visual check: Stand back and look at the joint from all angles. The pipes should be straight, with no gaps between the pipe and joint. The angle should be consistent (e.g., a perfect 90 degrees if that's your target).
Physical test: Apply gentle downward pressure to the end of one pipe (as if a tool or material were resting on it). The joint should flex slightly but return to position—no permanent bending or creaking. Then, push sideways on the joint (simulating a side load). Again, minimal movement is okay, but if the joint shifts or the pipes wiggle, it's too loose.
Level check: Place your bubble level along each pipe. They should be straight (horizontal, vertical, or at your desired angle) with no tilting. If one pipe is higher than the other, loosen the joint, adjust the insertion depth slightly, and retighten.
If you notice issues during testing (e.g., wobbling, misalignment), don't panic—just backtrack. Loosen the joint, realign the pipes, and retighten more carefully. It's better to spend an extra 5 minutes adjusting now than to rebuild the entire structure later.
Step 6: Integrate into Your Lean Setup (Optional but Important)
Once the two way lean pipe joint is secure and stable, it's time to integrate it into your larger lean system. For example, if you're building a lean pipe workbench, this joint might connect the workbench's legs to its top frame. If it's part of a material rack, it could join the vertical supports to the horizontal shelves.
During integration, pay attention to how the joint interacts with other components. For instance, if the joint is near a roller track, ensure it doesn't block the flow of materials. If it's part of a workbench, check that the joint doesn't stick out and create a hazard (e.g., a sharp edge where someone might bump their arm).
Finally, once the entire structure is assembled, give it a final once-over. Walk around it, check all joints (not just the one you installed), and test its functionality. Load it with the materials or tools it will hold in daily use—if it's a workbench, place a few heavy tools on it; if it's a material rack, add a box of parts. Let it sit for an hour, then check the joint again—sometimes initial loading can cause minor settling, which may require a quick retightening.

Troubleshooting Common Issues: What to Do When Things Go Wrong
Even with careful preparation, you might run into snags during or after installation. Here are the most common problems and how to fix them:
Issue 1: The Joint Feels Loose, Even After Tightening
If the pipes wiggle in the joint despite your best tightening efforts, there are a few possible causes:
- The pipe is too small for the joint: If the pipe's outer diameter is smaller than the joint's inner diameter, no amount of tightening will create a snug fit. Check the specs—e.g., a 25mm pipe in a 30mm joint will always be loose. Solution: replace with a joint that matches your pipe size.
- The locking mechanism is stripped: Over-tightening can strip bolts or clamp plates, making them unable to grip the pipe. Inspect the mechanism—if you see stripped threads or bent metal, the joint needs to be replaced. Solution: Get a new joint, and be gentler with the tightening next time!
- The pipe is dented or bent: A dented pipe won't seat properly in the joint, leaving gaps. Solution: If the dent is minor, use a rubber mallet to gently tap it out (support the pipe from the inside to avoid worsening the dent). If it's severe, replace the pipe.
Issue 2: The Pipes Are Misaligned (Angle Is Off)
If the joint is installed but the pipes aren't at the right angle (e.g., 95 degrees instead of 90), here's why:
- You skipped the alignment step: Rushing to tighten before checking the angle is the #1 cause. Solution: Loosen the joint, use a square or level to realign, then retighten.
- The joint is damaged: A bent joint (e.g., from shipping) might force the pipes into a misaligned angle. Check the joint for warping—if the two openings aren't perpendicular, it's defective. Solution: Contact your lean pipe supplier for a replacement.
- The insertion depth is uneven: If one pipe is inserted deeper than the other, it can pull the joint out of alignment. Solution: Check your marks and adjust insertion depth so both pipes are seated equally.
Issue 3: The Pipe Won't insert All the Way into the Joint
If you're struggling to push the pipe into the joint (even after checking for dents), possible causes include:
- Debris in the joint: Dirt, metal shavings, or rust inside the joint can block the pipe. Solution: Use a small brush or compressed air to clean the joint's inner opening.
- The pipe is out of round: A bent pipe (even slightly) will jam in the joint. Roll the pipe on a flat surface—if it wobbles, it's bent. Solution: Straighten the pipe with a pipe bender (for metal pipes) or replace it.
- The joint is the wrong size: As mentioned earlier, size matters! A joint labeled "28mm" might actually be 27mm due to poor manufacturing (common with low-quality suppliers). Solution: Measure the joint's inner diameter with calipers and confirm it matches your pipe's outer diameter.

Maintenance Tips: Keep Your Two Way Lean Pipe Joint Strong for Years
Installing the joint correctly is just the first step—with a little maintenance, you can extend its lifespan and keep it performing like new. Here's how:
Regular Inspections: Catch Issues Early
Make it a habit to inspect your two way lean pipe joints (and all lean system components) every 1-3 months, depending on usage. Look for:
- Loose bolts or clamps: Vibration from daily use can loosen even well-tightened joints. Give each bolt a gentle tug with your wrench—if it turns, retighten it.
- Rust or corrosion: Check metal joints and pipes for rust, especially in humid environments. Wipe away surface rust with a wire brush and apply a rust inhibitor (like WD-40) to prevent spread.
- Worn coatings: If your pipe has a PE coating, check for cracks or peeling. Exposed metal is prone to rust—touch up small areas with spray-on coating, or replace the pipe if damage is severe.
Cleaning: Keep It Debris-Free
Dirt, grease, and dust can build up in the joint over time, especially in manufacturing settings. Every 6 months, give the joint a thorough cleaning:
- Use a dry cloth to wipe away surface dust.
- For greasy joints, dampen a cloth with mild soap and water (avoid harsh chemicals like bleach, which can damage coatings).
- Blow out any debris from the joint's crevices with compressed air (wear safety glasses to protect your eyes).
Tightening Schedule: Prevent Loosening Over Time
Even the best joints loosen slightly over time due to thermal expansion (pipes and joints expand/contract with temperature changes) and vibration. Set a calendar reminder to retighten all joints in your lean system every 6 months. This quick task takes 5-10 minutes per joint and can prevent major issues like collapsed workbenches or falling materials.
Choosing the Right Two Way Lean Pipe Joint: It's Not One-Size-Fits-All
Before we wrap up, let's talk about selecting the right two way lean pipe joint for your project. With so many options on the market, it's easy to default to the cheapest or most readily available—but the wrong joint can cost you more in the long run. Here are the key factors to consider:
Material: Steel, Aluminum, or Plastic?
Two way lean pipe joints are typically made of steel (zinc-plated or stainless), aluminum, or plastic. Each has pros and cons:
- Steel: Strong and durable, ideal for heavy loads (e.g., workbenches holding machinery). Zinc-plated steel resists rust in dry environments, while stainless steel is better for humid or corrosive settings (e.g., food processing). Downside: Heavier than aluminum, and can rust if the coating is damaged.
- Aluminum: Lightweight and corrosion-resistant, making it great for mobile setups (e.g., turnover trolleys) or cleanrooms. Aluminum joints are also easier to handle during installation. Downside: Less strong than steel—avoid for very heavy loads.
- Plastic: Affordable and lightweight, best for light-duty use (e.g., small material racks). Downside: Not suitable for heavy loads or high temperatures—can warp or crack under stress.
Load Capacity: Don't Guess—Check the Specs
Every joint has a maximum load it can support (measured in kg or lbs). This is the total weight the joint can handle without bending or failing. For example, a small plastic joint might support 50kg, while a heavy-duty steel joint could handle 500kg+. Always check the supplier's specs and choose a joint with a load capacity 20% higher than your expected use—this "safety margin" accounts for unexpected stress (e.g., someone leaning on the workbench).
Supplier Reputation: Trust Matters
As we mentioned earlier, a reliable lean pipe supplier is critical. Look for suppliers who:
- Provide detailed specs (material, load capacity, insertion depth, etc.) for each joint.
- Offer warranties (e.g., 1-year warranty against defects).
- Have positive reviews from other customers (check platforms like Google or industry forums).
- Can answer technical questions (e.g., "What joint should I use for a 30mm aluminum pipe with a 200kg load?").
A good supplier won't just sell you a joint—they'll help you choose the right one for your needs, ensuring your lean system is safe and efficient.
Conclusion: Your Joint, Your Lean System, Your Success
Installing a two way lean pipe joint might seem like a small task, but as we've explored, it's a cornerstone of building a reliable, efficient lean system. From preparing your tools and inspecting components to aligning pipes and testing stability, every step plays a role in creating a structure that works with your workflow, not against it.
Remember: A well-installed joint isn't just about avoiding downtime or replacement costs (though those are big wins). It's about creating a workspace where employees can focus on their tasks without worrying about wobbly workbenches or misaligned material racks. It's about turning individual pipes into a system that reduces waste, speeds up processes, and makes every day on the job a little smoother.
So the next time you pick up a two way lean pipe joint, take a moment to appreciate its role. With the steps in this guide, you've got the knowledge to install it right—and build something that lasts. Here's to leaner, more efficient operations!