- Company Articles
- Products and Technology
- Installation And Maintenance
- Swivel Stem Caster Wheel with Brake: Troubleshooting Stuck or Slipping Brakes

Swivel Stem Caster Wheel with Brake: Troubleshooting Stuck or Slipping Brakes
Related Product
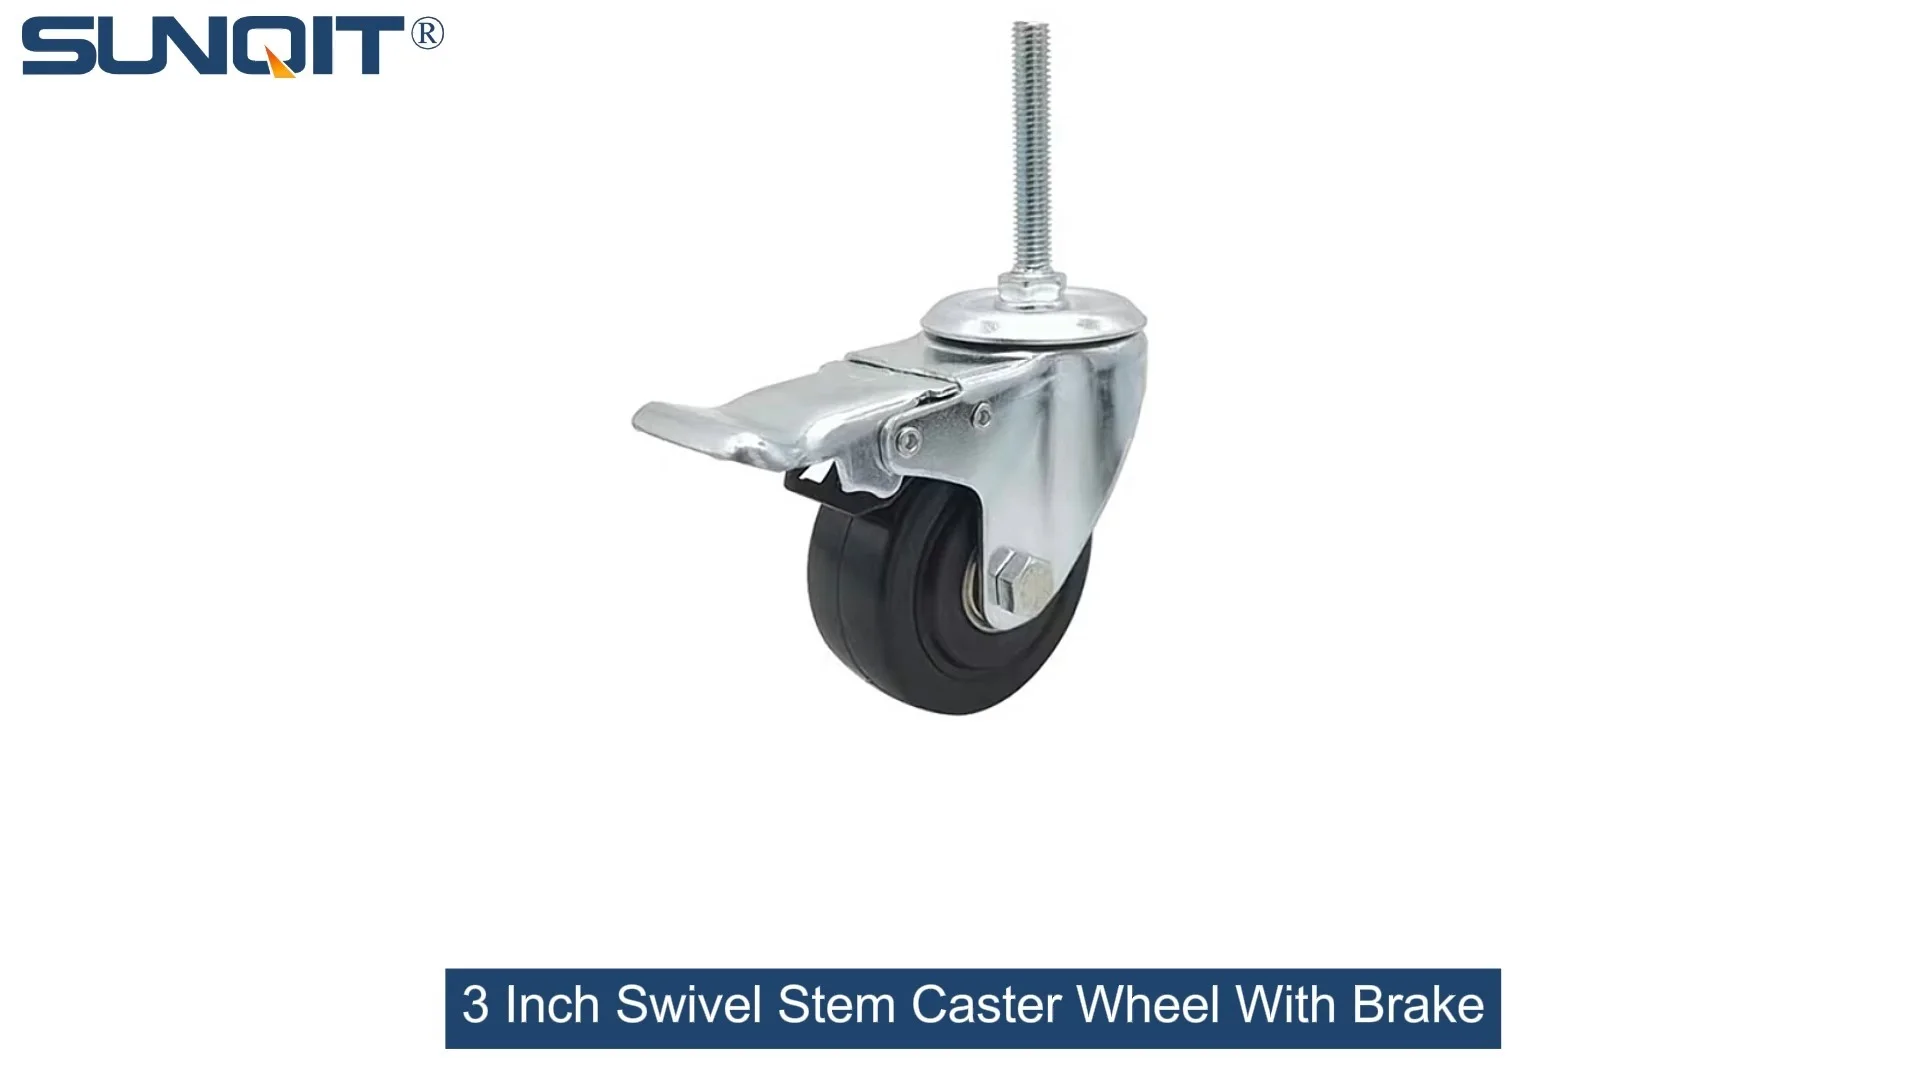
Swivel Stem Caster Wheel with Brake
360 Degree Swivel Stem Caster with brake. Threaded-post mount design, castors diameter 3 inch.Each swivel caster wheels loading 70KGS. Heavy enough and widely suit for carts, chairs, cabinet, flow rack, workbench, turnover rolley.
Picture this: It's a busy Tuesday morning in your workshop. You're rushing to move a loaded workbench across the floor to grab a tool, but when you step on the brake pedal of the swivel stem caster wheel with brake, nothing happens. The workbench drifts forward, knocking over a stack of boxes. Or maybe it's the opposite—you go to unlock the brake to reposition a trolley, and the pedal is stuck solid, refusing to budge. Frustrating, right? Stuck or slipping brakes on a swivel stem caster wheel with brake aren't just an annoyance; they throw a wrench in your workflow, risk damage to materials, and even compromise safety. Whether you're using these casters on a workbench, a turnover trolley, or a material rack, functional brakes are non-negotiable. Let's dive into why these issues happen and how to fix them—no fancy tools or engineering degree required.
First, Let's Get to Know Your Swivel Stem Caster Wheel with Brake
Before we troubleshoot, let's make sure we're on the same page about what a swivel stem caster wheel with brake actually is. At its core, it's a wheel mounted on a swiveling frame (the "stem") that attaches to equipment like workbenches or trolleys. The "with brake" part is crucial—it's usually a foot-operated pedal that, when pressed, locks the wheel in place to prevent movement. These casters are workhorses in factories, workshops, and warehouses because they blend mobility with stability. But when that brake starts acting up—sticking when you try to release it or slipping when you need it to hold—suddenly that "workhorse" feels more like a stubborn mule.
Whether you're using them on a lightweight tool cart or a heavy-duty workbench, the swivel stem caster wheel with brake relies on a few key parts working together: the wheel itself (often made of rubber, plastic, or steel), the swivel mechanism, the stem that connects to your equipment, and the brake assembly (which might include a pad, spring, or lever). When any of these parts fail, you're left with brakes that don't behave. Let's break down the most common culprits.
Why Do Brakes Get Stuck or Slip? Common Causes
Stuck or slipping brakes on a swivel stem caster wheel with brake rarely happen out of nowhere. They're usually a sign that something's off with the caster's components or environment. Let's walk through the usual suspects:
1. Dirt, Debris, and Grease Buildup
Workshops and warehouses are messy places—and that mess loves to find its way into small spaces, like the gap between your caster's brake pedal and wheel. Sawdust, metal shavings, oil spills, or even dust can clog the brake mechanism over time. When that happens, pressing the pedal might not fully engage the brake pad (causing slipping), or the debris could jam the pedal in the "locked" position (causing sticking). If you've noticed your brakes acting up after a particularly dusty project or an oil leak nearby, this is probably the issue.
2. Worn-Out Brake Pads or Springs
Brake pads are the unsung heroes here—they're the rubber or metal bits that press against the caster wheel to stop it from rolling. Over time, these pads wear down from friction, especially if you're constantly locking and unlocking the brake. When they get too thin, they can't grip the wheel properly, leading to slipping. Similarly, the small springs that help the brake pedal pop back up (when you release it) can weaken or break. A broken spring might leave the pedal stuck in "on" or "off" mode, making it feel like the brake is "stuck."
3. Misaligned or Loose Stem Connections
The stem is the metal rod that bolts the caster to your workbench or trolley. If that stem is loose, bent, or misaligned, it can throw off the entire brake mechanism. Imagine trying to press a brake pedal that's tilted at an odd angle—you might not be able to apply enough pressure, or the brake pad might not hit the wheel straight on. Loose stems can also cause the caster to wobble, which wears down the brake components faster. If your caster feels "wobbly" even when the brake is locked, check that stem connection first.
4. Damaged Caster Wheel Bearings
While it might not seem related, a wonky caster wheel can mess with your brakes too. If the wheel's bearings are worn or rusted, the wheel might not spin smoothly—or might even seize up slightly. When you hit the brake, a wheel with bad bearings might "skip" instead of locking, making it feel like the brake is slipping. You'll often notice a grinding or squeaking noise from the wheel itself if this is the case.
5. Extreme Temperatures or Moisture
Ever left a tool outside in the rain and found it rusted the next day? The same logic applies to your caster brakes. Moisture can cause rust on metal brake components, like the pedal lever or spring, making them stick. In freezing temperatures, water inside the brake mechanism can freeze solid, locking the pedal in place. Even high heat can warp plastic brake parts or dry out lubricants, leading to stiffness.

Troubleshooting 101: How to Fix Stuck or Slipping Brakes
Now that we know what's causing the problem, let's roll up our sleeves and fix it. Most brake issues with swivel stem caster wheels are easy to resolve with basic tools and a little patience. Here's a step-by-step guide to get your brakes working like new again:
Step 1: Clean the Brake Mechanism
Start with the simplest solution: cleaning. Dirt and debris are often the main culprits, so grab a few basic supplies: a stiff-bristled brush (an old toothbrush works great for small spaces), a can of compressed air, and a mild degreaser (like dish soap mixed with water or a citrus-based cleaner). Here's how to do it:
- Unlock the brake (if it's not stuck). If it is stuck, gently wiggle the pedal while brushing to loosen debris.
- Brush away loose dirt from around the brake pedal, wheel, and any gaps in the caster housing. Pay extra attention to where the brake pad meets the wheel—this is a common debris trap.
- Blow out stubborn dust with compressed air. Hold the can 6–8 inches away to avoid damaging plastic parts.
- Wipe with degreaser if there's oil or grease buildup. Dampen a rag with the cleaner and wipe the brake components, then dry thoroughly with a clean cloth.
- Test the brake by pressing and releasing the pedal a few times. If it moves smoothly now, you're done! If not, move to Step 2.
Step 2: Inspect and replace Worn Parts
If cleaning didn't work, it's time to check for wear. Grab a flashlight and take a close look at the brake pad, spring, and caster wheel:
- Brake pad: Look at the pad (the part that touches the wheel). If it's thin, cracked, or has smooth, shiny spots (a sign of overuse), it needs to be replaced. Most caster manufacturers sell replacement pads as part of caster accessories kits—just make sure to get the right size for your wheel.
- Spring: Check the small spring that helps the pedal pop back up. If it's stretched, bent, or broken, you'll need a new one. Springs are cheap and easy to swap—just remove the old one with pliers and hook the new one into place.
- Caster wheel: Spin the wheel by hand. If it grinds, wobbles, or doesn't spin freely, the bearings might be shot. You can try lubricating them with a few drops of machine oil, but if that doesn't help, replace the wheel entirely. Look for a replacement caster wheel that matches the size and load capacity of your original (e.g., 3-inch, 500-lb capacity).
Step 3: Adjust the Stem and Tighten Connections
A loose or misaligned stem can throw off your brakes. To fix this:
- Check the stem bolts: Look where the stem attaches to your workbench or trolley. If the bolts are loose, tighten them with a wrench (don't over-tighten—you could strip the threads).
- Straighten a bent stem: If the stem is slightly bent, gently tap it back into place with a rubber mallet. If it's severely bent, replace the entire caster—bending metal weakens it, and a wobbly stem is a safety hazard.
- Test alignment: After tightening or straightening, press the brake pedal. The pad should hit the wheel squarely, not at an angle. If it's off-center, loosen the stem bolts slightly, adjust the caster position, and retighten.
Step 4: Lubricate Moving Parts
Even if parts aren't worn, dry or rusty components can cause sticking. A little lubrication goes a long way:
- Use the right lube: Avoid thick greases (they attract dirt). Instead, use a light machine oil or silicone spray (great for plastic parts). Apply a drop or two to the brake pedal hinge, spring connections, and swivel joint (the part that lets the caster spin).
- Work the pedal: Press and release the brake several times to distribute the lubricant. Wipe away any excess to prevent dust buildup.
Quick Reference: Troubleshooting Table
| Issue | Possible Cause | Solution |
|---|---|---|
| Brake pedal is stuck in "locked" position | Debris jamming the pedal; rusted spring | Clean with brush and compressed air; lubricate spring; replace spring if broken |
| Brake slips when locked (wheel still moves) | Worn brake pad; misaligned stem; oily wheel | replace brake pad; tighten/adjust stem; clean wheel with degreaser |
| Brake pedal feels "spongy" or unresponsive | Loose stem bolts; stretched spring | Tighten stem bolts; replace spring |
| Wheel grinds when spinning (even with brake off) | Damaged bearings; dirty wheel | Lubricate bearings; replace wheel if grinding persists |

Preventing Future Issues: Maintenance Tips
Fixing a stuck or slipping brake is great, but preventing the problem in the first place is even better. With a little regular maintenance, your swivel stem caster wheel with brake will stay reliable for years:
1. Clean Casters Weekly
Spend 5 minutes every week brushing debris off your casters and blowing out dust with compressed air. This simple habit prevents buildup that leads to stuck brakes.
2. Lubricate Monthly
Apply a light oil or silicone spray to the brake pedal hinge and swivel joint once a month, especially if you use the casters daily. This keeps moving parts smooth and rust-free.
3. Check Load Limits
Every caster has a maximum weight it can handle (e.g., 300 lbs per wheel). Overloading your workbench or trolley puts extra strain on the brakes and wheels, causing them to wear out faster. Check the load rating on your caster's label and stick to it.
4. Inspect Before Heavy Use
Before moving a fully loaded trolley or workbench, give the brakes a quick test. Press the pedal to lock the wheel, then try to push the equipment—if it moves, stop and troubleshoot before you risk injury or damage.

When to replace: Knowing When It's Time for New Casters
Even with great maintenance, all caster wheels wear out eventually. Here are signs it's time to replace your swivel stem caster wheel with brake:
- Stem is bent or cracked: A damaged stem can't support weight safely—replace immediately.
- Brake pad replacement doesn't fix slipping: If new pads still won't grip, the brake housing might be warped. It's cheaper to replace the caster than to repair the housing.
- Wheel is cracked or warped: A damaged wheel can cause wobbling, which strains other parts and makes braking unreliable.
- Constant sticking, even after cleaning/lubrication: This usually means internal components (like the swivel joint) are worn out beyond repair.
When shopping for replacements, look for reputable suppliers that offer compatible caster accessories—this ensures you can easily swap parts later. And don't forget to match the stem size, wheel diameter, and load capacity to your equipment (e.g., a workbench with a 200-lb load needs casters rated for at least 50 lbs each, since weight is distributed across all wheels).
Final Thoughts: Keep Rolling Safely
Your swivel stem caster wheel with brake might seem like a small part of your workshop setup, but it plays a huge role in keeping things moving smoothly and safely. Stuck or slipping brakes aren't just a hassle—they can slow down production, damage tools, or even cause accidents. By taking a few minutes to clean, inspect, and maintain your casters regularly, you'll save time, money, and frustration in the long run.
Remember: most brake issues are fixable with basic tools and caster accessories like replacement pads or springs. And when it is time for new casters, investing in quality ones will pay off with years of reliable use. So the next time you step on that brake pedal, you can do it with confidence—knowing your caster has your back (and your workbench) steady.