- Company Articles
- Products and Technology
- Installation And Maintenance
- T-Slot Rubber Seal Cover Installation Tools: Must-Have Equipment for a Secure Fit

T-Slot Rubber Seal Cover Installation Tools: Must-Have Equipment for a Secure Fit
Related Product
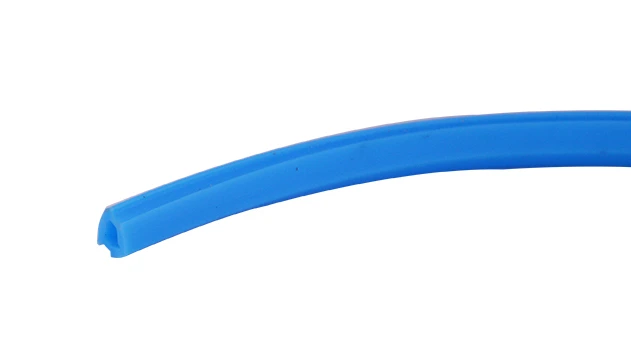
T-slot Rubber Seal Cover
The rubber T-slot seal cover prevents dust and debris buildup, covers wires in the T-slot channel, and adds an extra layer of protection to applications. It rolls into the T-slot, making it easy to assemble.
Let's start with a scenario we've all seen (or experienced) on the factory floor: You've just finished assembling a sleek aluminum profile workbench for your production line. It looks sharp, sturdy, and ready to boost efficiency—until you notice the T-slot rubber seal covers. One is hanging loose, another is halfway out of its slot, and a third has torn at the corner after someone tried to jam it in with a screwdriver. By the end of the shift, two more covers have popped off, leaving the T-slots exposed. Parts slide awkwardly across the surface, edges get scratched, and your team is spending more time fixing covers than assembling products. Sound familiar?
T-slot rubber seal covers might seem like small components, but their role in keeping aluminum profile systems running smoothly is huge. They protect the T-slots from debris, reduce noise when parts glide across surfaces, and even prevent scratches on delicate components. But here's the catch: installing them properly isn't as simple as pressing them into place with your hands. Without the right tools, you're setting yourself up for frustration, wasted time, and costly rework. In this article, we'll break down why these tools matter, the common challenges they solve, and the must-have equipment that turns a tedious chore into a quick, reliable process.
Why T-Slot Rubber Seal Covers Deserve Your Attention
Before diving into tools, let's take a moment to appreciate why T-slot rubber seal covers are non-negotiable in aluminum profile setups. These flexible, durable strips fit snugly into the T-slots of aluminum extrusion profiles—those grooves that make aluminum profiles so versatile for building workbenches, roller tracks, material racks, and more. Think of them as the "gaskets" of the industrial world: small, but critical for functionality.
First, they protect the T-slots themselves. Without a seal cover, dust, metal shavings, and coolant from production processes can accumulate in the slots, gumming up the works when you need to attach accessories like brackets or guides. Over time, that debris can even corrode the aluminum, weakening the profile's structural integrity. Then there's noise reduction: when parts slide across an uncovered T-slot, the metal-on-metal contact creates a (cì'ěr—sharp, grating) sound that adds up over a full shift. A rubber seal cover softens that impact, making the workspace quieter and less stressful for your team.
Perhaps most importantly, they keep surfaces safe. Exposed T-slots have sharp edges, which can scratch sensitive components (like circuit boards on an ESD workstation) or even cut gloves and skin. In high-precision environments—say, assembling medical devices or electronics—those scratches aren't just cosmetic; they can compromise product quality. And let's not forget aesthetics: a workbench or roller track with loose, torn, or missing seal covers looks unprofessional, which matters when clients or auditors walk through your facility.
So, if these covers are so crucial, why do they often end up as an afterthought? Because installing them without the right tools is a hassle. Let's talk about those challenges next.
The Hidden Struggles of Installing Seal Covers Without Proper Tools
Walk into any workshop, and you'll likely find someone using a flathead screwdriver, a pair of pliers, or even their fingernails to jam a T-slot rubber seal cover into place. It's a quick fix, but it rarely works. Here's why:
- Stretching and tearing: Rubber seal covers are designed to fit tightly into T-slots, but yanking or prying them with the wrong tools stretches the material. Over time, stretched covers lose their elasticity and pop out, leaving you to repeat the process. Worse, sharp tools like screwdrivers can tear the rubber, rendering the cover useless.
- Uneven insertion: Without a tool to guide the cover into the slot evenly, you'll end up with lumps or gaps. One side sits flush, the other sticks up—and that sticking-up part becomes a catch point for parts sliding across the surface. Before long, the cover is partially dislodged, and the cycle repeats.
- Damaging the aluminum profile: Aluminum extrusion profiles are durable, but their edges can be surprisingly delicate. Using metal tools to force a seal cover in can scratch or dent the profile, ruining its finish and weakening the T-slot itself. That's a costly mistake, especially if you have to replace the entire profile.
- Wasted time: What should take 5 minutes per workbench can turn into 30 minutes of wrestling with covers. Multiply that by a dozen workbenches or roller tracks, and you're looking at hours of lost productivity—time better spent on actual production tasks.
The good news? These problems are entirely avoidable. The solution lies in using tools specifically designed for T-slot rubber seal cover installation. Let's break down the must-have equipment that will make your life easier, your installations more secure, and your aluminum profile systems more reliable.

The Essential Tools for T-Slot Rubber Seal Cover Installation
When it comes to installing T-slot rubber seal covers, not all tools are created equal. The right equipment should be gentle on the rubber, precise in guiding the cover into the slot, and durable enough to withstand daily use. Below are the five tools no production team should be without, along with why they matter and how to use them.
1. T-Slot Seal Insertion Tool
This is the workhorse of seal cover installation. Designed with a smooth, rounded edge, it slides under the seal cover and guides it into the T-slot without stretching or tearing the rubber. Most insertion tools are made of plastic or soft metal (like aluminum) to avoid damaging the aluminum profile.
How to use it: Start by aligning one end of the seal cover with the T-slot. Hold the insertion tool at a 45-degree angle, with its edge under the cover. Gently press down and slide the tool along the slot, guiding the cover into place as you go. The tool's shape ensures the cover seats evenly, with no lumps or gaps.
Pro tip: Look for an insertion tool with a contoured handle—it reduces hand fatigue during long installation sessions, like when outfitting an entire roller track system.
2. Rubber Mallet
For stubborn seal covers or tight-fitting T-slots, a rubber mallet is indispensable. Unlike a metal hammer, it delivers gentle, even force that seats the cover without damaging the rubber or the aluminum profile.
How to use it: After partially inserting the cover with the insertion tool, place a soft cloth over the cover to protect it (this is optional but extra cautious). Tap the mallet lightly along the length of the cover, working from one end to the other. The goal is to "settle" the cover into the slot, not bash it in. A few light taps are usually enough.
Pro tip: Opt for a mallet with a replaceable rubber head. Over time, the rubber can wear down, but swapping in a new head is cheaper than buying a whole new tool.
3. Deburring Tool
Before installing a seal cover, you need to prep the aluminum profile—and that means smoothing out any burrs or sharp edges on the T-slot. A deburring tool, with its small, sharp blade, removes these imperfections quickly, ensuring the seal cover slides in smoothly and doesn't get caught on rough spots.
How to use it: Run the deburring tool along the edges of the T-slot, applying light pressure. The tool will shave off any burrs, leaving a clean, smooth surface. Wipe away the metal shavings with a cloth before installing the cover—you don't want debris trapped under the rubber.
Pro tip: Choose a deburring tool with a retractable blade for safety. When not in use, the blade tucks away, reducing the risk of accidental cuts.
4. Measuring Tape and Utility Knife
Seal covers rarely come in the exact length you need—especially for custom aluminum profile setups like a lean pipe workbench with non-standard dimensions. A measuring tape and sharp utility knife let you cut covers to size cleanly, ensuring a perfect fit.
How to use them: Measure the length of the T-slot, add a 1/4-inch buffer (to account for any slight stretching), and mark the seal cover with a pencil. Lay the cover flat on a cutting mat, align a straightedge with the mark, and score the rubber with the utility knife. Apply firm, even pressure—rubber is tough, so you may need to score it a few times before it cuts through. Avoid sawing motions, which can fray the edges.
Pro tip: A self-healing cutting mat protects your work surface and ensures clean cuts. It's a small investment that pays off in neater, more professional results.
5. Seal Cover Roller
For long stretches of T-slot—like those on a roller track or material rack—a seal cover roller is a game-changer. This tool, which looks like a small paint roller with a soft rubber wheel, presses the cover into the slot evenly, eliminating air bubbles and ensuring maximum contact with the T-slot edges.
How to use it: After partially inserting the cover with the insertion tool, run the roller along the length of the cover, applying gentle downward pressure. The roller's weight and smooth motion seat the cover firmly, leaving no gaps or lumps. It's especially useful for covers with adhesive backing, as it ensures the adhesive bonds properly to the T-slot.
Pro tip: Look for a roller with an ergonomic handle—your hands will thank you after rolling 20 feet of seal cover on a large material rack.
| Tool | Purpose | Best For | Key Benefit |
|---|---|---|---|
| T-Slot Seal Insertion Tool | Guides cover into T-slot evenly | Small to medium-length slots (workbenches, small racks) | Prevents stretching/tearing of rubber |
| Rubber Mallet | Seats cover with gentle force | Stubborn or tight-fitting covers | Avoids damage to aluminum profiles |
| Deburring Tool | Removes burrs from T-slot edges | New aluminum profiles or reworked slots | Ensures smooth insertion, reduces cover wear |
| Measuring Tape + Utility Knife | Cuts covers to exact length | Custom-length slots (non-standard workbenches, racks) | Eliminates gaps from ill-fitting covers |
| Seal Cover Roller | Presses covers into long slots evenly | Roller tracks, long material racks, conveyors | Eliminates air bubbles, ensures maximum adhesion |

Step-by-Step: Installing T-Slot Rubber Seal Covers Like a Pro
Now that you have the right tools, let's walk through the installation process. We'll use a lean pipe workbench as an example, but these steps apply to any aluminum profile system—from roller tracks to material racks.
Step 1: Prep the Aluminum Profile
Start by cleaning the T-slot. Use a dry cloth to wipe away dust, debris, or oil—any residue will prevent the seal cover from seating properly. Next, inspect the T-slot edges for burrs or sharp spots. If you find any, use the deburring tool to smooth them out. This step is critical: even a tiny burr can catch on the rubber and cause the cover to tear during installation.
Step 2: Measure and Cut the Seal Cover
Measure the length of the T-slot with your measuring tape. Add 1/4 inch to the measurement (this extra length ensures a snug fit, even if the rubber stretches slightly). Mark the seal cover with a pencil, then cut it to size using the utility knife and straightedge. Take your time—clean cuts mean fewer gaps and better adhesion.
Step 3: Align and Start Insertion
Line up one end of the cut seal cover with the end of the T-slot. Use your fingers to press the cover into the slot gently, starting at the marked end. Get the first inch or two seated evenly—this will guide the rest of the installation. Now, take the T-slot seal insertion tool and place its rounded edge under the unseated part of the cover. Hold the tool at a 45-degree angle and slide it along the slot, pressing the cover into place as you go. The tool should glide smoothly; if you feel resistance, stop and check for debris or misalignment.
Step 4: Secure with a Rubber Mallet (If Needed)
Most covers will seat fully with the insertion tool alone, but if you're working with a particularly tight T-slot or a stiffer rubber cover, grab the rubber mallet. Place a soft cloth over the cover (to protect the rubber) and tap lightly along the length of the slot. Focus on any areas that feel loose or uneven—one or two taps should be enough to seat the cover firmly.
Step 5: Roll for Even Adhesion (For Long Slots)
If you're installing a cover on a long T-slot (like a roller track), finish with the seal cover roller. Run the roller along the entire length of the cover, applying gentle downward pressure. This ensures the cover is pressed into the slot evenly, eliminating air bubbles and creating a tight seal. Pay extra attention to corners and edges—these are common weak points where covers tend to pop out.
Step 6: Inspect and Adjust
Once the cover is installed, run your hand along its length. It should feel smooth and flush with the aluminum profile—no lumps, gaps, or sticking-up edges. If you find a loose spot, use the insertion tool to press it back into place. For stubborn gaps, a quick tap with the rubber mallet (over a cloth) should do the trick. Finally, test the cover by sliding a small part across the surface—if it glides smoothly without catching, you're done!
The Payoff: Why Investing in These Tools Is Worth It
At this point, you might be thinking, "Do I really need all these tools? Can't I just keep using a screwdriver and save the money?" The short answer: yes, you need them—and here's why the investment pays off.
Time Savings
Let's do the math. Without tools, installing a seal cover on a 3-foot T-slot takes about 10 minutes (including wrestling with stretching, tearing, and rework). With the right tools? That same job takes 2 minutes. Multiply that by 10 workbenches, 5 roller tracks, and a handful of material racks, and you're looking at saving hours per week. That's time your team can spend on actual production tasks—like assembling products or maintaining equipment—instead of fixing small, avoidable issues.
Reduced Waste
Torn or stretched seal covers aren't just frustrating—they're expensive. If you're replacing 5 covers a week because they get damaged during installation, that adds up. Quality seal covers cost $2–$5 each, so 5 covers a week is $520–$1,300 a year in waste. With proper tools, you'll rarely need to replace a cover—saving money and reducing your environmental footprint (fewer discarded rubber covers in landfills).
Safer, More Efficient Workspaces
Securely installed T-slot rubber seal covers make your workspace safer and more efficient. No more exposed T-slot edges to scratch parts or cut hands. No more covers popping out and jamming roller tracks. Parts slide smoothly across workbenches, reducing friction and wear on both the parts and the equipment. Your team can focus on their jobs, not on troubleshooting seal covers—and that leads to better morale and higher productivity.
Longer-Lasting Aluminum Profiles
Aluminum extrusion profiles are built to last, but they need protection. Exposed T-slots collect debris, which can corrode the aluminum over time. By keeping seal covers securely in place, you're extending the life of your profiles—saving thousands of dollars on replacements down the line. It's a small step that protects a big investment.
Real-World Results: How One Manufacturer Cut Rework by 90%
Don't just take our word for it. Let's look at a case study from a mid-sized electronics manufacturer we worked with last year. Their production line relied heavily on aluminum profile workbenches and roller tracks, but their team was spending 2–3 hours daily reinserting or replacing T-slot rubber seal covers. The issue was so bad that supervisors had assigned a dedicated worker to "cover duty"—a full-time role that added no value to production.
We recommended a basic installation toolkit: T-slot seal insertion tool, rubber mallet, deburring tool, measuring tape, utility knife, and seal cover roller. The total cost? About $150. The manufacturer was skeptical at first—$150 for tools to install "simple rubber covers" seemed steep. But they agreed to try it.
Within a week, the results were clear. The "cover duty" role was eliminated—installation time dropped from 10 minutes per cover to 2 minutes, and rework (reinserting popped covers) fell by 90%. The team reported fewer scratches on circuit boards (thanks to secure covers), and the production line ran more smoothly with fewer interruptions. After a month, the plant manager told us, "We should have bought these tools years ago. The time and money we're saving is ridiculous."
This isn't an isolated case. From automotive plants to pharmaceutical labs, the right tools transform T-slot rubber seal cover installation from a headache into a non-issue.
Final Thoughts: Small Tools, Big Impact
T-slot rubber seal covers might be small, but their role in keeping aluminum profile systems running smoothly is undeniable. And while installing them might seem like a minor task, doing it right requires the right tools. The T-slot seal insertion tool, rubber mallet, deburring tool, measuring tape, utility knife, and seal cover roller aren't just "nice-to-haves"—they're essential for secure, efficient installations that save time, reduce waste, and keep your production line moving.
So, the next time you see a loose seal cover on a workbench or roller track, don't reach for a screwdriver. Invest in the tools that make the job easy. Your team will thank you, your production line will run smoother, and your aluminum profiles will last longer. After all, in manufacturing, it's the small details that add up to big success.