- Company Articles
- Products and Technology
- Installation And Maintenance
- Tightening Internal Straight Aluminum Joints: Torque Specifications & Tools

Tightening Internal Straight Aluminum Joints: Torque Specifications & Tools
Related Product
Internal straight aluminum joint
Aluminum pipe joint inside connection used for two pcs 28pcs aluminum pipe connection in straight angle,it connects two pcs pipe from inside.
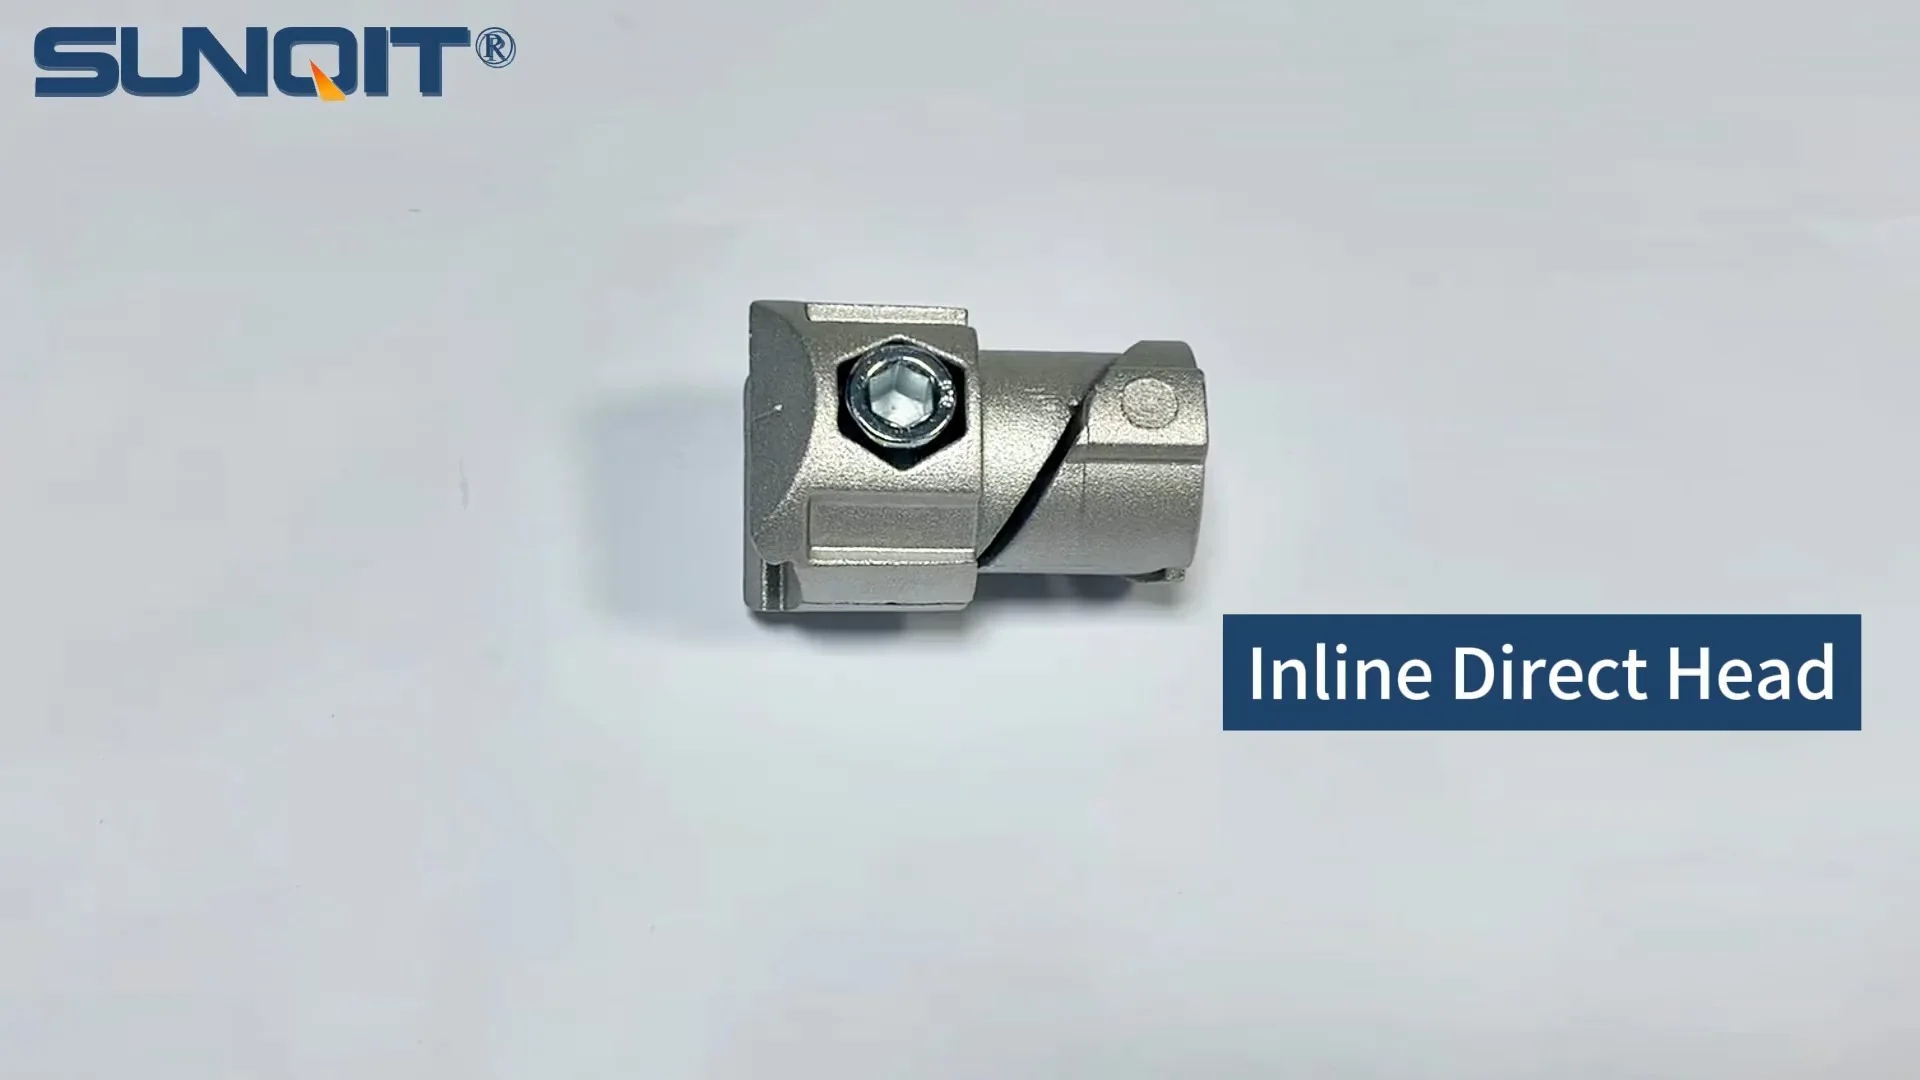
In the world of workshop setups, production lines, and industrial assemblies, there's a silent workhorse that holds everything together: the internal straight aluminum joint. These unassuming components might not grab headlines, but they're the backbone of stable, reliable structures—from the workbench where you tinker with tools to the aluminum profile frames that organize your warehouse. Yet, even the best joints fail if they're not tightened properly. Too loose, and your assembly wobbles; too tight, and you risk stripping threads or cracking the aluminum profile itself. So, how do you strike that perfect balance? Let's dive into the art and science of tightening internal straight aluminum joints, from understanding their design to mastering torque specs and choosing the right tools.
What Are Internal Straight Aluminum Joints?
Before we talk torque, let's get to know the star of the show: the internal straight aluminum joint. These joints are designed to connect aluminum profiles—those sleek, T-slot extrusions you see in everything from machine guards to workstations—in a straight line, creating rigid, load-bearing structures. Unlike external joints that clamp around the profile, internal straight joints fit inside the profile's T-slot, creating a clean, flush connection that's both strong and aesthetically pleasing.
Think of them as the glue of the aluminum profile world, but better: they're reusable, adjustable, and won't dry out. They're commonly paired with aluminum pipe accessories like parallel fixation aluminum pipe joints or aluminum pipe clamps, which add extra stability for heavy loads or dynamic applications. Whether you're building a simple material rack or a complex production line frame, internal straight aluminum joints are the unsung heroes ensuring your structure stays square and secure.
Why Torque Matters: More Than Just "Tight Enough"
If you've ever assembled furniture with a hex key, you might think, "Just tighten it until it doesn't move—that's good enough." But with aluminum profiles and internal straight joints, "good enough" can lead to big problems. Aluminum is a softer metal than steel, so its threads are more prone to stripping if over-tightened. On the flip side, under-tightening leaves gaps, allowing the joint to loosen over time—especially in high-vibration environments like near conveyors or machinery.
Consider a workbench built with aluminum profiles and internal straight joints. If the joints are under-tightened, the workbench top might sag when you place a heavy tool on it, or the legs could shift when you lean against it. Over-tighten, and you might crack the profile's T-slot or strip the joint's threads, turning an expensive aluminum profile into scrap. Torque isn't just about "tightness"—it's about applying the exact amount of force needed to create a secure, long-lasting connection without damaging the materials.

Torque Fundamentals: The Science Behind the Turn
Torque is simply a measure of rotational force—the "twist" you apply to a fastener like a bolt or joint. It's measured in Newton-meters (Nm) or foot-pounds (ft-lbs), and it's calculated as the force applied multiplied by the distance from the center of rotation (think: pushing a wrench handle 1 meter from the bolt with 1 Newton of force = 1 Nm of torque). For internal straight aluminum joints, torque is critical because it determines how much clamping force the joint exerts on the aluminum profile.
But torque isn't one-size-fits-all. Several factors affect how much torque a joint needs: the joint's thread size (M5 vs. M8, for example), the material of the joint (aluminum vs. stainless steel), and even the presence of lubrication (dry threads vs. threads coated with anti-seize). Aluminum profiles and joints require special care here—their softness means they can't handle the same torque as steel. A torque that's safe for a steel bolt in a steel frame might crack an aluminum profile or strip its threads.

Torque Specifications for Internal Straight Aluminum Joints
So, what's the "magic number" for tightening internal straight aluminum joints? It depends on the joint's size and material. Below is a table of common torque specifications to guide you. Note: These are general guidelines—always check the manufacturer's recommendations for your specific joint and aluminum profile.
| Joint Thread Size | Joint Material | Recommended Torque (Nm) | Tool Type | Notes |
|---|---|---|---|---|
| M5 | Aluminum | 2.0 – 2.5 | Preset torque driver or click-type wrench | Lower torque to avoid stripping aluminum threads |
| M6 | Aluminum | 3.5 – 4.0 | Click-type torque wrench | Use light anti-seize on threads for corrosion resistance |
| M8 | Stainless Steel (in Aluminum Profile) | 5.5 – 6.5 | Digital torque wrench (for precision) | Stainless steel joints can handle higher torque, but aluminum profile limits still apply |
| M10 | Aluminum (Heavy-Duty) | 8.0 – 9.0 | Heavy-duty click-type wrench | Only for thick-walled aluminum profiles (≥3mm wall thickness) |
Why the range? Factors like thread condition (clean vs. dirty), profile wall thickness, and load requirements play a role. For example, a joint holding up a heavy material rack will need the higher end of the range, while a joint in a lightweight workbench might be fine at the lower end. When in doubt, start at the lower torque and test the joint's stability—you can always tighten it a bit more if needed.
Essential Tools for the Job
You wouldn't use a hammer to drive a screw, and you shouldn't use a regular wrench to tighten internal straight aluminum joints. To get the torque right, you need the right tools. Here's what belongs in your toolkit:
1. Torque Wrenches: The Precision Instruments
The star tool here is the torque wrench—a device that measures and limits the amount of torque applied to a fastener. There are three main types:
- Click-Type Torque Wrench: The most common choice for workshops. You set the desired torque, and when you reach it, the wrench "clicks" to alert you. They're affordable, reliable, and work well for most internal straight joint applications.
- Digital Torque Wrench: For maximum precision, digital wrenches display torque in real time on a screen. They're great for small joints (like M5) where even 0.5 Nm matters, but they're pricier and require battery power.
- Preset Torque Driver: These are fixed-torque tools, ideal for repetitive tasks (like assembling multiple workbenches). Set them to your desired torque (e.g., 2.5 Nm for M5 joints) and they stop applying force once reached.
2. Socket Sets: The Right Fit
Torque wrenches need sockets to fit the joint's head (hex, Phillips, etc.). For internal straight aluminum joints, hex sockets are most common. Make sure the socket is the correct size for your joint—too loose, and you'll round the head; too tight, and you might damage the socket or joint.
3. Calibration Tools: Keep It Accurate
Torque wrenches lose accuracy over time, especially with heavy use. Have yours calibrated annually (or every 5,000 cycles) by a professional. A wrench that's off by even 10% can turn a "safe" torque into a disaster for your aluminum profile.
4. Anti-Seize Compound: Protecting Aluminum Threads
Aluminum threads are prone to galling (when metal surfaces stick together under pressure). A tiny dab of anti-seize compound (copper-based or nickel-based) on the joint's threads reduces friction, making torque application smoother and preventing thread damage. Just don't overdo it—too much anti-seize can throw off torque readings.
Step-by-Step Guide to Tightening Internal Straight Aluminum Joints
Now that you have the specs and tools, let's walk through the process of tightening an internal straight aluminum joint like a pro:
Step 1: Prep the Joint and Profile
Start with clean components. Wipe the joint's threads and the aluminum profile's T-slot with a dry cloth to remove dirt, debris, or oil. Even a small speck of grit can affect torque accuracy or cause cross-threading.
Step 2: Align the Components
Slide the internal straight joint into the aluminum profile's T-slot, making sure it's aligned with the hole in the profile you're connecting. Misalignment leads to uneven stress on the joint, which can loosen over time.
Step 3: Hand-Tighten First
Screw the joint into the profile by hand until it's snug. This ensures the threads engage properly and prevents cross-threading. If you feel resistance, stop—don't force it! Back the joint out and check for misalignment or debris.
Step 4: Set Your Torque Wrench
Adjust your torque wrench to the recommended torque (e.g., 4.0 Nm for an M6 aluminum joint). Double-check the setting—remember, aluminum is unforgiving of over-tightening.
Step 5: Apply Torque Steadily
Fit the socket onto the joint and attach the torque wrench. Apply force slowly and steadily—jerky movements can lead to inaccurate torque readings. For click-type wrenches, stop when you hear the "click." For digital wrenches, stop when the screen hits your target torque.
Step 6: Check for Movement
After tightening, gently wiggle the connected profiles. They should feel solid, with no play or movement. If they wobble, the joint might be under-tightened (or misaligned). If you hear a creak, you might have over-tightened—back off slightly and re-tighten to the correct torque.
Step 7: Re-Torque After Initial Use
Aluminum profiles and joints "settle" under load. After assembling your structure (say, a workbench), let it sit for a day or two, then re-tighten the joints. This ensures they're still at the correct torque after the initial compression.
Common Mistakes to Avoid
Even with the right tools, it's easy to slip up. Here are the most common mistakes and how to steer clear of them:
Mistake #1: Using a Regular Wrench Instead of a Torque Wrench
A pipe wrench or adjustable wrench gives you no torque control. You'll either under-tighten (wobbly assembly) or over-tighten (stripped threads). Invest in a torque wrench—it's cheaper than replacing damaged aluminum profiles.
Mistake #2: Cross-Threading the Joint
Cross-threading happens when the joint's threads don't align with the profile's threads, leading to a mangled, weak connection. Always start by hand-tightening—if it doesn't turn smoothly, back out and realign.
Mistake #3: Ignoring Thread Condition
Damaged or dirty threads can throw off torque readings. If a joint's threads are bent or rusted, replace it. For aluminum profiles, inspect the T-slot for cracks or deformation before installing the joint.
Mistake #4: Over-Tightening to "Be Safe"
It's tempting to crank the wrench an extra quarter-turn "just to be sure," but this is a recipe for disaster with aluminum. Stick to the recommended torque—physics, not guesswork, determines what's "safe."
Maintenance: Keeping Joints Tight for the Long Haul
Tightening internal straight aluminum joints isn't a "set it and forget it" task. Regular maintenance ensures your assemblies stay stable for years. Here's how:
Inspect Regularly
Check joints monthly for looseness, especially in high-vibration areas (like near conveyors or machinery). A quick wiggle test or visual inspection can catch issues before they become failures.
Clean Threads Annually
Over time, dirt and corrosion can build up on joint threads. Once a year, disassemble and clean the joints with a wire brush, then reapply anti-seize compound before re-tightening.
replace Worn Joints
If a joint's threads are stripped, or the head is rounded, replace it immediately. A damaged joint can't hold torque, and it puts stress on neighboring joints.
Real-World Example: Building a Sturdy Workbench
Let's put this all together with a practical example: building a workbench using aluminum profiles and internal straight aluminum joints. A typical workbench might use 40×40 mm aluminum profiles for the frame, with M6 internal straight joints connecting the legs to the tabletop supports.
Start by cutting the profiles to size, then cleaning the T-slots. Slide M6 internal straight joints into the leg profiles, align them with the tabletop supports, and hand-tighten. Set your click-type torque wrench to 4.0 Nm (the recommended torque for M6 aluminum joints), then tighten each joint until you hear the "click." After assembling the frame, add the tabletop (using aluminum pipe accessories like clamps for extra support) and let it sit overnight. The next day, re-tighten the joints to 4.0 Nm—they'll have settled slightly under the tabletop's weight.
The result? A workbench that can handle 200+ kg of tools and materials without wobbling, thanks to properly torqued internal straight aluminum joints. No stripped threads, no cracked profiles—just a solid, reliable workspace.
Conclusion: The Art of Precision
Tightening internal straight aluminum joints isn't rocket science, but it does require care, precision, and the right tools. By understanding your joint's design, following torque specs, and avoiding common mistakes, you'll build assemblies that stand the test of time—whether it's a workbench in your garage or a production line in a factory. Remember: aluminum is a team player, but it needs respect. Treat it gently, torque it right, and it will reward you with stability, durability, and peace of mind.
So, the next time you reach for that torque wrench, think of it as a conversation with your aluminum profiles: "I've got you, and you've got this." That's the secret to a job well done.