- Company Articles
- Products and Technology
- Installation And Maintenance
- Tightening Lean Pipe Fixed Clamps: Torque Recommendations & Tools

Tightening Lean Pipe Fixed Clamps: Torque Recommendations & Tools
Related Product
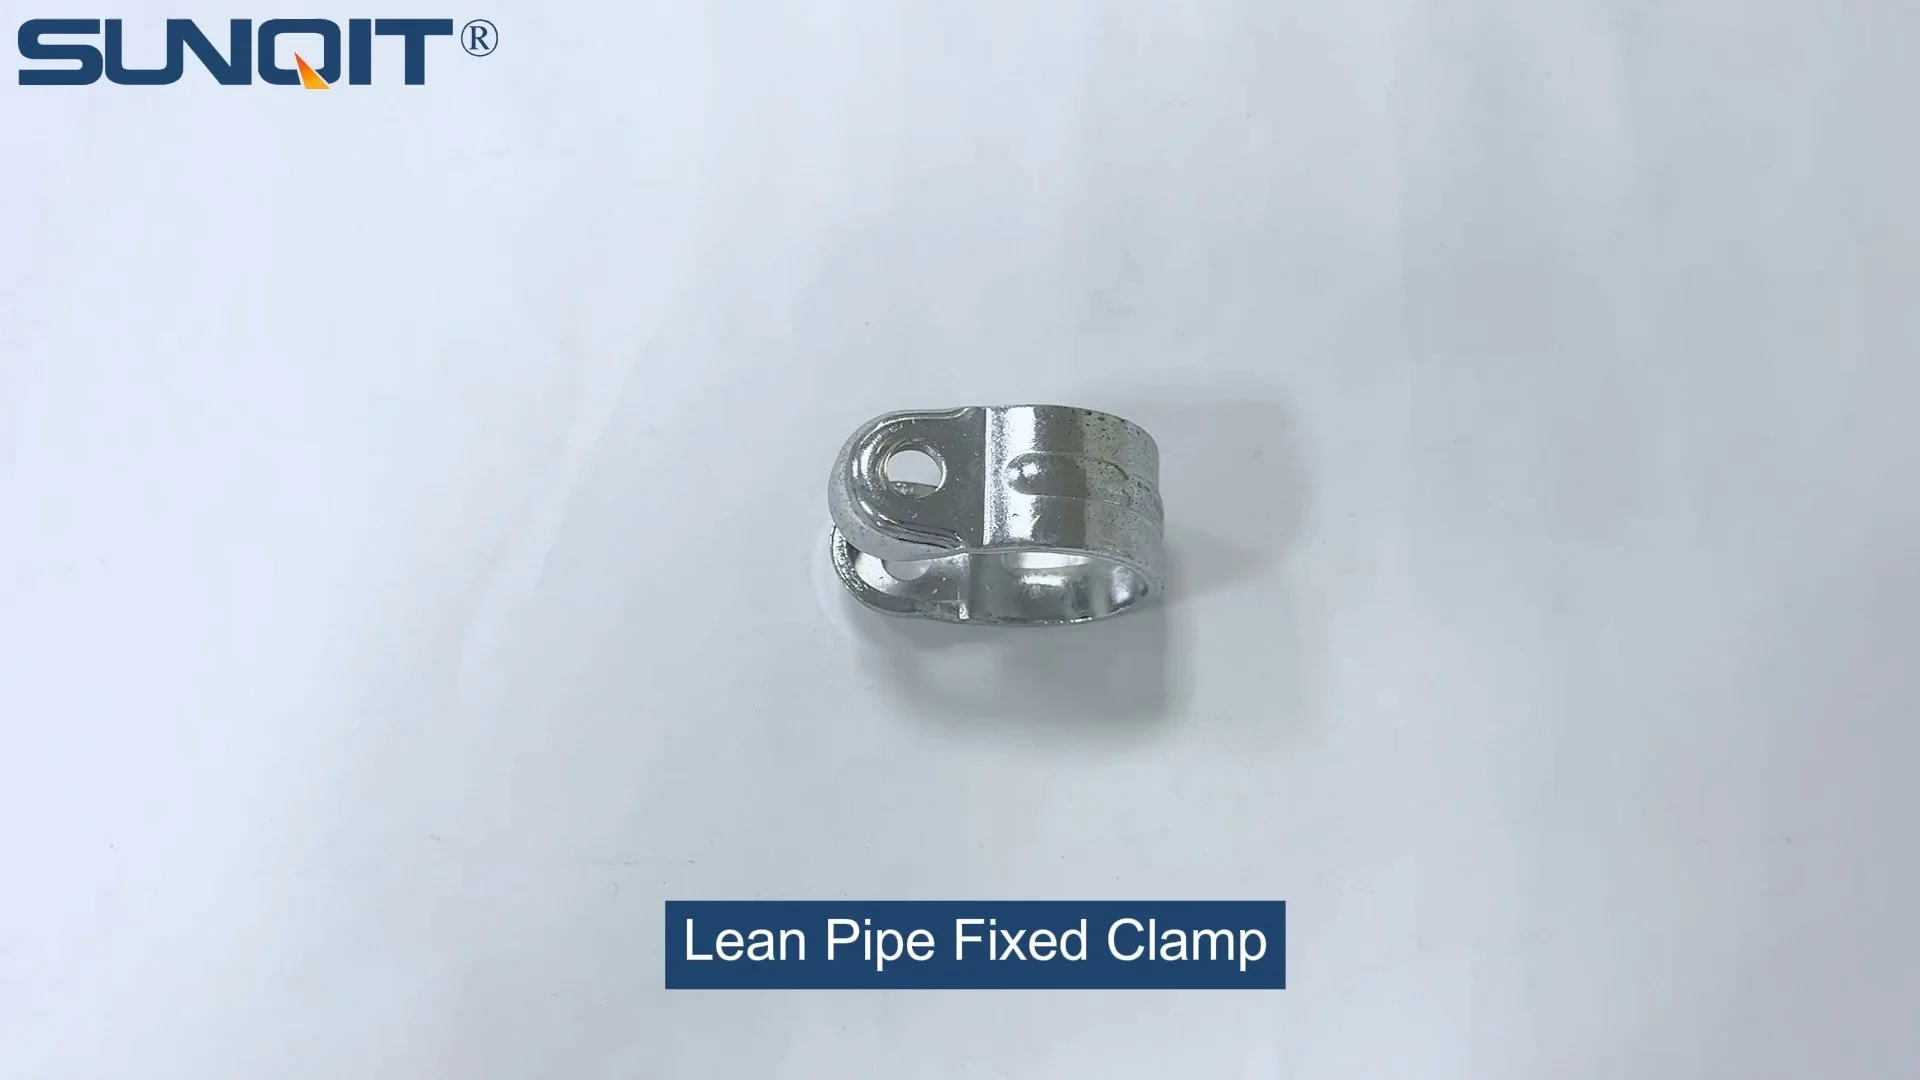
Lean Pipe Fixed Clamp
Lean pipe fixed clamp is used for pipe connector fixing the correct position during workbench flow rack hand trolley assemble work.
The hum of a production floor is a symphony of precision—machines whirring, conveyors gliding, and teams moving in sync to keep workflows smooth. But even the most well-oiled operations can hit a discordant note when something as small as a loose clamp throws everything off. Imagine a workbench where a technician is assembling delicate electronics: one wrong move, a wobble, and suddenly a component tumbles to the floor. Or a roller track that jams because the lean pipe fixed clamps holding it together have slipped, bringing an entire line to a halt. These aren't just minor inconveniences—they're costly disruptions that chip away at efficiency, safety, and morale.
If you've ever worked with lean pipe systems, you know the backbone of their flexibility lies in the connections. Lean pipe fixed clamps are the unsung heroes here, quietly holding together workbenches, flow racks, and roller tracks. But here's the thing: tightening them "by feel" isn't enough. Too loose, and they fail to secure; too tight, and you risk stripping threads or warping pipes. The sweet spot? Precision torque. In this guide, we'll walk through why torque matters, how to get it right for different materials (from steel to aluminum lean pipe), the tools you need, and common pitfalls to avoid. Because when your clamps are tight enough to stay put but gentle enough to protect your equipment, your lean system doesn't just work—it thrives.
What Are Lean Pipe Fixed Clamps, Anyway?
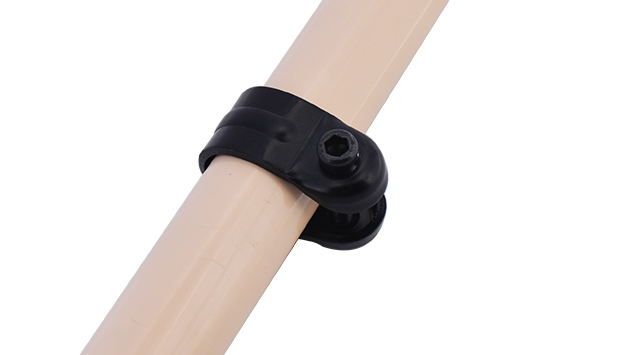
Before diving into torque specs, let's make sure we're on the same page about the star of the show: lean pipe fixed clamps. These small but mighty components are the glue that holds lean systems together. Think of them as the connective tissue between lean pipes, whether you're building a sturdy workbench, a flexible roller track, or a custom material rack. Unlike adjustable joints, fixed clamps lock pipes into place at specific angles—90 degrees for a workbench leg, 180 degrees for a straight run of roller track—ensuring stability even under constant use.
Made from materials like zinc-plated steel or durable plastic, they're designed to withstand the daily grind of manufacturing. But their strength lies in how they're installed. A poorly tightened clamp is a ticking time bomb: over weeks of vibration from machinery or repeated loading/unloading, it will loosen, turning a solid structure into a wobbly liability. That's why getting the torque right isn't just about "tightening"—it's about engineering reliability into every connection.
Made from materials like zinc-plated steel or durable plastic, they're designed to withstand the daily grind of manufacturing. But their strength lies in how they're installed. A poorly tightened clamp is a ticking time bomb: over weeks of vibration from machinery or repeated loading/unloading, it will loosen, turning a solid structure into a wobbly liability. That's why getting the torque right isn't just about "tightening"—it's about engineering reliability into every connection.
Why Torque Matters: The Cost of "Good Enough"
Let's talk about the consequences of cutting corners. A few months back, I visited a facility where the team had just installed new aluminum lean pipe workbenches. They looked great—sleek, modular, and ready to boost productivity. But within a month, complaints rolled in: drawers stuck, surfaces tilted, and one bench even collapsed under a heavy load. When we checked the lean pipe fixed clamps, the issue was clear: some were barely finger-tight, others cranked so hard the aluminum threads were stripped.
"We just tightened them until they felt snug," the supervisor admitted. That "snug" feeling is subjective. What feels tight to one person might be loose to another, and aluminum lean pipe, being softer than steel, can't handle the same brute force. The result? Thousands of dollars in replacement parts, hours of downtime, and a team frustrated by equipment that didn't live up to its promise.
On the flip side, over-tightening isn't just about damaging parts. It creates hidden stress. A steel lean pipe might seem tough, but cranking a clamp beyond its torque limit can warp the pipe, leading to misaligned roller tracks or uneven workbench surfaces. Over time, that stress weakens the entire structure, making it prone to failure when you need it most.
Torque, simply put, is the measure of rotational force applied to tighten a fastener. It's the science of "just right"—enough to hold the joint secure under load and vibration, but not so much that it causes damage. For lean systems, where adaptability and durability go hand in hand, mastering torque is non-negotiable.
"We just tightened them until they felt snug," the supervisor admitted. That "snug" feeling is subjective. What feels tight to one person might be loose to another, and aluminum lean pipe, being softer than steel, can't handle the same brute force. The result? Thousands of dollars in replacement parts, hours of downtime, and a team frustrated by equipment that didn't live up to its promise.
On the flip side, over-tightening isn't just about damaging parts. It creates hidden stress. A steel lean pipe might seem tough, but cranking a clamp beyond its torque limit can warp the pipe, leading to misaligned roller tracks or uneven workbench surfaces. Over time, that stress weakens the entire structure, making it prone to failure when you need it most.
Torque, simply put, is the measure of rotational force applied to tighten a fastener. It's the science of "just right"—enough to hold the joint secure under load and vibration, but not so much that it causes damage. For lean systems, where adaptability and durability go hand in hand, mastering torque is non-negotiable.
Torque Recommendations: A Guide by Material
Torque isn't a one-size-fits-all number. It depends on the material of your lean pipe, the type of lean pipe joint, and even the environment (humidity, temperature fluctuations). Below is a table breaking down recommended torque values for common scenarios. Keep in mind these are guidelines—always check the manufacturer's specs for your specific clamps and pipes.
| Pipe Material | Clamp/Joint Type | Recommended Torque (Nm) | Recommended Torque (ft-lbs) | Notes |
|---|---|---|---|---|
| Steel Lean Pipe (1.5mm wall) | Standard Steel Lean Pipe Joint | 15–18 Nm | 11–13 ft-lbs | Use medium-strength thread locker for high-vibration areas (e.g., near conveyors). |
| Aluminum Lean Pipe | Aluminum Lean Pipe Joint | 8–10 Nm | 6–7 ft-lbs | Aluminum is softer—avoid over-tightening to prevent thread stripping. |
| Stainless Steel Pipe (1.2mm wall) | Stainless Steel Lean Pipe Joint | 12–15 Nm | 9–11 ft-lbs | Use anti-seize compound to prevent galling (seizing of metal threads). |
| PE-Coated Lean Pipe (1.0mm wall) | Plastic-Coated Compatible Joint | 10–12 Nm | 7–9 ft-lbs | Coating can compress—stop at first sign of resistance to avoid tearing. |
Key Factors That Affect Torque:
- Thread Condition: Clean, lubricated threads require less torque than dirty or rusted ones. Always wipe threads clean before assembly.
- Joint Design: Some lean pipe joints have built-in washers or locking mechanisms that affect torque. Check if your joint requires a lower value to account for these features.
- Application Load: A workbench holding 50kg of tools needs tighter clamps than a lightweight turnover trolley. Err on the higher end of the range for heavy-load setups.
- Thread Condition: Clean, lubricated threads require less torque than dirty or rusted ones. Always wipe threads clean before assembly.
- Joint Design: Some lean pipe joints have built-in washers or locking mechanisms that affect torque. Check if your joint requires a lower value to account for these features.
- Application Load: A workbench holding 50kg of tools needs tighter clamps than a lightweight turnover trolley. Err on the higher end of the range for heavy-load setups.

The Tools You Need: Beyond a Wrench
You wouldn't use a hammer to drive a screw, so why rely on a regular wrench for torque-sensitive work? The right tools turn guesswork into precision. Here's what you'll need in your toolkit:
- Click-Type Torque Wrench: The gold standard for most shops. It "clicks" when you reach the set torque, so you know exactly when to stop. Look for a 1/4-inch or 3/8-inch drive for lean pipe clamps (smaller drives offer better precision for low-torque applications like aluminum lean pipe).
- Digital Torque Wrench: For ultimate accuracy, especially if you're working with multiple materials. Many models display torque in Nm and ft-lbs, and some even beep or vibrate when the target is hit. Great for training new team members who might miss the "click" of a mechanical wrench.
- Socket Set: Match the socket size to your clamp bolts (common sizes are 8mm, 10mm, and 12mm). Opt for deep sockets if the clamp bolts are recessed.
- Thread Lubricant/Anti-Seize: A small amount on steel or stainless steel threads reduces friction, ensuring the torque you apply goes into tightening the joint, not fighting resistance. For aluminum, use a lubricant specifically designed for soft metals to prevent galling.
- Wire Brush: To clean rust, dirt, or debris from clamp threads before tightening. A dirty thread can throw off torque readings—what feels tight might just be grime jamming the works.
- Torque Calibration Tool: Torque wrenches lose accuracy over time (especially if dropped). Calibrate yours annually to ensure readings are reliable. Many hardware stores or industrial suppliers offer this service for a small fee.
Pro tip: If you're switching between materials (e.g., steel to aluminum lean pipe), reset your torque wrench before each use. It's easy to forget and accidentally apply steel-level torque to aluminum—costly mistake.

Step-by-Step: Tightening Lean Pipe Fixed Clamps the Right Way
Now that you have the tools, let's walk through the process. Whether you're building a new workbench or maintaining an existing roller track, these steps will ensure consistent, reliable connections:
- Prep the Joint: Start by assembling the lean pipe and joint loosely. Make sure the pipes are aligned correctly—misalignment now will lead to stress on the clamp later. Wipe the clamp threads with a clean rag, and use a wire brush to remove any rust or debris. If using steel or stainless steel, apply a drop of anti-seize to the threads (skip this for aluminum unless the manufacturer recommends it).
- Hand-Tighten First: Screw the clamp onto the joint by hand until it's snug. This seats the threads properly and gives you a baseline. Never skip this step—cross-threading (when the threads don't mesh correctly) is a common issue if you start with a wrench.
- Set Your Torque Wrench: Adjust your torque wrench to the recommended value for your pipe material (check the table above). Lock the setting in place—most wrenches have a locking collar to prevent accidental changes.
- Apply Torque Gradually: Fit the socket over the clamp bolt and attach the torque wrench. Apply steady, even pressure (avoid jerky movements) until you hear the "click" (or feel the vibration/beep for digital wrenches). Stop immediately—over-tightening happens fast!
- Double-Check in a Star Pattern (For Multiple Clamps): If you're securing a structure with multiple clamps (like a workbench frame with four corners), tighten them in a star pattern (e.g., top-left, bottom-right, top-right, bottom-left). This distributes pressure evenly and prevents warping.
- Test the Connection: Give the joint a gentle tug or wiggle. It should feel solid, with no movement. If it shifts, check the torque setting—you might have under-tightened, or the threads could be damaged.
- Mark and Document: For critical structures (like heavy-duty material racks), use a paint pen to mark the clamp and pipe where they meet. If the mark shifts later, you'll know the clamp has loosened and needs re-tightening.
Common Mistakes to Avoid
Even with the best tools, slip-ups happen. Here are the most common errors I've seen, and how to steer clear of them:
- "Eyeballing" Torque: "It looks tight" or "I've done this a hundred times" is risky. Human perception is unreliable—what felt tight at 9 a.m. might feel different after lunch. Always use a torque wrench.
- Ignoring Material Differences: Treating aluminum lean pipe like steel is a recipe for disaster. Aluminum threads strip easily, so dial back the torque. Conversely, stainless steel needs enough torque to overcome its natural friction—too little, and it will loosen over time.
- Reusing Damaged Clamps: If a clamp is bent, has stripped threads, or the bolt is rusted, replace it. A worn clamp can't hold torque, no matter how carefully you tighten it.
- Overlooking Vibration: Areas near conveyors or heavy machinery vibrate constantly, which can loosen clamps over time. In these spots, use thread locker (medium-strength, so you can still disassemble later) and check torque monthly.
- Rushing the Process: Tightening clamps is tedious, but cutting corners leads to callbacks. Set aside enough time to do it right—your future self (and your production line) will thank you.
Maintenance: Keeping Clamps Tight Over Time
Torque isn't a "set it and forget it" job. Even perfectly tightened clamps can loosen due to temperature changes, vibration, or repeated loading. Here's how to keep them secure long-term:
- Schedule Regular Inspections: Do a quick check weekly—look for loose joints, rust, or damaged clamps. For high-use areas, inspect monthly with a torque wrench to verify settings.
- Retorque After the First Week: New joints can "settle" as materials compress slightly. Retighten clamps 5–7 days after initial installation to ensure they stay secure.
- Clean and Lubricate Seasonally: Wipe down clamps and joints with a damp cloth to remove dust and debris. Reapply anti-seize or lubricant to steel/stainless steel joints every 3–6 months, depending on humidity.
- Train Your Team: Make sure everyone who works with lean systems understands the importance of torque. A 10-minute demo with the torque wrench can prevent a lot of headaches down the line.
Final Thoughts: Precision Builds Confidence
At the end of the day, tightening lean pipe fixed clamps is about more than just nuts and bolts—it's about building trust in your equipment. When a technician knows their workbench won't wobble, or a material handler is confident the roller track won't jam, they can focus on what they do best: creating value.
Lean manufacturing is all about eliminating waste, and nothing wastes time like downtime from loose clamps. By investing a little time in learning torque basics, equipping your team with the right tools, and making precision a habit, you'll turn those small, silent connections into the foundation of a more efficient, safer, and more resilient operation.
So grab your torque wrench, check that aluminum lean pipe joint, and tighten with purpose. Your production line (and your peace of mind) will thank you.
Lean manufacturing is all about eliminating waste, and nothing wastes time like downtime from loose clamps. By investing a little time in learning torque basics, equipping your team with the right tools, and making precision a habit, you'll turn those small, silent connections into the foundation of a more efficient, safer, and more resilient operation.
So grab your torque wrench, check that aluminum lean pipe joint, and tighten with purpose. Your production line (and your peace of mind) will thank you.