- Company Articles
- Products and Technology
- Installation And Maintenance
- Tools Needed for Installing M10*56 Rubber Leveling Feet

Tools Needed for Installing M10*56 Rubber Leveling Feet
Related Product
M10*56 Rubber Leveling Feet
Adjustable leveling feet are designed to keep machines level when placed on uneven or sloped ground. Otherwise known as adjustable equipment feet, they are available to order in a wide variety of size and load capacity combinations.
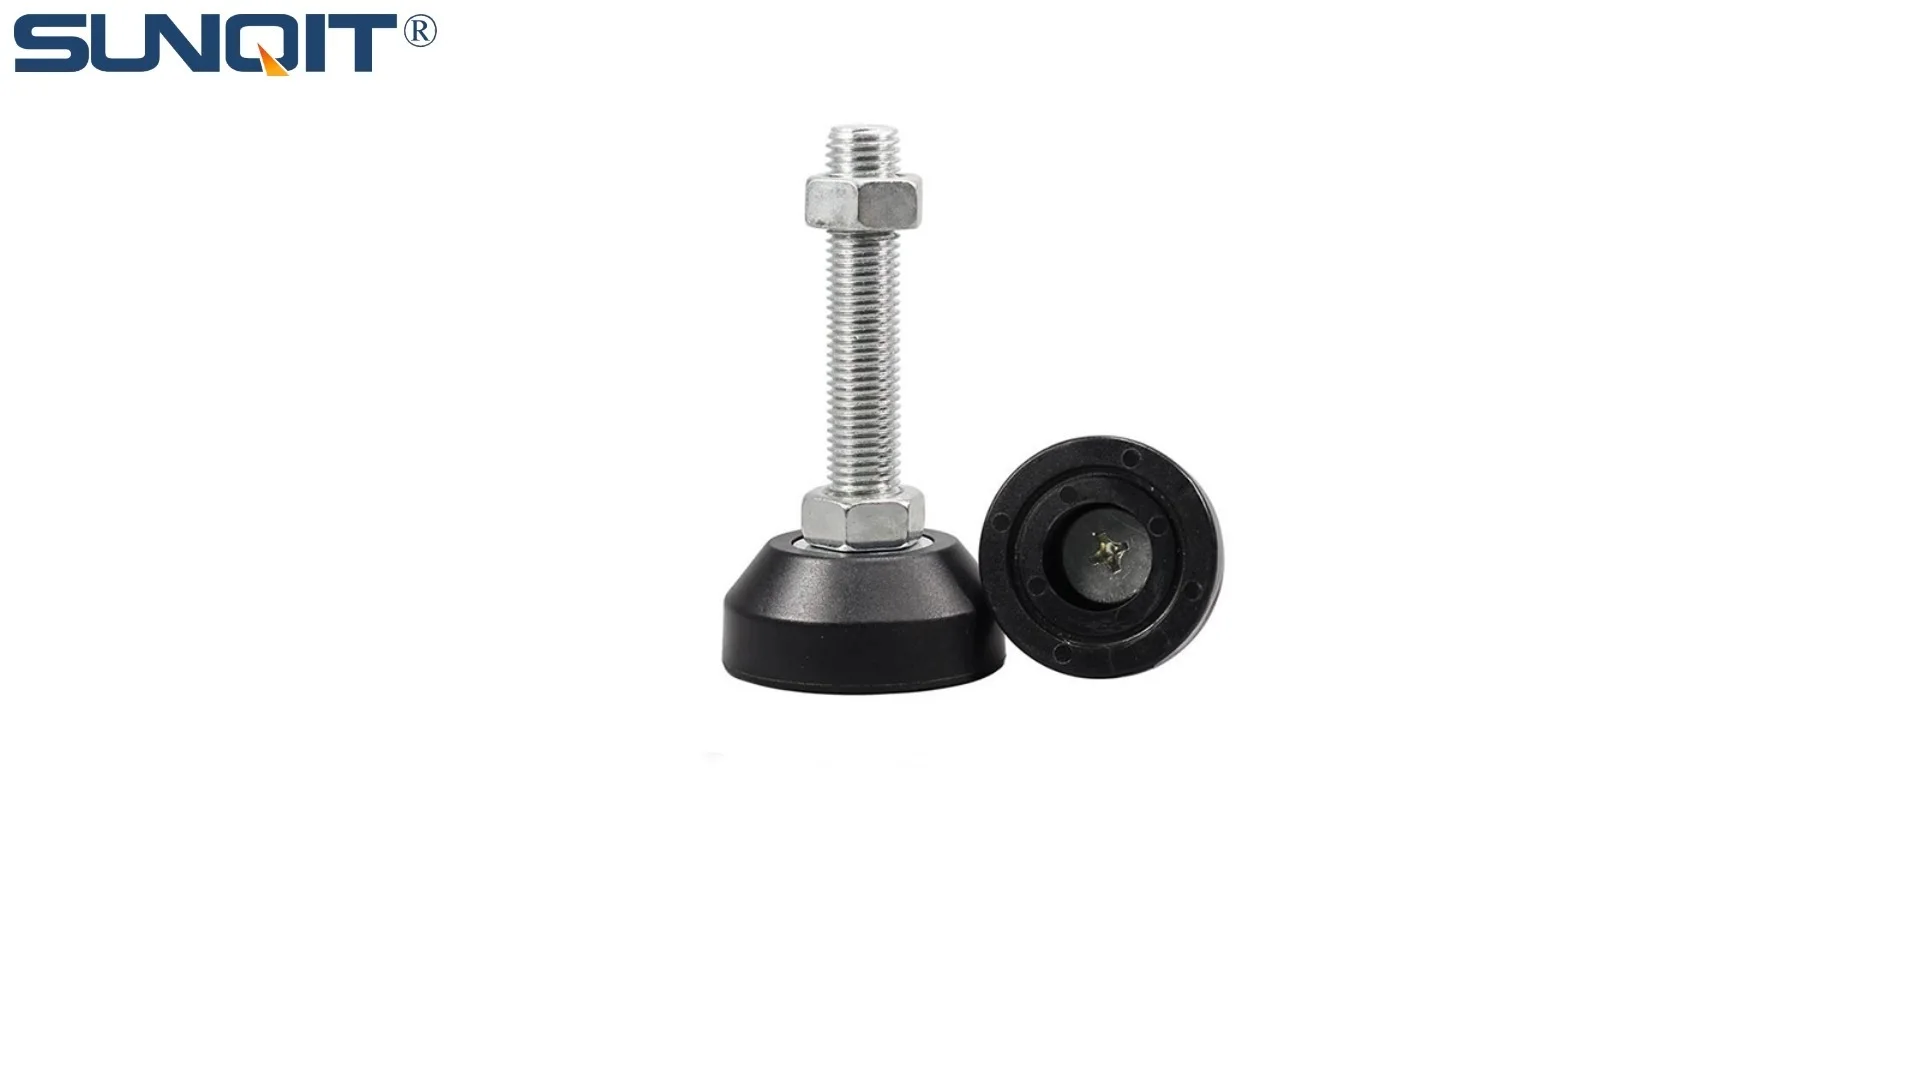
Let's be real—there's nothing more frustrating than setting up a new workbench or assembly station, only to have it wobble like a table at a cheap diner. You're trying to line up parts, tighten a bolt, or measure a component, and the whole surface shifts. Annoying, right? That's where M10*56 rubber leveling feet come in. These little heroes are the unsung champions of stable workspaces, whether you're building a lean pipe workbench, an aluminum profile assembly station, or even a heavy-duty material rack. But installing them? It's not rocket science, but it does require the right tools and a bit of know-how. Today, I'm breaking down everything you need to get the job done smoothly—no wobbly tables, no stripped threads, just a rock-solid foundation for whatever project comes your way.
First off, let's make sure we're on the same page. M10*56 rubber leveling feet are a type of adjustable leveling feet designed to screw into the bottom of workbenches, racks, or machinery. The "M10" refers to the metric thread size (10mm diameter), and "56" is the length of the threaded rod (56mm). The rubber base provides grip, so your setup won't slide around, and the adjustable height means you can tweak it to compensate for uneven floors—because let's face it, not every workshop has perfect concrete. Whether you're a seasoned mechanic, a DIY enthusiast, or someone setting up their first home workshop, getting these feet installed right is key to a functional space.
Why Bother with Proper Installation? (Spoiler: It's More Than Just "Tightening a Screw")
Before we dive into tools, let's talk about why this matters. I once skipped the "measure twice, drill once" step when installing leveling feet on a plywood workbench. I eyeballed the mounting holes, screwed in the feet, and thought, "Good enough!" Two weeks later, I was assembling a batch of small electronics, and the bench started creaking. Turns out, one foot was slightly angled, putting extra stress on the plywood. Over time, that stress cracked the wood. Oops. Moral of the story: Rushing installation leads to wobbly setups, damaged equipment, or worse—parts sliding off the bench mid-assembly. Taking 15 extra minutes to do it right saves hours of frustration later.
Plus, if you're using these feet on an ESD workstation (you know, those anti-static workbenches for sensitive electronics), stability is non-negotiable. A wobbly surface increases the risk of static discharge or accidental drops. So, let's treat this like the important step it is.
The Toolkit: What You'll Need (and Why Each One Matters)
You don't need a fully stocked industrial garage, but a few key tools will make this job a breeze. I've put together a list of essentials, along with why they're important and a few pro tips I've picked up over the years. Let's start with the basics:
| Tool | Purpose | Pro Tips |
|---|---|---|
| Adjustable Wrench or Socket Set (10mm) | Tightening the M10*56 leveling feet onto the mounting points. A socket set with a ratchet is easier for tight spaces. | Use a socket with a rubber grip to avoid scratching the feet's finish. If the feet have plastic caps, wrap the wrench in tape to protect them. |
| Measuring Tape (16ft or longer) | Ensuring mounting holes are evenly spaced and aligned. Critical for preventing uneven weight distribution. | Measure twice! Mark the center of each leg with a pencil before drilling—this keeps holes straight. |
| Drill and Drill Bits (M10 Tap Drill Size: 8.5mm) | Creating pilot holes if your workbench legs don't already have threaded holes. The M10 thread requires an 8.5mm drill bit for tapping. | Use a drill guide to keep the bit straight—angled holes make it impossible to screw in the feet evenly. |
| Thread Tap (M10 x 1.5mm Pitch) | Cutting threads into the pilot holes so the leveling feet can screw in securely. Essential if your workbench legs are unthreaded (common with aluminum profile legs). | Apply cutting oil to the tap to reduce friction—this makes threading smoother and extends the tap's life. |
| Spirit Level (2ft or Longer) | Checking if the workbench is level after installing the feet. A small bubble level works, but a longer one gives more accurate readings. | Check level in both directions (front-to-back and side-to-side) to ensure true stability. |
| Marker or Pencil | Marking drill points and alignment guides on the workbench legs. | Use a mechanical pencil for precise marks—thick marker lines can lead to off-center holes. |
| Rubber Mallet (Optional) | Gently tapping the feet into place if they're stuck (rare, but helpful for tight fits). | Never use a metal hammer—you'll dent or crack the rubber base or the threaded rod. |
| Thread Locker (Optional, Medium Strength) | Preventing the feet from loosening over time, especially if the workbench vibrates (e.g., near a conveyor or heavy machinery). | Use sparingly! A drop on the threads before installation is enough—too much can make future adjustments a pain. |
Pro move: If you're working with aluminum profile legs (super common in modern workshops), add a deburring tool to your list. Aluminum shavings can be sharp, and a quick pass with a deburring tool will smooth out any rough edges around the drill holes—no more sliced fingers when adjusting the feet later.

Step-by-Step Installation: Let's Get Those Feet On (Without the Headache)
Now that you've got your tools ready, let's walk through the installation process. I'm going to break this down into simple steps, with plenty of "been there, done that" advice to keep you on track. We'll assume you're installing the M10*56 feet on a standard workbench—if you're using them on a material rack or ESD workstation, the steps are similar, just adjust for the size of the legs.
Step 1: Prep Your Workbench (and Your Space)
First, clear the area. You don't want tools or parts rolling around while you work. If your workbench is already assembled, flip it upside down so the legs are facing up—that makes accessing the mounting points way easier. If it's unassembled, lay the legs flat on a clean, soft surface (a old towel works) to avoid scratching the finish.
Next, inspect the legs. Are there pre-drilled holes? If yes, check their size—they should be slightly smaller than M10 (around 8mm) to allow for threading. If there are no holes, you'll need to drill them. Measure the distance between the legs to ensure the feet will be evenly spaced—this is crucial for stability. For a standard 4-legged workbench, the holes should be centered on each leg, and the distance from front to back/side to side should be consistent.
Step 2: Drill Pilot Holes (If Needed)
Grab your measuring tape and marker. Mark the center of each leg where the leveling foot will go. Double-check the marks—measure from the top and bottom of the leg to ensure they're centered vertically, and from the edges for horizontal alignment. Once you're sure, grab your drill and 8.5mm bit (the M10 tap drill size). Set the drill to a medium speed and gently drill straight down into the mark. Let the drill do the work—pressing too hard can bend the bit or create an angled hole.
Pro tip: If you're drilling into aluminum profile (which is softer than steel), use a slower drill speed to avoid melting the metal around the hole. Aluminum chips can also clog the bit, so back it out every few seconds to clear them.
Step 3: Tap the Threads (Because "Screwing Into Wood" Doesn't Work Here)
Now, take your M10 x 1.5mm pitch thread tap. If you've never used a tap before, don't worry—it's simpler than it looks. Apply a drop of cutting oil to the tap (or even dish soap if you're in a pinch), then place the tip into the pilot hole. Hold the tap handle perpendicular to the leg (use your spirit level to check!) and slowly turn it clockwise. You'll feel resistance at first—that's the tap cutting threads into the metal. Turn it 1-2 full rotations, then reverse it a quarter turn to break off any metal shavings. Repeat until the tap is fully seated in the hole (about 15-20mm deep, depending on the leg thickness).
Warning: Never force the tap! If it gets stuck, reverse it slightly to free it up. Stripping the threads at this stage means starting over with a larger hole and a helicoil insert (which is a hassle, trust me).
Step 4: Screw in the M10*56 Rubber Leveling Feet
Now the fun part—attaching the feet! Take one M10*56 leveling foot and hand-screw it into the tapped hole. Turn it clockwise until it's snug, but don't tighten it all the way yet—you'll need to adjust the height later. Repeat this for all legs. If the feet have a hexagonal nut (most do), use your adjustable wrench or 10mm socket to gently tighten them—just enough to hold them in place, not so tight that you can't turn the height adjustment later.
If you're using thread locker, apply a small drop to the threads before screwing in the foot. Remember: medium-strength locker is best here—permanent locker will make future adjustments impossible without heat, which you don't want on plastic or rubber parts.
Step 5: Adjust the Height (The "Leveling" Part of Leveling Feet)
Flip the workbench upright (get a friend to help if it's heavy—safety first!). Place your spirit level on the top surface. Check the bubble—if it's off-center, you need to adjust the feet. Most M10*56 feet have a knurled ring or a hexagonal base that you can turn to raise or lower the height. Turn the ring clockwise to lower the foot (shortening the threaded rod) or counterclockwise to raise it (lengthening the rod).
Start with the lowest foot first—this is usually the one causing the wobble. Adjust it until the bubble is centered front-to-back, then do the same side-to-side. It might take a few tweaks—go slow, and check the level after each adjustment. Once the bubble is centered in both directions, give each foot a final gentle tighten with the wrench to lock in the height.
Step 6: Test for Stability (Jump on It… Maybe)
Now, give the workbench a good shake. Push on each corner—if it moves, the feet might need a little more adjustment. For extra peace of mind, place a heavy object (like a toolbox) on different parts of the bench to test weight distribution. The bench should feel solid, with no creaking or shifting.
Pro tip: If you're installing feet on a mobile workstation (one with caster accessories for rolling), lock the casters first before adjusting the leveling feet. Once the feet are set, unlock the casters and roll the bench around—then lock them again and check the level. Sometimes moving the bench can shift the feet slightly, so a final check is worth it.

Troubleshooting: When Things Go Sideways (And How to Fix Them)
Even with careful prep, things can go wrong. Here are the most common issues I've run into, and how to fix them without losing your cool:
Problem: The Leveling Foot Won't Screw In All the Way
This usually happens because the threads are misaligned or there's a burr in the hole. Try backing the foot out, blowing out any metal shavings with compressed air (or a straw if you don't have air), and re-screwing it in slowly. If it still sticks, run the tap through the hole again with cutting oil to clean up the threads.
Problem: The Workbench Still Wobbles After Adjustment
Check if the rubber feet are worn or uneven. Over time, rubber can compress, so if these are old feet, the pads might be misshapen. replace the rubber pads (you can find generic ones at hardware stores) or flip the feet if they're reversible. If the feet are new, the floor might be more uneven than you thought—try using shims under the feet (but only as a last resort; better to adjust the feet themselves if possible).
Problem: Stripped Threads (The Dreaded "Spinny Spinny")
Ugh, stripped threads. If the foot just spins without tightening, stop immediately! Forcing it will make it worse. If the hole is in aluminum (which is soft), you can try using a slightly larger tap (M11) to re-thread the hole, then use an M11 leveling foot. If that's not an option, helicoil inserts work wonders—these are small metal coils that thread into the stripped hole, creating new threads for the M10 foot. They're cheap and easy to install with a helicoil tool kit.
Problem: Rubber Feet Slipping on the Floor
If the workbench slides around, the rubber pads might be too smooth for your floor type (tile or polished concrete). Try adding rubber grip pads (the kind used under furniture legs) to the bottom of the feet—they're sticky and add extra traction. Alternatively, look for M10*56 feet with a textured rubber base—some manufacturers make them specifically for slippery floors.

Keeping Your Leveling Feet Happy: Maintenance Tips
Like any workshop tool, M10*56 rubber leveling feet need a little love to last. Here's how to keep them in top shape:
- Clean them regularly: Wipe the feet with a damp cloth to remove dust, oil, or debris. Built-up grime can make adjusting the height harder, and dirt under the rubber pad can throw off the level.
- Check for wear: Inspect the rubber pads every few months. If they're cracked, flattened, or starting to peel, replace them. Most lean pipe suppliers stock replacement pads, or you can buy generic ones online.
- Lubricate the threads: If the height adjustment gets stiff, apply a drop of silicone lubricant to the threaded rod (avoid oil-based lubes, which can degrade rubber). Wipe off excess to prevent attracting dust.
- Tighten loose feet: Over time, vibration can loosen the feet. Give them a quick check with the wrench every few weeks—just a gentle turn to ensure they're snug.
Wrapping Up: A Stable Workspace = Better Work
Installing M10*56 rubber leveling feet might seem like a small step, but it's one that makes a huge difference in your workshop. A stable workbench reduces frustration, improves precision, and even makes your space safer. With the right tools, a little patience, and the tips we've covered, you'll have those feet installed in no time—and you'll wonder how you ever worked on a wobbly surface.
Remember, whether you're building a lean pipe workbench, an aluminum profile assembly line, or just upgrading your garage setup, the foundation matters. These little feet are the unsung heroes of a functional workspace—so treat them like the investment they are. Now go forth, level your benches, and build something awesome.