- Company Articles
- Products and Technology
- Installation And Maintenance
- Tools Needed for Suction Cup Anti-Slip Foot Adjuster Installation: Checklist

Tools Needed for Suction Cup Anti-Slip Foot Adjuster Installation: Checklist
Related Product
Suction Cup Anti-slip Foot Adjuster
D=35mm suction cup anti-slip foot adjusterï¼screw M10*55ï¼with a blot, used for workbench, flowrack pipe contact with groud.
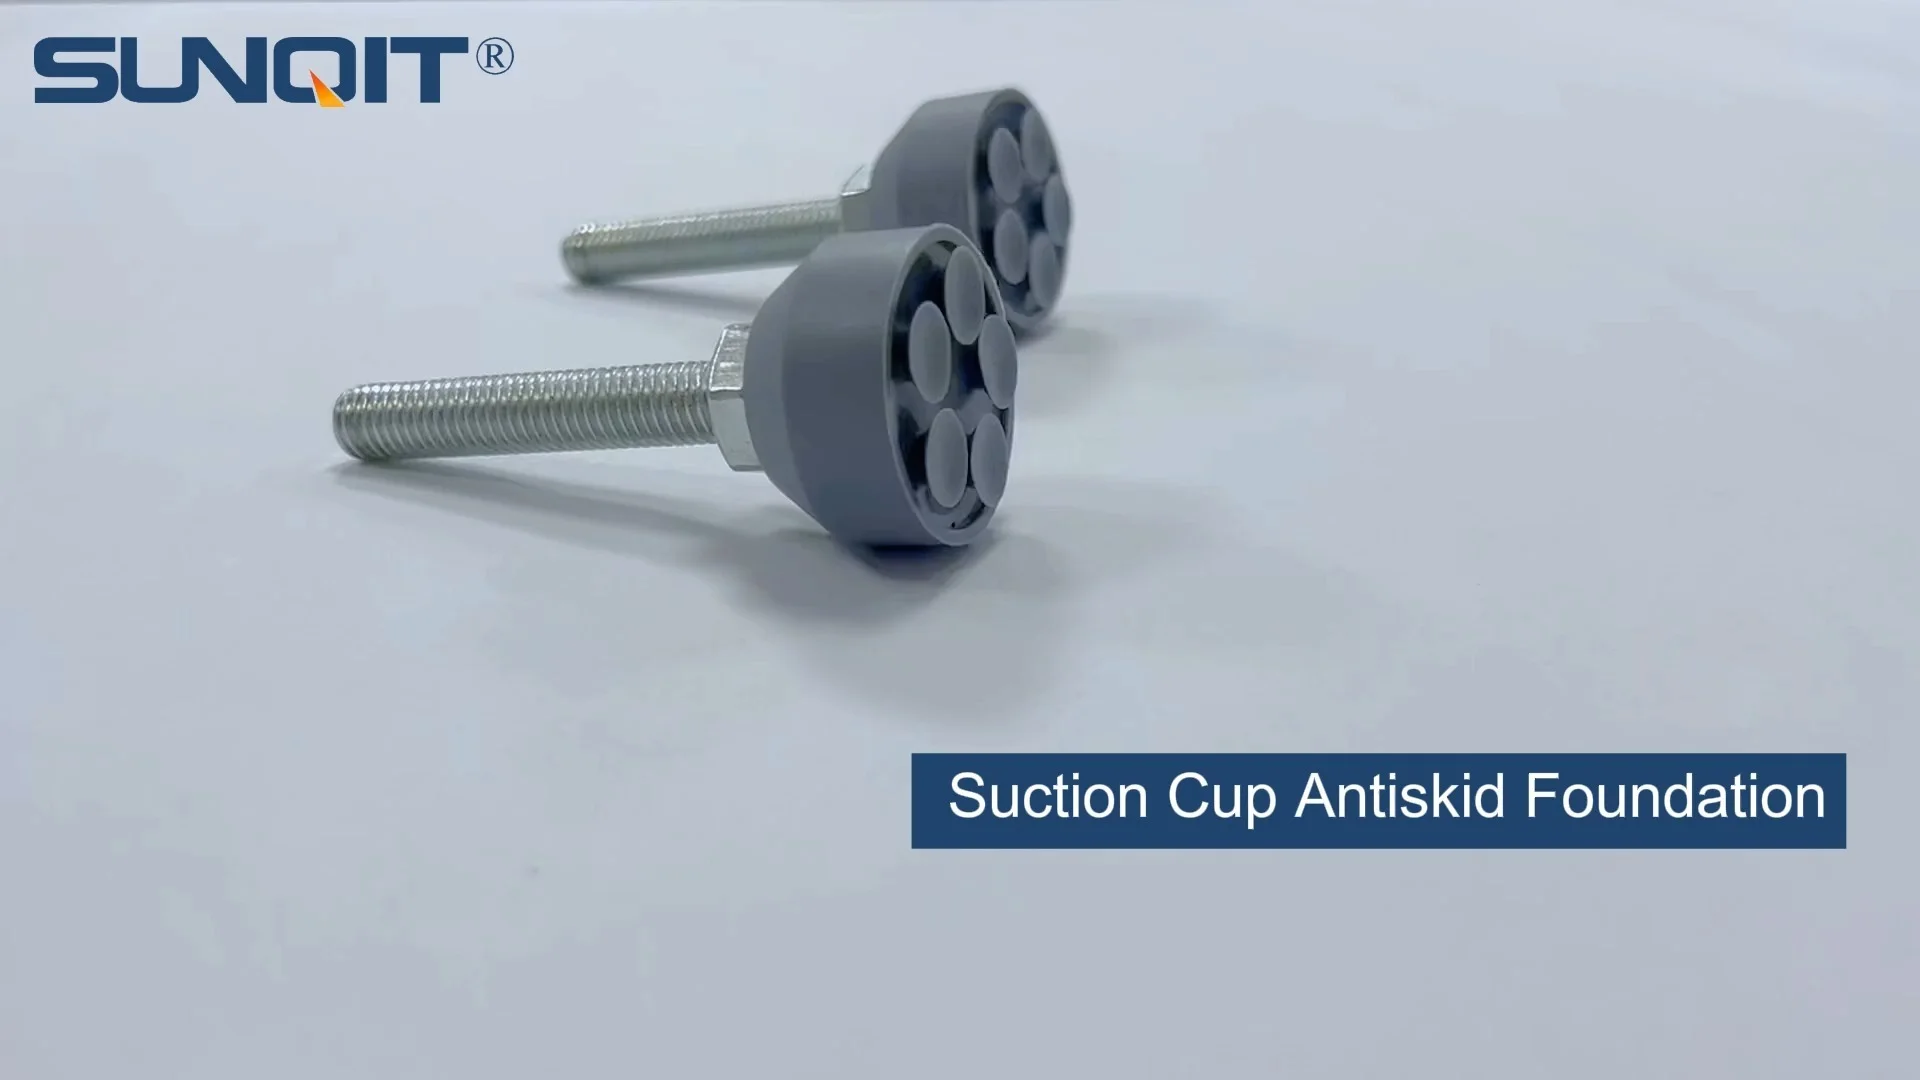
In the world of manufacturing, workshops, and laboratories, stability isn't just a nicety—it's a necessity. Whether you're assembling electronics on a workbench, organizing parts on a material rack, or conducting precision tests in a lab, the surfaces you rely on must stay steady. One often-overlooked hero in this quest for stability is the suction cup anti-slip foot adjuster . This small but mighty component attaches to the bottom of workbenches, material racks, and even aluminum profile structures, ensuring they stay level and grounded, even on uneven floors. But like any tool, its effectiveness depends entirely on proper installation. And proper installation? That starts with having the right tools on hand.
If you've ever tried to fix a wobbly table with a random assortment of tools, you know the frustration: stripped screws, misaligned parts, and a result that's barely better than when you started. Installing a suction cup anti-slip foot adjuster isn't rocket science, but it does require intention—and the right gear. In this guide, we'll walk you through everything you need to know, from why these adjusters matter to a detailed checklist of tools that will make the process smooth, efficient, and effective. We'll even dive into pro tips and troubleshooting, because the goal isn't just to "get it done"—it's to get it done right, so your workbench or material rack stays stable for years to come.
Why the Suction Cup Anti-Slip Foot Adjuster Deserves Your Attention
Before we jump into tools, let's take a moment to appreciate what the suction cup anti-slip foot adjuster actually does. Unlike standard adjustable leveling feet (which rely on screws to raise or lower a surface), these adjusters add a critical extra layer: suction. The rubber or silicone suction cup creates a vacuum seal with the floor, preventing sliding even when the surface is smooth (think polished concrete or tile). This is a game-changer in high-traffic areas, where vibrations from machinery or people walking by could otherwise jostle your setup.
Consider a busy production line. A workbench holding delicate circuit boards needs to stay perfectly still—even when a nearby conveyor belt rumbles to life. A material rack stacked with heavy components can't shift, or it might topple. In labs, where precision is everything, a wobbly surface could ruin an experiment. The suction cup anti-slip foot adjuster isn't just about "leveling"—it's about locking in stability. And to unlock that stability, you need to install it correctly.
Another key point: these adjusters often attach to aluminum profile structures. Aluminum profiles are popular in industrial settings because they're lightweight, durable, and customizable—you can build workbenches, shelving, and racks by connecting profiles with joints and brackets. But aluminum's smooth, sleek design means that mounting hardware (like foot adjusters) needs a precise fit. A loose or misaligned adjuster on an aluminum profile isn't just unstable; it could damage the profile itself over time, leading to costly replacements.
Pre-Installation Prep: Setting Yourself Up for Success
Before you even touch a tool, there's work to do. Pre-installation preparation might seem like a "nice-to-have," but it's actually the foundation of a successful install. Here's what you need to do first:
1. Inspect the Surface
The suction cup relies on a clean, smooth surface to create a seal. If your floor is covered in dust, oil, or debris, the cup won't stick. Grab a cleaning cloth and wipe the area where the adjuster will go—don't skip this step! Even a thin layer of grime can break the vacuum seal, rendering the anti-slip feature useless.
2. Measure Twice, Drill Once (or Don't Drill at All)
Most suction cup anti-slip foot adjusters mount to the bottom of your structure (like an aluminum profile workbench) using screws or bolts. Check the adjuster's manual to find the distance between mounting holes. Then, measure your structure to mark where these holes should go. A pencil or marker will help here—scribble a small dot so you know exactly where to place the screws. Pro tip: If your aluminum profile has pre-drilled slots (common in modular setups), align the adjuster's holes with these slots to avoid drilling new ones.
3. Check for Level (Before You Start)
Even with adjustable feet, it helps to know how much adjustment you'll need. Use a level tool to check if your structure is already tilting. If one corner is higher than the others, note the difference—this will guide how much you'll need to raise or lower the suction cup adjuster later.
4. Gather Your Tools (Yes, This is the Teaser for the Checklist!)
Now, the moment you've been waiting for: rounding up the tools. This is where most people cut corners, and it's almost always a mistake. Using the wrong tool (like a Phillips screwdriver on a hex screw) can strip the head, making it impossible to tighten or loosen later. Using no tool at all (hello, "finger-tightening") leads to loose connections that will fail under stress. So let's get serious—here's the ultimate checklist.

The Ultimate Tool Checklist for Suction Cup Anti-Slip Foot Adjuster Installation
Below is a detailed breakdown of every tool you'll need, why you need it, and pro tips to use it like a pro. We've organized them by category to make shopping (or rummaging through your toolbox) easier.
| Tool | Purpose | Pro Tips |
|---|---|---|
| Measuring Tape (10–25 ft) | To measure the distance between mounting holes on the adjuster and mark positions on your structure (e.g., aluminum profile workbench). | Use a retractable tape for precision. For small measurements (like 1–2 inches between holes), a metal ruler works too—just ensure it's straight! |
| Hex Key Set (Metric, SAE, or Both) | Most suction cup adjusters attach to aluminum profiles using hex screws (Allen screws). A set with multiple sizes ensures you'll have the right fit. | Invest in a "ball-end" hex key set—they allow you to angle the key up to 25 degrees, which is helpful when screws are in tight spots (common with aluminum profiles). |
| Level Tool (Bubble or Digital) | To ensure your structure is perfectly level after installing the adjuster. Even a 1-degree tilt can weaken the suction cup's grip. | Digital levels are more precise, but a good old bubble level works too. Place it on the top surface of your workbench or rack while adjusting the feet. |
| Rubber Mallet | For gently tapping the adjuster into place if it's a press-fit design, or for seating screws without stripping them (never use a metal hammer—it can damage the adjuster's plastic or rubber components). | Opt for a mallet with a soft rubber head to avoid marring the aluminum profile or the adjuster itself. |
| Cleaning Cloth (Microfiber or Lint-Free) | To wipe dust, oil, or debris from the floor (for the suction cup) and from the mounting surface of the aluminum profile (to ensure screws grip properly). | Dampen the cloth slightly with water (not cleaning solution—chemicals can degrade the suction cup material) for stubborn grime. |
| Pencil or Fine-Tip Marker | To mark where the mounting holes on the adjuster align with the aluminum profile or workbench legs. | Use a pencil for surfaces where you might need to erase marks later. For dark aluminum profiles, a white or silver marker shows up best. |
| Adjustable Wrench | To tighten nuts or lock washers that might secure the adjuster to the structure (common in heavy-duty setups). | Wrap the wrench jaws in tape to avoid scratching the aluminum profile—cosmetic damage might not affect function, but it's avoidable! |
| Safety Gloves | To protect your hands from sharp edges on aluminum profiles, metal screws, or the adjuster itself (some models have rigid plastic components). | Nitrile gloves are a good choice—they're flexible, chemical-resistant, and won't slip when handling tools. |
| Optional: Thread Locker (Blue, Removable) | For long-term stability, apply a small drop of thread locker to screws before tightening. This prevents them from loosening due to vibrations. | Use "blue" thread locker (not red!)—red is permanent and will make future adjustments nearly impossible. |

Step-by-Step Installation: Using Your Tools Like a Pro
Now that you've got your tools and prepped the area, let's walk through the installation process. We'll assume you're mounting the suction cup anti-slip foot adjuster to an aluminum profile workbench—one of the most common setups. Adjustments may vary slightly based on your specific adjuster model, so always check the manufacturer's instructions first!
Step 1: Position the Adjuster
Place the suction cup anti-slip foot adjuster on the bottom of the aluminum profile leg. Align the mounting holes on the adjuster with the slots or pre-drilled holes on the profile. Use your pencil to mark the center of each hole—this ensures you won't drill (or screw) off-center.
Step 2: Attach the Adjuster (Temporarily)
Take your hex key and insert a screw into one of the marked holes. Tighten it just enough to hold the adjuster in place—don't fully secure it yet. Do the same for the remaining screws. This "temporary" step lets you adjust the position if needed before finalizing.
Step 3: Level the Structure
Place your level tool on the top surface of the workbench. Check both the front-to-back and side-to-side tilt. If one corner is higher, use the adjuster's built-in screw (usually a large hex nut or dial) to lower that foot. If it's lower, raise it. Repeat this for all four corners until the level shows "perfectly flat."
Step 4: Secure the Screws
Once the structure is level, go back to the screws you loosely tightened earlier. Use your hex key to fully secure them—turn until they're snug, but don't over-tighten (this can strip the threads in the aluminum profile). If you're using thread locker, apply a tiny drop to each screw before the final turn.
Step 5: Engage the Suction Cup
Press down firmly on the workbench or material rack to engage the suction cup. You should hear a faint "pop" as the vacuum seal forms. To test it, gently push the structure from the side—there should be no sliding or shifting. If it moves, check the suction cup for debris (wipe it again!) or re-level the adjuster.
Step 6: Double-Check Everything
Give the screws one final tighten with your hex key (just to be safe). Recheck the level to ensure adjusting the screws didn't throw off the balance. If all looks good, remove your safety gloves and step back—you've installed your suction cup anti-slip foot adjuster!

Troubleshooting: When Things Don't Go as Planned
Even with the right tools, hiccups happen. Here are common issues and how to fix them:
Problem: The Suction Cup Won't Stick
Possible causes: The floor is dirty, the surface is too rough, or the cup is damaged. Solution: Wipe the floor again with a damp cloth. If the floor is textured (like industrial concrete with a rough finish), consider using a different foot adjuster—suction cups work best on smooth surfaces. If the cup has cracks or tears, replace it immediately (most suppliers sell replacement cups separately).
Problem: The Structure Still Wobbles After Installation
Possible causes: The adjuster isn't level, or the screws are loose. Solution: Recheck with your level tool—one foot might be higher than the others. Adjust the height using the built-in screw. If that doesn't work, tighten the mounting screws (but don't overdo it!).
Problem: Stripped Screw Heads
Possible causes: Using the wrong hex key size or over-tightening. Solution: If the screw is stripped, use a "screw extractor" tool to remove it. To prevent this, always match the hex key size to the screw head, and stop tightening when you feel resistance.
Maintenance: Keeping Your Adjuster in Top Shape
Installing the suction cup anti-slip foot adjuster isn't a "set it and forget it" task. Over time, dust, oil, and wear can affect its performance. Here's how to keep it working like new:
- Clean the suction cup monthly: Wipe it with a damp cloth to remove debris that might break the seal.
- Check screws quarterly: Use your hex key to tighten any loose screws—vibrations can loosen them over time.
- replace worn cups: If the suction cup starts to crack or lose elasticity, swap it out for a new one. Most suppliers sell replacements for just a few dollars, and it's cheaper than replacing the entire adjuster.
- Re-level annually: Floors can shift (especially in older buildings), so use your level tool to check the structure's balance once a year. Adjust the feet as needed.
Final Thoughts: Tools = Confidence
Installing a suction cup anti-slip foot adjuster might seem like a small task, but it's one that impacts everything from safety to productivity. With the right tools—measuring tape, hex keys, level, and the rest—you're not just "putting a foot on a rack." You're investing in stability, precision, and peace of mind. And when your workbench stays steady, your material rack doesn't shift, and your aluminum profile structures hold strong, you'll wonder how you ever managed without them.
So, before you start your next installation, take 5 minutes to gather the tools on this checklist. Your future self (and your back, from not struggling with the wrong gear) will thank you. And remember: the best tool in your box isn't the fanciest one—it's the one you use with intention. Happy installing!