- Company Articles
- Products and Technology
- Installation And Maintenance
- Training Teams on Lean Pipe Clamp B: Best Practices for Proper Use

Training Teams on Lean Pipe Clamp B: Best Practices for Proper Use
Related Product
Lean Pipe Clamp
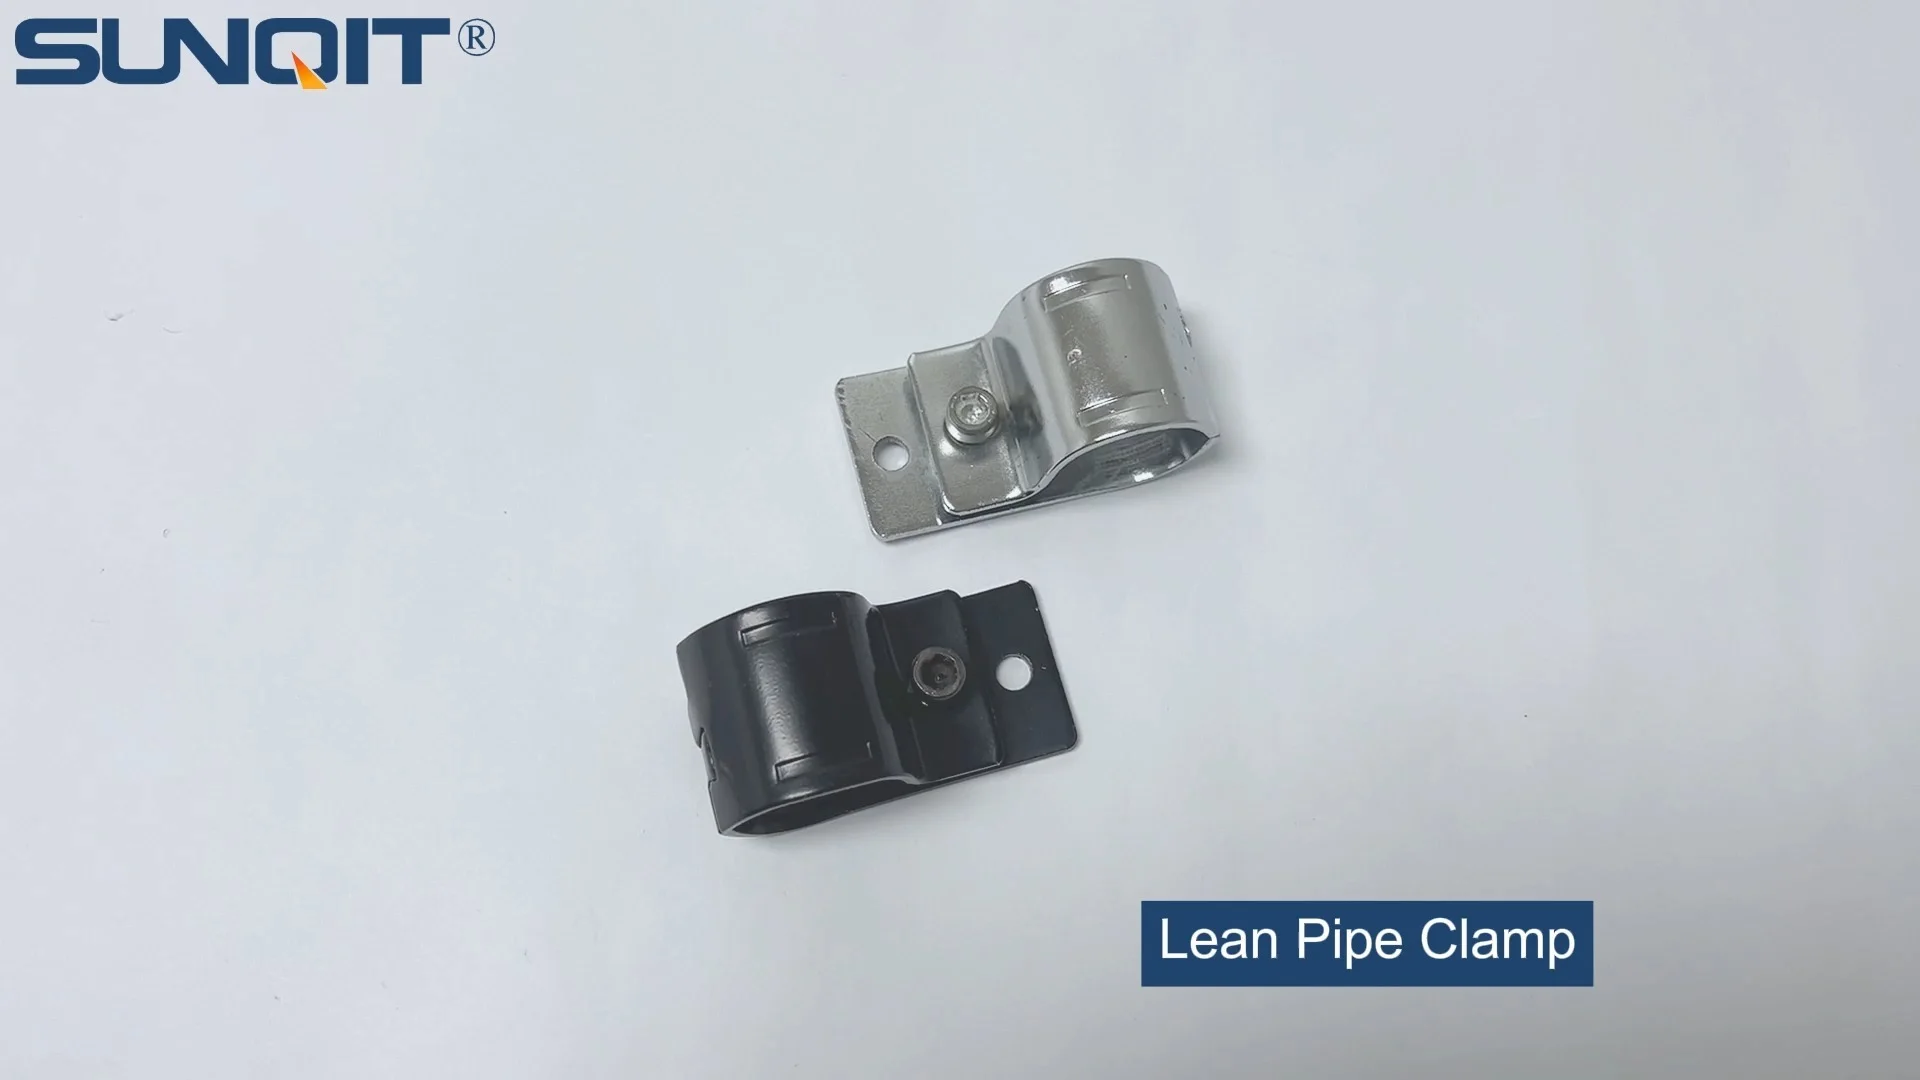
Lean pipe clamp is used for rack system hang monitor or other panel for workbenck, flowrack in production daily use.
Introduction: The Unsung Hero of Lean Systems
Walk into any well-run manufacturing facility, and you'll likely spot the quiet backbone of efficient workflows: lean systems. From streamlined workbenches to smooth-moving roller tracks, these setups don't just happen by accident. They're built piece by piece, with every component playing a critical role. Today, we're zooming in on one such component that's easy to overlook but impossible to replace: the Lean Pipe Clamp B. This small but mighty tool is the glue that holds together lean pipe structures—think workbenches, material racks, and turnover trolleys—and using it correctly can mean the difference between a sturdy, efficient workspace and a wobbly, frustrating one.
For teams new to lean manufacturing, or even seasoned pros who've never stopped to think about clamp technique, proper training on Lean Pipe Clamp B isn't just a box to check. It's an investment in safety, productivity, and the long-term success of your lean system. Imagine a scenario where a poorly secured clamp causes a workbench to collapse mid-shift, scattering parts and halting production. Or a material rack that sways under weight because clamps weren't tightened evenly, slowing down pickers and increasing the risk of injury. These aren't hypothetical—they're real consequences of under-trained teams. That's why we've put together this guide: to turn your team into Lean Pipe Clamp B experts, one best practice at a time.
Understanding Lean Pipe Clamp B: More Than Just a "Clamp"
Before diving into training, let's make sure everyone's on the same page: What exactly is Lean Pipe Clamp B, and why does it matter? At first glance, it might look like any other clamp—metal, with a screw mechanism and a gripping surface. But dig deeper, and you'll see it's engineered for precision. Unlike generic clamps, Lean Pipe Clamp B is designed specifically for use with lean pipes (often coated steel or aluminum) and lean pipe joints, creating a secure, adjustable connection that's the foundation of modular lean structures.
Let's break down its key features. Most Lean Pipe Clamp B models are made from durable materials like high-grade steel or reinforced plastic, chosen for their ability to withstand the wear and tear of daily factory use. The clamp's design includes a curved "jaw" that fits snugly around the circumference of a lean pipe, and a threaded bolt that tightens to lock the pipe in place against a joint. What makes it unique? Its compatibility with standard lean pipe sizes (typically 28mm or 30mm diameter) and its ability to rotate slightly, allowing for minor adjustments during assembly—perfect for teams building custom workbenches or material racks that need to fit specific spaces.
But here's the thing: Even the best tool is only as good as the person using it. A Lean Pipe Clamp B in untrained hands can lead to loose connections, misaligned pipes, or over-tightened bolts that strip threads. That's why training isn't just about "how to twist a bolt"—it's about understanding the clamp's role in the entire lean system. When a team member secures a clamp correctly, they're not just building a structure; they're ensuring that every part of the workflow, from material transport to assembly, runs smoothly. It's a small action with big ripple effects.

Pre-Training Prep: Setting Your Team Up for Success
Training day shouldn't start with a pile of clamps and a "figure it out" attitude. To make sure your team retains what they learn, you need to lay the groundwork first. Let's walk through the steps to prep effectively.
1. Assess Knowledge Gaps (Before You Train)
Not everyone on your team will come in with the same level of experience. Some might have used lean pipe clamps casually; others might be seeing them for the first time. Start by sending out a short survey or holding a quick huddle to ask: Have you worked with Lean Pipe Clamp B before? What challenges have you faced when building lean structures? Do you know the difference between over-tightening and under-tightening a clamp? This intel will help you tailor the training—no wasting time on basics for experts, and no overwhelming newbies with advanced tips.
2. Gather Your Toolkit (Clamps, Pipes, and a Whole Lot of Patience)
You can't practice clamping without the right materials. Assemble a training kit for each pair of participants that includes: Lean Pipe Clamp B (at least 5-10 per kit), standard lean pipes (2-3 lengths, preferably in different materials like aluminum or PE-coated steel), lean pipe joints (90-degree, 45-degree, and straight joints work best), a torque wrench (to teach proper tightening force), and a few "mistake props"—like a stripped clamp or a bent pipe—to show real-world consequences. Pro tip: Label each component (e.g., "Lean Pipe Clamp B – Chrome Finish") so teams get used to identifying parts correctly—this will save time later when they're ordering replacements or troubleshooting on the floor.
3. Set Clear Goals (What Success Looks Like)
Before training begins, tell your team exactly what they'll walk away with. For example: "By the end of today, you'll be able to assemble a stable 3-foot workbench frame using Lean Pipe Clamp B and identify 3 common clamping mistakes." Having concrete goals gives participants something to work toward, and it makes it easier to measure if the training worked (hint: test them by having them build that frame!).

Step-by-Step Training: From Classroom to Workbench
Now it's time to dive into the training itself. We'll break this into four phases: theory, demonstration, hands-on practice, and feedback. Each phase builds on the last, ensuring your team doesn't just hear about proper clamp use—they do it.
Phase 1: The "Why" Behind the Clamp (15-20 Minutes)
Start in the classroom (or a quiet corner of the shop) with a quick presentation. No death by PowerPoint—keep it interactive. Use photos or videos of real scenarios: Show a workbench that collapsed because of loose clamps (label the culprit: "See this Lean Pipe Clamp B? It was only tightened halfway!"), then show the same workbench after proper clamping (stable, no wobble). Explain: "Every clamp you secure is part of keeping this team safe and on schedule. If this workbench fails, we lose 2 hours of production and risk someone getting hurt. That's why we're here today."
Next, walk through the anatomy of Lean Pipe Clamp B. Pass around a clamp and point out the key parts: the jaw (curved to fit the pipe), the bolt (with a hex head for wrenches), and the base (which attaches to the joint). Explain how each part works: "The jaw grips the pipe, the bolt applies pressure, and the base locks into the joint's slot—all of this has to align for a tight fit." Then, introduce the concept of "torque" (the force needed to tighten the bolt). Most Lean Pipe Clamp B models require 25-30 Nm of torque—enough to hold weight but not so much that you strip the threads. Show them a torque wrench and demonstrate how to set it to the right level (yes, even experienced teams often guess at this—don't skip it).
Phase 2: Watch, Then Do (Demonstration Time)
Theory only goes so far. Now, gather your team around a demo station and show them how to use Lean Pipe Clamp B step by step. Think of this as a "cook along" but with clamps instead of pots. Here's your script:
Step 1: Align the pipe and joint. "First, slide the lean pipe into the joint's opening. Make sure it's straight—if it's crooked, the clamp will pull it out of alignment when you tighten." (Hold up a misaligned pipe and wiggle it: "See how this moves? That's a recipe for a wobbly rack.")
Step 2: Position the Lean Pipe Clamp B. "Now, place the clamp over the pipe and into the joint's groove. The jaw should wrap around the pipe evenly—no gaps. If one side is higher than the other, the clamp will slip." (Show a clamp placed incorrectly, then adjust it: "See the difference? Now it's sitting flush.")
Step 3: Tighten with the torque wrench. "Put the wrench on the bolt and turn clockwise. You'll feel resistance—stop when the wrench clicks (if it's a click-type torque wrench) or when it hits 25 Nm on the gauge. No 'just a little more'—that's how threads get damaged." (Demonstrate over-tightening on a scrap pipe: "Listen to that creak? That's the plastic coating stretching. Now this clamp is ruined.")
Step 4: Test the connection. "After tightening, give the pipe a gentle shake. It shouldn't move. If it does, check the clamp—maybe it's misaligned or not tight enough." (Shake a properly secured pipe: "Solid as a rock. That's what we want.")
Phase 3: Hands-On Practice (The Most Important Part)
Now, it's the team's turn. Split them into pairs (buddy systems work wonders for learning) and give each pair a task: "Build a mini material rack using 4 pipes, 4 joints, and 8 Lean Pipe Clamp Bs." Walk around and observe—don't jump in immediately if someone struggles. Let them make small mistakes (like under-tightening) so you can correct them in the moment. When you see a clamp that's off-kilter, say: "Hey, let's look at this together. Notice how the jaw is only touching the pipe on one side? That's why it's loose—let's reposition it."
For extra practice, throw in a "challenge scenario": "Your material rack needs to hold 50 pounds of parts. Tighten the clamps, then we'll stack weights on it. If it holds, you pass!" This adds a fun, competitive element and reinforces the real-world application.
Phase 4: Feedback and Q&A (No Stupid Questions)
After everyone has built their structure, gather the group to discuss. Ask: What was trickiest about using the clamp? Did anyone notice a mistake they made halfway through? Then, highlight successes: "Maria and Raj's rack didn't budge when we added weight—look at how evenly they tightened the clamps!" This positive reinforcement makes people more likely to apply what they learned.
Leave time for questions. Common ones might include: "What if the clamp is stuck?", "Can we reuse a clamp that was over-tightened?", or "How do we know if the joint is compatible with Lean Pipe Clamp B?" Answer honestly—if you don't know, say, "Great question—I'll check with our lean pipe supplier and share the answer tomorrow." This builds trust and shows you value their curiosity.

Common Mistakes (and How to Fix Them Before They Happen)
Even with training, teams will slip up. The key is to teach them to recognize mistakes before they cause problems. Here's a breakdown of the most frequent errors and how to avoid them, organized in a handy table for quick reference:
| Mistake | Why It Happens | Consequence | How to Fix It |
|---|---|---|---|
| Under-tightening the clamp | Team member is afraid of stripping threads; rushes through assembly | Pipe slips over time; structure wobbles or collapses | Use a torque wrench set to 25-30 Nm; mark the bolt with a permanent marker after tightening (if it rotates later, it's loose) |
| Over-tightening the clamp | Team member thinks "tighter = better"; uses a pipe wrench for extra force | Bolt threads strip; clamp becomes useless; pipe coating cracks | Stick to the torque wrench! If you hear a "creak" or see the pipe bend, stop immediately |
| Misaligning the clamp jaw | Hasty assembly; not checking if the jaw sits flush on the pipe | Clamp slips sideways; uneven weight distribution | Before tightening, visually inspect: jaw should wrap around the pipe with no gaps. Rotate the clamp if needed to align |
| Using the wrong clamp for the pipe size | Grabbing the first clamp in the bin; not checking pipe diameter | Clamp doesn't grip; pipe falls out of joint | Label clamps by pipe size (e.g., "Lean Pipe Clamp B – For 28mm Pipes"); store them in separate bins |
| Ignoring damaged clamps | "It still works, right?" attitude; not inspecting clamps before use | Bent jaw fails to grip; rusted bolt snaps during tightening | Add a "clamp inspection" step to pre-assembly checks: Look for rust, bent jaws, or stripped threads. Toss damaged clamps immediately |
Pro Tip: Create a "mistake kit" for your training area. Fill a box with examples of damaged clamps (stripped bolts, bent jaws), misaligned joints, and warped pipes. Let teams handle them and say, "This is what not to do." Tangible examples stick in the mind better than lectures!
Beyond Training Day: Reinforcing Good Habits
Training shouldn't end when the clock hits 5 PM. To make sure proper clamp use becomes second nature, you need to reinforce what your team learned long after the session.
1. Create a "Clamp Checklist" for Daily Use
Post a simple checklist near workstations where lean structures are built: 1. Align pipe and joint. 2. Position Lean Pipe Clamp B with jaw flush. 3. Tighten to 25 Nm with torque wrench. 4. Shake test (no movement = good). 5. Mark bolt with marker. Make it visual—add diagrams if some team members prefer pictures over text. Over time, this becomes muscle memory.
2. Assign "Clamp Champions"
Pick 1-2 team members from each shift who excelled during training to be "champions." Their job? Answer questions, spot-check clamp work, and run 5-minute refresher sessions for new hires. This turns training into a team effort—no one feels like they're being "monitored," and knowledge spreads organically.
3. Schedule Monthly "Clamp Clinics"
Set aside 30 minutes once a month to revisit clamp technique. Use this time to address new challenges (e.g., "We've been using aluminum lean pipes lately—does that change how we clamp?") or highlight wins ("Last month, we had zero structure failures thanks to your tight clamps!"). Keep it casual—bring donuts, make it a "lunch and learn."
Case Study: How One Team Cut Downtime by 40% with Clamp Training
Let's put this all into perspective with a real example. A mid-sized electronics manufacturer we worked with was struggling with frequent disruptions: Their assembly line workbenches, built with lean pipe and Lean Pipe Clamp B, kept wobbling. Parts fell off, workers wasted time readjusting, and once, a rack collapsed, injuring a team member. The root cause? After interviewing the team, we found that 80% of them had never been trained on proper clamp use—they guessed at tightening, reused damaged clamps, and mixed up pipe sizes.
We stepped in to train their 3 shifts using the methods above: pre-training surveys, hands-on practice with torque wrenches, and a "mistake kit" demo. Two months later, the results spoke for themselves: Workbench failures dropped from 12 per month to 3. Downtime due to structural issues fell by 40%, and the team reported feeling more confident ("I used to worry every time I added parts to the rack—now I know it's secure," one assembler told us). The best part? The training paid for itself in saved production time within 6 weeks.
Conclusion: Clamps, Teamwork, and the Future of Your Lean System
At the end of the day, Lean Pipe Clamp B is more than a tool—it's a symbol of how small details shape big outcomes. When your team masters this clamp, they're not just building better workbenches or sturdier racks. They're building a culture of precision, safety, and pride in their work. And that culture is what will keep your lean system running smoothly for years to come.
So don't treat clamp training as an afterthought. Invest the time, gather the tools, and watch your team transform from "just putting parts together" to "building something that lasts." After all, a lean system is only as strong as its weakest clamp—and with the right training, yours will be unbreakable.