- Company Articles
- Products and Technology
- Installation And Maintenance
- Troubleshooting Common Issues with 40 Aluminum Roller Track Grey Systems

Troubleshooting Common Issues with 40 Aluminum Roller Track Grey Systems
Related Product
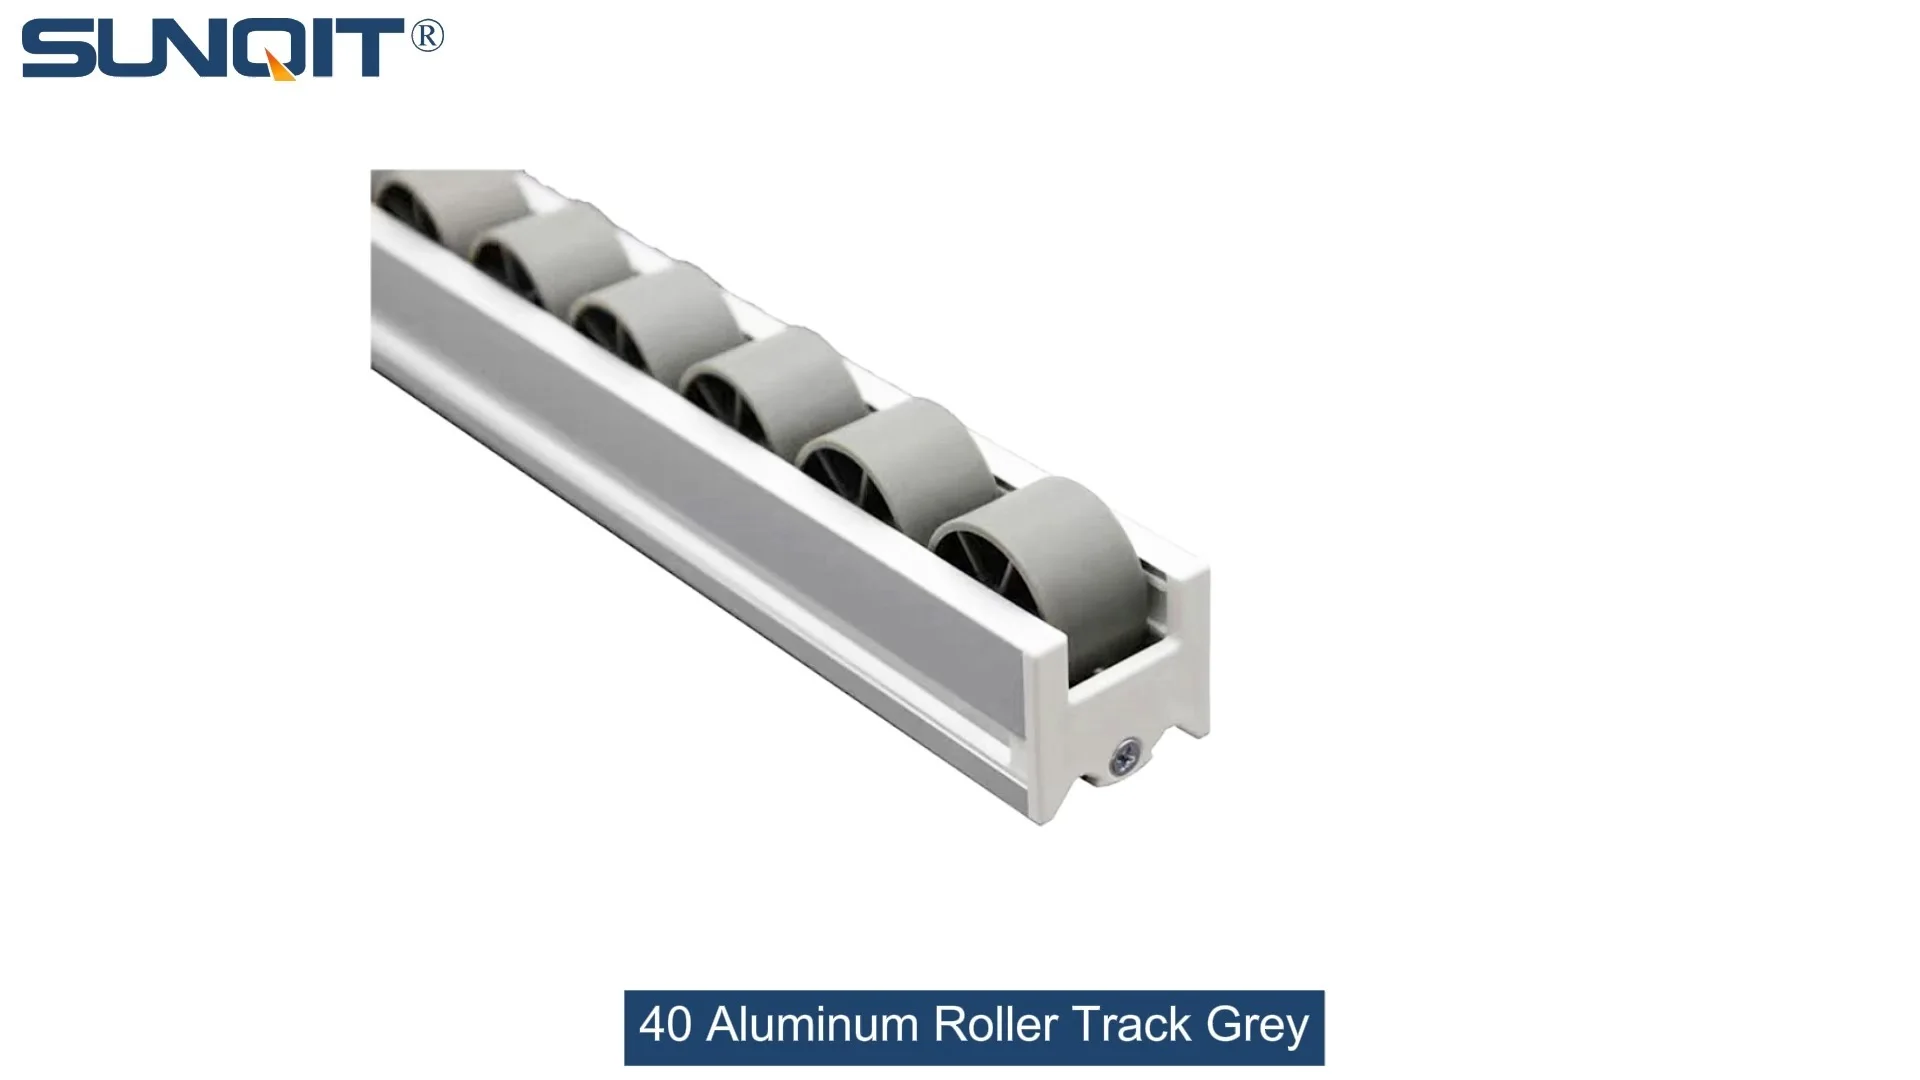
40 Aluminum Roller Track Grey
Durable and smooth-running modular roller rails. The system is fully assembled. The roller rail profile contains plastic rollers mounted on steel axles. Aluminum frame with plastic wheel make it anti corrosion,and material convey more smooth.
Introduction: The Backbone of Smooth Workflows
In the fast-paced world of manufacturing, warehousing, and assembly lines, efficiency isn't just a goal—it's the lifeline of operations. At the heart of many of these efficient setups lies the 40 Aluminum Roller Track Grey system, a workhorse designed to move materials, components, and products with minimal friction and maximum reliability. Whether you're feeding parts to an assembly station, sorting packages in a warehouse, or streamlining inventory movement, this roller track system is often the unsung hero keeping things moving.
But even the most dependable systems can hit snags. A jammed roller, a misaligned track, or a squeaky component might seem minor at first, but in a busy environment, these issues can snowball into delays, frustrated teams, and missed deadlines. That's why understanding how to troubleshoot common problems with your 40 Aluminum Roller Track Grey system isn't just a skill—it's an essential part of keeping your workflow running like a well-oiled machine. In this guide, we'll walk through the most frequent issues operators face, break down their root causes, and provide step-by-step solutions to get your system back on track.
Understanding Your 40 Aluminum Roller Track Grey System
Before diving into troubleshooting, let's take a moment to familiarize ourselves with the basics. The 40 Aluminum Roller Track Grey system is built around a lightweight yet durable aluminum frame, designed to support rollers that glide materials along a path. It's commonly paired with aluminum profile accessories—like brackets, guides, and mounts—that secure the track to workbenches, racks, or mobile units. One key component you'll often encounter is the roller track placon mount for aluminum profile flat, a small but critical part that anchors the track to flat aluminum profiles, ensuring stability even under heavy loads.
These systems are prized for their versatility: they can be configured in straight lines, curves, or multi-level setups, and they work seamlessly with everything from small electronic components to heavier boxes. But their complexity—with moving parts, joints, and mounting hardware—means there are several points where things can go wrong. Let's start with the most common culprit: roller jamming.

Issue #1: Roller Jamming or Sluggish Movement
Few things disrupt a workflow faster than a roller that suddenly stops rotating or moves sluggishly. You might notice materials getting stuck mid-track, requiring manual intervention, or items tipping over because they're not moving smoothly. This issue is not only frustrating but can also damage delicate products or create bottlenecks in your process.
Common Causes
Debris Buildup: Over time, dust, dirt, and small particles (like metal shavings in a manufacturing plant or packaging fragments in a warehouse) can accumulate in the track's grooves or around the roller axles. This debris acts like sand in a gearbox, slowing movement and eventually causing jams.
Misaligned Rollers: Rollers are designed to sit evenly in their tracks, with their axles parallel to ensure smooth rotation. If a roller shifts out of alignment—due to loose mounting hardware or accidental impact—it can rub against the track walls, creating friction and jamming.
Worn Bearings: Most rollers in these systems use small bearings to reduce friction. Over time, these bearings can wear out, become dry, or even rust (in humid environments), causing the roller to seize up.
Damaged Roller Surfaces: If a roller is cracked, chipped, or has uneven wear (common with heavy or sharp-edged loads), it may catch on materials or the track itself, leading to jamming.
Troubleshooting Steps
Step 1: Inspect and Clean the Track: Start by powering down the system (if motorized) and removing any materials from the track. Use a flashlight to check for debris in the roller grooves and around the axles. A small brush or compressed air can effectively dislodge dust and particles—avoid using water, as it can cause rust on metal components.
Step 2: Check Roller Alignment: Look at the rollers from the side—they should all sit at the same height and angle. If one is tilted or sitting higher/lower than others, check the mounting brackets. Tighten any loose screws or bolts, paying special attention to the roller track placon mount for aluminum profile flat, which often secures the track to the underlying structure. If a roller is bent, it will need to be replaced.
Step 3: Test Roller Bearings: Spin each roller by hand. It should rotate freely with minimal resistance. If a roller feels stiff or makes a grinding noise, the bearings are likely worn. Remove the roller (you may need a screwdriver or wrench, depending on the model), and inspect the bearings. If they're dry, apply a small amount of lubricant (avoid heavy oils—use a light machine oil or silicone spray). If they're rusted or cracked, replace the roller entirely.
Step 4: Inspect Roller Surfaces: Run your finger along the roller surface. If you feel cracks, chips, or uneven wear, replace the roller. Even minor damage can cause jams, especially with small or irregularly shaped items.

Issue #2: Excessive Noise During Operation
A quiet roller track system is a sign of smooth operation. But if your 40 Aluminum Roller Track Grey system starts making loud squeaks, rattles, or grinding sounds, it's more than just a nuisance—it's a warning sign that something is wrong. Excessive noise can disrupt communication on the factory floor, indicate premature wear, and even lead to worker fatigue over time.
Common Causes
Dry or Worn Bearings: As with jamming, dry or worn bearings are a frequent cause of noise. When bearings lack lubrication, metal parts rub against each other, creating squeaking or grinding sounds.
Misaligned Tracks: If the track sections aren't perfectly aligned (e.g., one section is slightly higher than the next), materials will bump or scrape as they transition, causing loud thuds or rattles.
Loose Mounting Hardware: Over time, the bolts, nuts, or brackets that secure the track to its base (like the roller track placon mount for aluminum profile flat) can loosen due to vibration. This causes the track to shift, leading to rattling or clanking as rollers move over unstable sections.
Damaged Plastic Components: Many systems use plastic roller track guide rail grey to guide materials and reduce friction. If these guides are cracked or chipped, they can catch on materials or rollers, creating scraping noises.
Troubleshooting Steps
Step 1: Isolate the Noise Source: Walk along the track while it's running (safely, keeping hands and tools clear) to pinpoint where the noise is coming from. Is it a single roller, a joint between track sections, or the entire length?
Step 2: Lubricate Bearings: If the noise is coming from individual rollers, start by lubricating the bearings. Use a precision oiler to apply a drop of light machine oil to each bearing. Avoid over-lubricating, as excess oil can attract more debris.
Step 3: Check Track Alignment: Use a level to ensure the track is even along its length. If sections are misaligned, loosen the mounting hardware (including the roller track placon mount for aluminum profile flat), adjust the track until it's level, and retighten the bolts. For curved tracks, ensure the radius is consistent—sharp bends can cause materials to scrape.
Step 4: Tighten Loose Hardware: Go through all mounting points, including brackets, joints, and placon mounts. Use a torque wrench to ensure bolts are tightened to the manufacturer's specifications (over-tightening can strip threads, so be careful!). Pay special attention to areas near motors or high-traffic sections, as these vibrate more and loosen faster.
Step 5: Inspect Plastic Guides: Check the plastic roller track guide rail grey for cracks, chips, or warping. If damaged, replace them—these guides are inexpensive and easy to swap out, and doing so can eliminate scraping noises immediately.

Issue #3: System Instability or Wobbling
A stable track system is essential for safe operation—wobbling or shifting can cause materials to fall, damage the track itself, or even lead to injury. You might notice the track swaying when materials pass through, or the entire setup moving slightly on its base. This is particularly common with mobile systems (those mounted on carts with caster wheels) but can also affect fixed installations.
Common Causes
Uneven or Worn Caster Wheels: If your track is mounted on a mobile cart, uneven or worn caster wheels are a likely culprit. Caster wheels with flat spots or inconsistent height will cause the entire system to wobble as it moves.
Loose or Damaged Mounting Brackets: The brackets that attach the track to the workbench or cart (including aluminum profile accessories like angle codes or gussets) can loosen or bend, reducing stability.
Overloading: Every track system has a weight limit. If you're consistently moving items heavier than the system's capacity, it can cause the frame to flex or the mounting points to fail, leading to instability.
Uneven Flooring: Even fixed systems can wobble if they're installed on uneven floors. This is common in older facilities where concrete slabs have settled or cracked.
Troubleshooting Steps
Step 1: Check Caster Wheels (if applicable): Inspect caster wheels for wear, flat spots, or debris stuck in the tread. replace any damaged wheels, and ensure all wheels are the same size and type. If the cart wobbles even when stationary, adjust the leveling feet (if equipped) to balance the load.
Step 2: Reinforce Mounting Brackets: Inspect all aluminum profile accessories, including brackets, angle codes, and placon mounts. Tighten loose bolts, and replace any bent or cracked brackets. For added stability, consider adding gussets (triangular support brackets) at joints or high-stress areas.
Step 3: Verify Weight Limits: Check the manufacturer's specifications for your track system's weight capacity. If you're overloading it, redistribute materials or invest in a heavier-duty track. Remember that weight limits apply to both individual rollers and the system as a whole.
Step 4: Level the Base: For fixed systems, use shims under the base (e.g., under the workbench legs) to level the track. For mobile systems, avoid using them on uneven floors—if that's unavoidable, consider adding locking caster wheels to stabilize the cart during use.
Preventive Maintenance: Keeping Your System Running Smoothly
The best way to avoid troubleshooting is to prevent issues from happening in the first place. A little regular maintenance can extend the life of your 40 Aluminum Roller Track Grey system and keep it operating at peak efficiency. Here's a quick checklist to follow:
- Daily Checks: Visually inspect the track for debris, loose hardware, or damaged rollers. Wipe down plastic guides with a dry cloth to remove dust.
- Weekly Maintenance: Lubricate roller bearings with light machine oil. Tighten any loose bolts or mounting hardware (paying attention to roller track placon mount for aluminum profile flat and aluminum profile accessories).
- Monthly Inspections: Check roller alignment and track levelness. Inspect caster wheels (if applicable) for wear and replace as needed. Test weight capacity with a sample load to ensure stability.
- Quarterly Deep Clean: Remove all rollers, clean the track thoroughly with compressed air and a brush, and inspect bearings for rust or damage. replace any worn components (rollers, guides, or brackets) before they fail.
Troubleshooting Quick Reference Table
| Issue | Symptoms | Common Causes | Solutions |
|---|---|---|---|
| Roller Jamming | Rollers stop rotating; materials get stuck | Debris in track, misaligned rollers, worn bearings | Clean track, realign rollers, lubricate/replace bearings |
| Excessive Noise | Squeaking, grinding, or rattling sounds | Dry bearings, misaligned tracks, loose hardware | Lubricate bearings, align tracks, tighten hardware |
| System Instability | Track wobbles; materials fall or shift | Worn caster wheels, loose brackets, overloading | replace caster wheels, tighten brackets, reduce load |
| Uneven Material Flow | Materials speed up/slow down unexpectedly | Damaged rollers, uneven track, worn guides | replace damaged rollers, level track, swap out guides |
Conclusion: Your System, Your Workflow, Your Success
Your 40 Aluminum Roller Track Grey system is more than just a piece of equipment—it's a critical part of your team's ability to work efficiently, safely, and productively. By understanding common issues like roller jamming, noise, and instability, and knowing how to troubleshoot them quickly, you can minimize downtime, reduce frustration, and keep your operations moving forward.
Remember, the key to long-term success is proactive care: regular maintenance, thorough inspections, and prompt replacement of worn parts (like roller track placon mount for aluminum profile flat or aluminum profile accessories) will keep your system running smoothly for years to come. And when in doubt, don't hesitate to consult the manufacturer's manual or reach out to a trusted supplier—they can provide guidance tailored to your specific setup.
With the right knowledge and a little elbow grease, you'll turn troubleshooting from a headache into a quick, routine task—one that ensures your roller track system remains the reliable backbone of your workflow.