- Company Articles
- Products and Technology
- Installation And Maintenance
- Troubleshooting Common Issues with Anti-Slip Adjustable Leveling Feet

Troubleshooting Common Issues with Anti-Slip Adjustable Leveling Feet
Related Product
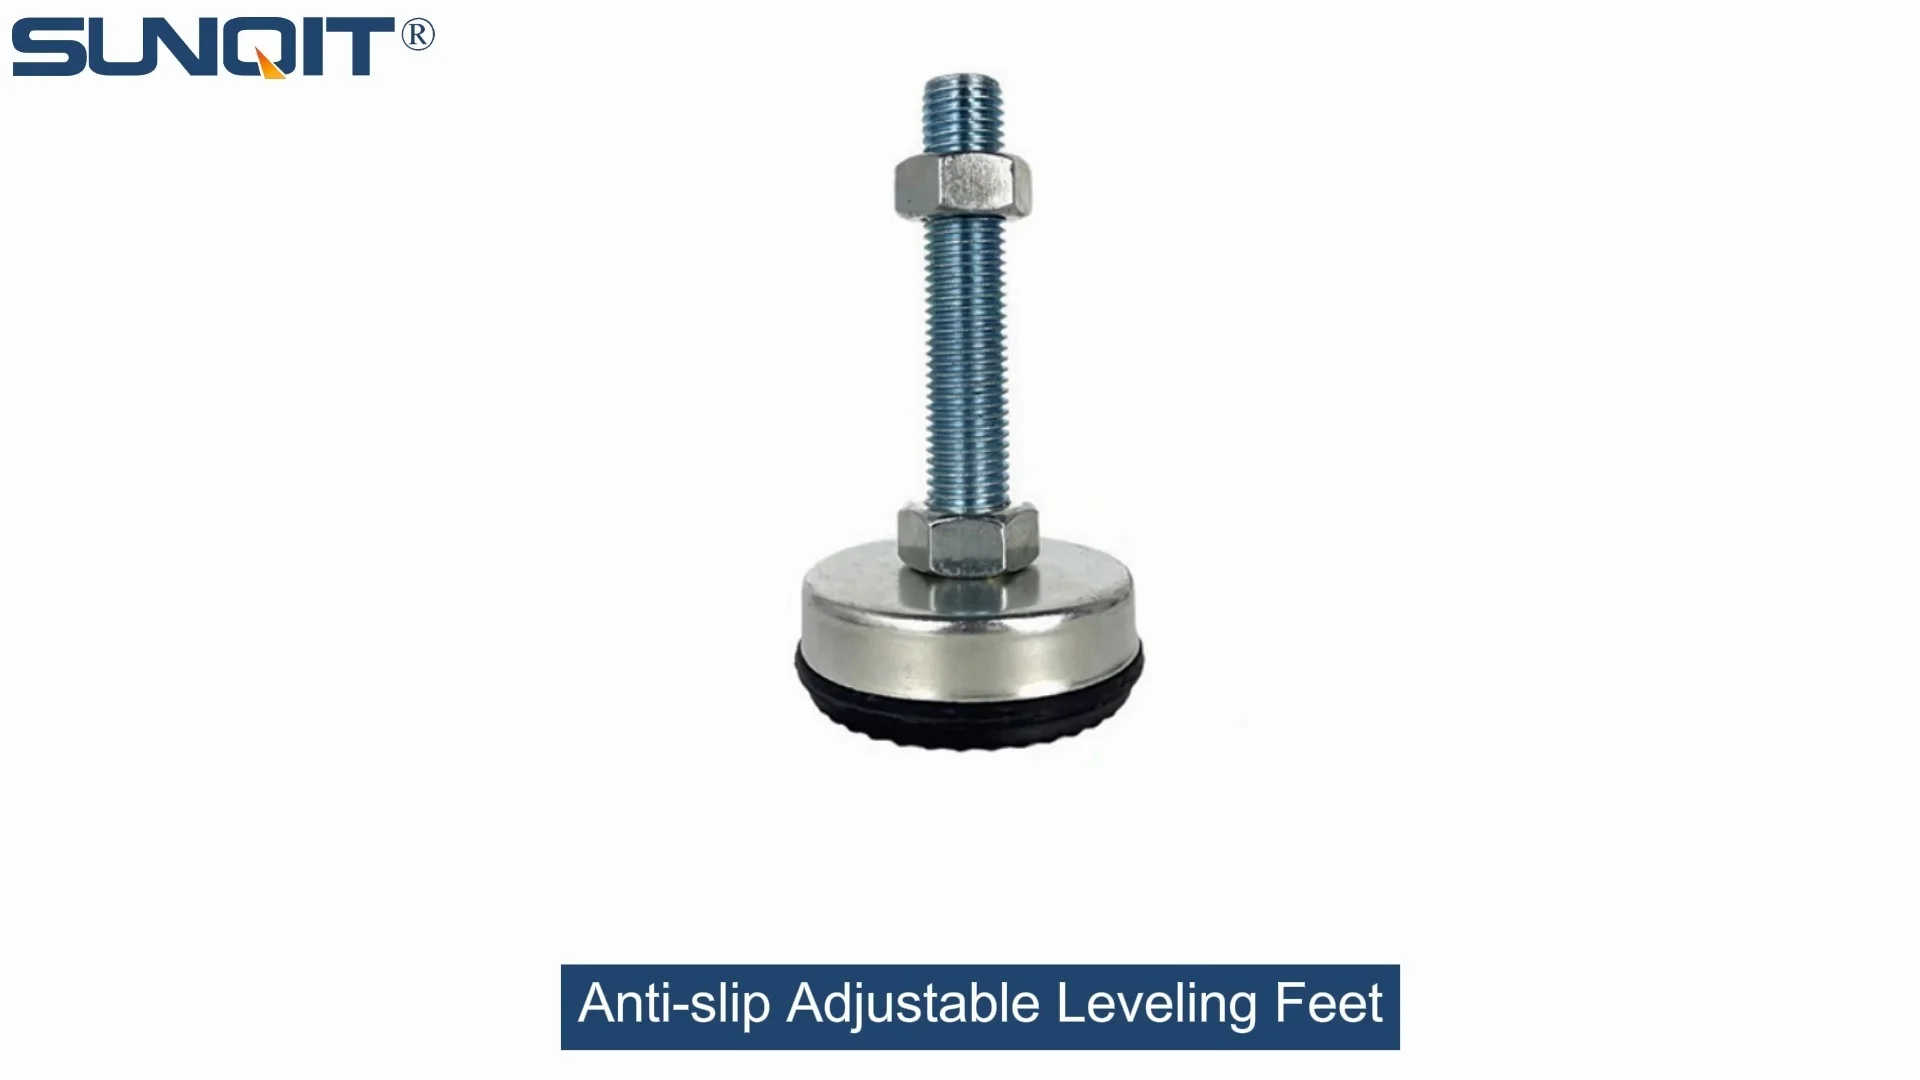
Anti-slip Adjustable Leveling Feet
Anti-slip Adjustable Leveling Feet are designed to keep machines level when placed on uneven or sloped ground, the rubber base will prevent product slip during work.
Walk into any busy manufacturing facility, and you'll likely spot workbenches lined with tools, components, and ongoing projects. But what happens when that essential workbench starts to wobble mid-assembly? Or when tools slide off because the surface isn't level? Chances are, the anti-slip adjustable leveling feet – those small but mighty components keeping everything stable – might be crying out for attention. These unassuming parts play a critical role in maintaining balance, preventing slippage, and ensuring safety in workspaces, whether they're bolted to a basic aluminum tube frame or integrated into a complex aluminum profile workstation. In this guide, we'll break down the most common problems with anti-slip adjustable leveling feet, why they happen, and how to fix them – so you can get back to smooth, stable operations.
Understanding Anti-Slip Adjustable Leveling Feet: More Than Just "Feet"
Before diving into troubleshooting, let's clarify what these components actually do. Anti-slip adjustable leveling feet are designed to compensate for uneven floors, stabilize equipment like workbenches or material racks, and prevent surfaces from sliding. They typically consist of a threaded rod, a base (often with a rubber or plastic anti-slip pad), and a locking nut to secure the height once adjusted. When paired with structures like aluminum profile workbenches or stainless steel pipe series frames, they become the unsung heroes of workplace efficiency. But like any hardworking tool, they're prone to wear, misuse, and environmental damage – and that's when problems start.
Common Issues and How to Fix Them
1. Wobbling or Instability: When Your Workbench Feels Like a rocking Boat
One of the most frustrating issues is a workbench that won't stay steady. You're tightening a bolt, and suddenly the whole surface shifts. Not only does this slow down work, but it also risks damaging components or causing accidents. What's behind this wobble?
Possible Causes:
- Uneven Floor Surfaces: Concrete floors in older facilities often have dips or bumps. Even new floors can settle over time, creating inconsistencies that leveling feet struggle to bridge.
- Loose Threads: The locking nut that secures the leveling foot's height might have vibrated loose from daily use, allowing the foot to twist or sink.
- Worn or Damaged Anti-Slip Pads: If the rubber pad on the base is cracked, flattened, or missing, the foot can't grip the floor properly, leading to slippage and instability.
- Mismatched Foot Heights: If someone adjusted one foot without checking the others, you might end up with uneven height settings across the workbench's legs.
Troubleshooting Steps:
- Check the Floor: Place a spirit level on the workbench surface to see if it's level from side to side and front to back. If not, the floor might be the culprit. Mark the low spots with tape to target adjustments.
- Tighten Locking Nuts: Grab a wrench and gently tighten the locking nut on each leveling foot. Start with the wobbliest corner, then check adjacent feet to ensure they're secure. Avoid over-tightening, as this can strip threads.
- Inspect Anti-Slip Pads: Flip the workbench (if possible) or crawl under to examine the pads. If they're cracked, hard, or missing, replace them immediately. Look for pads made of high-friction rubber – these work best on concrete or tile floors.
- Reset Heights: Loosen all locking nuts, adjust each foot so the spirit level reads flat, then retighten the nuts. For workbenches with aluminum profile legs, ensure the feet are threaded into the leg sockets fully to avoid wobble at the connection point.
2. Slipping Tools and Components: When "Anti-Slip" Doesn't Deliver
You've leveled the workbench, but tools still slide off the surface. Or worse, a delicate circuit board for an ESD workstation shifts mid-solder, ruining hours of work. If the anti-slip feature isn't working, what's wrong?
Possible Causes:
- Dirty or Greasy Pads: Oil, coolant, or dust can coat the anti-slip pads, turning them into smooth, slippery surfaces. In facilities with frequent spills, this is a common issue.
- Wrong Pad Material for the Environment: Standard rubber pads might not grip well on oily floors. Similarly, hard plastic pads can slide on polished concrete.
- Overloading the Workbench: If the workbench is carrying more weight than its legs (and leveling feet) can handle, the feet might compress or sink, tilting the surface and causing items to slide.
- ESD Workbench Specifics: For ESD workstations, conductive or static-dissipative pads are required. If these pads are worn, they lose both anti-slip and ESD properties.
Troubleshooting Steps:
- Clean the Pads: Wipe the anti-slip pads with a degreaser (like isopropyl alcohol) to remove oil, dust, or grime. For stubborn buildup, use a soft brush to scrub the pad's texture back to life.
- Upgrade to Specialty Pads: If your facility deals with oils or coolants, switch to nitrile rubber pads – they resist chemicals and maintain grip better than standard rubber. For ESD workstations, opt for conductive rubber pads that both prevent slipping and dissipate static.
- Check Weight Limits: Refer to your workbench's manual to confirm its load capacity. If you're regularly exceeding it, consider adding extra legs or upgrading to a heavy-duty model with reinforced leveling feet (look for ones labeled "heavy-duty split foot seat" for added stability).
- Add Side Rails: For extra security, install aluminum side guards along the workbench edges. This prevents items from sliding off even if the surface has a slight tilt – a simple fix that works wonders in high-traffic areas.
3. Stuck or Jammed Height Adjustment: When You Can't Raise or Lower the Foot
You notice the workbench is uneven, so you reach down to adjust a leveling foot – but it won't budge. The thread feels stuck, or the foot spins without changing height. This is a common issue in humid or dusty environments, but it's fixable with a little patience.
Possible Causes:
- Rust or Corrosion: If the threaded rod is made of steel and exposed to moisture (e.g., in a workshop with poor ventilation), rust can build up between the threads, jamming the mechanism.
- Dust and Debris: Sawdust, metal shavings, or dirt can get trapped in the threads, acting like sandpaper and making adjustment difficult.
- Misaligned Threads: Forcing the foot to turn when it's at an angle can cross-thread the rod, bending or damaging the threads and preventing smooth movement.
- Frozen Locking Nut: The locking nut might have seized to the rod, especially if it hasn't been adjusted in months. This is common with workbenches that stay in one spot for years.
Troubleshooting Steps:
- Clean and Lubricate the Threads: Use a wire brush to gently scrub away rust or debris from the threaded rod. Then apply a penetrating oil (like WD-40) and let it sit for 10–15 minutes. Wipe away excess oil, then try turning the foot again – the lubricant should loosen stuck threads.
- Free a Frozen Locking Nut: If the nut is stuck, tap it lightly with a hammer (wrapping the nut in a cloth to avoid damage) to break up corrosion. Then use a wrench with a longer handle for extra leverage, turning slowly to avoid stripping threads.
- Check for Cross-Threading: If the foot spins but doesn't move up or down, look at the threads. Are they bent or misaligned? If so, the rod might need replacement. For aluminum profile legs, check if the internal threads in the leg are damaged – a common issue if the foot was over-tightened.
- Prevent Future Jams: After adjusting, apply a thin layer of anti-corrosion lubricant (like silicone spray) to the threads. This repels moisture and dust, keeping adjustments smooth for longer.
4. Premature Wear: When Leveling Feet Fail Too Soon
You replaced the leveling feet six months ago, and already they're showing signs of damage: cracked pads, bent rods, or stripped threads. This isn't just frustrating – it's costly. Why are they wearing out so fast?
Possible Causes:
- Overloading: Even if you're under the workbench's total weight limit, concentrating heavy loads (like a 50kg toolbox) on one corner can strain the leveling foot, bending the rod or crushing the pad.
- Poor-Quality Materials: Cheap leveling feet often use thin steel rods or low-grade rubber pads that break down quickly under industrial use. This is common with generic "lean pipe and accessories" kits that cut corners on components.
- Chemical Exposure: If your workspace uses harsh cleaners, solvents, or coolants, these can degrade rubber pads or corrode metal parts over time.
- Frequent Movement: Workbenches on casters (part of caster and accessories setups) might have leveling feet that get dragged or kicked when moving, damaging the pads or bending the rods.
Troubleshooting Steps:
- Upgrade to Heavy-Duty Models: Invest in leveling feet with thick steel rods (at least 10mm diameter), reinforced plastic or metal bases, and industrial-grade rubber pads. Look for suppliers that specialize in "lean pipe supplier" or "aluminum profile accessories" – they often carry durable options designed for industrial use.
- Distribute Weight Evenly: Train your team to place heavy items in the center of the workbench, not on the edges. Use dividers or bins to spread out tools and components.
- Protect from Chemicals: If solvents are unavoidable, choose leveling feet with chemical-resistant pads (e.g., polyurethane instead of rubber) or add a protective boot over the pad to shield it.
- Handle with Care During Movement: If your workbench has casters, always retract the leveling feet fully before moving. Avoid dragging the bench – use the casters to roll it smoothly, and lower the feet gently once in place.
Quick Reference: Common Issues, Causes, and Fixes
| Issue | Common Causes | Quick Fix |
|---|---|---|
| Wobbling workbench | Loose locking nuts, uneven floors, worn pads | Tighten nuts, adjust heights with a spirit level, replace pads |
| Tools sliding off | Dirty pads, wrong pad material, overloading | Clean pads, upgrade to high-friction rubber, add side rails |
| Stuck adjustment | Rust, debris in threads, frozen locking nut | Clean threads, apply lubricant, tap nut gently to loosen |
| Premature wear | Overloading, poor materials, chemical exposure | Upgrade to heavy-duty feet, distribute weight, use protective covers |

Choosing the Right Anti-Slip Adjustable Leveling Feet for Your Workspace
Prevention is better than cure. When selecting new leveling feet, keep these factors in mind to avoid future issues:
- Load Capacity: Check the maximum weight each foot can support (usually listed in kg). Aim for feet that handle 1.5x your typical load to account for occasional heavy items.
- Floor Type: For concrete, rubber pads work best. For tile or smooth floors, choose pads with a textured surface or suction cups (like the suction cup anti-slip foot adjuster). For oily environments, go with nitrile or polyurethane.
- Adjustment Range: Measure the worst-case floor unevenness in your workspace. Choose feet with an adjustment range (e.g., 30–80mm) that can bridge those gaps.
- Material Compatibility: If your workbench uses aluminum profile, ensure the leveling feet have compatible threads (most aluminum legs use M10 or M12 threads). For stainless steel pipe series frames, look for corrosion-resistant feet to match the frame's durability.

Maintenance Tips to Extend Lifespan
With regular care, your anti-slip adjustable leveling feet can last for years. Here's a simple maintenance routine to follow:
- Weekly Inspection: Quick check for loose nuts, cracked pads, or debris in threads. Tighten nuts and wipe pads clean with a dry cloth.
- Monthly Lubrication: Apply a light coat of silicone lubricant to the threads to prevent rust and keep adjustments smooth.
- Quarterly Deep Clean: Remove the feet (if possible) to scrub threads and pads with a brush and mild detergent. replace any worn pads or damaged parts.
- Annual Replacement Check: Even with good maintenance, pads and threads wear out. Plan to replace leveling feet every 1–2 years in high-use areas.

Conclusion: Small Parts, Big Impact
Anti-slip adjustable leveling feet might seem like afterthoughts compared to flashy machinery or high-tech tools, but they're the backbone of a stable, efficient workspace. From keeping a workbench level during delicate assembly to preventing costly slips and falls, these small components play a huge role in daily operations. By understanding common issues, troubleshooting proactively, and choosing the right feet for your needs, you can avoid downtime, reduce costs, and keep your team working safely. After all, in manufacturing, stability isn't just a nicety – it's the foundation of productivity.