- Company Articles
- Products and Technology
- Installation And Maintenance
- Troubleshooting Common Issues with Duplex Aluminum Pipe Joints

Troubleshooting Common Issues with Duplex Aluminum Pipe Joints
Related Product
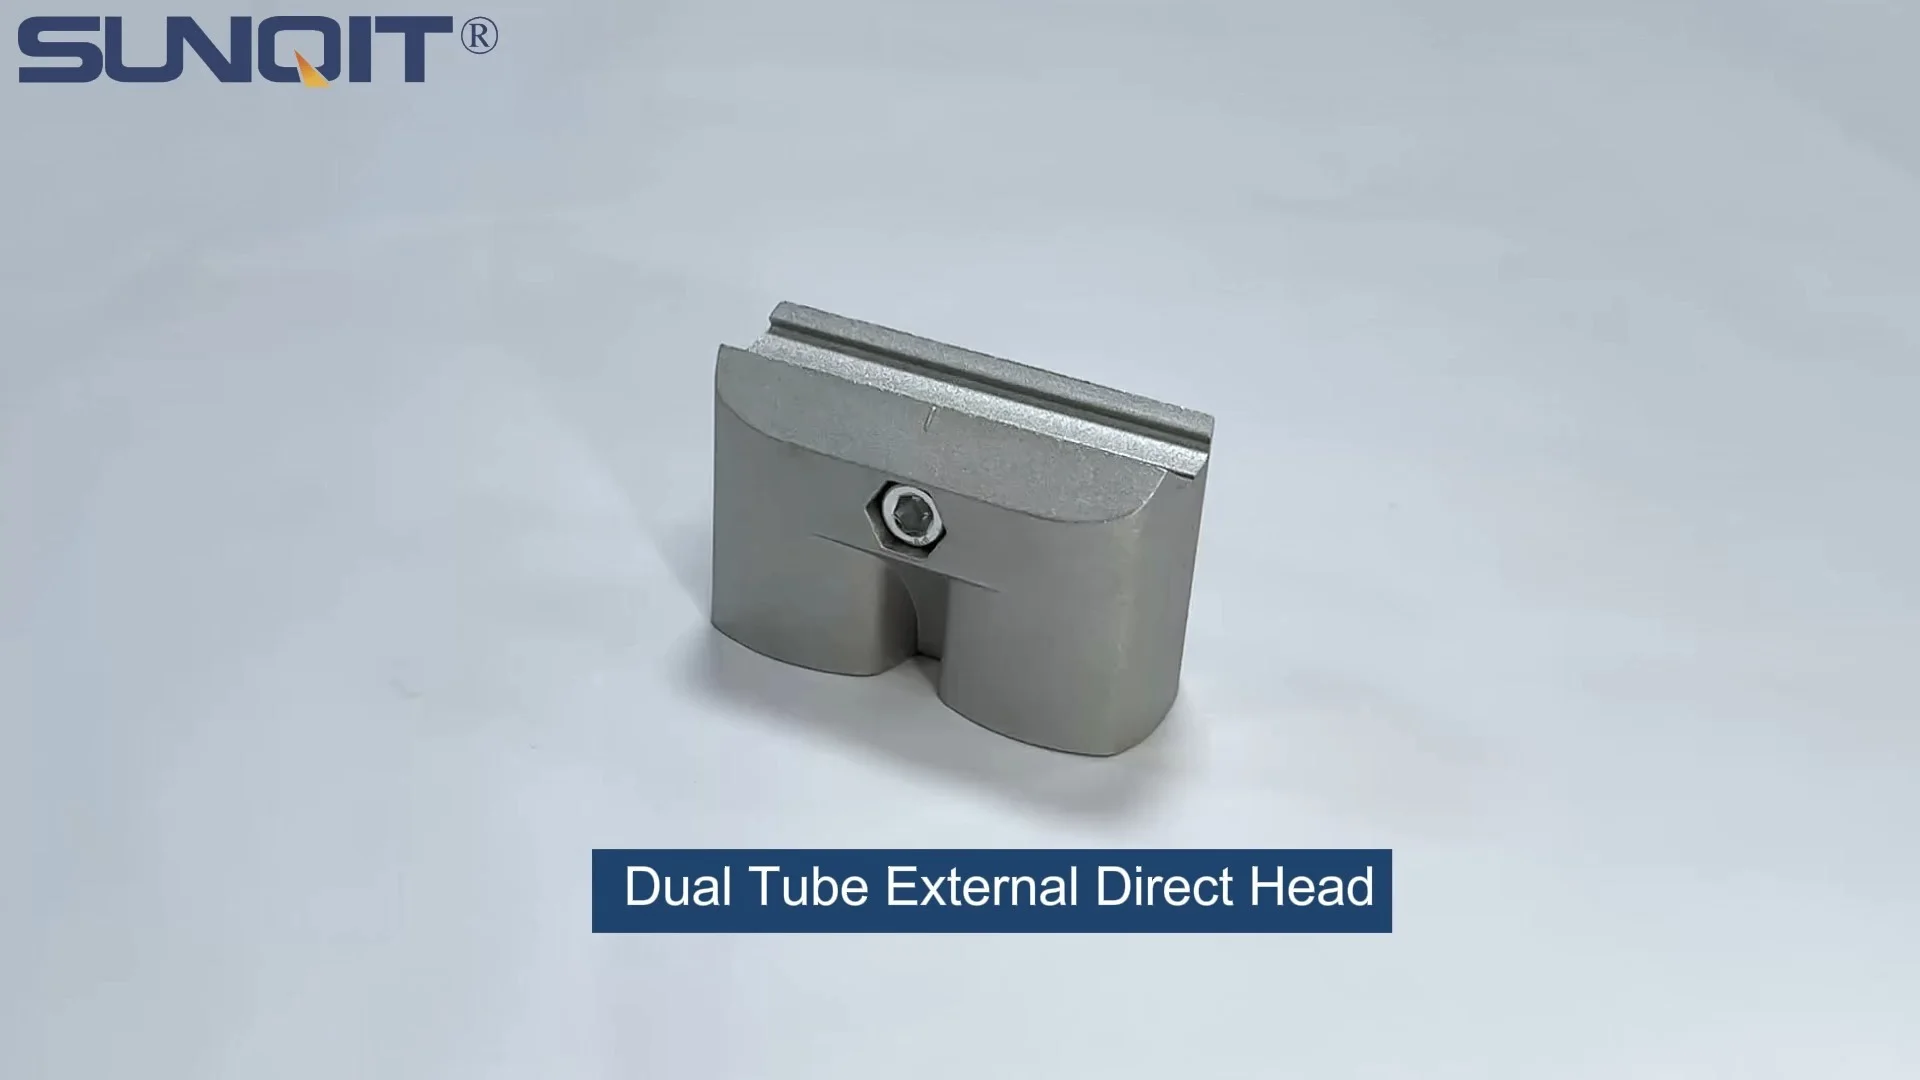
Duplex Aluminum Pipe Joint
Duplex Aluminum pipe joint used for one pcs 28pcs aluminum pipe and one pcs of 28mm duplex pipe connection in straight angle.
In the world of lean manufacturing and modular workspace design, duplex aluminum pipe joints are the unsung heroes that hold everything together. These unassuming components play a critical role in (building) sturdy, flexible structures—from workbenches and material racks to conveyors and turnover trolleys. Whether you're setting up a new production line or maintaining an existing lean pipe system, encountering issues with these joints can bring operations to a halt, compromise safety, or reduce efficiency. In this guide, we'll walk through the most common problems with duplex aluminum pipe joints, why they happen, and how to fix them—so you can keep your workspace running smoothly.
Understanding Duplex Aluminum Pipe Joints
Before diving into troubleshooting, let's clarify what makes duplex aluminum pipe joints unique. Unlike standard single-piece joints, duplex joints are designed with dual locking mechanisms—typically a combination of threaded components and friction-based grips—to create a stronger, more stable connection between aluminum pipes. They're engineered to work seamlessly with aluminum pipe accessories, such as brackets, clamps, and end caps, making them a cornerstone of modular systems. Their popularity stems from their versatility: they can be disassembled, reconfigured, and reused, aligning perfectly with the principles of lean management that prioritize adaptability and waste reduction.
But even the most well-designed components can run into issues. Let's explore the top problems you might face and how to address them.
1. Loose Connections: The Silent Saboteur of Stability
One of the most frequent complaints with duplex aluminum pipe joints is unexpected looseness, which can turn a rigid workbench into a wobbly hazard or a conveyor frame into a squeaky nuisance. If you've noticed your structure shifting, creaking, or even leaning to one side, loose joints are likely the culprit.
Symptoms to Watch For
- Visible gaps between the joint and the pipe
- Squeaking or rattling noises when the structure is moved or loaded
- Wobbling or tilting, especially under weight (e.g., a workbench that rocks when you lean on it)
- Accessories like shelves or roller tracks shifting out of alignment
Root Causes
Improper Tightening During Assembly: Duplex joints require precise torque to secure the dual locking mechanisms. Over-tightening can strip threads or warp the joint, while under-tightening leaves room for movement. Many users make the mistake of hand-tightening without using a torque wrench, leading to inconsistent results.
Worn or Damaged Threads: Repeated assembly and disassembly (a common practice in lean environments) can wear down the threads on the joint's internal components. Corrosion or debris in the threads can also prevent a snug fit.
Mismatched Pipe and Joint Sizes: Using a joint designed for a 20mm pipe with a 25mm aluminum profile, for example, will never create a tight connection. Even small size discrepancies can lead to looseness over time.
Troubleshooting Steps
- Inspect the Joint: Remove the joint from the pipe and check for stripped threads, cracks, or deformation. If the threads look worn or the joint body is bent, it's time to replace it.
- Clean the Threads: Use a small brush or compressed air to remove dirt, dust, or corrosion from both the joint and the pipe. Even tiny particles can prevent proper seating.
- Re-Tighten with Precision: Reattach the joint and use a torque wrench to tighten it to the manufacturer's recommended specification (typically 15–20 Nm for most duplex joints). Avoid using pliers or adjustable wrenches, which can damage the joint's finish and lead to uneven torque.
- Use Thread Locker (If Needed): For high-vibration environments (e.g., near conveyors or heavy machinery), apply a small amount of medium-strength thread locker to the joint's threads before tightening. This prevents loosening due to constant movement without making future disassembly impossible.
Pro Tip:
Mark joints with a permanent marker after tightening (e.g., a line across the joint and pipe). If the line shifts later, you'll know the joint has loosened and needs re-tightening.
Prevention: Keep Joints Secure for the Long Haul
The best way to avoid loose connections is to build good habits during assembly and maintenance:
- Follow Torque Guidelines: Always refer to the manufacturer's torque specs. Most reputable suppliers (like your trusted lean pipe supplier) will provide this information in their product manuals.
- Schedule Regular Inspections: Add joint checks to your weekly maintenance routine, especially for high-use structures like workbenches and material racks.
- replace Worn Joints Proactively: If a joint feels "soft" when tightened (i.e., it doesn't resist torque as much as new ones), replace it before it fails.

2. Misalignment During Assembly: When Straight Becomes Crooked
Imagine spending hours assembling a material rack, only to realize the shelves are tilted, or the vertical pipes lean at a slight angle. Misalignment is a frustrating issue that often stems from how duplex aluminum pipe joints interact with pipes during setup—and it can throw off your entire structure's functionality.
Symptoms to Watch For
- Pipes that don't meet at 90° or 45° angles (the joint's intended angle)
- Difficulty attaching accessories like roller tracks or workbench tops (they don't sit flush)
- Uneven weight distribution (e.g., a shelf that slopes, causing items to slide off)
- Stress cracks in joints or pipes (from forcing misaligned parts together)
Root Causes
Measuring Errors: Even a 1mm miscalculation in pipe length can lead to misalignment when combined with duplex joints, which have fixed offset distances between connection points.
Bent or Damaged Pipes: Aluminum pipes are lightweight, but they're not indestructible. A bent pipe will never align properly with a straight joint, no matter how much you adjust it.
Mismatched Joint Angles: Using a 45° joint where a 90° joint is needed (or vice versa) is an easy mistake, especially when joints look similar at a glance. This immediately throws off the structure's geometry.
Troubleshooting Steps
Fixing misalignment starts with identifying where the error occurred:
- Check Pipe Straightness: Roll the pipe on a flat surface (like a table). If it wobbles, it's bent and should be replaced. Even minor bends (less than 1°) can cause alignment issues.
- Verify Joint Angles: Use a protractor to confirm the joint's angle matches your design (e.g., 90° for vertical supports). If you mixed up angles, swap in the correct joint.
- Measure Twice, Cut Once: Re-measure pipe lengths to ensure they match your blueprint. If a pipe is too short or long, trim or replace it. Remember: duplex joints add a small length to the overall structure (the "joint offset"), so account for that in measurements.
- Use Alignment Tools: Clamp a straightedge or level to the assembled frame to check for plumb (vertical straightness) and square (90° angles). For large structures, a laser level can help spot subtle tilts.
Pro Tip:
Build "jigs" for repetitive assemblies. For example, create a square frame with fixed dimensions to use as a template when assembling workbenches. This ensures every unit is identical and aligned.
Prevention: Plan for Precision
Misalignment is often avoidable with pre-assembly planning:
- Create Detailed Blueprints: Include joint types, pipe lengths, and angles in your design. Free tools like SketchUp or even graph paper can help visualize the structure before assembly.
- Sort Joints by Angle: Before starting, separate joints by their angle (90°, 45°, etc.) and label them. This prevents grabbing the wrong one in a hurry.
- Invest in Quality Cutting Tools: A miter saw with a fine-tooth blade ensures clean, straight pipe cuts—no jagged edges that throw off alignment.

3. Corrosion and Surface Damage: Protecting Aluminum's Shine
Aluminum is naturally resistant to corrosion, thanks to its oxide layer, but duplex aluminum pipe joints (and the pipes they connect) aren't immune to damage. Exposure to moisture, chemicals, or even harsh cleaning agents can lead to unsightly and problematic surface issues.
Symptoms to Watch For
- White, powdery deposits (aluminum oxide) on the joint or pipe surface
- Pitting or small holes in the aluminum (signs of advanced corrosion)
- Discoloration (yellow, gray, or black spots)
- Flaking or peeling of the joint's finish (common in painted or anodized joints)
Root Causes
Moisture and Humidity: In damp environments (e.g., warehouses with poor ventilation or near water-based processes), aluminum can absorb moisture, leading to oxidation. This is especially true if the oxide layer is scratched or damaged.
Chemical Exposure: Cleaning agents with high pH (alkaline) or low pH (acidic) levels can eat away at aluminum's protective layer. For example, using bleach or ammonia-based cleaners on a workbench with duplex joints is a recipe for damage.
Galvanic Corrosion: This occurs when aluminum comes into contact with more noble metals (like steel) in the presence of moisture. For example, using steel screws with aluminum joints can create a "battery effect," accelerating corrosion.
Troubleshooting Steps
Addressing corrosion early is key to preventing permanent damage:
- Clean Gently: For light oxide deposits, mix equal parts water and white vinegar, apply with a soft cloth, and rub gently. Rinse thoroughly and dry immediately. Avoid abrasive pads, which scratch the surface.
- Remove Pitting: Minor pitting can be sanded with fine-grit sandpaper (400–600 grit), followed by a polish to restore the finish. For severe pitting, the joint or pipe may need replacement.
- Neutralize Chemical Residues: If the damage was caused by chemicals, neutralize the area with a mild baking soda solution (1 tablespoon per cup of water) to stop further reaction, then rinse and dry.
- Apply Protective Coating: After cleaning, apply a thin layer of clear acrylic spray or aluminum-specific wax to seal the surface and prevent future corrosion.
Prevention: Keep Aluminum Looking Like New
The best defense against corrosion is to minimize exposure to harmful elements:
- Choose the Right Finish: Opt for anodized or powder-coated duplex joints and aluminum pipes, which add an extra layer of protection against moisture and chemicals.
- Control the Environment: Use dehumidifiers in damp areas and avoid placing aluminum structures near pools of water or chemical storage.
- Use Compatible Metals: When attaching accessories, choose aluminum or stainless steel hardware (which won't cause galvanic corrosion) instead of steel.
- Clean with Care: Stick to mild, pH-neutral cleaners (like dish soap and water) for routine cleaning. Avoid abrasive or chemical-heavy products.

4. Compatibility Issues with Aluminum Pipe Accessories
Duplex aluminum pipe joints are designed to work with a wide range of aluminum pipe accessories—from roller track guide rails to caster wheels—but compatibility issues can still arise, turning a simple upgrade into a frustrating puzzle.
Symptoms to Watch For
- Accessories (e.g., brackets, clamps) that won't slide onto the pipe or fit into the joint
- Loose fits that cause accessories to wobble or fall off
- Damage to the accessory or joint (e.g., cracked brackets) when forcing parts together
Root Causes
Non-Standard Sizing: Not all aluminum pipes and joints are created equal. Some manufacturers use proprietary sizes (e.g., 28mm pipes instead of the standard 25mm), which won't work with off-the-shelf accessories.
Incorrect Accessory Type: Accessories are often designed for specific joint styles. For example, a clamp made for a single-locking joint may not fit a duplex joint with its dual mechanisms.
Low-Quality Knockoffs: Cheap, unbranded accessories may have inconsistent dimensions, even if they claim to be "standard." This is common with products from disreputable suppliers.
Troubleshooting Steps
Fixing compatibility issues starts with verifying specs:
- Check Pipe Diameter and Wall Thickness: Use calipers to measure your pipe's outer diameter and wall thickness. Compare this to the accessory's listed compatibility (e.g., "fits 25mm OD, 1.5mm wall pipes").
- Consult the Manufacturer: If you're unsure, reach out to your lean pipe supplier. Reputable suppliers will provide detailed compatibility charts for their joints and accessories.
- Test Before Bulk Purchasing: Buy one or two accessories first to test fit before ordering in bulk. This saves time and money if they don't work.
- Modify (If Safe): For minor size discrepancies (e.g., an accessory that's 0.5mm too small), you may be able to gently file or sand the accessory's opening. Avoid modifying joints, as this weakens them.
Pro Tip:
Stick to accessories from the same manufacturer as your duplex joints. Most brands design their products to work together seamlessly, reducing compatibility risks.
Prevention: Avoid Compatibility Headaches
The easiest way to avoid compatibility issues is to plan ahead:
- Buy a Complete System: When possible, purchase pipes, joints, and accessories from a single supplier. This ensures everything is designed to work together.
- Keep Spec Sheets Handy: Save product specifications (diameters, weights, materials) for your pipes and joints. Reference them when shopping for new accessories.
- Avoid Generic "One-Size-Fits-All" Claims: If an accessory says it "fits all aluminum pipes," proceed with caution. Standard sizes exist for a reason—generic products often cut corners.
5. Wear and Tear: When Joints Start to Show Their Age
Even with proper maintenance, duplex aluminum pipe joints will eventually wear out. The constant stress of supporting weight, being disassembled and reassembled, and exposure to daily use takes a toll—but recognizing the signs of wear early can prevent catastrophic failure.
Symptoms to Watch For
- Cracks in the joint body (often near the connection points)
- Deformation (e.g., the joint no longer holds its shape when tightened)
- Reduced grip strength (the pipe slides inside the joint, even when fully tightened)
- Loose internal components (rattling inside the joint when shaken)
Root Causes
Overloading: Exceeding the joint's weight capacity puts stress on its components, leading to cracks or deformation over time. For example, stacking heavy materials on a shelf supported by underrated joints is a common culprit.
Frequent Disassembly: While duplex joints are designed for reusability, repeatedly taking them apart and reassembling them wears down the threads and friction surfaces.
Impact Damage: Dropping heavy objects on the joint, bumping into the structure with forklifts, or rough handling during reconfiguration can cause micro-cracks that grow over time.
Troubleshooting Steps
Worn joints are a safety hazard—here's how to handle them:
- replace Immediately: If a joint is cracked, deformed, or has loose internal parts, stop using the structure and replace the joint. Do not attempt to repair it—aluminum is not easily weldable, and repaired joints are unreliable.
- Upgrade to Heavy-Duty Joints: If overloading was the cause, switch to heavy-duty duplex joints with higher weight capacities. Consult your supplier for options.
- Reinforce the Structure: For joints that show minor wear (e.g., reduced grip), add extra support (e.g., additional joints or brackets) to reduce stress on the worn component while waiting for replacements.
Prevention: Extend Joint Lifespan
With care, you can maximize the life of your duplex aluminum pipe joints:
- Adhere to Weight Limits: Check the manufacturer's weight ratings for joints and never exceed them. Distribute weight evenly across the structure to avoid stress points.
- Handle with Care: When disassembling, loosen joints slowly and avoid dropping them. Store spare joints in a padded container to prevent impact damage.
- Limit Reconfiguration: While modularity is a strength, excessive disassembly accelerates wear. Plan your structure's layout carefully to minimize the need for frequent changes.
Troubleshooting Summary Table
| Issue | Key Symptoms | Common Causes | Quick Fix | Prevention |
|---|---|---|---|---|
| Loose Connections | Wobbling, squeaking, shifting accessories | Improper tightening, worn threads | Re-tighten with torque wrench; replace worn joints | Follow torque specs; inspect weekly |
| Misalignment | Crooked frames, uneven shelves, accessory fit issues | Measuring errors, bent pipes, wrong joint angles | Check pipe straightness; use alignment tools | Pre-assembly blueprints; sort joints by angle |
| Corrosion | White deposits, pitting, discoloration | Moisture, chemicals, galvanic reaction | Clean with vinegar; apply anti-corrosion coating | Choose anodized finishes; avoid steel contact |
| Accessory Compatibility | Accessories won't fit or wobble | Non-standard sizes, incorrect type, knockoffs | Verify specs; test fit before bulk buying | Buy from the same supplier; check specs |
| Wear and Tear | Cracks, deformation, reduced grip | Overloading, frequent disassembly, impact | replace worn joints; reinforce with brackets | Adhere to weight limits; handle with care |
Conclusion: Keep Your Lean System Strong with Healthy Joints
Duplex aluminum pipe joints may be small, but their role in your lean pipe system is enormous. By understanding the common issues—loose connections, misalignment, corrosion, compatibility problems, and wear—and how to troubleshoot them, you can ensure your workbenches, material racks, and conveyors remain sturdy, safe, and efficient.
Remember, prevention is always better than a fix. Regular inspections, proper assembly techniques, and choosing quality components from a trusted lean pipe supplier will go a long way in keeping your joints—and your entire operation—in top shape. After all, in lean manufacturing, every component counts—and a well-maintained joint is the foundation of a well-run workspace.