- Company Articles
- Products and Technology
- Installation And Maintenance
- Troubleshooting Common Issues with Flat Swivel Castor Wheel with Brake

Troubleshooting Common Issues with Flat Swivel Castor Wheel with Brake
Related Product
Flat Swivel Castor Wheel With Brake
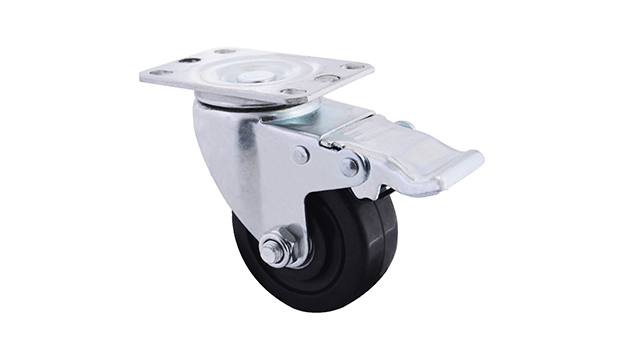
Chair Casters Ball Bearing Wheels Rubber Base with brake design. Resistant to abrasion, impact and corrosion. Heavy payload can hold 70Kgs per pcs,which can make it works at a stable and smooth status.
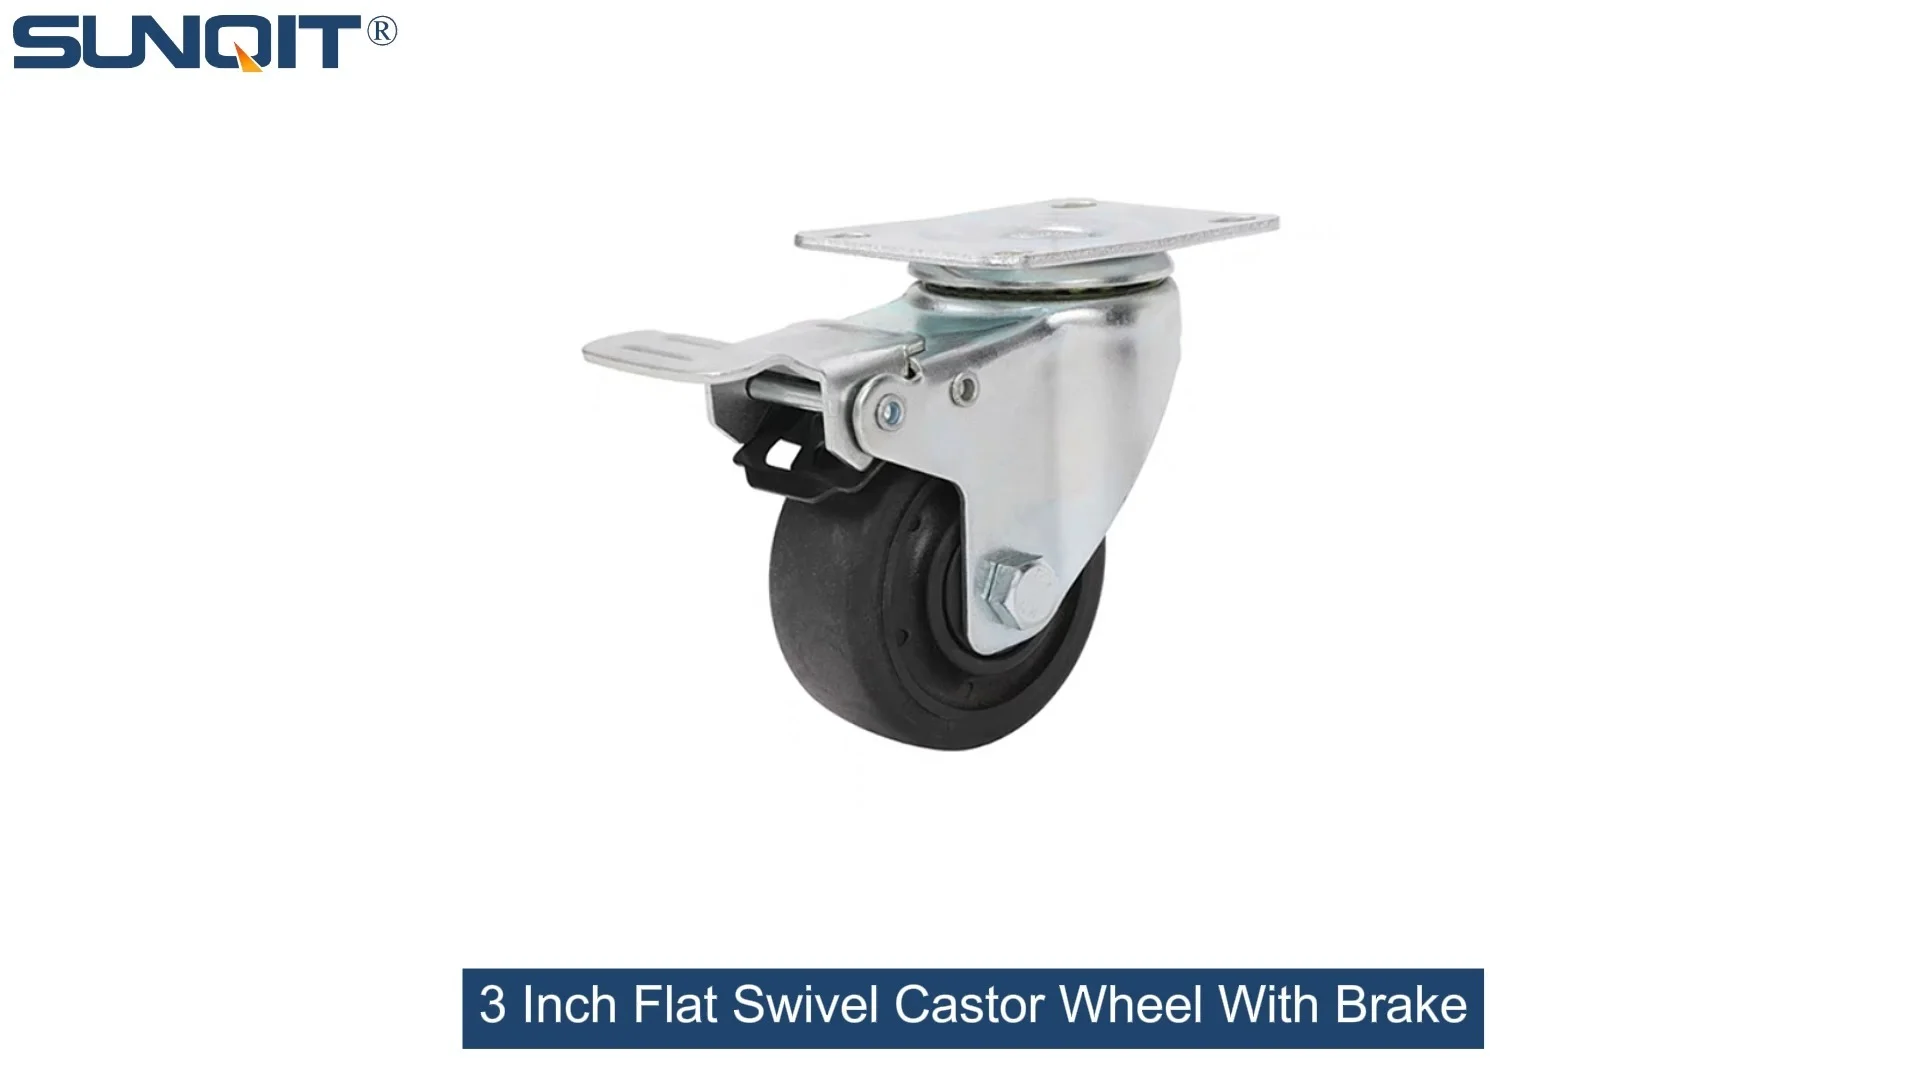
Walk into any busy workshop, manufacturing plant, or warehouse, and you'll notice a silent workhorse keeping operations moving: the flat swivel castor wheel with brake. These unassuming components are the backbone of material handling—mounted on workbenches, turnover trolleys, material racks, and even heavy-duty equipment, they turn static structures into mobile assets. But when a castor jams, a brake fails, or a wheel starts to wobble, suddenly that smooth workflow grinds to a halt. Downtime creeps in, frustration rises, and productivity takes a hit. The good news? Most common issues with flat swivel castor wheels with brakes are fixable with a little know-how, basic tools, and the right approach. In this guide, we'll walk through the most frustrating problems you might encounter, why they happen, and step-by-step solutions to get your castors rolling smoothly again. Whether you're a seasoned maintenance tech or a workshop manager trying to keep things on track, this is your go-to resource for troubleshooting—and preventing—caster headaches.
1. The Brake Refuses to Engage (or Disengage): When Safety Slips
There's a sinking feeling when you press the brake lever on your trolley and nothing happens. Or worse—you release the brake, and it stays locked, forcing you to manhandle a heavy load. The brake is the safety net of any castor, so when it fails, it's not just an annoyance; it's a hazard. Let's break down why this happens and how to fix it.
Common Causes of Brake Malfunction
Brakes on flat swivel castor wheels with brakes are surprisingly simple mechanisms, but they're prone to a few common issues:
- Debris Buildup: Factories and warehouses are dusty places. Sawdust, metal shavings, dirt, or even spilled liquids can work their way into the brake mechanism, gumming up the lever or preventing the brake pad from pressing against the wheel.
- Worn Brake Pads: Every time you engage the brake, the pad rubs against the wheel to create friction. Over months (or years) of use, that pad wears down—eventually becoming too thin to grip effectively.
- Misaligned Lever or Linkage: If the castor has been bumped, dropped, or overloaded, the brake lever or the metal linkage connecting it to the pad might bend or shift out of place. When this happens, pressing the lever doesn't translate to the pad hitting the wheel.
- Loose or Stripped Bolts: The brake assembly is held together with small bolts or screws. Vibration from daily use can loosen these over time, or if they're overtightened, the threads might strip, leaving the brake wobbly and ineffective.
Troubleshooting Steps: How to Diagnose the Problem
Start with a visual inspection. Kneel down and look closely at the brake mechanism while someone else presses and releases the lever (or do it yourself if the load is light). Here's what to check:
- Check for Gunk: Is there a layer of dust or debris around the lever, pad, or linkage? Run a finger (gently!) along the moving parts—if it comes away grimy, that's likely the culprit.
- Inspect the Brake Pad: Look at the pad itself. Is it thin, cracked, or covered in oil (which reduces friction)? If the pad is less than 1/8 inch thick, it's time for a replacement.
- Test Lever Movement: Does the lever move smoothly, or is it stiff or "sticky"? If it feels stuck, debris or misalignment is the issue. If it moves too freely (no resistance), the linkage might be broken or disconnected.
- Tighten Loose Parts: Grab a hex key or screwdriver (check the bolt heads first!) and gently tighten any visible bolts on the brake assembly. Be careful not to overtighten—stripping threads makes the problem worse.
Solutions: Fixing the Brake
Once you've identified the cause, here's how to fix it:
- Clean the Mechanism: For debris, spray a small amount of compressed air to blow out dust, then wipe the lever and linkage with a rag dampened in isopropyl alcohol (avoid oil-based cleaners—they attract more dirt). For sticky levers, a drop of silicone lubricant (not WD-40, which dries out over time) on the pivot points can help.
- replace Worn Pads: Most brake pads are replaceable—check with your caster supplier for compatible replacements. Simply remove the old pad (usually held in by a screw or clip), align the new one, and secure it. Pro tip: Keep a few spare pads in your caster accessories kit—they're cheap insurance against downtime.
- Realign or Bend the Linkage: If the lever is misaligned but not broken, gently bend the metal linkage back into place using pliers (protect the metal with a rag to avoid scratches). If it's bent beyond repair, you'll need to replace the linkage—again, a common caster accessory.
- Fix Loose or Stripped Bolts: For loose bolts, tighten them to a "snug" feel (overtightening risks stripping). For stripped threads, replace the bolt with a slightly larger size (e.g., M5 instead of M4) or use a thread repair kit if the hole is in the castor housing.
Pro Tip:
After fixing the brake, test it under load! Engage the brake, then try to push the trolley. If it moves even a little, the pad might still be misaligned or worn. Better to catch it now than during a busy shift.
2. Swivel Stiffness: When Your Castor Refuses to Turn
Flat swivel castors are designed to rotate 360 degrees, making it easy to maneuver trolleys and workbenches around tight corners. But when the swivel joint seizes up, suddenly you're wrestling with a castor that only turns halfway—or not at all. Maneuvering becomes a workout, and you might even damage the castor or the floor from the strain. What's causing this stubborn stiffness?
Why Swivel Joints Get Sticky
The swivel joint is the "neck" of the castor, connecting the wheel assembly to the mounting plate. Inside, there's usually a raceway (a circular track) with ball bearings or nylon rollers that let it spin smoothly. When that system fails, stiffness sets in:
- Dirt and Corrosion: Moisture, dust, or chemicals (like coolants or cleaning agents) can seep into the swivel joint, causing rust on metal parts or gumming up the bearings. In humid environments, this happens faster—especially if the castor isn't stainless steel or coated.
- Lack of Lubrication: Bearings and raceways need lubricant to reduce friction. Over time, lubricant dries out, gets contaminated, or flushes away, leaving metal-on-metal contact that grinds the joint to a halt.
- Overloading: Every castor has a weight rating. If you regularly push or pull a load heavier than the castor's capacity, the swivel joint takes extra strain. Over time, this bends the raceway or damages the bearings, making rotation rough.
- Bent Swivel Plate: If the castor hits a curb, a pallet, or a heavy object, the mounting plate (the part bolted to your trolley) might bend. A bent plate puts uneven pressure on the swivel joint, restricting movement.
Troubleshooting Stiff Swivels
To figure out why your castor won't swivel, start with a few simple tests:
- Spin the Wheel by Hand: Lift the trolley slightly so the castor is off the ground. Try to spin the swivel joint by hand—does it move freely, or is there resistance? If it's still stiff when unloaded, the problem is in the joint itself, not the load.
- Check for Rust or Debris: Look at the gap between the swivel joint and the mounting plate. Is there visible rust, dirt, or a white/green powdery residue (a sign of corrosion)? That's a red flag.
- Inspect the Swivel Plate: Place a straightedge (like a ruler) against the mounting plate. Does it lie flat, or does it curve upward or downward? A bent plate is often visible to the naked eye.
- Test Under Load: If the castor swivels fine unloaded but stiffens when you add weight, you're probably overloading it. Check the castor's weight rating (usually stamped on the housing) and compare it to your typical load.
Solutions: Freeing Up the Swivel
Stiff swivels are often fixable with cleaning, lubrication, or minor adjustments:
- Clean and Lubricate the Joint: For dirt or light corrosion, spray the swivel joint with a penetrating oil (like PB Blaster) and let it sit for 10 minutes. Then, manually rotate the joint back and forth to work the oil in. Wipe away excess oil, then apply a high-quality bearing grease (look for one rated for heavy loads) to the raceway. Avoid using too much grease—it attracts dirt.
- replace Bearings (If Needed): If the joint is still stiff after cleaning, the bearings might be damaged. Some castors let you pop out the old bearings and replace them with new ones (check your caster supplier for replacement parts). For sealed swivel joints, you might need to replace the entire castor—but that's a last resort.
- Straighten a Bent Swivel Plate: Use a vice or a rubber mallet to gently bend the mounting plate back into shape. Go slow—bending too hard can crack the plate. If it's badly bent, replace the plate (another common caster accessory).
- Reduce Load or Upgrade Castors: If overloading is the issue, either lighten the load or swap out the castors for a higher-weight-rated model. It's tempting to "make do" with existing castors, but overloading leads to more frequent failures (and costlier repairs down the line).
3. Wobbling or Vibrating Wheels: When the Ride Gets Shaky
You're pushing a trolley across the workshop, and instead of gliding smoothly, it feels like it's "shimmying"—the wheel wobbles from side to side, or the entire castor vibrates. Not only is this annoying, but it can damage the floor, loosen other parts of the trolley, and even cause items on the workbench to shift or fall. Wobbling is almost always a sign of misalignment or wear, but pinpointing the cause takes a little detective work.
Why Wheels Wobble
A wobbly caster wheel is rarely random. Here are the usual suspects:
- Loose Axle: The wheel is mounted on an axle, which is held in place by nuts or clips. If those nuts loosen (again, thanks to vibration), the wheel can shift side to side on the axle, causing wobble.
- Bent Axle: If the castor hits a hard object (like a steel beam or a dropped tool), the axle might bend. A bent axle means the wheel isn't centered, so it wobbles as it turns.
- Uneven or Damaged Wheel Tread: Over time, caster wheels can develop flat spots (from sitting in one place too long), cracks, or uneven wear (if the load isn't distributed evenly). A wheel with a lumpy tread will vibrate as it rolls.
- Uneven Floor or Poor Leveling: If your workshop floor has bumps, cracks, or slopes, the castor might bounce or wobble as it rolls over them. Even a small dip can throw off the wheel's path—this is where adjustable leveling feet come in handy, but if they're not set properly, the trolley might rock, amplifying the wobble.
Troubleshooting Wobble: The Wheel Test
To find the source of the wobble, try this simple test: Lift the trolley so the wobbly castor is off the ground, then spin the wheel by hand. Watch the gap between the wheel and the castor housing—if the gap widens and narrows as it spins, the axle is bent or the wheel is off-center. If the wheel spins smoothly but still wobbles when loaded, the issue is likely the floor or leveling.
You can also check the axle nuts: Grab a wrench and try to tighten them. If they turn easily, they were loose—problem solved. If they're tight but the wheel still wobbles, the axle is probably bent.
Solutions: Stabilizing the Wheel
Fixing a wobbly wheel depends on the cause, but most solutions are straightforward:
- Tighten the Axle Nuts: This is the easiest fix! Use a wrench to snug up the nuts on both sides of the wheel. Don't overtighten—you want the wheel to spin freely, not bind.
- replace a Bent Axle: If the axle is bent, remove the wheel, pull out the old axle, and insert a new one (available from caster suppliers). Make sure the new axle is the same length and diameter as the old one—too short, and the wheel won't stay in place; too long, and it will rub against the housing.
- Swap Out Damaged Wheels: If the wheel has flat spots, cracks, or uneven tread, replace it. Match the new wheel's size, tread type (rubber, polyurethane, nylon), and bearing type (ball bearings for smoothness, roller bearings for heavy loads) to the old one. Pro tip: If one wheel is worn, replace all four on the trolley—mismatched wear causes more wobble.
- Level the Floor (or the Trolley): If the floor is the culprit, use adjustable leveling feet on the trolley to compensate for dips. Turn the feet clockwise to lower them, counterclockwise to raise them, until the trolley sits flat and doesn't rock. For persistent floor issues, consider adding a thin plywood sheet under the workbench or trolley path to smooth things out.

4. Noisy Castors: When Your Wheels Squeal, Grind, or Rattle
A little noise from castors is normal—after all, they're metal and rubber parts moving against each other. But when that noise turns into a high-pitched squeal, a grinding growl, or a constant rattle, it's more than just annoying. It's a sign that something is wrong. Noisy castors can disrupt communication on the shop floor, mask other mechanical issues, and even indicate parts are wearing out faster than they should. Let's quiet things down.
Common Causes of Noisy Castors
Noise is a castor's way of yelling, "Pay attention!" Here's what it might be trying to tell you:
- Dry Bearings: The wheel's bearings need lubrication to spin smoothly. When they run dry, metal rubs against metal, creating a grinding or squeaking sound.
- Misaligned Wheels: If the wheel isn't straight on the axle (axial misalignment) or the swivel joint is off-kilter, the wheel might drag against the castor housing as it turns. This friction causes a scraping or grinding noise.
- Loose Parts: Rattling usually means something is loose—axle nuts, swivel joint bolts, or even the entire castor mounting bolts. As the castor moves, these parts vibrate against each other, creating that annoying "clatter."
- Damaged Wheel Tread: A wheel with cracks, chunks missing, or embedded debris (like a nail or a stone) will make a thumping or clicking noise as it rolls over the floor.
Troubleshooting Noise: The "Listen and Locate" Method
To find the source of the noise, push the trolley slowly and listen closely. Have a colleague help by putting their ear near the castors while you push—this can pinpoint which wheel is the culprit. Once you've identified the noisy castor:
- Spin the Wheel by Hand: If it squeaks or grinds while spinning, the bearings are dry or damaged.
- Check for Rubbing: Look for shiny metal marks on the wheel or the castor housing—this indicates the wheel is dragging against the housing (misalignment).
- Shake the Castor: Grab the wheel and wiggle it side to side. If there's play (movement) in the axle or swivel joint, loose bolts are likely the cause.
- Inspect the Tread: Run your hand over the wheel—can you feel cracks, bumps, or debris stuck in the tread? These are easy to spot and fix.
Solutions: Quieting the Noise
Most noise issues are quick fixes with basic tools:
- Lubricate the Bearings: For dry bearings, remove the wheel, clean the axle with a rag, then apply bearing grease to the inner and outer bearings. Reinstall the wheel and spin it by hand—silence should follow. For sealed bearings (no way to add grease), a few drops of silicone lubricant around the axle can help temporarily, but you'll eventually need to replace the wheel.
- Realign the Wheel: If the wheel is rubbing the housing, loosen the axle nuts, adjust the wheel so it's centered, then retighten the nuts. If the axle is bent, replace it (as we covered earlier).
- Tighten All Bolts: Go through the castor with a wrench and tighten every bolt—axle nuts, swivel joint bolts, mounting bolts. Even a 1/4-turn can eliminate rattling.
- Remove Debris or replace the Wheel: Pick out any stones or nails stuck in the tread with a screwdriver. If the tread is cracked or damaged, replace the wheel with a new one (matching size and tread type).

Troubleshooting Quick-Reference Table: Fixes at a Glance
| Problem | Common Cause | First Step to Fix | Long-Term Solution |
|---|---|---|---|
| Brake won't engage | Debris in brake mechanism | Clean with compressed air and alcohol | Keep brake area clean; check weekly for buildup |
| Swivel joint stiff | Dry or corroded bearings | Apply penetrating oil, then grease | Lubricate swivel joints monthly; store castors indoors to prevent corrosion |
| Wheel wobbles | Loose axle nuts | Tighten axle nuts with a wrench | Check nuts monthly; use thread locker on bolts for high-vibration areas |
| Squeaking/grinding noise | Dry wheel bearings | Grease bearings or replace if damaged | Establish a lubrication schedule (every 3 months for heavy use) |
| Brake sticks (won't disengage) | Misaligned brake lever | Gently bend linkage back into place | Avoid overloading; replace bent levers promptly to prevent further damage |
5. Preventive Maintenance: Keeping Castors Rolling for Years
The best way to deal with castor issues is to prevent them from happening in the first place. A little proactive maintenance goes a long way toward extending the life of your flat swivel castor wheels with brakes and keeping your workflow smooth. Here's a simple routine to follow:
Weekly Checks (5-Minute Routine)
- Inspect brakes: Engage and disengage each brake to ensure they work smoothly.
- Check for loose bolts: Tighten any axle nuts, swivel joint bolts, or mounting bolts that feel wobbly.
- Clean debris: Wipe off visible dirt or dust from wheels and brake mechanisms with a dry rag.
Monthly Maintenance (15-Minute Deep Dive)
- Lubricate: Apply grease to swivel joints and wheel bearings. Use silicone lubricant on brake levers to keep them moving freely.
- Check wheel tread: Look for wear, cracks, or embedded debris. replace wheels with more than 50% tread wear.
- Test load capacity: Ensure you're not overloading trolleys—refer to the castor's weight rating if unsure.
Quarterly Overhaul (30-Minute Tune-Up)
- replace worn parts: Swap out brake pads, bearings, or axles that show signs of wear. Keep a stock of caster accessories on hand for quick replacements.
- Check alignment: Ensure wheels are straight on axles and swivel joints rotate freely without binding.
- Level trolleys: Adjust adjustable leveling feet to ensure even weight distribution and reduce wobble on uneven floors.
Toolkit Must-Haves:
Keep these items near your workshop bench for quick fixes: hex keys, adjustable wrench, bearing grease, silicone lubricant, compressed air can, replacement brake pads, and a small wire brush (for cleaning debris).
Flat swivel castor wheels with brakes might seem like small parts, but they're the unsung heroes of your workshop's efficiency. When they fail, the whole operation feels the impact—but with the troubleshooting steps and preventive maintenance tips in this guide, you're equipped to handle the most common issues. Remember: most problems start small—loose bolts, a little dirt, dry bearings—and grow into bigger headaches if ignored. By taking 5 minutes each week to inspect, clean, and tighten, you'll save hours of downtime and frustration down the line. And when it's time to replace parts, don't skimp on quality—investing in durable caster wheels and reliable caster accessories pays off in smoother rides, longer life, and fewer repairs. Now get out there, give those castors a little love, and keep your workshop rolling!