- Company Articles
- Products and Technology
- Installation And Maintenance
- Troubleshooting Common Issues with Heavy Duty Split Foot Seats

Troubleshooting Common Issues with Heavy Duty Split Foot Seats
Related Product
Heavy Duty Split Foot Seat
M10 aluminum heavy duty split foot deat with foot adjuster for workbench and flow rack.
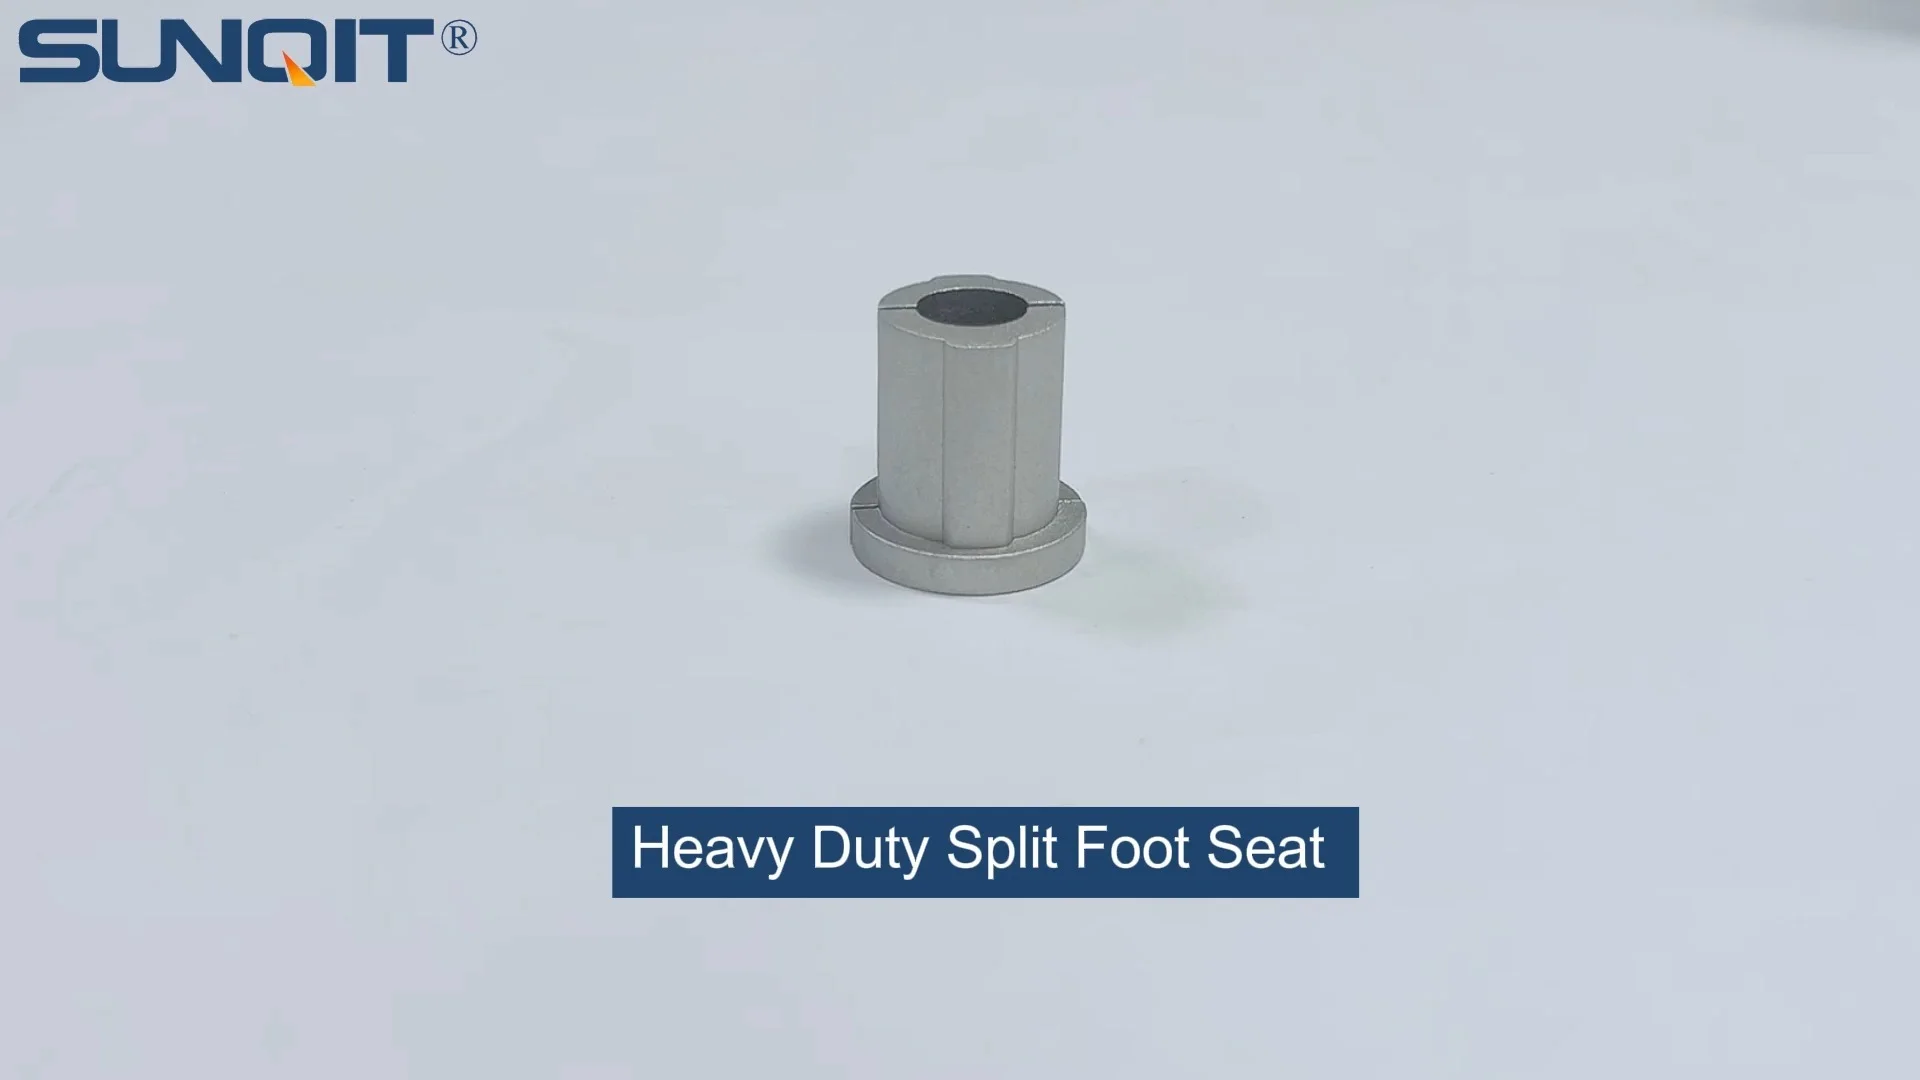
In the world of industrial workspaces, stability is everything. Whether you're assembling electronics on a precision workbench, loading materials onto a material rack, or operating machinery, the foundation beneath you can make or break efficiency, safety, and product quality. Enter the heavy duty split foot seat—a humble yet critical component that often goes unnoticed until something goes wrong. These unassuming parts are the unsung heroes of workbench and equipment stability, designed to distribute weight evenly, absorb vibrations, and keep surfaces level even under heavy loads. But like any hardworking tool, they're prone to wear, misalignment, and damage over time. In this guide, we'll walk through the most common issues that plague heavy duty split foot seats, why they happen, and how to fix them—so you can get back to work with confidence.
At a Glance: Common Issues & Quick Fixes
| Common Issue | Key Symptoms | Primary Causes | Quick Fix |
|---|---|---|---|
| Uneven Workbench Surface | Rocking, tools sliding, uneven measurements | Loose bolts, worn foot pads, floor irregularities | Tighten bolts, replace foot pads, adjust with adjustable leveling feet |
| Excessive Vibration | Rattling tools, noisy operation, component wear | Loose joints, missing anti-vibration pads, overloading | Reinforce joints, add vibration-dampening pads, reduce load |
| Stuck Adjustment Mechanism | Cannot raise/lower foot seat, stripped threads | Rust, debris buildup, over-tightening | Clean threads, apply lubricant, replace stripped components |
| Corrosion/Rust | Flaking metal, discoloration, weakened structure | Humid environments, chemical exposure, poor coating | Remove rust, apply anti-corrosion treatment, upgrade to stainless steel |
| Aluminum Profile Cracking | Visible cracks at attachment points, instability | Overloading, improper torque, material fatigue | replace cracked aluminum profile , reduce load, use reinforced brackets |
1. Uneven Workbench Surface: When Stability Goes Out the Window
There's nothing more frustrating than trying to work on a wobbly workbench. A slight rock can throw off measurements, cause tools to slide, or even damage delicate components. More often than not, the root cause traces back to the heavy duty split foot seats—those small but mighty parts that connect the workbench frame to the floor. Let's break down why this happens and how to fix it.
Symptoms to Watch For
- The workbench rocks back and forth when you press on opposite corners.
- Tools or materials slide toward one side of the surface, even when the bench is "level."
- Precision tasks (like drilling or assembly) result in misaligned holes or uneven joints.
- You hear a "creaking" sound when moving around the bench.
Why It Happens: The Usual Suspects
Uneven surfaces are rarely caused by a single issue—they're usually a combination of wear and environmental factors. Here's what to check:
- Loose Mounting Bolts: Over time, the bolts that secure the split foot seat to the workbench frame (often made of aluminum profile for lightweight strength) can vibrate loose. This is especially common in high-traffic work areas where the bench is frequently bumped or loaded/unloaded.
- Worn or Compressed Foot Pads: The rubber or plastic pads at the bottom of split foot seats act as shock absorbers and grip enhancers. After months of heavy use, these pads can flatten, crack, or lose their traction, leading to unevenness.
- Floor Irregularities: Even the flattest factory floors have imperfections—cracks, dips, or uneven concrete. Heavy duty split foot seats are designed to compensate for minor issues, but severe irregularities can overwhelm their adjustability.
- Misaligned Installation: If the foot seats were installed hastily or without a spirit level, they might sit at slightly different heights from the start, creating a "teeter-totter" effect once the bench is loaded.
Step-by-Step Fix: Getting Back to Level
Fixing an uneven workbench is straightforward with the right tools. Here's how to do it:
- Check the Floor First: Before adjusting the foot seats, rule out floor issues. Place a 4-foot spirit level on the workbench surface. If the bubble stays centered but the bench still rocks, the floor is likely uneven. If the bubble shifts, the problem is with the foot seats.
- Tighten Loose Bolts: Use a socket wrench to check all bolts connecting the split foot seats to the aluminum profile frame. Tighten them in a crisscross pattern (like tightening lug nuts on a car) to ensure even pressure. For extra security, use a torque wrench set to the manufacturer's recommended torque (usually 25-30 Nm for aluminum frames).
- Inspect and replace Foot Pads: Flip the bench (or use a jack to lift one corner at a time) to examine the foot pads. If they're cracked, flattened, or missing chunks, replace them immediately. Look for pads with a Shore A hardness of 60-70 for a balance of grip and durability.
- Adjust with Adjustable Leveling Feet : Many modern split foot seats come with built-in adjustable leveling feet —screw-in mechanisms that let you raise or lower each foot individually. Use a hex key or screwdriver to turn the adjustment dial until the spirit level shows the bench is flat. For stubborn unevenness, add shims (metal or plastic) under the foot pad—just make sure they're non-slip and heat-resistant.
Pro Tip: Prevent Future Wobbles
To keep your workbench stable long-term, mark the position of each split foot seat with a permanent marker after leveling. This makes it easy to spot if a foot seat shifts over time. Also, clean the foot pads monthly with soap and water to remove oil or debris that can reduce grip.

2. Excessive Vibration: When Your Workbench Becomes a Rattling Mess
Vibration might seem like a minor annoyance, but it's more than just noise. Over time, constant shaking can loosen components, damage sensitive equipment, and even fatigue workers. If your workbench feels like it's vibrating with every task, the split foot seats are probably to blame.
Symptoms to Watch For
- Tools or small parts "walk" across the workbench surface during use.
- Persistent buzzing or rattling sounds, even when the bench is lightly loaded.
- Premature wear on aluminum profile joints or mounting brackets.
- Workers report hand fatigue or discomfort after extended use at the bench.
Why It Happens: The Science of Shakes
Vibration in workbenches is often a case of "resonance"—when the frequency of an external force (like a drill, sander, or nearby machinery) matches the natural frequency of the bench. Heavy duty split foot seats are supposed to dampen this, but they can fail for these reasons:
- Missing or Damaged Anti-Vibration Pads: Many split foot seats come with integrated foam or rubber anti-vibration pads. If these pads are torn, compressed, or missing, the foot seat can't absorb shocks, turning the entire bench into a sounding board.
- Loose Joints Between Foot Seats and Frame: Even slightly loose connections between the split foot seat and the aluminum profile frame create gaps where vibration can amplify. Think of it like a guitar string—tight connections dampen sound; loose ones vibrate.
- Overloading Beyond Capacity: Every heavy duty split foot seat has a weight limit (usually 500-1000 lbs per foot). Exceeding this causes the seat to flex, creating harmonic vibrations that spread through the bench.
- Hard Floor Surfaces: Concrete or tile floors reflect vibration instead of absorbing it. Without proper damping, the split foot seats can't counteract this, leading to a feedback loop of shaking.
Step-by-Step Fix: Quieting the Rattle
Reducing vibration requires a mix of mechanical fixes and material upgrades. Here's how to do it:
- Add or replace Anti-Vibration Pads: If your split foot seats don't have built-in pads, install aftermarket vibration-dampening pads (look for neoprene or silicone options with a thickness of at least 1/2 inch). For existing pads, check for hardness—if they feel rock-solid, replace them with softer ones (Shore A 40-50) for better shock absorption.
- Reinforce the Frame-to-Foot Connection: Disassemble the split foot seat from the aluminum profile frame and clean the mating surfaces with isopropyl alcohol. Apply a thin layer of thread-locking compound (like Loctite Blue) to the bolts before reinstalling, then torque them to spec. This prevents future loosening from vibration.
- Redistribute the Load: If the bench is overloaded, move heavy equipment (like power tools) to the edges, where the split foot seats can better support the weight. Avoid clustering weight in the center, which creates uneven stress on the seats.
- Install Rubber Isolators: For extreme cases (like near heavy machinery), add rubber isolators between the split foot seat and the floor. These are small, spring-like devices that absorb vibration before it reaches the bench. Just make sure the isolators are rated for the total weight of the bench plus load.
Pro Tip: Test for Resonance
To find out if vibration is caused by resonance, tap the workbench gently with a rubber mallet and listen. A "ringing" sound means the bench is resonating at a certain frequency. Adding mass (like a steel plate under the work surface) can change the resonance frequency and reduce shaking.

3. Stuck Adjustment Mechanism: When Your Split Foot Seat Refuses to Move
Adjustable heavy duty split foot seats are a game-changer for adapting to uneven floors or changing workspace needs—until the adjustment dial freezes. If you're struggling to raise or lower your foot seats, don't force it—you could strip the threads or break the mechanism. Instead, diagnose the issue with these steps.
Symptoms to Watch For
- The adjustment dial turns but the foot seat doesn't move up or down.
- The dial is completely stuck—you can't turn it, even with pliers.
- You hear grinding or clicking sounds when trying to adjust.
Why It Happens: The Culprits Behind Sticky Adjustments
Stuck mechanisms are almost always due to contamination or mechanical wear. Here's what's likely going on:
- Rust or Corrosion: In humid environments or workshops with water exposure, the metal threads of the adjustment mechanism can rust, creating a rough, sticky surface that prevents smooth movement.
- Dirt and Debris: Dust, metal shavings, or oil can work their way into the gap between the adjustment dial and the foot seat body, gumming up the threads.
- Over-Tightening: Cranking the adjustment dial too hard (especially when the foot seat is fully extended or retracted) can strip the threads or bend the internal shaft, making movement impossible.
- Lack of Lubrication: The threads and moving parts of split foot seats need occasional lubrication to stay smooth. Without it, friction builds up, leading to sticking.
Step-by-Step Fix: Freeing a Stuck Foot Seat
Before replacing the entire foot seat, try these DIY fixes to restore adjustability:
- Clean the Mechanism: Use a can of compressed air to blow out dust and debris from the adjustment dial area. For stubborn grime, spray a small amount of degreaser (like WD-40 Specialist Degreaser) and let it sit for 5 minutes, then wipe clean with a rag.
- Break Up Rust: If rust is the issue, apply a penetrating oil (like PB Blaster or Liquid Wrench) to the threads. Let it soak for 10-15 minutes, then tap the adjustment dial gently with a rubber mallet to loosen rust particles. Try turning the dial again—if it moves, apply more oil and work it back and forth to clean the threads.
- Lubricate the Threads: Once the mechanism is moving, apply a light machine oil (like 3-in-1 Oil) or silicone lubricant to the threads. Avoid heavy greases, which can attract dirt. Turn the dial fully up and down several times to distribute the lubricant evenly.
- replace Stripped Components: If the dial spins freely without moving the foot seat, the threads are likely stripped. In this case, you'll need to replace the adjustment shaft or the entire split foot seat. Most manufacturers sell replacement parts, so check with your supplier before buying a new seat.
Pro Tip: Prevent Sticky Adjustments
Lubricate the adjustment mechanism every 3 months with silicone spray (it's water-resistant, making it ideal for humid environments). Also, cover the foot seats with plastic caps when not in use to keep out dust and debris.

4. Corrosion and Rust: When Your Split Foot Seats Start to Degrade
Heavy duty split foot seats are built to withstand tough conditions, but even the toughest metal can fall victim to corrosion. Rust, pitting, or discoloration isn't just unsightly—it weakens the seat's structure, reducing its load-bearing capacity and lifespan. If you notice signs of corrosion, it's time to act fast.
Symptoms to Watch For
- Orange or brown spots on the metal parts of the split foot seat.
- Flaking or powdery residue on the surface (a sign of advanced rust).
- Pitting or holes in the metal, especially around bolt holes or adjustment mechanisms.
- The foot seat feels softer or more flexible than when new.
Why It Happens: The Enemies of Metal
Corrosion is a chemical reaction between metal, moisture, and oxygen—but certain environments speed it up:
- High Humidity: Workshops with poor ventilation (like those near water or in tropical climates) create the perfect breeding ground for rust. Even stainless steel split foot seats can corrode if exposed to constant moisture.
- Chemical Exposure: Oils, solvents, or cleaning agents (especially acidic ones) can eat away at protective coatings on metal foot seats, leaving them vulnerable to rust.
- Salt or Chloride: In coastal areas or facilities that use salt-based deicers, chloride ions accelerate corrosion, even on galvanized steel.
- Scratched Coatings: The paint or powder coating on split foot seats acts as a barrier against moisture. Scratches from tools, dropped parts, or rough handling can break this barrier, exposing bare metal.
Step-by-Step Fix: Treating Corrosion
Minor corrosion can be treated, but severe damage (like holes or deep pitting) usually requires replacement. Here's how to save a rusty split foot seat:
- Remove Loose Rust: Use a wire brush or sandpaper (80-120 grit) to scrub away flaking rust and paint. Work in small, circular motions, and wear gloves to avoid sharp edges. For hard-to-reach areas (like around bolts), use a dental pick or small wire brush.
- Neutralize Remaining Rust: Apply a rust converter (like Rust-Oleum Rust Reformer) to the cleaned area. This chemical turns remaining rust into a stable, paintable surface. Let it dry completely (usually 24 hours) until it turns black.
- Repaint or Recoat: Sand the treated area lightly with 220-grit sandpaper to smooth the surface, then apply a rust-resistant primer (like Krylon Rust Protector Primer). Once dry, top with a durable paint or powder coating (matching the original color if possible). For extra protection, add a clear enamel topcoat.
- Upgrade to Corrosion-Resistant Materials: If corrosion is a recurring issue, replace steel split foot seats with stainless steel or aluminum versions. Aluminum is naturally resistant to rust, while stainless steel contains chromium, which forms a protective oxide layer. Both are more expensive upfront but save money in the long run.
Pro Tip: Protect Against Future Corrosion
Apply a thin layer of car wax to painted split foot seats every 6 months—it adds a protective barrier against moisture and chemicals. In humid areas, use a dehumidifier near the workbench to keep air moisture below 60%.
5. Cracking or Damage to Aluminum Profile Attachments
Many workbenches use aluminum profile frames for their lightweight strength, and heavy duty split foot seats are critical for connecting these frames to the floor. If the attachment point between the foot seat and the aluminum profile starts to crack, the entire bench's structural integrity is at risk.
Symptoms to Watch For
- Visible cracks in the aluminum profile around the bolt holes for the split foot seat.
- Bending or warping of the profile when the bench is loaded.
- Gaps between the foot seat and the profile, even when bolts are tight.
- A sudden "give" or flex in the bench when pressure is applied.
Why It Happens: The Hidden Dangers of Stress
Aluminum is strong, but it's not indestructible. Cracks at the foot seat attachment are usually caused by:
- Overloading: Aluminum profiles have a maximum weight capacity (typically 200-500 lbs per linear foot). Exceeding this (by placing heavy machinery or stacks of materials on the bench) creates excessive stress at the foot seat bolts, leading to cracks.
- Improper Bolt Torque: Tightening bolts too much can stretch or crack the aluminum around the holes. Conversely, loose bolts allow the foot seat to shift, creating stress concentrations that weaken the profile over time.
- Fatigue Failure: Repeated loading and unloading of the bench (like in assembly lines) causes microscopic cracks to form in the aluminum. These cracks grow over time until the profile fails.
- Low-Quality Aluminum: Not all aluminum profiles are created equal. Cheap, low-grade aluminum (with high levels of impurities) is more prone to cracking under stress than high-quality, alloyed aluminum (like 6061-T6).
Step-by-Step Fix: Repairing or Reinforcing Aluminum Profiles
Small cracks can be reinforced, but large or spreading cracks mean the profile needs replacement. Here's what to do:
- Stop Crack Propagation: Use a drill with a small bit (1/8 inch) to drill a hole at the end of the crack. This relieves stress and prevents the crack from growing further.
- Reinforce with a Gusset Plate: Cut a piece of steel or aluminum plate (1/4 inch thick) to fit over the cracked area. Drill holes to match the existing bolt pattern, then bolt the plate to the profile using stainless steel bolts. This distributes stress away from the crack.
- replace the Profile (if needed): If the crack is longer than 2 inches or the profile is bent, remove the split foot seat and replace the damaged section of aluminum profile . Use a hacksaw or miter saw to cut the old profile, then connect the new section with corner brackets or T-slot connectors.
- Upgrade to Heavy-Duty Brackets: To prevent future cracks, replace standard bolts with bolted brackets that spread the load over a larger area of the profile. Look for brackets designed for your profile size (e.g., 2020, 3030, or 4040 series) for a secure fit.
Pro Tip: Avoid Overloading
Check the weight capacity of your aluminum profile frame and split foot seats (usually listed in the manufacturer's manual). Post the maximum load limit on the workbench as a reminder, and avoid placing heavy items near the edges, where stress is highest.
Prevention is Key: A Maintenance Checklist for Heavy Duty Split Foot Seats
Fixing issues is important, but preventing them saves time, money, and frustration. Use this monthly checklist to keep your split foot seats in top shape:
- Inspect Foot Pads: Check for wear, cracks, or loss of grip. replace if more than 50% worn.
- Tighten Bolts: Use a torque wrench to ensure bolts are tight to spec (check manufacturer guidelines).
- Clean and Lubricate Adjustment Mechanisms: Remove debris and apply lubricant to keep adjustments smooth.
- Check for Corrosion: Look for rust or pitting, especially in humid areas. Treat minor rust immediately.
- Verify Levelness: Use a spirit level to ensure the workbench is flat. Adjust adjustable leveling feet as needed.
- Inspect Aluminum Profiles: Check for cracks, bends, or stress marks around foot seat attachments.
Conclusion: Your Workbench's Foundation Deserves Attention
Heavy duty split foot seats might be small, but they're the backbone of a stable, efficient workspace. From uneven surfaces to corrosion, the issues we've covered here are common—but they're also preventable with regular maintenance and quick fixes. By taking the time to inspect, clean, and adjust your split foot seats, you'll not only extend their lifespan but also improve safety, reduce downtime, and make every task at your workbench smoother and more productive.
Remember: A wobbly workbench isn't just a nuisance—it's a sign that your foundation needs care. So grab your tools, follow this guide, and give your split foot seats the attention they deserve. Your workbench (and your sanity) will thank you.