- Company Articles
- Products and Technology
- Installation And Maintenance
- Troubleshooting Common Issues with Parallel Lean Pipe Joint Chrome

Troubleshooting Common Issues with Parallel Lean Pipe Joint Chrome
Related Product
Parallel Lean Pipe Joint Chrome
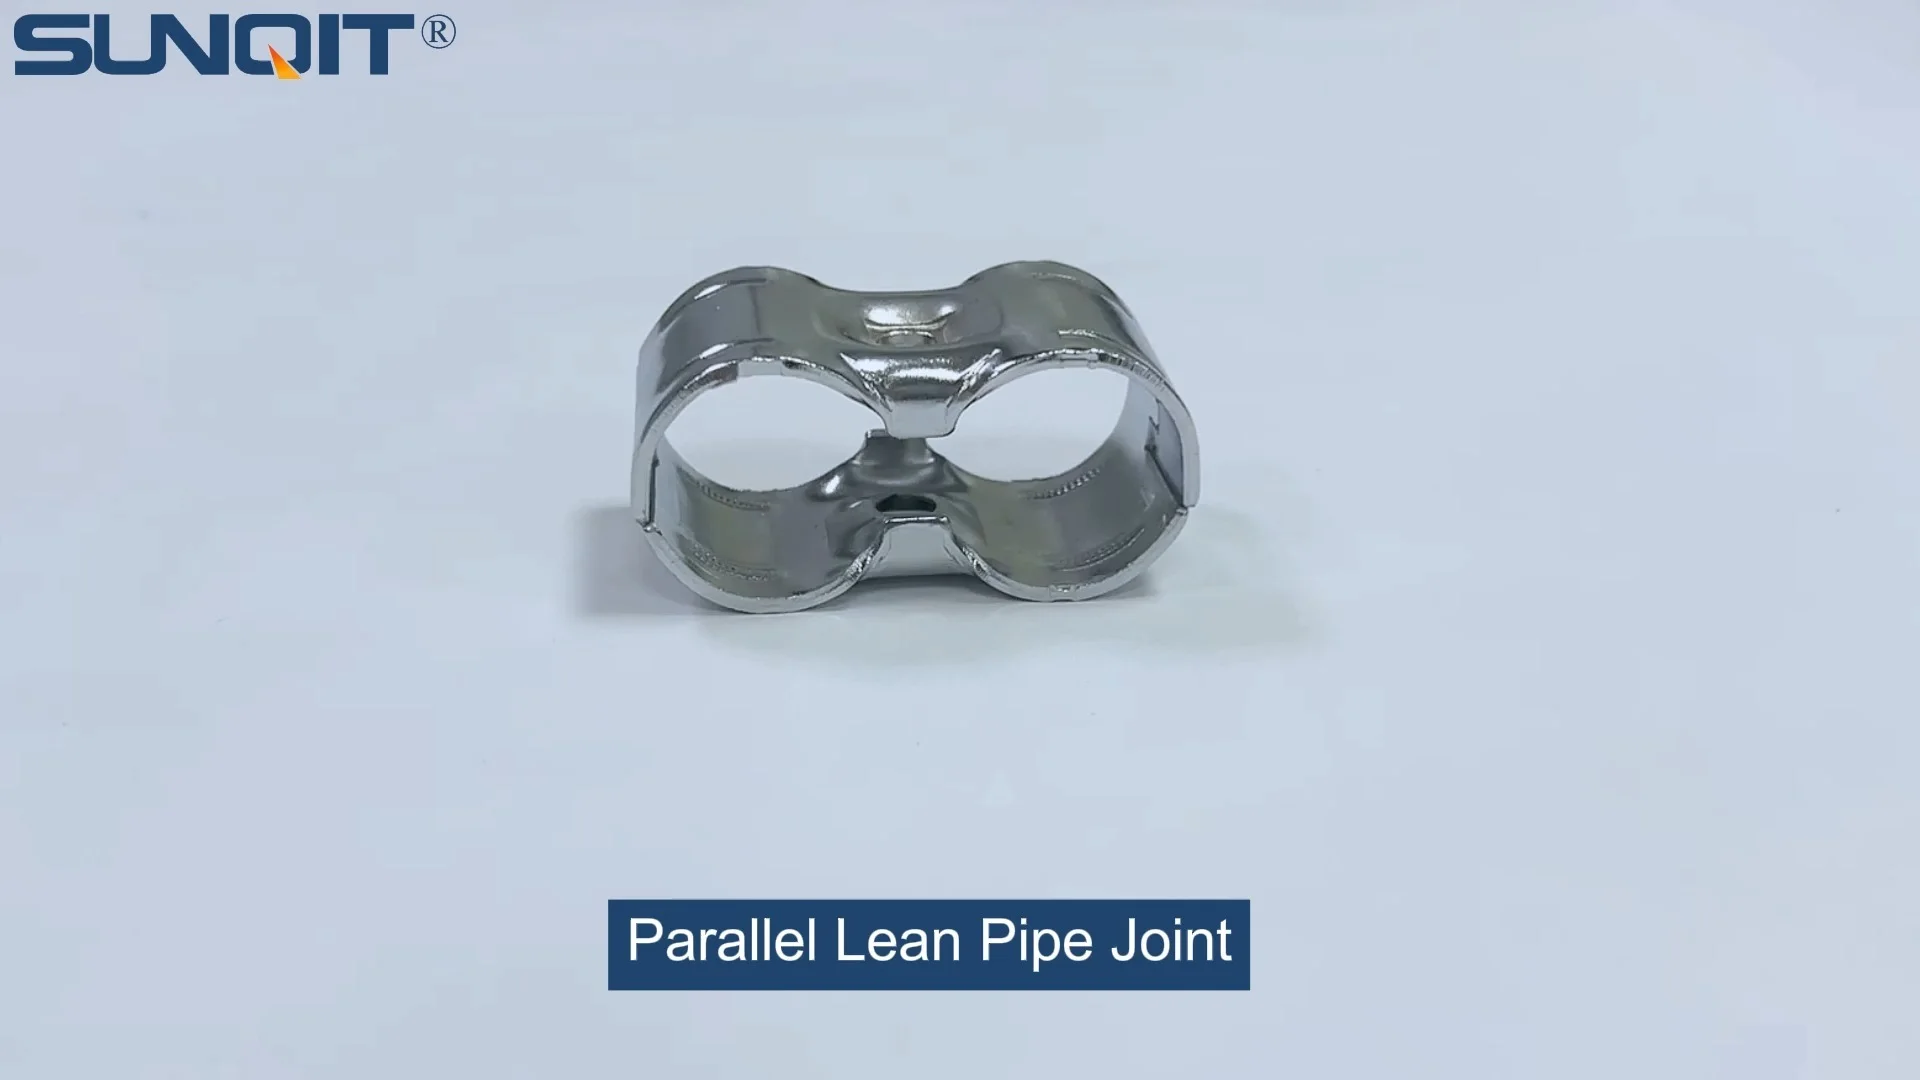
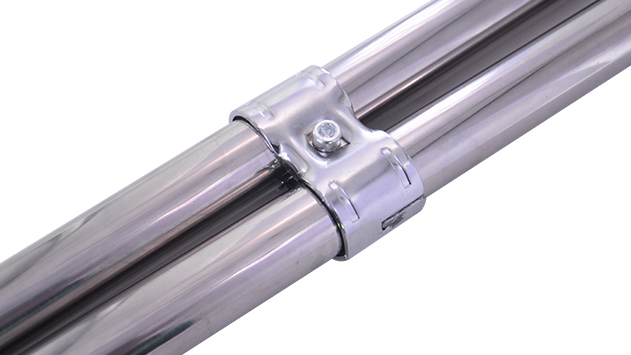
Parallel lean pipe joint used for 2 pcs 28MM lean pipe connection in parallel direction to enhance frame structure, usually for heavy payload requirement for workbench. flow rack, hand trolley.
Introduction: The Backbone of Lean Systems
In the fast-paced world of manufacturing and production, efficiency isn't just a buzzword—it's the lifeblood of operations. At the heart of this efficiency lies the lean system, a philosophy that minimizes waste and maximizes value. But even the most well-designed lean system is only as strong as its components, and few components are as critical as the parallel lean pipe joint chrome. These unassuming yet vital parts hold together everything from lean pipe workbenches where assembly line workers spend hours daily to flow racks that keep materials moving smoothly through the production floor.
Parallel lean pipe joint chrome, with their sleek metallic finish and robust construction, are designed to connect lean pipes (often aluminum or steel) in parallel configurations, creating stable structures that withstand the rigors of daily use. Whether you're setting up a new material rack, reinforcing a conveyor system, or maintaining an existing workstation, understanding how to troubleshoot these joints can save hours of downtime, reduce costs, and keep your lean system running like a well-oiled machine. In this guide, we'll dive deep into the most common issues you might encounter with parallel lean pipe joint chrome, why they happen, and how to fix them—so you can get back to what matters most: keeping your production line moving.
Understanding Parallel Lean Pipe Joint Chrome: What Makes Them Tick?
Before we jump into troubleshooting, let's take a moment to understand what parallel lean pipe joint chrome are and why they're so essential. These joints are specifically engineered to connect two or more lean pipes in a parallel arrangement, ensuring the structure remains level, stable, and capable of supporting weight without flexing or warping. The "chrome" in their name refers to the chromium plating applied to their surface, which serves two key purposes: enhancing corrosion resistance and reducing friction during assembly.
Most parallel lean pipe joint chrome are made from high-grade steel, then coated with a thin layer of chromium through electroplating. This process not only gives them their characteristic shiny appearance but also creates a hard, protective barrier that stands up to moisture, oils, and minor chemical exposure—common hazards in factory environments. Underneath that chrome layer, the joints feature precision-machined threads and grooves designed to fit snugly with lean pipe accessories like clamps, washers, and end caps, ensuring a secure connection that won't slip or loosen under stress.
These joints are versatile, too. You'll find them in everything from simple workbench frames to complex multi-tiered material racks. For example, a typical lean pipe workbench might use parallel joints to connect the front and back rails, ensuring the tabletop stays flat and stable even when loaded with heavy tools or components. In flow racks, they're used to align roller tracks, keeping materials sliding smoothly from one workstation to the next. Without well-functioning parallel joints, these structures would quickly become wobbly, unsafe, and inefficient—undermining the very principles of the lean system they're meant to support.
Common Issues with Parallel Lean Pipe Joint Chrome: Diagnosis and Solutions
1. Loosening Joints: When Stability Takes a Hit
One of the most frequent complaints about parallel lean pipe joint chrome is that they tend to loosen over time. Imagine walking up to your lean pipe workbench one morning to find that the shelf holding your tools has tilted slightly, or noticing that a section of your flow rack is sagging—chances are, a loose parallel joint is the culprit. So why does this happen?
Causes of Loosening:
- Vibration: Manufacturing floors are noisy places, and the constant hum of machinery, from conveyor belts to drills, creates vibrations that can gradually loosen even the tightest joints. Over weeks or months, these vibrations work their way into the threads of the joint, reducing friction and allowing the connection to slip.
- Improper Torque During Installation: It's easy to either overtighten or undertighten joints during assembly. Overtightening can strip threads or warp the joint, while undertightening leaves room for movement. Both mistakes set the stage for loosening down the line.
- Wear and Tear: Washers, gaskets, or the threads themselves can wear out over time, especially in high-traffic areas. A worn washer, for example, loses its ability to distribute pressure evenly, making the joint more prone to slipping.
Troubleshooting Steps:
- Check Torque with a Wrench: Start by using a torque wrench to verify if the joint is properly tightened. Most manufacturers recommend a specific torque range (e.g., 15-20 Nm for standard joints). If it's below this range, tighten it to the recommended level.
- Inspect Washers and Gaskets: Remove the joint and check the condition of any washers or gaskets. If they're cracked, flattened, or brittle, replace them with new ones. Nylon or rubber washers are ideal here, as they provide better grip than metal ones.
- Apply Thread Locker: For joints that loosen repeatedly, apply a small amount of medium-strength thread locker (like Loctite 242) to the threads before reassembly. This adhesive helps lock the joint in place without making it permanent, so you can still disassemble it later if needed.
Prevention Tips: Schedule monthly "tightness checks" in high-vibration areas (e.g., near conveyor motors) and quarterly checks in lower-traffic zones. Train your assembly team to use torque wrenches instead of impact drivers, which can easily overtighten joints. And always use lock washers—they add an extra layer of security against vibration.
2. Corrosion: When the Chrome Loses Its Shine
Chrome plating is supposed to protect against rust, but even the best plating can fail. If you've noticed brownish spots, pitting, or a dull, cloudy appearance on your parallel lean pipe joint chrome, corrosion is likely the issue. Left unchecked, corrosion can weaken the joint, making it unsafe to use and shortening its lifespan.
Causes of Corrosion:
- Moisture Exposure: Factories with high humidity, frequent floor cleaning, or processes that involve water (like cooling systems) are prime environments for corrosion. Even a small amount of standing water on a joint can start the rusting process, especially if the chrome plating has tiny scratches or pinholes.
- Chemical Contact: Oils, solvents, and cleaning agents used on the production floor can eat away at chrome plating over time. For example, using a harsh degreaser near a lean pipe workbench might inadvertently splash onto nearby joints, causing the chrome to deteriorate.
- Poor Plating Quality: Not all parallel lean pipe joint chrome are created equal. Low-quality joints may have thin or uneven chrome plating, which is more prone to chipping or flaking, exposing the underlying steel to the elements.
Troubleshooting Steps:
- Clean the Joint Thoroughly: Start by cleaning the corroded area with a mild detergent and a soft cloth. Avoid abrasive sponges or steel wool, which can scratch the remaining chrome. For stubborn spots, mix baking soda with water to make a paste and gently rub it in—this acts as a mild abrasive without damaging the surface.
- Inspect for Pitting: After cleaning, check if the corrosion has caused pitting (small holes in the metal). If the pitting is shallow and limited to a small area, you can apply a rust-inhibiting primer followed by a chrome-colored touch-up paint to seal the spot. If the pitting is deep or covers a large area, the joint should be replaced—pitting weakens the metal and can lead to sudden failure.
- Check Adjacent Components: Corrosion rarely happens in isolation. Inspect nearby lean pipes, lean pipe accessories (like clamps or end caps), and even the aluminum profile of your workbench for signs of rust. If other parts are corroded, address them at the same time to prevent the issue from spreading.
Prevention Tips: Keep your workspace dry by fixing leaky pipes or using dehumidifiers in humid areas. When cleaning, use pH-neutral cleaners and avoid spraying directly on joints—instead, wipe them down with a damp cloth. For joints in particularly harsh environments (e.g., near chemical storage), consider applying a thin coat of clear polyurethane sealantto add an extra barrier against corrosion.
3. Misalignment: When Your Structure is "Off-Kilter"
A misaligned parallel lean pipe joint chrome might not seem like a big deal at first, but it can throw off an entire structure. You might notice that your lean pipe workbench is wobbly, materials on a flow rack get stuck halfway, or a conveyor belt keeps slipping off track. Misalignment often starts small—maybe a joint is off by just a few millimeters—but over time, it can lead to uneven weight distribution, increased wear on other components, and even structural failure.
Causes of Misalignment:
- Incorrect Placement During Assembly: Rushing through assembly is a common culprit. If the joint isn't positioned exactly parallel to the other pipes (e.g., one pipe is higher than the other), the structure will lean or twist.
- Bent or Damaged Lean Pipes: Lean pipes (especially aluminum ones) can bend if dropped or overloaded. A bent pipe will pull the joint out of alignment, even if the joint itself is installed correctly.
- Uneven Workbench or Floor: If the surface where the structure sits is uneven, the entire system will lean, causing joints to twist. This is especially common in older factories with cracked or sloped concrete floors.
Troubleshooting Steps:
- Use a Level to Identify the Issue: Place a spirit level on top of the structure (e.g., the shelf of a material rack or the surface of a workbench). If the bubble is off-center, you'll know which direction the misalignment is.
- Realign the Joints: Loosen the misaligned joint and any adjacent joints, then adjust the pipes until they're parallel. Use a straightedge (like a long aluminum profile) to ensure the pipes are perfectly aligned along their length. Once aligned, retighten the joints.
- replace Bent Pipes: If a pipe is bent, it's better to replace it than to try bending it back—bending weakens the metal and makes it more prone to breaking. Measure the length of the bent pipe and order a new one from your lean pipe supplier.
- Level the Base: If the floor or workbench is uneven, use shims (small pieces of metal or plastic) under the feet of the structure to level it out. For larger structures, consider installing adjustable feet, which let you fine-tune the height of each corner.
Prevention Tips: Always measure twice before drilling or tightening joints—taking an extra minute to check alignment can save hours of rework later. Use jigs or templates during assembly to ensure pipes are parallel; many lean pipe suppliers sell alignment tools specifically for this purpose. And inspect your lean pipes for damage before assembly—even a small bend can cause big problems down the line.
4. Difficulty in Assembly: When the Joint Just Won't "Click"
There's nothing more frustrating than trying to assemble a structure and finding that the parallel lean pipe joint chrome just won't screw into place smoothly. Maybe the threads grind together, the joint feels "stuck," or it won't seat all the way. This isn't just a minor annoyance—it can slow down assembly, damage the joint or pipe, and even lead to improper connections that fail later.
Causes of Assembly Difficulty:
- Damaged Threads: Cross-threading (screwing the joint in at an angle) is a common mistake that strips or bends threads. Even a tiny burr on the threads can make assembly difficult.
- Mismatched Components: Not all lean pipe accessories are created equal. Using a parallel lean pipe joint chrome designed for 28mm pipes with a 30mm pipe, for example, will result in a loose or stuck fit.
- Lack of Lubrication: Chrome plating reduces friction, but over time, dust, dirt, or rust can build up on the threads, making them harder to turn. Without lubrication, the threads can seize up.
Troubleshooting Steps:
- Inspect Threads for Damage: Use a flashlight to check the threads on both the joint and the pipe. If you see stripped areas, burrs, or rust, use a thread file (a small tool with ridges that smooths threads) to gently clean them. For severe damage, replace the joint or pipe.
- Verify Component Compatibility: Check the specifications of your lean pipe and joint. Most lean pipes are either 28mm (standard) or 30mm (heavy-duty), and joints are sized accordingly. If they don't match, contact your supplier for the correct part.
- Apply a Small Amount of Lubricant: A drop of machine oil or graphite powder on the threads can work wonders. Avoid using WD-40, as it's a solvent, not a lubricant—it will dry out and attract dust over time.
Prevention Tips: Train your assembly team to start screwing joints by hand first—this allows them to feel if the threads are aligning properly before using a wrench. If it feels tight or uneven, back out and try again. And keep a thread file and lubricant handy in your toolbox for quick fixes during assembly.
5. Damage to Lean Pipe Accessories: When the Little Parts Fail
Parallel lean pipe joint chrome don't work alone—they rely on a host of lean pipe accessories, like clamps, brackets, and end caps, to function properly. When these accessories get damaged, the joint itself can suffer. For example, a cracked clamp might not hold the joint securely, leading to loosening, while a bent bracket could pull the joint out of alignment. Recognizing when accessories are damaged and addressing it early can prevent bigger issues with the joint.
Causes of Accessory Damage:
- Overloading: Hanging too much weight on a shelf or rack puts extra stress on the clamps and brackets that connect to the parallel joint. Over time, this can bend or crack the accessories.
- Impact: Forklifts, pallet jacks, or even workers rushing through the area can bump into the structure, damaging accessories like side guards or end caps.
- Using Incompatible Accessories: Mixing and matching accessories from different suppliers is risky. A clamp designed for steel pipes, for example, might not fit properly on an aluminum pipe, leading to stress cracks.
Troubleshooting Steps:
- Inspect Accessories Regularly: During your monthly maintenance checks, take a few minutes to look at the clamps, brackets, and other accessories connected to parallel joints. Look for cracks, bends, or signs of stress (like discoloration).
- replace Damaged Parts Immediately: Don't wait for a cracked clamp to fail—replace it right away. Most lean pipe suppliers keep common accessories in stock, so you can get replacements quickly.
- Reinforce Weak Points: If a particular area (e.g., a shelf that holds heavy tools) is prone to accessory damage, add extra brackets or use heavier-duty accessories. For example, switching from plastic clamps to metal ones can increase durability.
Prevention Tips: Label weight limits clearly on all structures, and train your team to respect them. Install bumpers or guards on corners of racks and workbenches to protect against impact from machinery. And stick to accessories from the same supplier as your parallel lean pipe joint chrome—this ensures compatibility and reduces the risk of fit issues.

Summary Table: Common Issues, Causes, and Fixes
| Issue | Primary Causes | Troubleshooting Steps | Prevention Strategies |
|---|---|---|---|
| Loosening Joints | Vibration, improper torque, worn washers | Check torque with wrench, replace washers, apply thread locker | Monthly torque checks, use lock washers, train on proper tightening |
| Corrosion | Moisture, chemical exposure, poor chrome plating | Clean with mild detergent, inspect for pitting, replace if severe | Apply protective coating, use pH-neutral cleaners, store in dry area |
| Misalignment | Incorrect assembly, bent pipes, uneven floor | Realign with level/straightedge, replace bent pipes, use shims to level base | Measure twice before assembly, use jigs for alignment, inspect pipes for damage |
| Assembly Difficulty | Damaged threads, mismatched components, lack of lubrication | Clean threads with file, verify compatibility, apply lubricant | Start assembly by hand, keep thread file/lubricant handy, check specs first |
| Accessory Damage | Overloading, impact, incompatible accessories | replace damaged parts, reinforce weak points with heavier-duty accessories | Label weight limits, install bumpers, use accessories from same supplier |
Conclusion: Keeping Your Lean System Strong
Parallel lean pipe joint chrome might not be the most glamorous part of your lean system, but they're undeniably essential. By understanding how to troubleshoot common issues like loosening, corrosion, and misalignment, you can ensure these joints continue to do their job—holding your structures together, supporting your team, and keeping your production line moving forward. Remember, the key to success is proactive maintenance: regular checks, quick repairs, and a little attention to detail can go a long way in preventing small problems from becoming big headaches.
Whether you're a seasoned maintenance technician or new to lean systems, this guide should give you the tools you need to tackle parallel lean pipe joint chrome issues with confidence. And if you ever find yourself stuck, don't hesitate to reach out to your lean pipe supplier—they're experts in their products and can often provide tailored advice or replacement parts. After all, a strong lean system starts with strong components, and with the right troubleshooting skills, you'll keep yours strong for years to come.