- Company Articles
- Products and Technology
- Installation And Maintenance
- Troubleshooting Common Issues with Roller Track Placon Mount Joints

Troubleshooting Common Issues with Roller Track Placon Mount Joints
Related Product
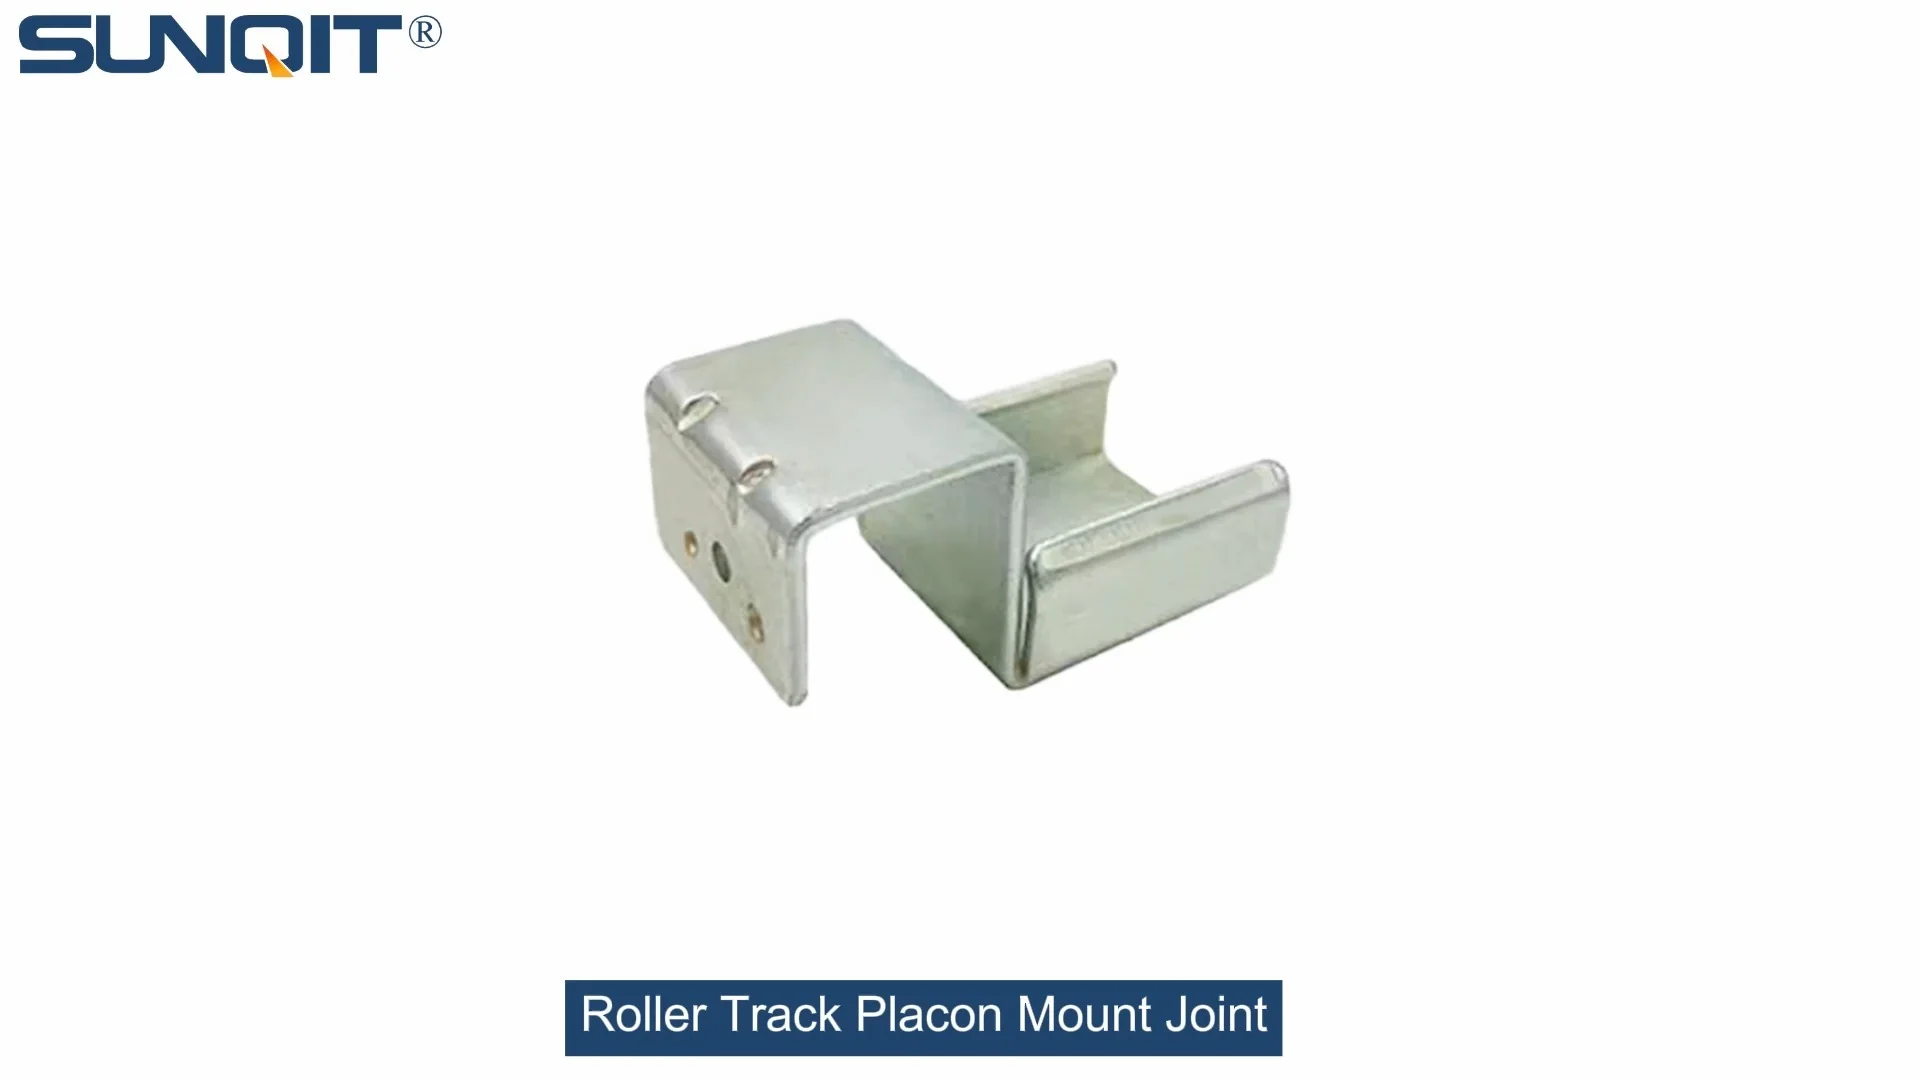
Roller Track Placon Mount Joint
Roller track placon mount work as a connector for roller track and pipe or aluminum profile in rack syetem, it is a necessary parts in rack system which widely used in industrial plant and logistic,warehouse storage.
In the rhythm of a busy manufacturing floor, every component has a role to play—especially when it comes to keeping materials moving. Roller track placon mount joints might not grab headlines, but they're the unsung heroes of smooth operations. These small but critical connectors link roller tracks to aluminum profiles, ensuring workpieces glide from station to station without a hitch. Whether you're running a 3C assembly line, a medical device workshop, or a high-volume center, a faulty joint can throw a wrench into your entire workflow. Let's dive into the most common problems teams face with these joints, why they happen, and how to fix them—so you can get back to what matters: efficient, uninterrupted production.
Why Roller Track Placon Mount Joints Matter in Lean Systems
Before we jump into troubleshooting, let's talk about why these joints are so crucial. In lean manufacturing, every second counts. Roller track placon mount joints are the backbone of flow racks, conveyors, and even workbench setups, holding roller tracks securely to aluminum profiles while maintaining the flexibility lean systems are known for. A well-functioning joint keeps materials flowing at the right pace, reduces manual handling, and minimizes downtime. But when they fail? You're looking at jammed workpieces, scratched products, and frustrated operators. The good news? Most issues are fixable with a little know-how—and the right approach to maintenance.
Common Issues & Solutions
1. Loose Joint Connections
Spotting the Signs
- Visible gaps between the joint and aluminum profile
- Workpieces rocking or shifting as they move along the track
- Rattling noises during operation (especially with heavier loads)
- Inconsistent workpiece speed—sometimes fast, sometimes slow
Why It Happens
- Under-tightened fasteners: Installation teams often rush to meet deadlines, skimping on proper torque when securing joints to aluminum profiles.
- Vibration fatigue: Over time, constant vibration from moving loads can loosen screws—common in high-traffic areas like assembly lines for consumer electronics.
- Mismatched components: Using generic screws or washers that don't fit the joint's threading (a frequent issue with off-brand or low-quality accessories).
- Thermal expansion: In facilities with fluctuating temperatures (like those housing plastic injection molding machines), metal components expand and contract, weakening connections.
Step-by-Step Fix
- Stop the line (if safe): Never try to tighten a joint while the track is in motion—this is how scratches or damaged workpieces happen.
- Inspect the hardware: Check if screws are stripped or bent. If they are, replace them with high-quality replacements (look for ones rated for industrial use, like the stainless steel options in our lean pipe accessories line).
- Use a torque wrench: Tighten screws to the manufacturer's recommended torque (typically 8-10 Nm for aluminum profile joints). Too tight, and you risk stripping the aluminum; too loose, and the joint will loosen again.
- Add anti-vibration measures: For high-vibration areas, apply thread-locking fluid (like Loctite 243) or install lock washers. Our lean solution team often recommends this for automotive parts assembly lines.
Keep It Tight: Preventive Tips
Pro Tip: Create a weekly "joint check" checklist for operators. A quick 5-minute visual inspection (looking for gaps or rust) can catch looseness before it becomes a problem.
- Use graded hardware designed for aluminum profiles—avoid generic Home Depot screws.
- Mark screws with a permanent marker after tightening; if the mark shifts, you'll know it's loose.
- For critical lines (like medical device assembly), schedule monthly torque checks with a calibrated wrench.
2. Roller Track Misalignment
Spotting the Signs
- Workpieces veering to one side of the track (often scratching against aluminum profile edges)
- Jams at the joint connection point—workpieces get stuck where two track sections meet
- Uneven wear on roller wheels (one side wearing down faster than the other)
- Operators having to manually guide products along the track
Why It Happens
- Poor initial installation: Rushing to set up the track without using a level or straightedge—common in fast-paced startup environments.
- Uneven floor surfaces: Concrete floors with dips or bumps can throw the entire track off-kilter, even if the joints are installed perfectly.
- Overloading: Using a joint rated for 50kg loads to support 80kg workpieces causes the aluminum profile to flex, bending the joint over time.
- Inconsistent profile quality: Low-grade aluminum profiles with uneven walls or warped sections make alignment impossible, even with top-tier joints.
Step-by-Step Fix
- Check the basics first: Use a 4-foot level to verify if the aluminum profile itself is straight. If the profile is bent, replacing the joint won't help—you'll need to swap the profile.
- Loosen, realign, retighten: Loosen the joint screws, slide the track into position (use a string line for long runs), then retighten gradually—alternating screws to avoid uneven pressure.
- Shim if needed: For floors with minor dips, place thin aluminum shims under the profile feet to level the system. Our lean solution team often uses 0.5mm and 1mm shims for precision adjustments.
- Upgrade to heavy-duty joints: If overloading is the issue, switch to reinforced joints (like our parallel rotatory aluminum joint B) rated for higher weights.
Stay Aligned: Preventive Tips
- During installation, use a laser level for long track runs—this beats a string line for accuracy, especially in large warehouses.
- Mark the floor with tape at the base of each aluminum profile to spot shifting early.
- Pair joints with adjustable feet (like our anti-slip adjustable leveling feet) to compensate for floor unevenness.
3. Excessive Noise During Operation
Spotting the Signs
- Loud squeaking or grinding sounds when workpieces move over the joint
- High-pitched "whining" at higher track speeds
- Noise that gets worse as the shift progresses
- Operators reporting headaches or ear fatigue by the end of the day
Why It Happens
- Lack of lubrication: Metal-on-metal contact between the joint and roller track pins—common in facilities that skip maintenance schedules.
- Worn joint components: Plastic or nylon parts (like roller track guide rails) breaking down, leaving rough edges that catch on moving parts.
- Mismatched track and joint sizes: Using a 40mm joint with a 38mm roller track creates gaps that cause vibration and noise.
- Loose roller wheels: While not a joint issue directly, loose wheels put extra stress on joints, leading to rattling and squeaking.
Step-by-Step Fix
- Start with lubrication: Apply a dry lubricant (like graphite spray) to the joint's moving parts—avoid oil-based lubes, which attract dust and grit.
- Inspect for wear: Check the joint's contact points for burrs or cracks. If plastic components are worn, replace them with our high-durability yellow or grey plastic roller track guide rails.
- Verify sizing: Measure the track diameter and compare it to the joint's specs. If they don't match, swap in the correct joint—using our online size guide to double-check.
- Tighten roller wheels: Sometimes the noise isn't the joint itself! Tighten loose wheel axles and replace any wheels with flat spots.
Quiet Operations: Preventive Tips
Pro Tip: Schedule lubrication during slow shifts (like first thing in the morning) to avoid disrupting production. A little lube every 2-3 weeks goes a long way.
- Use noise-dampening joint covers for high-speed lines—our plastic roller track guide rails come in noise-reducing designs.
- Train operators to report unusual sounds immediately—don't wait for a small squeak to become a loud grind.
4. Premature Wear & Tear
Spotting the Signs
- Cracks or chips in the joint's plastic or metal components
- Rust forming on metal parts (even in indoor facilities)
- Threads stripping when trying to tighten screws
- Joints breaking completely under normal loads (a major red flag)
Why It Happens
- Low-quality materials: Using cheap plastic joints or uncoated steel parts in humid environments (like food packaging lines) leads to rapid degradation.
- Chemical exposure: Harsh cleaning agents or coolants dripping onto joints—common in automotive or machining operations.
- Fatigue from repetitive motion: Joints in high-cycle applications (like a conveyor moving 1000+ parts per hour) wear out faster without proper reinforcement.
- Mismatched environmental ratings: Using standard joints in ESD-sensitive areas (like electronics assembly) where static discharge weakens materials over time.
Step-by-Step Fix
- replace with durable alternatives: Swap out plastic joints for aluminum or stainless steel versions—our aluminum lean pipe joints are corrosion-resistant and ideal for humid environments.
- Clean and protect: Remove rust with a wire brush, apply a rust-inhibiting primer, then seal with industrial-grade paint. For chemical exposure, use protective caps or sleeves.
- Upgrade to ESD-safe components: In 3C assembly or electronics manufacturing, use ESD workstation-rated joints with conductive materials to prevent static damage.
- Reinforce high-stress areas: Add support brackets (like our roller track placon mount center support bracket) to distribute weight and reduce fatigue.
Long-Lasting Joints: Preventive Tips
- Choose joints rated for your environment: stainless steel for moisture, aluminum for lightweight strength, ESD-safe for electronics.
- Implement a "replace before failure" schedule—swap out high-cycle joints every 6-12 months, even if they look okay.
- Keep a small stock of spare joints on hand—nothing kills productivity like waiting for a replacement part.

Quick Reference: Troubleshooting Checklist
| Issue | Key Symptom | First Step to Fix | Preventive Action |
|---|---|---|---|
| Loose Connections | Workpiece rocking/shifting | Tighten screws with torque wrench | Weekly visual gap checks |
| Track Misalignment | Workpieces veering to one side | Loosen joint, realign with level, retighten | Use laser level during installation |
| Excessive Noise | Squeaking/grinding sounds | Apply dry lubricant to joint moving parts | Lubricate every 2-3 weeks |
| Premature Wear | Cracks or rust on joint | replace with aluminum/stainless steel joint | Choose environment-rated components |

Beyond Troubleshooting: Building a Leaner System
Fixing problems as they arise is important, but true lean manufacturing is about preventing issues before they start. That's where a thoughtful lean solution comes in. At SunQit, we design roller track placon mount joints and aluminum profile systems with durability and adaptability in mind. Our custom solutions team works with you to assess your workflow, identify high-stress areas, and recommend joint configurations that reduce wear, minimize noise, and keep things aligned—all while staying true to the "reusable, sustainable" lean philosophy.
Whether you're setting up a new flow rack, upgrading an existing conveyor, or building a custom workbench, the right joints make all the difference. And when issues do pop up? You now have the tools to diagnose and fix them fast—keeping your line running, your team happy, and your production goals on track.
Roller track placon mount joints may be small, but their impact on your operation is huge. By understanding the signs of trouble, addressing root causes, and investing in preventive maintenance, you can turn these humble components into a competitive advantage. Remember: in lean manufacturing, every detail matters—and that includes the joints holding your system together. With the right knowledge and the right parts, you'll keep your production line flowing smoothly, your costs low, and your customers satisfied.