- Company Articles
- Products and Technology
- Installation And Maintenance
- Troubleshooting Corrosion in Vertical Lean Pipe Joints: Prevention Strategies

Troubleshooting Corrosion in Vertical Lean Pipe Joints: Prevention Strategies
Related Product
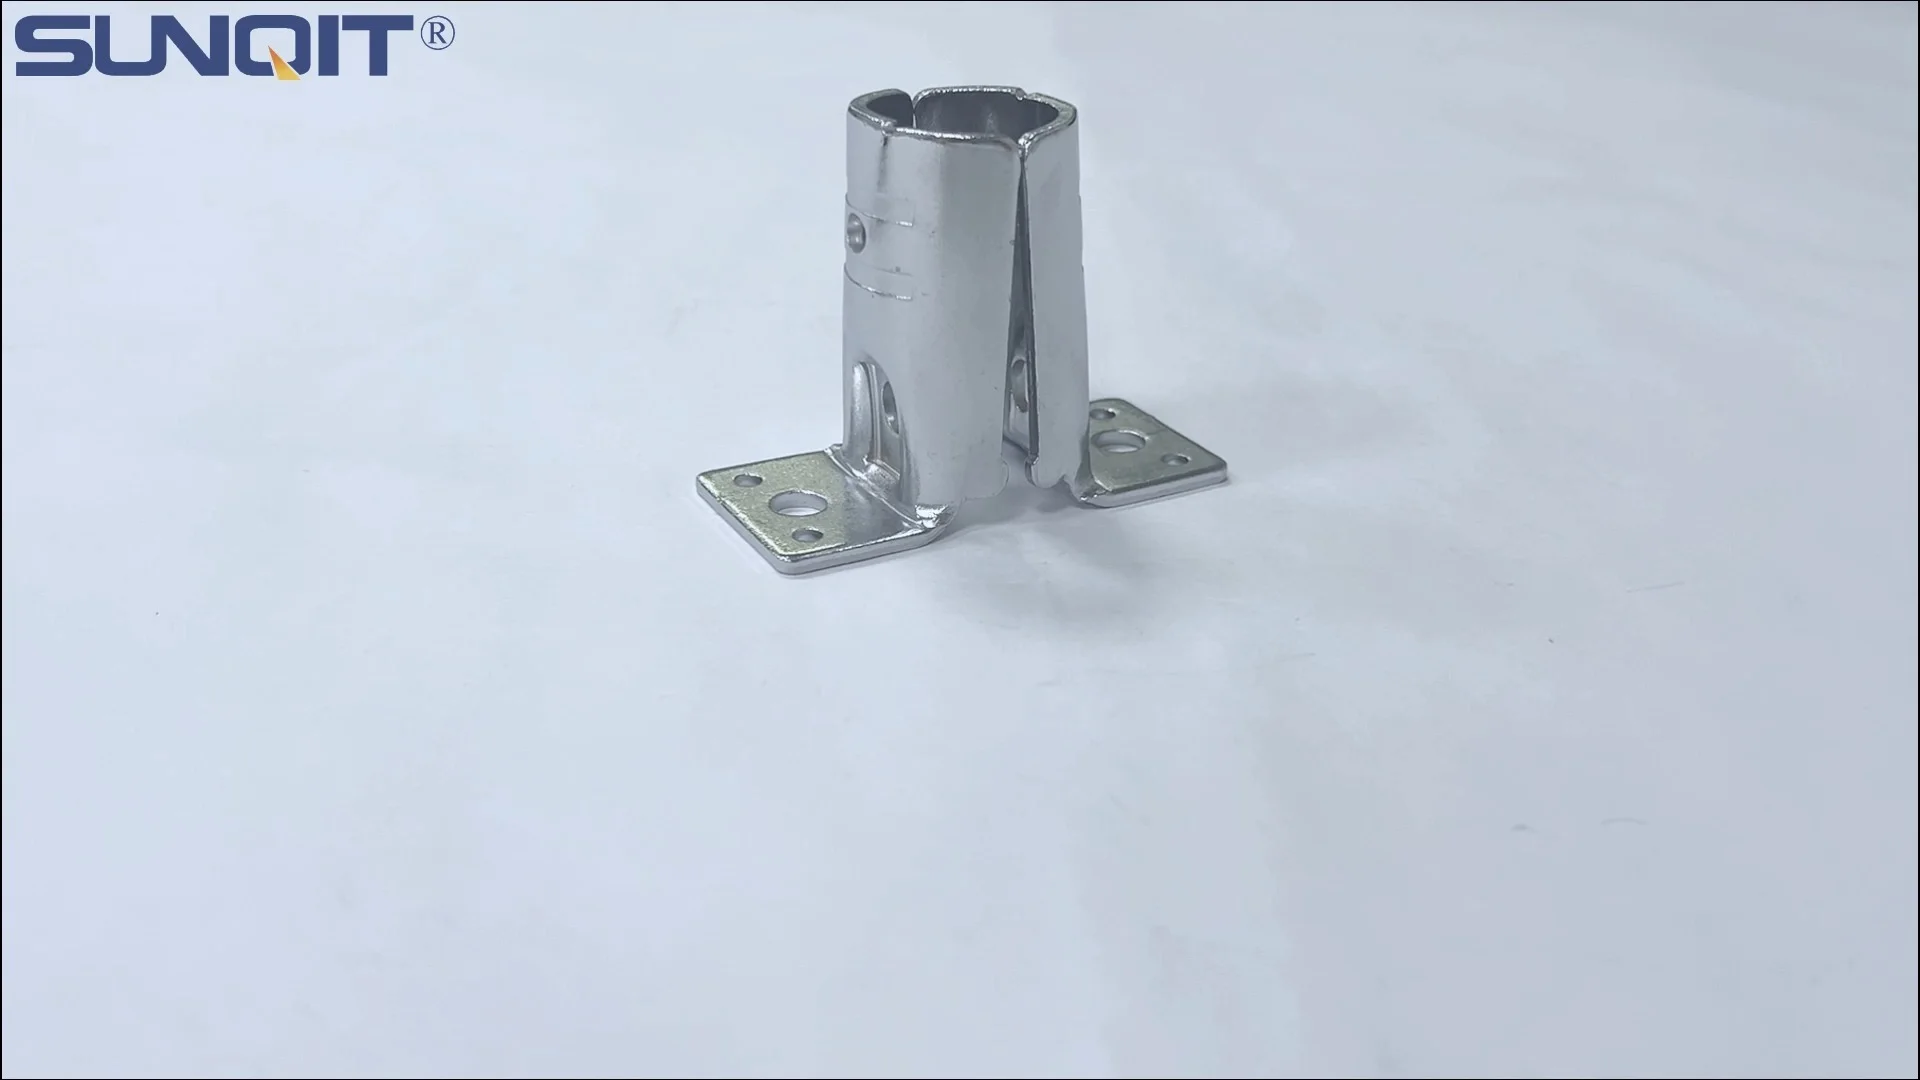
Vertical Lean Pipe Joint
Vertical lean pipe joint is used for 28mm lean pipe fixed on ground and keep it stable.
Walk into any busy manufacturing plant, and you'll likely spot them: vertical lean pipe joints, quietly holding together the backbone of production lines. These unassuming connectors link aluminum lean pipes, support workbenches, secure material racks, and keep turnover trolleys rolling smoothly. They're the unsung heroes of lean systems, ensuring workflows stay efficient and operations run like clockwork. But what happens when these critical joints start to corrode? A rusted joint isn't just an eyesore—it's a ticking time bomb. Left unchecked, corrosion can weaken connections, cause equipment to wobble, or even lead to catastrophic failure, grinding production to a halt and putting workers at risk.
I've spent over a decade working with lean pipe systems, from installing them on factory floors to troubleshooting the inevitable hiccups that come with daily use. One memory stands out: a maintenance supervisor once called me to a facility where a material rack had suddenly tilted, spilling parts across the floor. The culprit? A single vertical lean pipe joint, corroded from months of exposure to machine coolant and high humidity, had snapped under the weight. That incident stuck with me because it wasn't just about a broken part—it was a reminder that corrosion in these joints isn't just a maintenance issue; it's a threat to productivity, safety, and the bottom line.
In this article, we'll dive deep into the world of vertical lean pipe joints, exploring why corrosion happens, how to spot it before it becomes a crisis, and most importantly, how to prevent it. Whether you're a plant manager, a maintenance tech, or someone just starting to build their first lean system, you'll walk away with actionable strategies to keep your joints strong, your lines running, and your operations resilient. Let's start by understanding the enemy: corrosion itself.
Why Do Vertical Lean Pipe Joints Corrode?
Corrosion is a chemical reaction that eats away at metal, and vertical lean pipe joints are particularly vulnerable for a few key reasons. Unlike horizontal joints, which might sit above moisture or debris, vertical joints often run along walls, near floor drains, or in areas where condensation drips—think steam from cleaning processes, rainwater seeping in through loading docks, or even spilled liquids from production. Add in the fact that joints are where two or more pipes meet, creating tiny gaps and crevices where moisture, dirt, and chemicals can hide, and you've got the perfect storm for corrosion.
Environmental Culprits: Moisture, Chemicals, and More
The biggest driver of corrosion is moisture. Even in "dry" facilities, humidity can linger in the air, especially in regions with hot, sticky summers or poorly ventilated work areas. When that moisture settles on a lean pipe joint, it reacts with oxygen to form iron oxide—better known as rust. But it's not just water vapor that's the problem. Many manufacturing environments are full of chemicals: coolants from machining operations, lubricants from conveyor systems, cleaning agents used to sanitize workbenches, or even salt from de-icing products tracked in during winter. These substances can speed up corrosion by acting as electrolytes, making the chemical reaction between metal and moisture happen faster.
I once worked with a food processing plant where the washdown area used a strong alkaline cleaner. Over time, that cleaner was splashing onto the vertical joints of their aluminum lean pipe workbenches. The result? A chalky, white residue (aluminum oxide) that, while less destructive than rust, still weakened the joint's grip. The plant hadn't realized the cleaner was eating away at the protective coating on the joints, leading to premature wear.
Material Matters: Choosing the Wrong Pipe or Joint
Not all lean pipe joints are created equal, and the materials they're made from play a huge role in how resistant they are to corrosion. Let's break down the options:
- Uncoated Steel Joints: These are the most budget-friendly but also the most prone to rust. Unless you're in a completely dry, indoor environment (think an office supply closet), these are a risky choice. I've seen uncoated steel joints start showing rust within weeks in a moderately humid warehouse.
- PE Coated Lean Pipe Joints: PE (polyethylene) coating acts as a barrier between the metal and the environment, slowing down corrosion. But if the coating gets scratched—say, during installation or when moving heavy equipment—the exposed metal underneath becomes a target for moisture.
- Stainless Steel Pipe Series Joints: Stainless steel contains chromium, which forms a protective oxide layer that resists rust. It's a great choice for wet or chemical-heavy environments, like pharmaceutical labs or automotive plants. However, even stainless steel isn't invincible: in highly acidic or salt-rich environments, it can still corrode (a process called pitting).
- Aluminum Lean Pipe Joints: Aluminum naturally forms a thin layer of aluminum oxide that protects against further corrosion. It's lightweight, durable, and works well in most indoor settings. The catch? It can react with other metals (like steel) in a process called galvanic corrosion if they're in direct contact, especially in moist environments.
The mistake many facilities make is choosing the cheapest joint without considering their environment. A warehouse in Arizona's dry desert might get away with uncoated steel, but a seafood processing plant near the coast? Stainless steel or PE coated lean pipe joints are non-negotiable.
Installation and Maintenance: The Hidden Factors
Even the best materials can fail if joints are installed incorrectly. When workers rush to assemble a system, they might overtighten joints, stripping threads or cracking coatings. Or they might leave gaps between pipes and joints, creating spaces where water, dirt, and grime can accumulate. I've seen joints where the installer forgot to use the rubber gaskets that come with PE coated lean pipe systems—those gaskets are designed to seal out moisture, and skipping them is like leaving a window open during a rainstorm.
Maintenance is another silent killer. Let's say you install a beautiful set of stainless steel pipe series joints in a brewery. They're resistant to beer spills and steam, but if no one ever cleans them, yeast, hops, and sugar residues can build up, creating a sticky film that traps moisture and accelerates corrosion. Over time, even stainless steel can start to pit under that layer of gunk.
Troubleshooting Corrosion: How to Spot It Early
The key to managing corrosion is catching it early—before it weakens the joint. But how do you spot the signs, especially when joints are tucked away behind workbenches or in hard-to-reach corners? Let's walk through a step-by-step troubleshooting process that I've refined over the years.
Step 1: Visual Inspection—Your First Line of Defense
Start with a thorough visual check. Grab a flashlight, a mirror (for tight spots), and a notepad, and walk the length of your lean systems. Look for these red flags:
- Rust (Iron Oxide): The classic sign—reddish-brown flakes or powdery residue on steel joints. Even a tiny spot means moisture has found its way in.
- White/Gray Residue: On aluminum lean pipe joints, this is aluminum oxide, a sign the metal is reacting to moisture or chemicals.
- Pitting: Small, deep holes in the metal, often caused by salt or acidic chemicals. These are dangerous because they weaken the joint from the inside out.
- Discoloration: Stains or dark spots on PE coated joints could mean the coating is damaged, exposing the metal underneath.
- Loose Connections: If a joint wobbles or the pipe turns in the joint, corrosion might have eaten away at the threads or the grip.
Pro tip: Take photos of any suspicious joints. Comparing photos over time can help you track if corrosion is spreading or getting worse. I once had a client who dismissed a small rust spot as "no big deal" until I showed them photos from three months prior—what was a pinhead-sized dot had grown into a quarter-inch patch.
Step 2: Dig Deeper with Testing
If visual inspection raises concerns, it's time to test. Here are a few simple methods:
- Scrape Test: Use a plastic scraper (not metal, which can damage the joint) to gently remove surface rust or residue. If the metal underneath is smooth and solid, the corrosion might be superficial. If it's pitted or crumbly, the joint is compromised.
- Thickness Measurement: For critical joints (like those supporting heavy material racks), use a caliper to measure the thickness of the joint's metal. Compare it to a new joint—if it's thinner by more than 10%, it's time to replace it.
- Salt Spray Test (For New Installations): If you're installing a new system and want to test material resistance, you can buy a small salt spray test kit online. This mimics coastal or high-salt environments and shows how well joints hold up over time.
Step 3: Identify the Root Cause
Once you've found corrosion, the next question is: why did it happen? Without knowing the root cause, you might fix the joint only to have the same problem pop up elsewhere. Let's use a common scenario to walk through this:
Scenario: You notice rust on a vertical lean pipe joint in your assembly line. The joint connects a steel pipe to an aluminum workbench. The area is near a floor drain that's often wet, and the plant uses a citrus-based cleaner to wipe down the workbench.
Root Cause Analysis:
- Material Mix: Steel (pipe) and aluminum (workbench) are in direct contact. In a moist environment (near the drain), this causes galvanic corrosion.
- Cleaner: Citrus-based cleaners are acidic, which accelerates corrosion, especially on uncoated steel.
- Moisture: The floor drain creates constant humidity, providing the water needed for the chemical reaction.
The solution here wouldn't just be replacing the joint—it would involve using a dielectric gasket (to separate steel and aluminum), switching to a non-acidic cleaner, and improving drainage around the workbench. Without addressing all three factors, the new joint would corrode too.
| Symptom | Possible Cause | Action to Take |
|---|---|---|
| Reddish-brown flakes on joint | Iron oxide (rust) from steel exposure to moisture | Check if joint is uncoated steel; test thickness; replace if pitted. |
| White, chalky residue on aluminum joint | Aluminum oxide (natural protection, but excessive may mean high humidity) | Clean residue; inspect for gaps in joints; improve ventilation. |
| Small holes (pitting) on stainless steel joint | Exposure to salt, acid, or chloride (e.g., from de-icing salts or cleaners) | Test environment for pH levels; switch to acid-resistant stainless steel (316 grade). |
| Loose joint with no visible corrosion | Corrosion inside threads (hidden from view) | Disassemble joint; inspect threads for rust or pitting; replace if damaged. |

Prevention Strategies: Keeping Joints Corrosion-Free
Now that we know why corrosion happens and how to spot it, let's focus on the good stuff: prevention. The goal is to create an environment where joints stay strong, clean, and corrosion-free for years. Here are the strategies that have worked for me and the facilities I've helped.
1. Choose the Right Materials for Your Environment
This is the foundation of corrosion prevention. Start by auditing your facility's environment—ask:
- What's the average humidity? (Use a hygrometer to measure—aim for below 60% to slow corrosion.)
- Are there chemicals present? (Coolants, cleaners, oils, acids?)
- Is the area exposed to water? (Near sinks, drains, or outdoor elements?)
- Are there other metals in the system? (Steel, aluminum, copper?)
Based on your answers, pick your joints:
- Dry, Indoor, No Chemicals: Aluminum lean pipe joints or PE coated lean pipe joints (budget-friendly options).
- Moderate Humidity, Mild Chemicals: Stainless steel pipe series joints (304 grade works here).
- High Humidity, Acids/Salts: Stainless steel 316 grade (more corrosion-resistant) or fully coated PE joints.
- Mixed Metals: Use dielectric gaskets or insulators to separate dissimilar metals; avoid direct contact.
Remember: spending a little more on quality joints upfront saves you from costly replacements and downtime later. A stainless steel joint might cost twice as much as an uncoated steel one, but it'll last 5–10 times longer in a harsh environment.
2. Install Joints Like a Pro
Even the best materials fail with shoddy installation. Train your team on proper assembly, or hire a professional installer if you're building a complex system. Here are the key steps:
- Clean Pipes and Joints First: Dust, oil, or debris on pipes can prevent joints from sealing properly. Wipe them down with a lint-free cloth before assembly.
- Use the Right Tools: Avoid using pliers or channel locks, which can scratch coatings. Use the manufacturer-recommended wrench or hex key for a snug (but not over-tight) fit.
- Seal the Gaps: For PE coated lean pipe joints, always use the included rubber gaskets. For stainless steel, apply a thin layer of anti-seize compound (avoid copper-based compounds on aluminum) to threads to prevent galling (a form of wear from friction).
- Check Alignment: Vertical joints should be plumb (straight up and down) to prevent uneven weight distribution, which can stress the joint and create gaps over time.
3. Maintain Like You Mean It
Maintenance is the unsung hero of corrosion prevention. A little regular care goes a long way. Here's a simple schedule to follow:
- Weekly: Wipe down joints with a damp cloth to remove dust, oil, or debris. Pay extra attention to areas near chemicals or moisture.
- Monthly: Inspect joints for signs of corrosion (use the visual checks we discussed earlier). Tighten any loose joints—vibration from machinery can loosen threads over time.
- Quarterly: For PE coated joints, check for scratches or cracks in the coating. Touch up with a PE repair kit (available from most lean pipe suppliers). For stainless steel, polish with a non-abrasive stainless steel cleaner to restore the protective oxide layer.
- Annually: Do a full system audit. Measure joint thickness, test for galvanic corrosion in mixed-metal areas, and replace any joints that show significant wear.
One facility I worked with started a "joint of the month" program, where each maintenance tech was assigned a section of the plant to inspect in detail. It turned into a friendly competition, and they caught several corroded joints before they failed. Sometimes, making maintenance a team effort is all it takes to stay ahead.
4. Control the Environment
You can't always change the weather, but you can control your facility's microclimate. Here are a few tweaks that make a big difference:
- Dehumidify: In high-humidity areas (like near steam cleaners or dishwashers), install dehumidifiers to keep relative humidity below 60%.
- Improve Drainage: Fix leaky pipes, unclog floor drains, and use absorbent mats near water sources to keep moisture away from joints.
- Switch Cleaners: Avoid acidic or chloride-heavy cleaners (like bleach) on metal joints. Opt for pH-neutral cleaners instead—they're gentler on metal and just as effective at removing grime.
- Ventilate: Use fans or open windows (when weather permits) to circulate air and reduce condensation on cold pipes or joints.

Real-World Success: How One Plant Beat Corrosion
The Problem: A Automotive Parts Facility Struggles with Coolant and Corrosion
A mid-sized automotive parts manufacturer was facing a recurring issue: vertical lean pipe joints on their assembly line were corroding every 6–8 months, leading to frequent replacements and unplanned downtime. The line used steel pipes with standard zinc-plated joints, and the area was prone to spills of machine coolant (which contains oils and mild acids). The maintenance team was spending 10+ hours a month replacing joints, and the plant manager was frustrated with the cost and disruption.
The Solution: A Three-Pronged Approach
After assessing the environment, we recommended:
- Material Swap: replace zinc-plated joints with PE coated lean pipe joints, which are resistant to coolant and moisture.
- Installation Upgrade: Add rubber gaskets to all joints and use dielectric tape to separate steel pipes from aluminum workbenches (stopping galvanic corrosion).
- Maintenance Overhaul: Implement a weekly cleaning schedule with pH-neutral cleaner and monthly inspections.
The Result: Joint Life Triples
Six months later, the plant manager reported that not a single joint had corroded. The PE coating held up to coolant spills, the gaskets kept moisture out, and the cleaning schedule prevented grime buildup. Joint replacement time dropped to 2 hours a month, and the plant saved over $15,000 in parts and labor in the first year alone. "We should have done this years ago," the manager told me. "It's not just about the money—it's the peace of mind knowing the line won't crash because of a rusty joint."
This case study shows that corrosion isn't inevitable. With the right materials, installation, and maintenance, vertical lean pipe joints can last for years—even in tough environments.

Conclusion: Corrosion-Proof Your Lean System
Vertical lean pipe joints might be small, but they're the backbone of your lean system. Corrosion in these joints isn't just a maintenance issue; it's a threat to productivity, safety, and your bottom line. But by understanding why corrosion happens, learning to spot it early, and implementing proactive prevention strategies—choosing the right materials like stainless steel pipe series or PE coated lean pipe, installing joints properly, and maintaining them regularly—you can keep your system strong, your lines running, and your operations resilient.
Remember, the best defense against corrosion is a good offense. Don't wait for a joint to snap or a rack to tilt—start inspecting, maintaining, and upgrading today. Your team, your production schedule, and your budget will thank you.
Now, go take a walk through your plant. Look at those vertical lean pipe joints. What do you see? A potential problem, or a system that's ready to stand the test of time? With the strategies in this article, you've got the tools to make sure it's the latter.