- Company Articles
- Products and Technology
- Installation And Maintenance
- Troubleshooting External Straight Aluminum Joint Issues: Expert Solutions

Troubleshooting External Straight Aluminum Joint Issues: Expert Solutions
Related Product
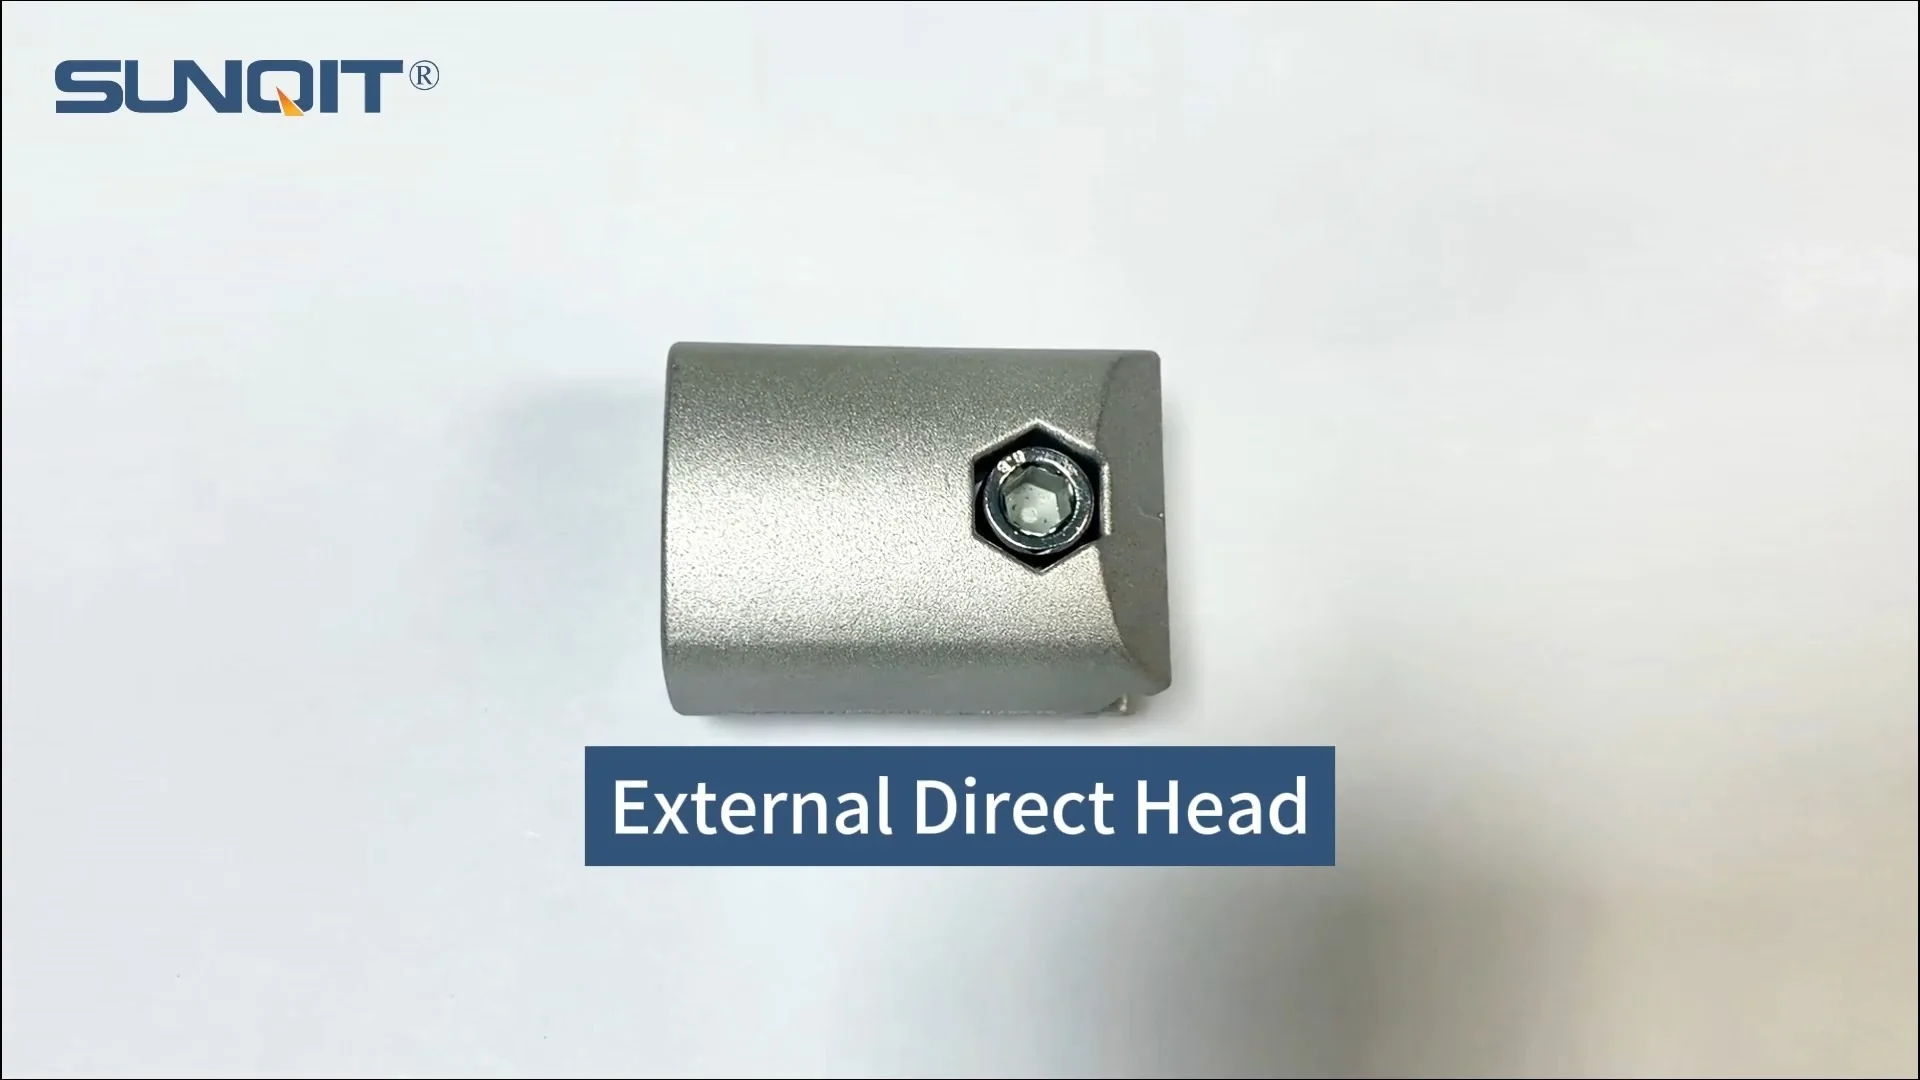
External Straight Aluminum Joint
Aluminum pipe joint outside connection used for two pcs 28pcs aluminum pipe connection in straight angle,it connects two pcs pipe from outside.
It's a busy Tuesday morning on the factory floor. Your team is rushing to meet a critical production deadline, and the assembly line suddenly stutters. A closer look reveals the problem: the aluminum profile workbench holding essential components has started to wobble. Upon inspection, you notice the external straight aluminum joint connecting the table's legs to its frame is loose—again. Sound familiar? For anyone managing lean systems, manufacturing setups, or material handling equipment, these small but vital components can be the difference between smooth operations and costly downtime. In this guide, we'll dive deep into the world of external straight aluminum joints, explore their common issues, and provide actionable troubleshooting steps and expert solutions to keep your workflow running like clockwork.
Understanding External Straight Aluminum Joints: The Backbone of Lean Systems
Before we jump into troubleshooting, let's take a moment to appreciate the role these joints play. External straight aluminum joints are the unsung heroes of modular industrial setups. They're the connectors that bring aluminum profile s, pipes, and accessories together, forming everything from workbenches and flow racks to conveyors and turnover trolleys. Designed for flexibility, strength, and ease of assembly, they're a cornerstone of lean manufacturing—allowing teams to reconfigure workspaces quickly, adapt to changing production needs, and maintain efficient material flow.
Most external straight aluminum joints are engineered to work with T-slot aluminum profiles, using clamping mechanisms or bolts to secure pipes in place. They're typically made from lightweight yet durable aluminum alloys, resistant to corrosion and capable of supporting moderate to heavy loads (depending on the model). Their design often includes features like threaded holes, adjustable clamps, and compatibility with aluminum pipe accessories such as clamps, brackets, and end caps. But like any hardworking component, they're prone to wear, damage, and misalignment over time—especially in high-traffic, high-stress environments.
Key Features to Know
- Material Composition: Aluminum alloys (often 6063-T5) for strength and corrosion resistance.
- Connection Type: T-slot compatibility, with clamping or bolt-on mechanisms to attach to aluminum profiles.
- Load Capacity: Ranges from 50kg to 500kg+ per joint, depending on size and design.
- Adjustability: Many models allow for minor angle or position adjustments to correct alignment issues.
- Accessory Compatibility: Works with aluminum pipe clamps, end caps, and brackets to enhance functionality.
Common Issues with External Straight Aluminum Joints
Even the most well-designed components run into problems. Let's break down the most frequent issues you might encounter with external straight aluminum joints, along with their root causes and telltale signs.
1. Looseness or Instability
The Problem: The joint feels wobbly, or the connected aluminum profile shifts under load. This is the most common issue and often the first sign of trouble.
Causes:
- Worn or damaged clamping mechanisms (e.g., stripped threads, cracked clamp arms).
- Improper initial tightening (under-torquing during installation).
- Vibration from nearby machinery gradually loosening bolts or clamps.
- Thermal expansion/contraction (common in environments with extreme temperature fluctuations).
Signs to Look For: Visible gaps between the joint and profile, creaking sounds when the structure is moved, or components sliding out of alignment during use.
2. Misalignment
The Problem: The joint connects two aluminum profiles at an angle, even though they're supposed to be straight. This can throw off the entire structure's stability.
Causes:
- Installation error (e.g., forcing the joint onto misaligned profiles).
- Damaged or bent joint housing (from impact or overloading).
- Uneven flooring causing the structure to tilt, putting stress on the joint.
- Using mismatched components (e.g., a joint designed for 20mm profiles paired with 30mm pipes).
Signs to Look For: Profiles that don't sit flush, visible gaps between the joint and pipe, or uneven weight distribution (e.g., a workbench that rocks when pressed).
3. Corrosion or Surface Damage
The Problem: The joint's surface becomes pitted, discolored, or covered in a white/greenish film—signs of corrosion or chemical damage.
Causes:
- Exposure to moisture, humidity, or corrosive substances (e.g., cleaning chemicals, oils).
- Poor maintenance (infrequent cleaning allowing dirt and debris to trap moisture).
- Low-quality aluminum alloys (common in non-branded or counterfeit joints).
Signs to Look For: Flaking paint, rough patches on the joint's surface, or difficulty turning bolts due to corroded threads.
4. Thread or Clamp Failure
The Problem: The joint's threads strip, or the clamp mechanism fails to grip the aluminum profile, even when tightened.
Causes:
- Over-tightening during installation (stripping threads or cracking clamp arms).
- Repeated assembly/disassembly (wearing down thread edges).
- Using the wrong tool (e.g., a Phillips screwdriver on a hex bolt, rounding the head).
- Exceeding the joint's load capacity (stressing the clamp beyond its design limits).
Signs to Look For: Bolts spinning freely without tightening, clamps that slip even when fully closed, or visible cracks in the joint's plastic or metal components.
5. Compatibility Issues with Aluminum Pipe Accessories
The Problem: The joint doesn't fit properly with other components, such as aluminum pipe clamp s, brackets, or end caps.
Causes:
- Using non-standard or off-brand accessories (not designed for the joint's specific dimensions).
- Mismatched profile sizes (e.g., a 4040 joint paired with 3030 profiles).
- Outdated joint models (discontinued designs with limited accessory support).
Signs to Look For: Accessories that won't lock into place, gaps between the joint and accessory, or components that fall off during use.

Troubleshooting Step-by-Step: How to Diagnose the Issue
Troubleshooting external straight aluminum joints requires a systematic approach. Rushing to "fix" the problem without proper diagnosis can lead to temporary solutions—or worse, cause further damage. Follow these steps to pinpoint the root cause:
Step 1: Visual Inspection
Start with the basics: a thorough visual check. Grab a flashlight and examine the joint from all angles. Look for:
- Cracks or chips: Pay close attention to the joint's housing, clamp arms, and threaded holes. Even small cracks can weaken the structure.
- Corrosion: White or greenish deposits (aluminum oxide) indicate moisture exposure. Dark spots may signal chemical damage.
- Alignment: Check if the joint sits flush with the aluminum profile. Gaps or tilting suggest misalignment.
- Worn components: Look for stripped bolt heads, flattened clamp pads, or missing parts (e.g., washers, lock nuts).
Step 2: Tightness Test
If the joint feels loose, grab the appropriate tool (hex key, screwdriver, or wrench) and attempt to tighten the bolts or clamps. Note:
- Does the bolt turn easily? If it spins without resistance, the threads may be stripped.
- Does tightening stop the wobble? If yes, the issue was likely under-torquing or vibration-related.
- Does the clamp grip firmly? After tightening, try to wiggle the connected profile. If it still moves, the clamp mechanism may be worn.
Step 3: Load Simulation
Many joints only reveal issues under operational loads. Simulate real-world conditions by placing the typical weight (e.g., tools, components) on the structure. Observe:
- Deflection: Does the joint bend or shift under load?
- Noise: Creaking or popping sounds often indicate stress points.
- Stability: Does the structure return to its original position when the load is removed?
Step 4: Compatibility Check
If you're experiencing fit issues with accessories, verify compatibility. Check the joint's specifications (usually printed on the housing or in the manufacturer's manual) against the aluminum profile and accessories. Key details to confirm:
- Profile size: 2020, 3030, 4040, etc. (must match the joint's design).
- Accessory type: Ensure clamps, brackets, or end caps are designed for external straight joints (not internal or angled models).
- Manufacturer guidelines: Some brands (e.g., Misumi, Bosch Rexroth) use proprietary designs that only work with their accessories.
Step 5: Environmental Assessment
Finally, consider the environment. Is the joint exposed to:
- Moisture: High humidity, spills, or washdowns can accelerate corrosion.
- Vibration: Nearby machinery (e.g., pumps, compressors) can loosen bolts over time.
- Chemicals: Oils, solvents, or cleaning agents may degrade plastic components or strip protective coatings.

Expert Solutions: Fixing Common External Straight Aluminum Joint Issues
Now that you've diagnosed the problem, it's time to fix it. Below are targeted solutions for each common issue, backed by industry best practices.
Solution for Looseness or Instability
Quick Fix: Retighten the joint using a torque wrench (follow the manufacturer's torque specs—typically 2-5 Nm for aluminum joints). For added security, apply a thread locker (e.g., Loctite 243) to bolts to prevent vibration-related loosening.
Long-Term Fix: If retightening doesn't work, inspect the clamp pads. Over time, these pads (often made of rubber or plastic) wear down, reducing grip. replace them with new pads (available from most aluminum pipe accessories suppliers). For joints with stripped threads, use a thread repair kit (e.g., helicoils) or replace the joint entirely if damage is severe.
Solution for Misalignment
Quick Fix: Loosen the joint, realign the aluminum profile, and retighten. Use a straightedge or level to ensure the profiles are perfectly straight before securing the joint.
Long-Term Fix: If misalignment persists, check the flooring. Uneven surfaces can cause structural tilting. Use shims under the feet of the structure to level it. For bent joints, replace them—aluminum is difficult to bend back without weakening the material.
Solution for Corrosion
Quick Fix: Clean corroded areas with a mild detergent and a soft brush. For heavy corrosion, use a specialized aluminum cleaner (e.g., Alumiprep 33) to remove oxide deposits. Rinse thoroughly and dry with a lint-free cloth.
Long-Term Fix: Apply a protective coating (e.g., clear acrylic spray or anti-corrosion wax) to shield the joint from moisture. In high-humidity environments, consider upgrading to stainless steel bolts or joints with anodized finishes for extra resistance.
Solution for Thread or Clamp Failure
Quick Fix: For stripped bolts, replace them with new ones of the same size and thread pitch. Avoid over-tightening—use a torque wrench to stay within specs.
Long-Term Fix: If the clamp mechanism is damaged (e.g., cracked arms, broken springs), replace the joint. When installing new joints, train your team on proper torque techniques to prevent future damage. For high-load applications, upgrade to heavy-duty joints with reinforced clamps.
Solution for Compatibility Issues
Quick Fix: replace incompatible accessories with those recommended by the joint manufacturer. Most suppliers list compatible aluminum pipe accessories on their websites or in catalogs.
Long-Term Fix: Standardize on a single brand or system (e.g., 2020 or 4040 profiles) to avoid compatibility headaches. Work with a trusted supplier who can provide guidance on matching joints, profiles, and accessories.

Preventive Maintenance: Keeping Joints in Top Shape
The best way to avoid joint issues is to prevent them in the first place. A proactive maintenance routine can extend the life of your external straight aluminum joints and reduce downtime. Use the table below as a checklist to keep track of key tasks.
| Maintenance Task | Frequency | Tools Required | Key Steps |
|---|---|---|---|
| Visual Inspection | Weekly | Flashlight, magnifying glass (for small cracks) | Check for cracks, corrosion, loose bolts, or misalignment. Document any issues. |
| Tightness Check | Monthly | Hex keys, torque wrench, thread locker (as needed) | Retighten bolts to specs. Apply thread locker to joints in high-vibration areas. |
| Cleaning | Quarterly | Mild detergent, soft brush, lint-free cloth | Remove dirt, grease, and debris. Dry thoroughly to prevent corrosion. |
| Accessory Inspection | Bi-Annually | Pliers, replacement pads/clamps | Check clamp pads, washers, and lock nuts for wear. replace as needed. |
| Load Testing | Annually | Weights (simulating operational load) | Test joint stability under maximum rated load. replace joints that fail. |
Pro Tip: Train Your Team
Many joint issues stem from improper installation. Take 15 minutes to train your team on how to correctly assemble aluminum profiles and joints. Emphasize torque specs, alignment, and the importance of using compatible accessories. A little knowledge goes a long way in preventing avoidable mistakes.
Real-World Case Study: Solving Joint Issues at XYZ Manufacturing
To illustrate how these solutions work in practice, let's look at XYZ Manufacturing, a mid-sized electronics assembler. XYZ was struggling with frequent downtime due to wobbly workbenches in their assembly area. The culprit? Loose external straight aluminum joints on their 4040 aluminum profile workbenches. Here's how they fixed it:
- Diagnosis: The maintenance team performed visual inspections and found that the joints' clamp pads were worn down, reducing grip. Vibration from nearby soldering equipment was also loosening bolts over time.
- Solution: They replaced all worn clamp pads with new ones (sourced from their aluminum pipe accessories supplier) and applied thread locker to all bolts. They also added a monthly tightness check to their maintenance schedule.
- Result: Downtime due to workbench issues dropped by 40%, and the team reported a noticeable improvement in stability. The fix cost less than $200 in parts and an hour of labor—far cheaper than the $1,500+ in lost productivity they'd been experiencing monthly.
Conclusion: Small Joints, Big Impact
External straight aluminum joints may seem like minor components, but they're critical to the reliability of your lean system, workbenches, and material handling setups. By understanding their common issues, following a systematic troubleshooting process, and investing in preventive maintenance, you can avoid costly downtime, improve safety, and keep your operations running smoothly. Remember: when it comes to these joints, an ounce of prevention is worth a pound of cure. So grab your flashlight, torque wrench, and this guide—and keep those joints tight, aligned, and ready for action.