- Company Articles
- Products and Technology
- Installation And Maintenance
- Troubleshooting Lean Pipe Clamp Issues: Expert Solutions

Troubleshooting Lean Pipe Clamp Issues: Expert Solutions
Related Product
Lean Pipe Clamp
Lean pipe clamp is used for rack system hang monitor or other panel for workbenck, flowrack in production daily use.
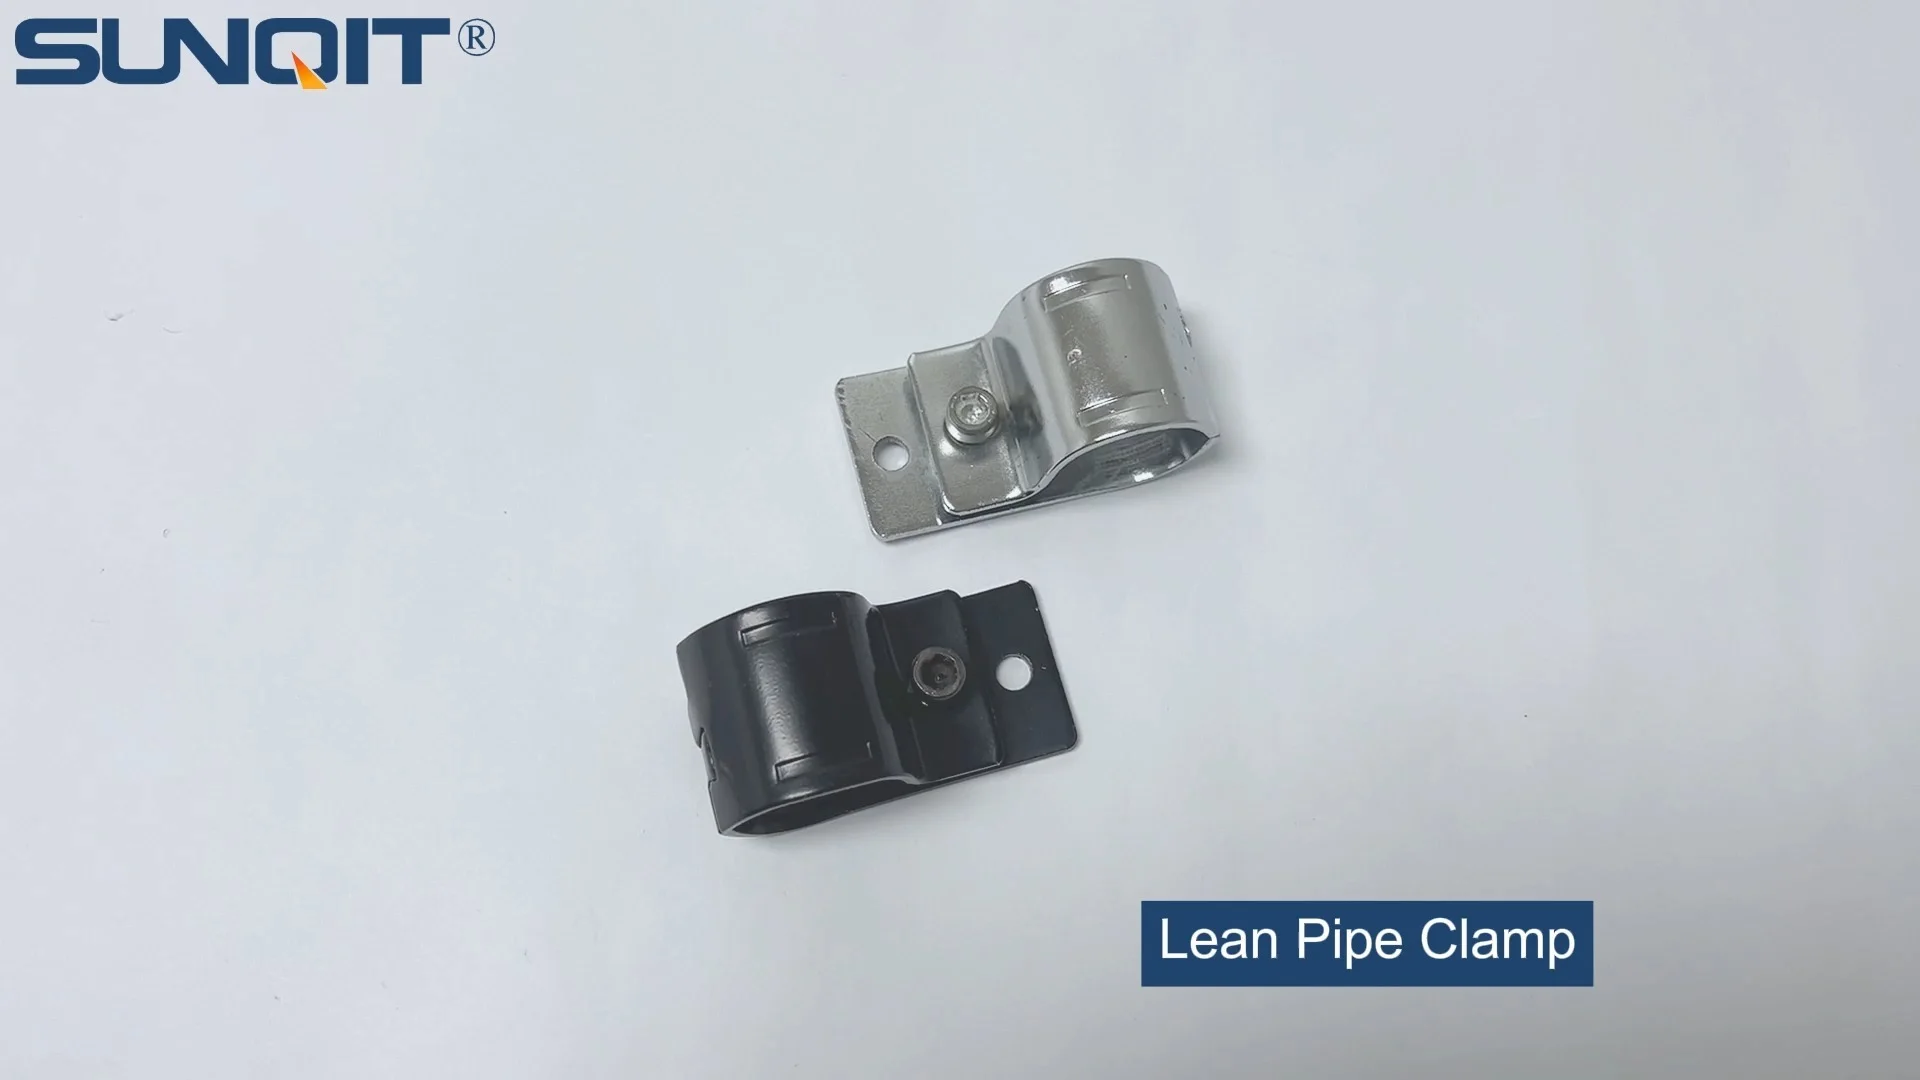
If you've ever walked through a busy manufacturing plant or set up a lean workbench in your workshop, you've probably seen the quiet backbone of efficient workflows: lean pipe systems. These modular setups—built from pipes, joints, and clamps—are the unsung heroes of productivity, letting teams customize workbenches, assembly lines, and material racks on the fly. But for all their flexibility, there's one component that can make or break the whole system: the lean pipe clamp. These small, unassuming pieces hold pipes and joints together, ensuring stability, alignment, and safety. When they fail, the result is more than just a wobbly workbench; it's downtime, frustrated teams, and even potential safety hazards. In this guide, we'll dive into the most common lean pipe clamp issues, why they happen, and expert solutions to fix (and prevent) them—so you can keep your lean system running smoothly, no matter how busy the floor gets.
Why Lean Pipe Clamps Matter More Than You Think
Before we jump into troubleshooting, let's take a second to appreciate what lean pipe clamps actually do. Think of them as the "glue" of your lean system. A single clamp connects two pipes at a joint, distributing weight evenly and keeping the structure rigid. Whether you're building a lightweight material rack or a heavy-duty assembly workbench, clamps ensure that every component stays where it's supposed to—even when workers lean on the bench, tools are dropped, or materials are loaded and unloaded hundreds of times a day. But here's the catch: clamps are under constant stress. Over time, that stress can lead to looseness, corrosion, or misalignment. And when one clamp fails, it creates a domino effect—other clamps take on extra weight, joints weaken, and suddenly your "stable" system is anything but. That's why knowing how to spot and fix clamp issues early isn't just about maintenance; it's about protecting your team's efficiency and keeping operations running without costly interruptions.
Common Lean Pipe Clamp Issues (and How to Solve Them)
1. Loose Clamps: The Wobbly Workbench Dilemma
The most frequent complaint we hear from plant managers and technicians? "My workbench is wobbling, and I can't figure out why." Nine times out of ten, the culprit is a loose lean pipe clamp. You tighten it during setup, but after a few weeks of use, it starts to slip. Before long, the entire structure feels unstable, and workers avoid leaning on it—slowing down tasks that require steady support.
What causes it? Loose clamps usually stem from two issues: improper installation or material fatigue. If the clamp wasn't tightened to the right torque during setup, vibrations from daily use (like tools being placed on the workbench or parts sliding on a flow rack) will gradually loosen it. Even if you did tighten it correctly, the constant stress of weight and movement can stretch the clamp's metal slightly over time, reducing its grip. In humid or high-temperature environments, rust can also eat away at the clamp's threads, making it harder to stay tight.
Expert solutions: Start with the basics: check the clamp's torque. Most lean pipe clamps require a specific tightening force—usually between 15-25 Nm (newton-meters), depending on the material (steel vs. aluminum). Use a torque wrench to ensure it's snug but not over-tightened (over-tightening can strip threads or crack the clamp). If the threads are rusted, clean them with a wire brush and apply a small amount of anti-seize lubricant (avoid oil-based lubes, which attract dust). For clamps that keep slipping despite proper torque, consider upgrading to a heavy-duty model with serrated jaws—these grip the pipe more aggressively, resisting vibration-related loosening.
Pro Tip: Mark clamps with a paint pen after tightening. If the mark shifts later, you'll know the clamp has loosened—no guesswork needed!
2. Misalignment: When Pipes Don't "Click" Into Place
Ever tried to assemble a lean pipe structure and found that the pipes just won't line up? Maybe the joint sits at a weird angle, or the clamp won't close all the way. This misalignment isn't just frustrating—it weakens the entire system. A misaligned clamp puts uneven stress on the pipe and joint, increasing the risk of bending or breaking under load.
What causes it? Misalignment often starts with the lean pipe joint itself. If the joint is bent, cracked, or worn, the clamp can't seat properly, forcing the pipe into an awkward position. Low-quality joints (common in budget-friendly kits) are especially prone to this—their tolerances are off, so even new clamps struggle to align. Another culprit? Using the wrong clamp size for your pipe. For example, a clamp designed for 28mm steel pipe won't fit snugly on a 30mm aluminum lean pipe, leaving gaps that cause misalignment.
Expert solutions: First, inspect the lean pipe joint. If it's bent or cracked, replace it immediately—damaged joints can't be fixed, and reusing them puts your entire structure at risk. For minor alignment issues, try loosening all nearby clamps, realigning the pipes by hand, and retightening them in a crisscross pattern (like tightening lug nuts on a car wheel). This ensures even pressure. If you're using aluminum pipes, opt for clamps specifically designed for aluminum—they have softer jaws that conform to the pipe's surface, reducing slippage. And always double-check clamp-pipe compatibility: most suppliers list recommended pipe diameters on their clamp packaging.
3. Corrosion: When Rust Eats Away at Reliability
In factories with high humidity, frequent cleaning (think food processing or pharmaceutical plants), or exposure to chemicals, corrosion is a silent enemy. A rusty lean pipe clamp might not look like a big deal at first, but over time, it can eat through the metal, weakening the clamp until it snaps under pressure. Worse, rust can spread to adjacent joints and pipes, turning a small issue into a system-wide problem.
What causes it? Corrosion is a chemical reaction: moisture, oxygen, and metal mix to form rust. In damp environments, even stainless steel clamps can corrode if they're not properly maintained. Saltwater exposure (near coastal plants) or contact with cleaning agents (like bleach or acidic degreasers) accelerates this process. Cheap, uncoated steel clamps are the most vulnerable—they start rusting within months in humid conditions.
Expert solutions: Prevention is key here. If you're in a high-moisture environment, swap out standard steel clamps for stainless steel or aluminum models. Stainless steel resists rust, while aluminum forms a protective oxide layer that stops corrosion in its tracks. For existing rust, use a wire brush to remove flaky material, then apply a rust-inhibiting primer and a coat of industrial-grade paint (matching the clamp's original color to avoid unsightly patches). If the corrosion has eaten deep pits into the clamp, replace it—pitted metal can't regain its strength, even after cleaning.
Pro Tip: Wipe down clamps monthly with a dry cloth in humid areas. For extra protection, spray a thin layer of silicone-based lubricant (avoid oil-based products) on stainless steel clamps to repel moisture.
4. Compatibility Issues: Mixing and Matching the Wrong Parts
Lean pipe systems are all about flexibility—mixing and matching pipes, joints, and accessories to build custom setups. But that flexibility can backfire if you pair incompatible components. For example, using a plastic-coated lean pipe with a clamp designed for bare steel might seem fine at first, but the plastic can wear away, leaving the clamp loose and the pipe exposed.
What causes it? The biggest culprit is using parts from different suppliers. While most lean pipe systems follow general standards, there are subtle differences in thread size, clamp jaw design, and joint dimensions between brands. A clamp from Supplier A might not fit a joint from Supplier B, even if they're both labeled "28mm." Another issue is mixing materials: combining steel pipes with aluminum clamps, for instance, can cause galvanic corrosion (a chemical reaction between dissimilar metals) that weakens both components.
Expert solutions: Stick to a single supplier for critical components like clamps, joints, and pipes—this ensures compatibility. If you must mix brands, check the supplier's technical specs (available on their website) to confirm thread sizes, pipe diameter tolerances, and material compatibility. For plastic-coated pipes, use clamps with rubberized jaws—they grip the plastic without tearing it, and the rubber acts as a barrier against galvanic corrosion. When in doubt, ask your lean pipe supplier for a compatibility chart—most are happy to provide one.
5. Wear and Tear: When Clamps Just "Wear Out"
Even the best-made clamps don't last forever. After months (or years) of tightening, loosening, and supporting heavy loads, the clamp's jaws can wear down, the threads can strip, or the handle can break. This is normal wear and tear, but ignoring it can lead to sudden failures—like a clamp giving way mid-shift, causing a material rack to collapse.
What causes it? The main culprit is frequency of use. Clamps on adjustable workbenches or temporary assembly lines (which get reconfigured often) wear out faster than those on fixed structures. Poor-quality materials also play a role: clamps made from low-grade steel will bend or strip long before high-carbon steel or aluminum alternatives. Even the way you use the clamp matters—using pliers to tighten a clamp with a plastic handle, for example, can crack the handle, making it unusable.
Expert solutions: The first step is regular inspection. Add clamp checks to your weekly maintenance routine: look for worn jaws (they'll have smooth, shiny spots where the grip has faded), stripped threads (the clamp spins without tightening), or cracked handles. replace any clamp that shows these signs—don't wait for it to fail. For high-use clamps (like those on workbenches that get reconfigured weekly), invest in heavy-duty models with reinforced jaws and metal handles. They cost a bit more upfront but last 2-3 times longer than standard clamps. And teach your team proper clamp use: use the handle provided, not pliers or wrenches, to avoid damaging the clamp.

Quick Reference: Lean Pipe Clamp Troubleshooting Table
| Issue | Common Causes | Quick Fix | Long-Term Prevention |
|---|---|---|---|
| Loose clamps | Improper torque, vibration, rusted threads | Tighten with torque wrench (15-25 Nm); clean rust with wire brush | Use serrated-jaw clamps; mark tightened clamps for visual checks |
| Misalignment | Bent/worn joints, wrong clamp size, low-quality parts | replace damaged joints; realign pipes and retighten in crisscross pattern | Use aluminum-specific clamps for aluminum pipes; verify part compatibility |
| Corrosion | Moisture, chemical exposure, uncoated steel | Clean rust with wire brush; apply rust-inhibiting primer | Upgrade to stainless steel/aluminum clamps; wipe down monthly in humid areas |
| Compatibility issues | Mixed suppliers, mismatched materials (steel + aluminum) | Check supplier specs for thread/pipe size; use rubber-jaw clamps for coated pipes | Stick to one supplier; avoid mixing dissimilar metals |
| Wear and tear | Frequent reconfiguration, low-grade materials, improper use | replace clamps with worn jaws, stripped threads, or cracked handles | Use heavy-duty metal-handle clamps for high-use setups; train teams on proper use |

Beyond Troubleshooting: Building a Clamp Maintenance Routine
Fixing clamp issues as they pop up is important, but the best way to keep your lean pipe system running smoothly is to prevent problems before they start. A simple maintenance routine can extend clamp life by 50% or more, saving you time and money in replacements. Here's how to build one:
Weekly checks: Walk through your lean systems and visually inspect clamps. Look for rust, looseness, or misalignment. Tighten any clamps that show movement (use your paint pen marks to spot shifts). Check joints for cracks or bending—replace immediately if found.
Monthly deep cleans: Wipe down clamps with a dry cloth to remove dust and debris. For clamps in humid areas, use a mild detergent (avoid harsh chemicals) to clean off moisture, then dry thoroughly. Apply a thin layer of anti-seize lubricant to threads on stainless steel clamps.
Quarterly replacements: Even well-maintained clamps wear out. Every 3-6 months (depending on use), replace clamps on high-stress areas like workbench corners or material rack supports. Keep a stock of spare clamps and joints on hand so you're not waiting for replacements during a breakdown.
Team training: Your frontline workers are the first to notice clamp issues. Train them to spot loose or damaged clamps and report them immediately. Offer a small incentive (like a coffee card) for reporting problems—this turns everyone into a maintenance ally.

The Bottom Line: Clamps Keep Your Lean System Lean
At the end of the day, lean pipe clamps might seem like small parts, but they have a huge impact on your operations. A loose clamp slows down work. A corroded clamp risks safety. A misaligned clamp weakens your entire system. By taking the time to troubleshoot issues early, investing in quality parts, and building a simple maintenance routine, you'll keep your lean pipe systems—and your team—working at their best. Remember: lean manufacturing is all about eliminating waste, and the biggest waste of all is downtime caused by preventable clamp failures. So grab that torque wrench, inspect those joints, and give your clamps the attention they deserve—your productivity (and your peace of mind) will thank you.