- Company Articles
- Products and Technology
- Installation And Maintenance
- Troubleshooting Stuck Parallel Rotatory Lean Pipe Joints: Quick Fixes

Troubleshooting Stuck Parallel Rotatory Lean Pipe Joints: Quick Fixes
Related Product
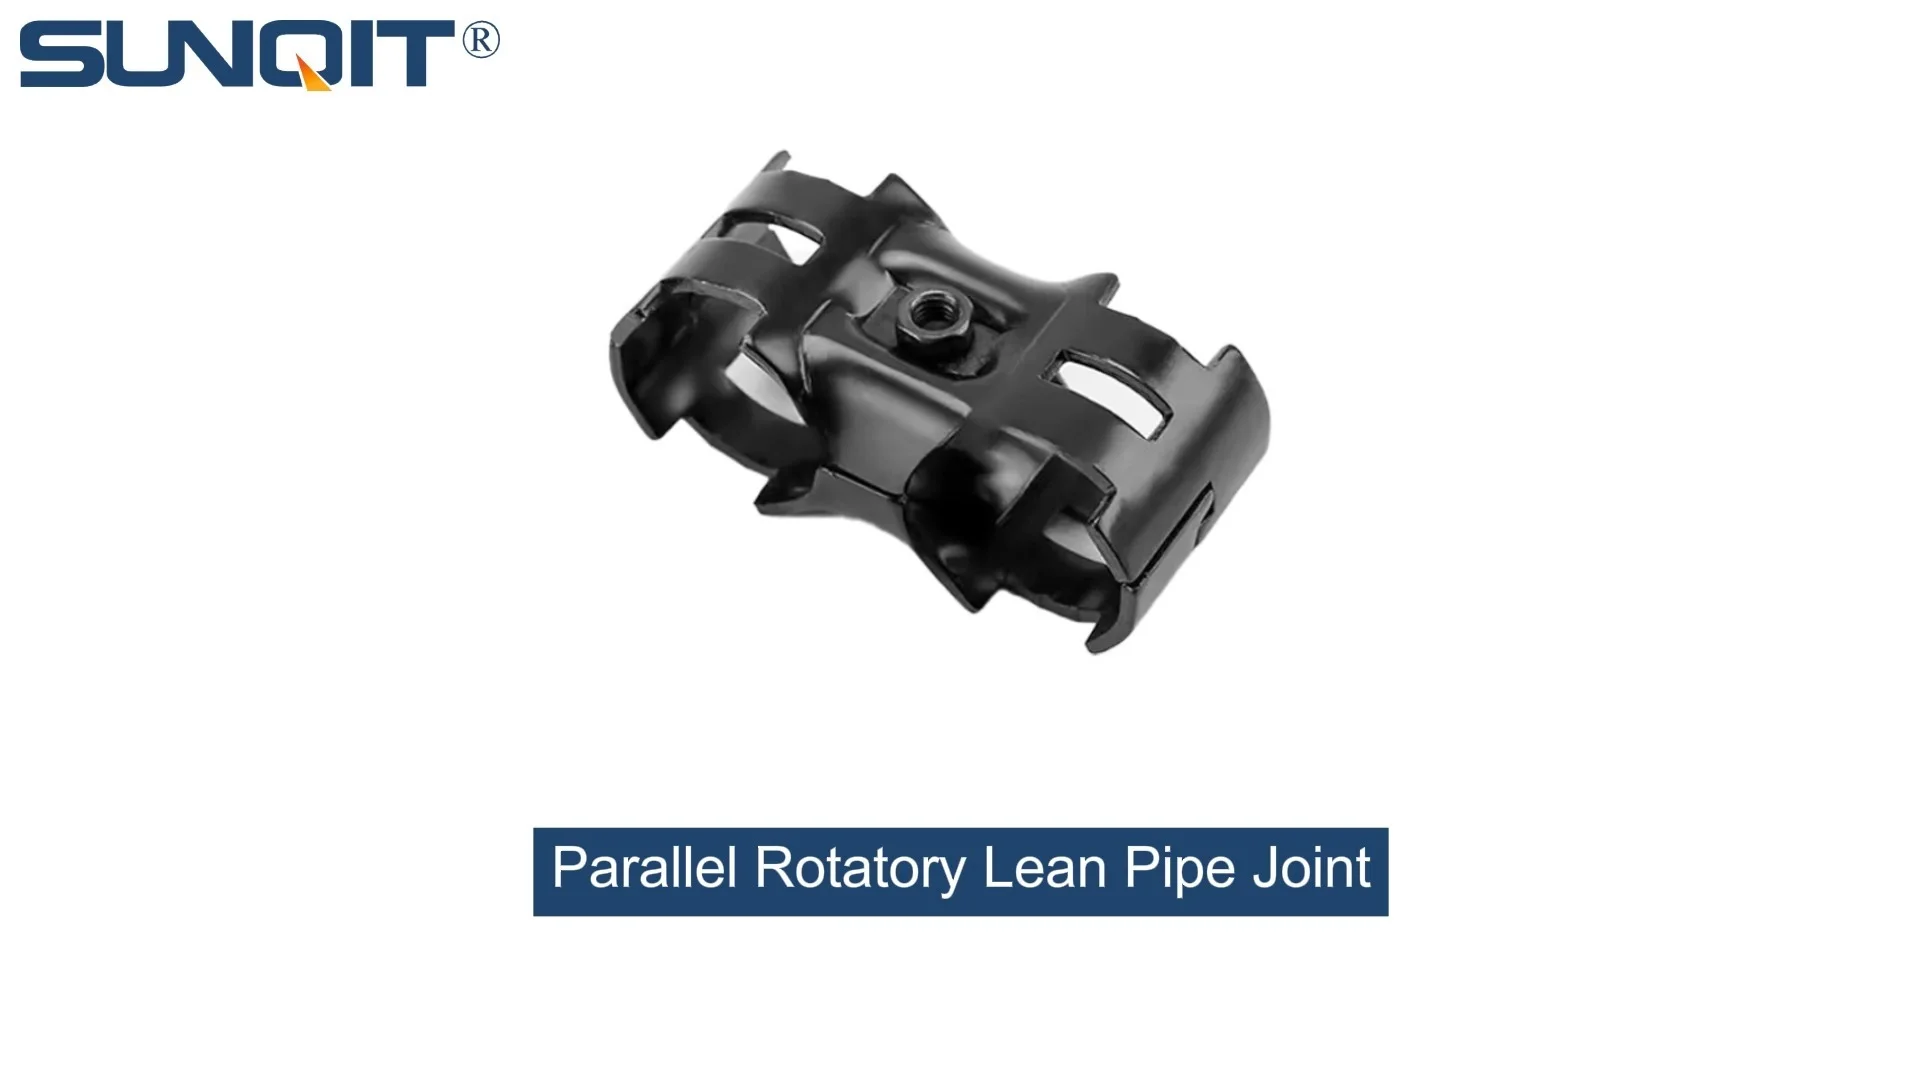
Parallel Rotatory Lean Pipe Joint
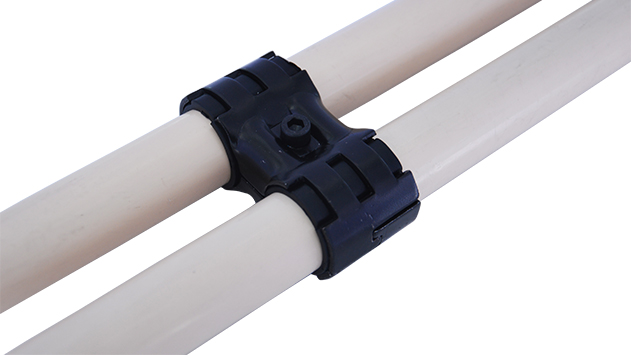
Parallel rotatory lean pipe joint, for 2 pcs pipe conenction in parallel direction with rotatory function.
Walk into any busy manufacturing floor, warehouse, or assembly line, and you'll likely spot a familiar sight: lean pipe systems. These versatile setups—made from pipes, joints, and accessories—form the backbone of workbenches, flow racks, turnover trolleys, and more. They're the unsung heroes of efficiency, letting teams adapt layouts on the fly, streamline workflows, and keep production humming. But even the most reliable systems hit snags, and one of the most frustrating? A stuck parallel rotatory lean pipe joint.
If you've ever tried to adjust a workbench height, reposition a flow rack, or swivel a component only to meet a jarring, immovable joint, you know the feeling. That "why won't this budge?!" moment can bring tasks to a halt, test patience, and eat into valuable time. The good news? Stuck parallel rotatory lean pipe joints are rarely a death sentence for your setup. With a little know-how, some basic tools, and the right approach, you can diagnose the issue and get things moving again—often in minutes. Let's dive into how.
First Things First: What Even Is a Parallel Rotatory Lean Pipe Joint?
Before we fix the problem, let's make sure we're all on the same page about the part in question. A parallel rotatory lean pipe joint is a small but mighty component that connects two lean pipes (or aluminum lean pipes, if you're using the lightweight, corrosion-resistant variety) in a way that lets them rotate parallel to each other. Think of it like a hinge that keeps the pipes aligned but allows smooth swiveling—perfect for adjusting angles on workbenches, tilting material racks, or repositioning sections of a conveyor system.
These joints are designed to be user-friendly: no special tools needed for basic adjustments, just a firm hand and a little force. But when they get stuck, that "user-friendly" promise feels more like a tease. The key to fixing them? Understanding why they stick in the first place.
Why Do Parallel Rotatory Lean Pipe Joints Get Stuck? Common Culprits
Stuck joints rarely happen without reason. More often than not, the issue boils down to one (or a combo) of these everyday problems. Let's break them down:
1. Debris Buildup: The Silent Saboteur
Manufacturing floors are dusty, greasy, and full of tiny particles—metal shavings, plastic bits, sawdust, even spilled coolant. Over time, these particles love to sneak into the gaps of your parallel rotatory lean pipe joint. At first, it might just feel like a little extra resistance. But as debris builds up, it acts like sand in a hinge, grinding movement to a halt. If your joint is near a workbench where parts are being assembled or a flow rack where boxes slide, this is extra likely.
2. Lack of Lubrication: Friction's Best Friend
Lean pipe joints, like any moving part, need a little love in the form of lubrication. Without it, metal-on-metal (or metal-on-plastic) contact creates friction, which over time wears down components and makes movement stiff. If your joint hasn't been lubed in months (or ever), chances are it's crying out for a few drops of oil. This is especially true for joints on equipment that's used daily—like the adjustable arms on a workbench or the swivel sections of a turnover trolley.
3. Over-Tightening: When "Secure" Becomes "Stuck"
We've all been there: you're assembling a lean system, and you want to make sure everything is rock-solid. So you crank down on the joint's locking mechanism—maybe a bolt or a clamp—until it feels "tight enough." But here's the thing: parallel rotatory joints aren't meant to be clamped down like a vice. Over-tightening can warp the joint's internal components, bend the pipe slightly, or jam the rotating mechanism. The result? A joint that's stuck fast, even if you loosen the bolt later.
4. Corrosion: The Enemy of Metal (and Smooth Movement)
If your lean pipe system uses steel components (instead of aluminum lean pipe), moisture is public enemy number one. Even a little humidity—from a leaky roof, a rainy season, or a spill—can cause rust to form on the joint's moving parts. Rust doesn't just look bad; it creates rough, uneven surfaces that catch and grind when you try to rotate the joint. In severe cases, rust can even fuse parts together, making movement impossible without some serious elbow grease.
5. Wear and Tear: When Parts Just Get Old
Nothing lasts forever, and parallel rotatory lean pipe joints are no exception. After months (or years) of constant use—swiveling, adjusting, supporting weight—internal components like washers, bearings, or plastic sleeves can wear thin. A cracked washer might get stuck in the mechanism; a worn bearing might no longer glide smoothly. If your joint has seen heavy use (think: supporting a loaded material rack or being adjusted multiple times a day), wear and tear could be the culprit.
Diagnosing the Problem: How to Figure Out Why Your Joint Is Stuck
Before you grab a wrench and start forcing things (spoiler: that's usually a bad idea), take 5 minutes to diagnose the issue. A little investigation can save you time, effort, and maybe even prevent damage to the joint or your lean pipe system. Here's how to do it:
Pro Tip: Grab a flashlight and a clean rag before you start. Good visibility and a quick wipe-down can reveal clues you might miss otherwise.
Step 1: Visual Inspection
Start by looking closely at the joint. Is there visible debris—dust, metal shavings, or gunk—around the (gaps) where the joint rotates? Are there signs of rust or corrosion, especially on metal parts? Do you see any cracks, bends, or warping in the joint itself or the connected lean pipe? If you spot debris, that's a likely culprit. Rust? Corrosion is probably to blame. Cracks or bends? Wear and tear or over-tightening might be the issue.
Step 2: Check for Looseness (Yes, Looseness!)
Next, try loosening the joint's locking mechanism (usually a bolt or a clamp). Even if you think it's already loose, give it a gentle turn counterclockwise. Sometimes, vibration from nearby machinery can tighten bolts over time without you noticing. If the joint suddenly moves a little after loosening, over-tightening was the problem. If not, move on.
Step 3: Test Movement (Gently!)
With the locking mechanism loose, try to rotate the joint very gently. Does it feel like it's caught on something (a "snag")? That could mean debris or a broken component. Is the resistance smooth but strong (like pushing through molasses)? That's likely friction from lack of lubrication or mild corrosion. Does it move a tiny bit and then stop abruptly? Maybe a part is bent or warped.
Step 4: Check Adjacent Components
Sometimes the joint isn't the problem—it's what's connected to it. For example, if the joint is on a turnover trolley with caster wheels, a stuck caster might be putting extra pressure on the joint, making it hard to rotate. Or if the lean pipe itself is bent (maybe from a heavy load), that could jam the joint. Wiggle the connected pipes gently to see if they move freely. If they're stiff or bent, that might be the root cause.
Step 5: Narrow It Down with This Handy Table
Still not sure? Use this quick-reference table to match symptoms to possible causes:
| Symptom | Likely Cause |
|---|---|
| Visible dust/debris in joint gaps; movement feels "gritty" | Debris buildup |
| Smooth resistance; no visible debris; joint hasn't been lubed in months | Lack of lubrication |
| Joint moves after loosening locking mechanism; metal parts look bent | Over-tightening |
| Rust/corrosion on metal parts; joint is in a humid area | Corrosion |
| Joint moves unevenly; visible cracks/worn parts; used heavily | Wear and tear |

Quick Fixes: How to Unstick Your Parallel Rotatory Lean Pipe Joint
Now that you've diagnosed the problem, let's fix it. Below are step-by-step solutions for each common cause. Remember: always start with the gentlest method first—you don't want to damage a repairable joint!
Fix 1: Clear Debris Buildup
If debris is the culprit, your goal is to clean out the gaps without scratching or damaging the joint. Here's how:
- Loosen the locking mechanism: Make sure the joint is fully unlocked—this gives debris room to escape.
- Blow it out: Use compressed air (if available) to blast debris from the gaps. Hold the air nozzle a few inches away to avoid damaging delicate parts.
- Brush gently: If air alone doesn't work, use a soft-bristled brush (an old toothbrush works!) to dislodge stubborn particles. Avoid metal brushes—they can scratch the joint.
- Wipe clean: Use a lint-free rag dampened with rubbing alcohol or degreaser to wipe away any remaining gunk. Let it dry completely.
- Test movement: Try rotating the joint. If it moves smoothly, you're done! If not, move to the next fix.
Fix 2: Lubricate the Joint
For joints stuck due to friction (no debris, smooth resistance), lubrication is your best friend. Here's how to do it right:
- Choose the right lube: Avoid thick greases—they attract dust. Instead, use a lightweight silicone spray or machine oil (3-in-1 oil works well). For food-grade environments, use NSF-approved lubricants.
- Apply sparingly: Spray or (drip) a small amount of lube into the joint's rotating gaps. A little goes a long way—too much will just drip out and make a mess.
- Work it in: Gently rotate the joint back and forth a few times to spread the lube evenly. You should feel the resistance loosen up as you go.
- Wipe excess: Use a clean rag to wipe away any extra lube. This prevents dust from sticking to the joint later.
Fix 3: Correct Over-Tightening
If you suspect over-tightening, the solution is to loosen the joint and (gently!) realign the parts. Here's how:
- Loosen the locking mechanism completely: Turn the bolt or clamp counterclockwise until it's loose enough that the joint has play.
- Gently wiggle the joint: Move the connected pipes back and forth to release any tension. If the joint was warped from over-tightening, this might "pop" it back into place.
- Retighten properly: Tighten the locking mechanism just enough to hold the joint in place—you should still be able to rotate it with moderate force. A good rule: tighten until you feel resistance, then stop. No need to crank it!
Fix 4: Fight Corrosion
For rusty or corroded joints, you'll need to break down the rust before lubricating. Here's how:
- Scrub gently: Use a wire brush (soft brass bristles, not steel—they're less scratchy) to remove loose rust. Focus on the rotating gaps.
- Apply rust remover: Soak a rag in white vinegar or a commercial rust remover (like CLR) and wrap it around the joint. Let it sit for 10–15 minutes to dissolve stubborn rust.
- Rinse and dry: Wipe the joint with a damp rag to remove rust remover, then dry thoroughly with a clean towel. Moisture is rust's friend—don't skip this step!
- Lubricate: Follow the lubrication steps above to protect the joint from future rust.
Fix 5: Address Wear and Tear
If the joint is worn out (cracks, broken parts, or no improvement after cleaning/lubing), you might need to replace a component. Here's what to do:
- Identify the damaged part: Look for cracked washers, missing bearings, or worn plastic sleeves. Check the joint's manual (or ask your lean pipe supplier) for part numbers.
- replace the part: If you have spare parts on hand, swap out the damaged component. If not, order from your supplier—most lean pipe joint parts are affordable and easy to replace.
- Assemble and test: Put the joint back together, lubricate it, and test movement. If it still sticks, the entire joint might need replacing.

Preventing Stuck Joints: Keep Them Moving Smoothly for the Long Haul
Fixing a stuck joint is great, but preventing it from happening again is even better. With a little regular maintenance, you can keep your parallel rotatory lean pipe joints (and all your lean pipe components) running smoothly for years. Here's how:
1. Clean Regularly
Make a habit of wiping down joints with a clean rag every week, especially in dusty or greasy areas. For high-use joints (like on workbenches), a quick blast of compressed air every month will keep debris at bay.
2. Lubricate on Schedule
Set a calendar reminder to lubricate joints every 3–6 months (more often for daily-use joints). Keep a small bottle of lubricant near your lean systems for easy access.
3. Train Your Team on Proper Use
Many stuck joints start with over-tightening. Teach your team to tighten joints "just enough"—not like they're building a bridge. A quick demo during onboarding can save countless headaches later.
4. Choose the Right Materials
If you're in a humid or corrosive environment (like a marine workshop or a facility with frequent washdowns), swap steel lean pipe for aluminum lean pipe. Aluminum resists rust and corrosion, making joints less likely to stick over time.
5. Inspect During Downtime
Use scheduled downtime (like weekend shifts or maintenance days) to inspect joints for wear and tear. Look for cracks, rust, or loose parts—catching issues early means easier fixes.
Real-World Example: How One Factory Fixed Stuck Joints in 20 Minutes
Let's put this all together with a real story. Last year, a electronics assembly plant in Ohio was struggling with stuck parallel rotatory joints on their workbench E (single deck, without caster)—a critical station where workers assemble circuit boards. The joints, which allowed the workbench's side shelves to swivel, had become so stiff that adjusting them took 10 minutes per shift—time that added up fast.
The maintenance team started with a visual inspection and noticed dust and solder flux buildup in the joint gaps. They grabbed a can of compressed air, blew out the debris, and wiped the joints clean. Next, they applied a few drops of silicone spray and worked the joints back and forth. Within 20 minutes, the shelves swiveled like new. To prevent a repeat, they added a weekly "joint cleaning" task to the workbench checklist—and haven't had a stuck joint since.
When to Call in the Pros: Knowing When It's Time for a Replacement
Most stuck joints can be fixed with the steps above, but sometimes a joint is beyond repair. If you've tried cleaning, lubricating, and adjusting, and the joint still won't move smoothly (or moves unevenly/with a "clunk"), it might be time to replace it. Signs you need a new joint:
- Visible cracks in the joint body
- Broken or missing internal parts (and no spares available)
- Bent or warped metal that won't straighten
- Movement that feels "gritty" even after cleaning and lubricating (a sign of worn bearings)
Replacing a parallel rotatory lean pipe joint is usually straightforward: just unscrew the old joint, remove the pipes, and screw in the new one. Most suppliers sell joints individually, so you won't need to replace the entire system.
Final Thoughts: Keep Calm and Rotate On
A stuck parallel rotatory lean pipe joint might feel like a big problem, but it's almost always a small fix. With a little diagnosis, the right tools, and some basic maintenance, you can get your joint moving smoothly again—and keep it that way. Remember: the key is to act quickly (stuck joints only get worse with time) and be gentle (forcing things can break parts).
Whether you're dealing with debris, dry lubrication, or a little over-enthusiastic tightening, the solutions here will help you get back to what matters: keeping your lean system efficient, your team productive, and your workflow moving forward. Now go give that joint a little love—and watch it rotate like new!