- Company Articles
- Products and Technology
- Installation And Maintenance
- Troubleshooting Vertical Lean Pipe Joint Loosening: Causes & Quick Fixes

Troubleshooting Vertical Lean Pipe Joint Loosening: Causes & Quick Fixes
Related Product
Vertical Lean Pipe Joint
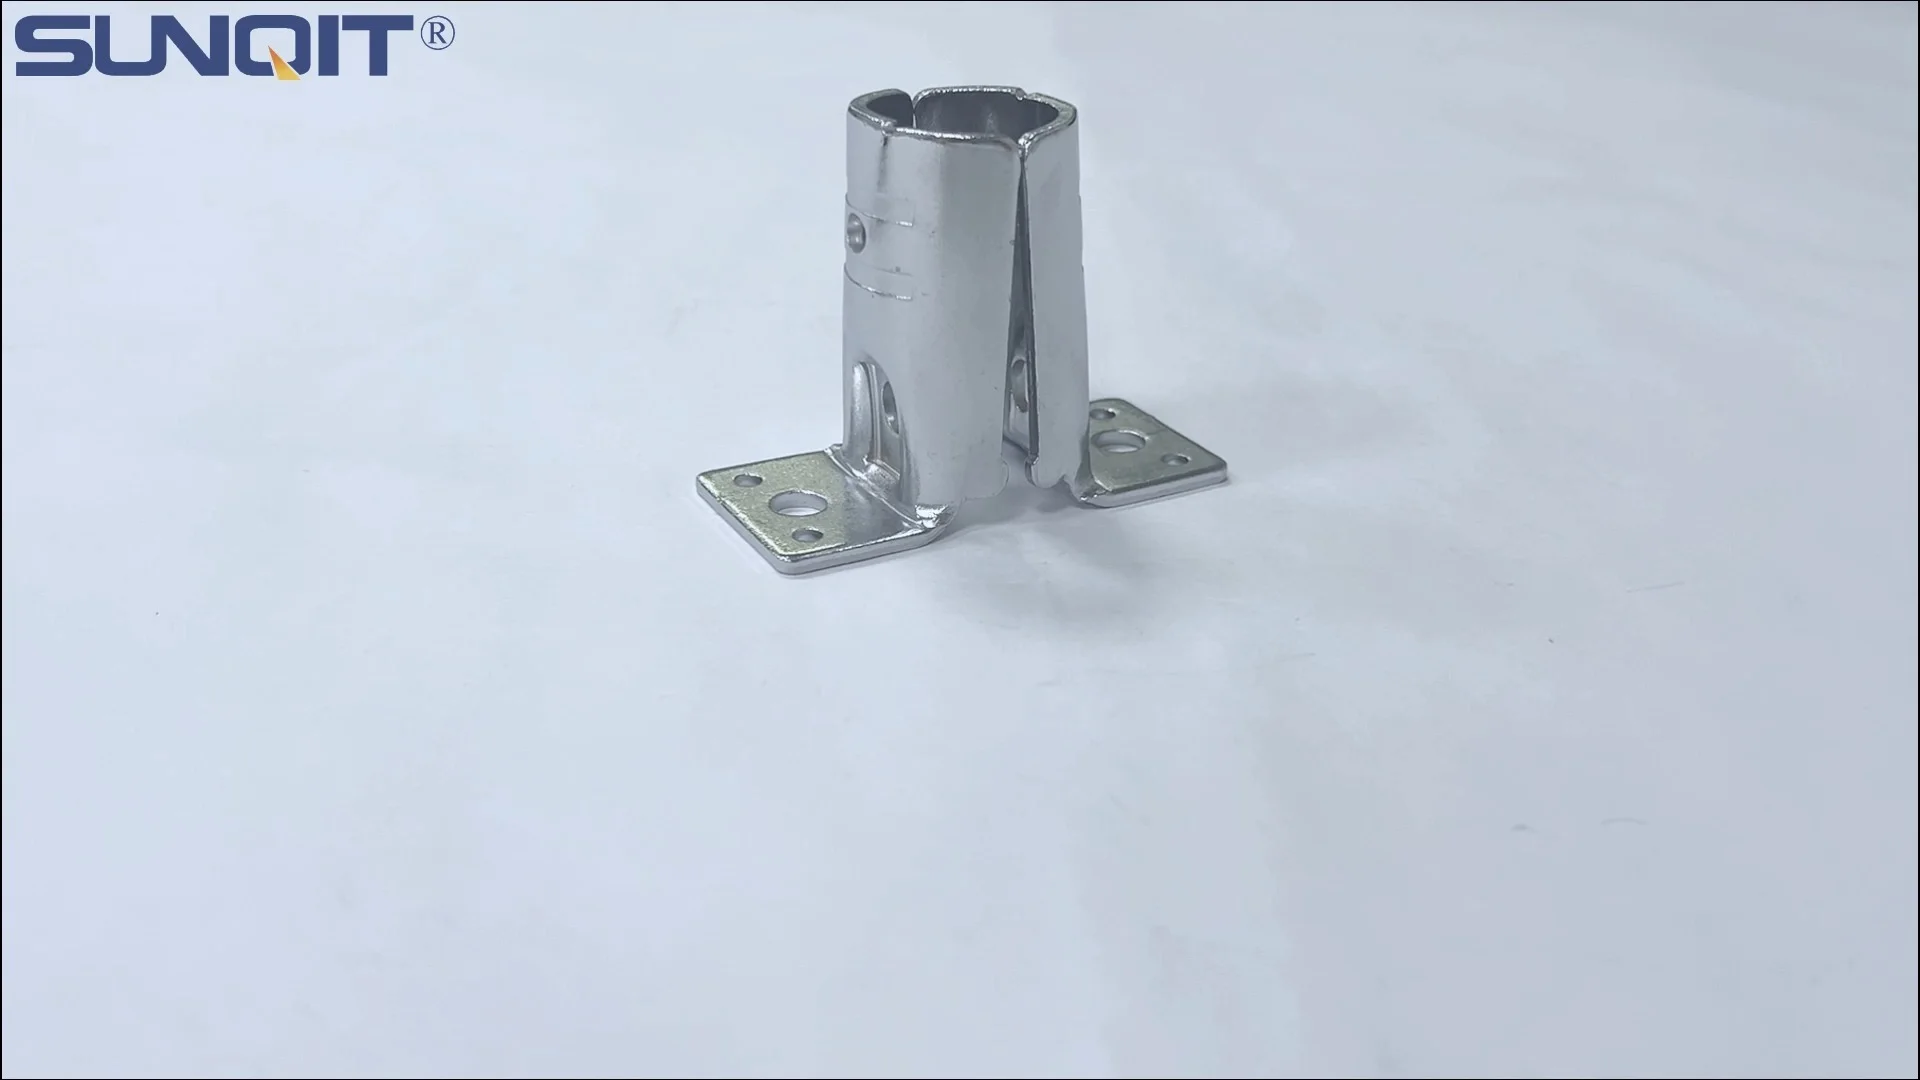
Vertical lean pipe joint is used for 28mm lean pipe fixed on ground and keep it stable.
It's 8:15 AM on a Tuesday, and the production floor of a mid-sized electronics assembly plant is already humming with activity. Maria, the line supervisor, is making her morning rounds when she notices something off: the end workbench on Line 3 is wobbling slightly. A quick glance underneath reveals the culprit—a vertical lean pipe joint that's come loose, its connection to the aluminum profile beneath it barely holding. "Again?" she sighs, recalling how a similar issue last month caused a 20-minute delay when a bin of components nearly slid off the workbench.
For anyone who works with lean systems, this scenario is all too familiar. Vertical lean pipe joints are the unsung heroes of modular workspaces, holding together everything from workbenches and flow racks to turnover trolleys. But when they loosen, they don't just disrupt productivity—they create safety hazards, compromise workflow efficiency, and chip away at the "lean" in lean manufacturing. In this article, we'll dive into why these joints loosen, how to diagnose the problem quickly, and the fixes that will keep your lean pipe structures stable for the long haul.
Understanding Vertical Lean Pipe Joints: The Backbone of Flexible Workspaces
Before we jump into troubleshooting, let's take a moment to appreciate what vertical lean pipe joints actually do. These small, often unassuming components are the connectors that turn simple lean pipes into dynamic, customizable structures. Whether you're building a lightweight workbench for assembly tasks or a heavy-duty material rack, vertical joints bear the brunt of vertical loads—holding up shelves, supporting tool holders, and keeping the entire structure aligned.
Most vertical lean pipe joints are designed to be modular, allowing for quick adjustments. They typically feature a clamping mechanism that tightens around the lean pipe (often made of steel or aluminum) and fastens to a base, like an aluminum profile or a caster wheel mount. This modularity is what makes lean systems so popular: you can reconfigure a workbench in an hour, or repurpose a flow rack for a new product line without rebuilding from scratch. But that flexibility comes with a trade-off: if the joint isn't properly secured or maintained, it's prone to loosening over time.
Common types of vertical joints include fixed-angle joints (like 90° or 180°), swivel joints for adjustable structures, and internal rotary joints that allow for rotation while maintaining stability. No matter the type, their job is simple: stay tight, stay aligned, and support the load. When they fail at that job, the consequences ripple through your entire operation.
Why Do Vertical Lean Pipe Joints Loosen? 5 Common Culprits
Loose joints rarely happen overnight. They're usually the result of a combination of factors—some preventable, some inevitable. Let's break down the most common causes, using real-world examples to illustrate how each issue plays out on the factory floor.
1. Improper Installation: "Tight Enough" Isn't Always Enough
Imagine a new hire assembling a workbench for the first time. They line up the lean pipe, slide on the vertical joint, and tighten the bolt with a wrench—"good and tight," as they'd say. But "tight" is subjective. If they under-tighten, the joint will slip under load. If they over-tighten, they might strip the threads or warp the joint's clamping mechanism, weakening it over time.
Alignment is another installation pitfall. If the lean pipe isn't perfectly vertical when the joint is tightened, the load isn't distributed evenly. Over weeks of use, that misalignment creates stress points, causing the joint to creep loose. A study by the Lean Manufacturing Association found that 38% of joint failures trace back to installation errors—making this the single biggest cause of loosening.
2. Wear and Tear: The Hidden Cost of Daily Use
Even the best-installed joints can loosen over time, thanks to good old-fashioned wear and tear. Let's say you have a turnover trolley with caster wheels that's pushed back and forth between the warehouse and the assembly line 20 times a day. Every bump in the floor, every sudden stop, and every turn sends vibrations up through the lean pipe and into the vertical joints. Over months, that constant movement can wear down the joint's clamping surfaces, making it harder for the mechanism to grip the pipe.
Material fatigue also plays a role. Lean pipes and joints are often made of steel or aluminum, which can develop micro-cracks with repeated stress. For example, a workbench used for heavy-duty tasks (like mounting power tools) might see the vertical joint flex slightly every time the tool is used. Over time, that flexing weakens the joint's structure, leading to gradual loosening.
3. Overloading: When "Just a Little Extra" Breaks the Camel's Back
We've all done it: added one more box to the shelf, stacked a few extra components on the workbench, or loaded a trolley beyond its recommended weight. But lean pipe structures—including their vertical joints—are designed with specific load limits in mind. A standard vertical joint might safely support 50kg, but pile 70kg on top, and you're asking for trouble.
Overloading creates excessive stress on the joint's clamping mechanism. The more weight it bears, the more the lean pipe tends to "settle" or shift within the joint, gradually loosening the connection. In extreme cases, overloading can even bend the joint or warp the lean pipe itself, making it impossible to tighten the joint properly ever again.
4. Environmental Factors: Rust, Humidity, and Temperature Swings
Your workshop's environment can also sabotage your vertical joints. Humidity is a silent enemy: in damp facilities (like those near coastal areas or with poor ventilation), metal joints can develop rust, which eats away at the clamping surfaces and threads. A rusted bolt won't tighten properly, and a rusted joint socket won't grip the lean pipe as effectively.
Temperature fluctuations are another issue. In facilities with unregulated heating or cooling, lean pipes and joints expand and contract at different rates (since they're often made of different materials, like steel pipe and aluminum joints). This thermal movement can gradually loosen the joint over time, especially in regions with extreme seasonal temperature changes.
5. Poor Maintenance: Out of Sight, Out of Mind
Let's be honest: when was the last time you inspected the vertical joints on your workbench? For many teams, joint maintenance falls low on the priority list—until something goes wrong. Dust, debris, and even spilled lubricants can build up in the joint's mechanism, preventing it from tightening fully. A joint clogged with sawdust or grease might feel tight when you wrench on it, but the debris is actually creating a false sense of security—the pipe isn't being clamped properly, and it will loosen as soon as the load shifts.

Step-by-Step Troubleshooting: How to Diagnose Loose Vertical Joints
Not all loose joints are created equal. A joint that's loosened due to overloading needs a different fix than one that's rusted. The key is to diagnose the root cause before grabbing a wrench. Here's a simple, 4-step process to figure out why your vertical joint is loose:
Step 1: Visual Inspection—Look for Clues
Start with your eyes. Kneel down and examine the vertical joint closely. What do you see?:
- Rust or corrosion: Reddish-brown spots on the joint or bolt? That's a sign of humidity damage.
- Scratches or dents: If the joint's clamping surface is scratched or dented, it might not grip the pipe tightly.
- Misalignment: Is the lean pipe leaning to one side, or is the joint not sitting flush against the base (like an aluminum profile)? Misalignment is often visible to the naked eye.
- Debris buildup: Dust, grease, or metal shavings in the joint's mechanism can prevent proper clamping.
Step 2: The "Wiggle Test" and Tightness Check
Gently wiggle the lean pipe above the joint. If it moves more than 1-2mm, the joint is definitely loose. Next, try tightening the joint's bolt with a torque wrench (set to the manufacturer's recommended torque—usually 15-20 Nm for steel joints). If the bolt turns easily and the joint tightens up, the issue was likely under-tightening or minor vibration. If the bolt is already tight but the pipe still wiggles, the problem is deeper—maybe wear, rust, or a damaged joint.
Step 3: Load Testing—Is the Joint Overburdened?
Check the weight on the structure above the joint. If it's a workbench, remove all items and weigh them (or estimate based on known weights). Compare that to the joint's rated load capacity (usually listed in the product manual or on the supplier's website). If the load exceeds the rating, overloading is the likely culprit.
Step 4: Material Check—Wear and Fatigue
Finally, inspect the lean pipe and joint for signs of wear. Run your hand along the pipe where it meets the joint—are there indentations or smooth spots from friction? Check the joint's clamping teeth (if it has them) for dullness or damage. If the pipe is bent or the joint is cracked, replacement is necessary.

Quick Fixes: How to Tighten Loose Joints (and When to replace Them)
Once you've diagnosed the cause, it's time to fix the problem. Below are quick, actionable solutions for the most common scenarios. Keep in mind: some fixes are temporary (to get you through a shift), while others are permanent.
Fix #1: Re-Tighten with Proper Torque (For Under-Tightening or Minor Vibration)
If the joint is simply under-tightened, grab a torque wrench and a clean cloth. First, wipe away any debris from the bolt and joint mechanism. Then, set the torque wrench to the manufacturer's recommended setting (check the joint's specs—if you don't have them, 18 Nm is a safe starting point for most steel joints). Tighten the bolt slowly and steadily until the wrench clicks. Avoid "over-tightening" to "be safe"—this can strip threads or warp the joint.
Pro tip: For joints that loosen frequently due to vibration (like those on trolleys with caster wheels), apply a small amount of thread locker (blue, removable type) to the bolt threads before tightening. This prevents the bolt from vibrating loose again.
Fix #2: Clean and Deburr (For Debris or Rust Buildup)
If debris or rust is preventing the joint from clamping, start by disassembling the joint (if possible). Use a wire brush to scrub away rust from the clamping surfaces and bolt threads. For stubborn debris, soak the joint in a mild degreaser for 10 minutes, then rinse and dry thoroughly. If the lean pipe has burrs or rough spots where it meets the joint, use sandpaper to smooth them out—this ensures better contact with the joint's clamping mechanism.
Reassemble the joint and tighten to the correct torque. If rust has damaged the threads beyond repair, replace the bolt with a new one (available from your lean pipe supplier).
Fix #3: Reinforce with a Support Bracket (For Overloading or Wear)
If the joint is worn but still functional, or if you need to temporarily support an overloaded structure, add a support bracket. These small, L-shaped brackets attach to the lean pipe and the base (e.g., the aluminum profile of the workbench), sharing the load with the vertical joint. You can buy pre-made brackets from lean pipe suppliers, or make a simple one from angle iron if you're in a pinch.
Note: This is a temporary fix. If the joint is worn, plan to replace it as soon as possible to avoid complete failure.
Fix #4: replace the Joint (For Severe Wear, Damage, or Rust)
Sometimes, a joint is too far gone to fix. If you see cracks, stripped threads, or the clamping mechanism no longer grips the pipe even after cleaning and tightening, it's time to replace it. Start by removing the old joint: loosen the bolt, slide the joint off the pipe, and detach it from the base. Then, slide the new joint onto the pipe, align it properly, and tighten to the recommended torque. Always use a new joint from a reputable lean pipe supplier—cheap, knockoff joints are more likely to loosen again quickly.

Long-Term Prevention: Keep Joints Tight for Months (Not Weeks)
Fixing a loose joint is important, but preventing it from loosening in the first place is even better. Here are five strategies to keep your vertical lean pipe joints stable for the long haul:
1. Train Your Team on Proper Installation
Most installation errors happen because staff aren't trained on torque specs or alignment. Hold a 30-minute workshop where you demonstrate how to use a torque wrench, align lean pipes vertically, and check for proper clamping. Create a simple cheat sheet with torque values for different joint types (e.g., "Steel vertical joint: 18 Nm; Aluminum joint: 15 Nm") and post it near assembly areas.
2. Schedule Monthly Inspections
Add "joint checks" to your team's monthly maintenance checklist. Assign a responsible team member to inspect all vertical joints, focusing on high-use areas like workbenches and trolleys with caster wheels. During inspections, tighten loose bolts, clean debris, and note any joints that need replacement. This proactive approach catches issues before they cause downtime.
3. Label Load Limits Clearly
Prevent overloading by labeling every lean pipe structure with its maximum load capacity. Use durable stickers or engraved plates, and place them at eye level (e.g., on the side of a workbench or shelf). For example: "Max Load: 50kg per shelf." Train staff to respect these limits, and enforce consequences for repeated overloading.
4. Invest in High-Quality Joints and Pipes
It's tempting to cut costs with cheap lean pipe joints, but they're false economy. High-quality joints (from reputable suppliers) are made with stronger materials, better clamping mechanisms, and tighter tolerances—meaning they're less likely to loosen over time. Look for joints with hardened steel clamping surfaces, corrosion-resistant coatings, and clear torque specifications.
5. Control the Environment
Reduce rust and wear by controlling humidity in your facility (aim for 40-60% relative humidity). Use dehumidifiers in damp areas, and avoid placing lean pipe structures near water sources or steam vents. For outdoor or extra-corrosive environments, consider upgrading to stainless steel joints or aluminum lean pipes, which resist rust better than standard steel.
Case Study: How One Factory Cut Joint Loosening by 75% in 3 Months
A automotive parts manufacturer in Ohio was struggling with frequent vertical joint loosening on their assembly line workbenches. The issue was causing weekly delays, and staff were frustrated with constant re-tightening. After diagnosing the problem (a mix of under-tightening, vibration from nearby machinery, and occasional overloading), the plant manager implemented three changes:
- Torque training: All maintenance staff received training on using torque wrenches, with a cheat sheet posted at each workbench.
- Thread locker: Blue thread locker was applied to all vertical joint bolts during monthly inspections.
- Load labels: Each workbench was labeled with its max load, and team leads conducted weekly load checks.
Three months later, joint loosening incidents dropped by 75%. The plant saved an estimated 12 hours of downtime per month, and staff reported feeling "more confident" in the stability of their workspaces.
Summary: Causes, Symptoms, Fixes, and Prevention
| Cause | Common Symptoms | Quick Fix | Long-Term Prevention |
|---|---|---|---|
| Under-tightening or vibration | Joint wiggles; bolt turns easily when tightened | Re-tighten with torque wrench; apply thread locker | Train staff on proper torque; use thread locker on high-vibration joints |
| Debris/rust buildup | Joint won't tighten fully; visible rust or dirt | Disassemble, clean with wire brush/degreaser; replace bolt if rusted | Monthly cleaning; control facility humidity |
| Overloading | Joint loosens repeatedly; pipe/bracket bends | Remove excess load; add temporary support bracket | Label load limits; enforce weight checks |
| Wear/fatigue | Clamping surfaces worn; pipe has indentations | replace joint; smooth pipe with sandpaper | Use high-quality joints; inspect for wear monthly |
| Misalignment | Structure leans; joint not flush with base | Loosen joint, realign pipe, re-tighten | Train staff on proper alignment during installation |
Conclusion: Small Joints, Big Impact on Lean Systems
Vertical lean pipe joints might be small, but their role in keeping your lean system running smoothly is huge. A loose joint isn't just a minor annoyance—it's a threat to productivity, safety, and the efficiency that lean manufacturing promises. By understanding the causes of loosening, diagnosing issues quickly, and applying the right fixes, you can keep your workbenches stable, your flow racks secure, and your team focused on what matters: making great products.
Remember: proactive maintenance is always cheaper than reactive repairs. Spend a few minutes each month inspecting your joints, train your team on proper installation, and invest in quality components. Your lean system (and your bottom line) will thank you.