- Company Articles
- Products and Technology
- Installation And Maintenance
- Troubleshooting: Why Your Suction Cup Anti-Slip Foot Adjuster Isn't Sticking

Troubleshooting: Why Your Suction Cup Anti-Slip Foot Adjuster Isn't Sticking
Related Product
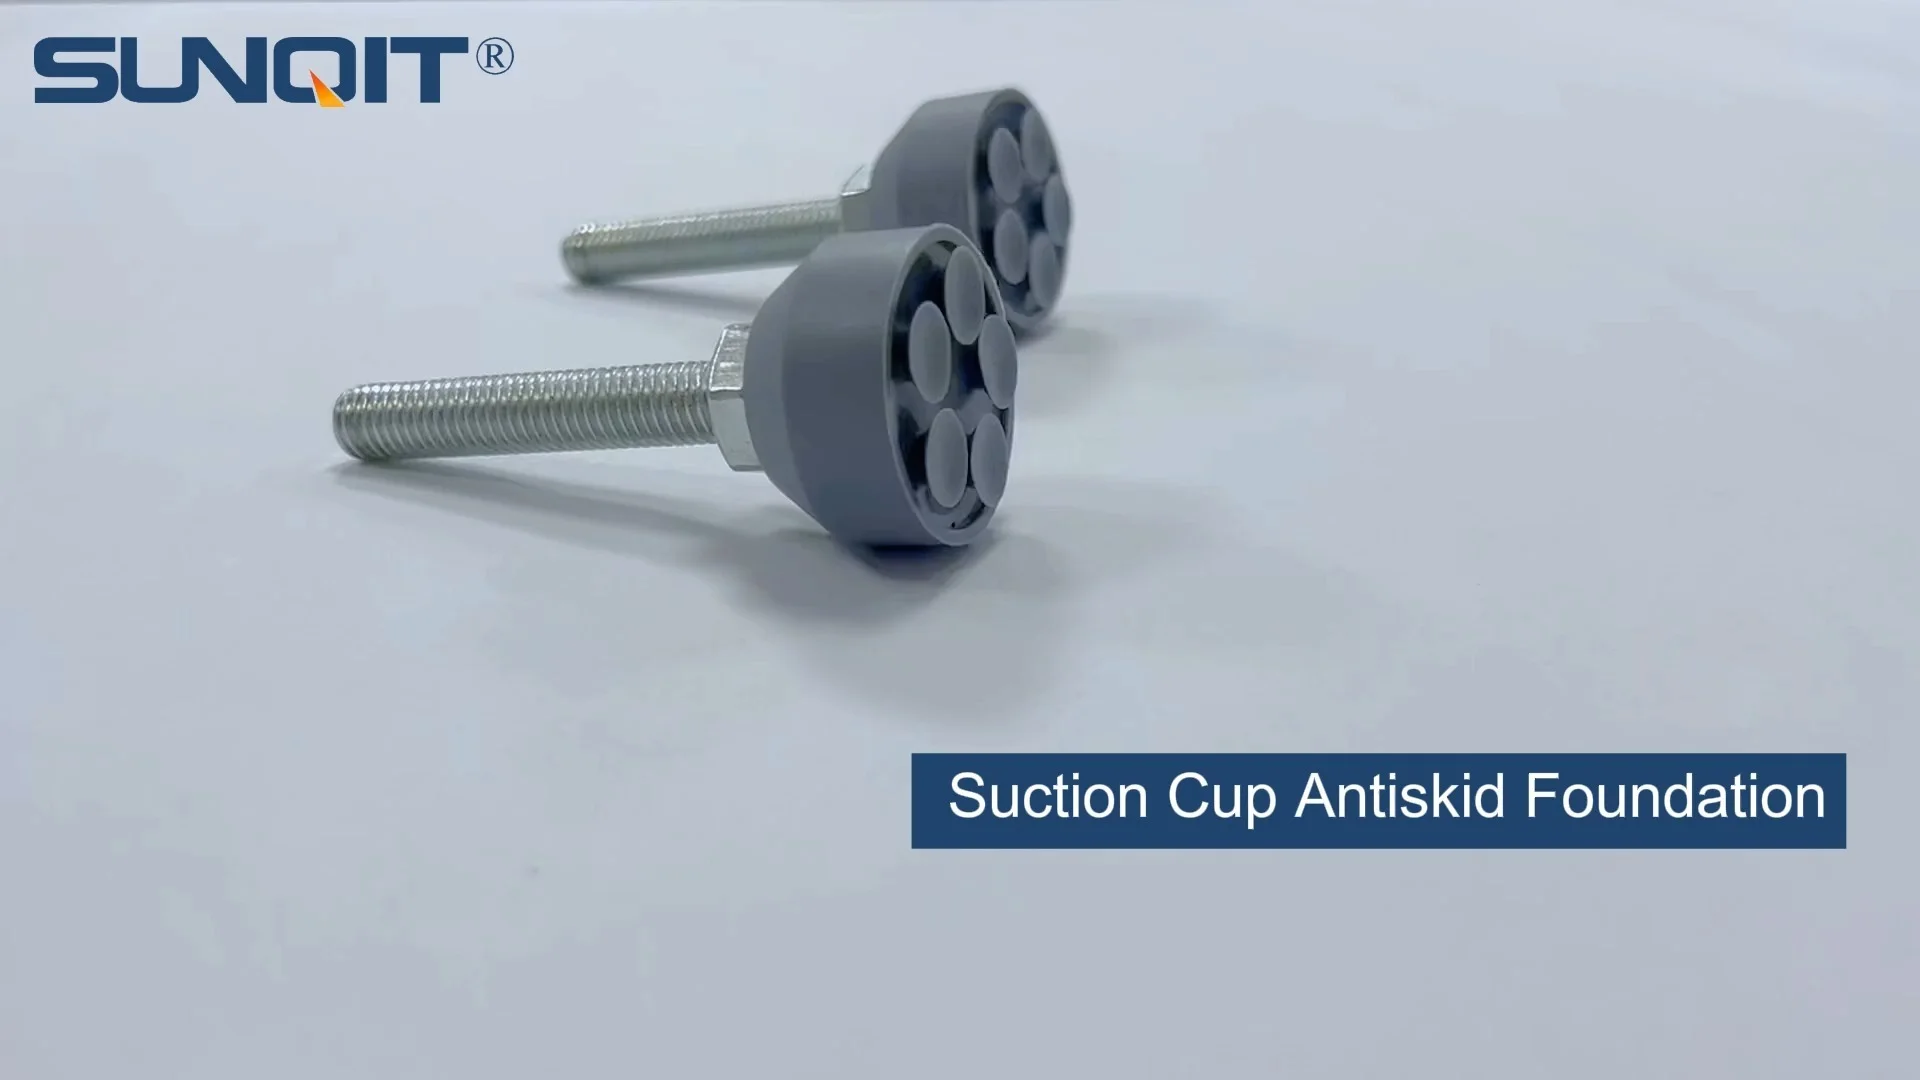
Suction Cup Anti-slip Foot Adjuster
D=35mm suction cup anti-slip foot adjusterï¼screw M10*55ï¼with a blot, used for workbench, flowrack pipe contact with groud.
Imagine this: You've just spent an hour setting up your new lean pipe workbench in the workshop. The aluminum profile frame is sturdy, the caster wheels lock smoothly, and you're ready to start assembling parts. But as soon as you place a heavy toolbox on the bench, you notice something off—the whole setup wobbles. You check the legs, and sure enough, the suction cup anti-slip foot adjuster you tightened earlier has slipped. Again. If this sounds familiar, you're not alone. Suction cup foot adjusters are supposed to keep workbenches, material racks, and even turnover trolleys stable, but when they fail to stick, they turn a productive day into a frustrating one.
Whether you're running a small garage workshop or managing a busy production line, stability matters. A wobbly workbench isn't just annoying—it's a safety hazard. Tools slide, parts get damaged, and worst-case scenario, someone could trip. So why do these tiny but crucial components fail? Let's dive into the most common culprits and fix them for good. By the end of this guide, you'll know exactly how to diagnose, solve, and prevent suction cup slip-ups, ensuring your lean pipe workbench (and any other equipment using these adjusters) stays rock-solid.
First, Let's Get to Know Your Suction Cup Anti-Slip Foot Adjuster
Before we troubleshoot, let's make sure we're on the same page about what these adjusters do. At their core, suction cup anti-slip foot adjusters are designed to do two things: level your equipment and keep it from sliding. Unlike rigid adjustable leveling feet, which rely on friction and weight to stay put, these adjusters use a suction cup mechanism. When you tighten the adjuster, the cup presses against the floor, forcing out air to create a vacuum seal. The anti-slip rubber or silicone material on the bottom adds extra grip, making them ideal for smooth floors like concrete, tile, or even polished aluminum profile surfaces.
They're especially popular with lean pipe workbenches because they're easy to install and adjust. Unlike caster wheels, which are great for mobility but need locking mechanisms, suction cup adjusters provide stability without compromising on flexibility. You can tweak their height to level the bench on uneven floors, and the suction keeps it from shifting during use. But here's the catch: that vacuum seal is delicate. Even small issues can break it, leaving you with a slippery situation.
Common Culprit #1: The Surface Isn't Suction-Friendly
Let's start with the most obvious (but often overlooked) issue: the floor itself. Suction cups thrive on smooth, non-porous surfaces. Think of it like a kitchen plunger—if you press it against a bumpy tile or a cracked concrete floor, it'll never seal properly. The same logic applies here.
What's Happening
Suction cups work by creating a tight seal. For that seal to hold, the surface needs to be flat and free of gaps. If your workshop floor has:
- Small cracks or potholes: Even a hairline crack can let air seep back into the suction cup, breaking the vacuum.
- Rough textures: Concrete floors with a "broom finish" (that rough, non-slip texture) are great for preventing falls, but terrible for suction cups. The uneven surface means the cup can't make full contact.
- Oil, grease, or dust: A thin layer of machine oil, sawdust, or even spilled soda can act as a barrier between the suction cup and the floor. The cup might stick at first, but as the substance spreads, the seal breaks.
- Moisture: You might think a damp floor would help the suction cup stick, but too much water (like after mopping) creates a film that prevents a proper vacuum. The cup slides on the water instead of gripping the floor.
Real-World Example
A local auto repair shop once reached out to me with this exact problem. Their lean pipe workbenches, used for assembling car parts, kept sliding even with new suction cup adjusters. When I visited, I noticed the concrete floor was covered in tiny oil stains from years of vehicle maintenance. The technicians would wipe the floor with a dry rag, but that only spread the oil around. The suction cups were sticking to the oil, not the concrete—and oil and vacuum seals don't mix.
How to Fix It
Start by giving the floor a deep clean. Grab a degreaser (like dish soap mixed with warm water) and a scrub brush. Focus on the area where the adjusters sit—even a small spot of grime can cause issues. Rinse thoroughly and dry with a lint-free cloth. For rough surfaces, try placing a thin, smooth rubber mat under the adjusters (just make sure the mat itself doesn't slip!). If the floor is cracked, fill small gaps with epoxy filler and sand it smooth once dry. For larger cracks, consider using a self-leveling concrete patch to create a flat surface.

Common Culprit #2: Installation Mistakes (Yes, Even the "Small" Ones)
You'd think tightening a foot adjuster is straightforward—twist until it's snug, right? Wrong. There's a sweet spot between "too loose" and "too tight," and missing it can spell disaster for your suction cup's grip.
What's Happening
Let's break down the two most common installation errors:
1. Under-Tightening
If you don't tighten the adjuster enough, the suction cup never fully presses against the floor. Air remains trapped under the cup, so there's no vacuum to hold it in place. The adjuster might feel secure at first, but as you add weight to the workbench, the cup lifts slightly, and air seeps in. Result? Slip.
2. Over-Tightening
This is the trickier one. You might think, "If a little tight is good, more tight is better!" But suction cups are made of flexible materials like rubber or silicone. Over-tightening warps the cup, bending its edges upward. Instead of creating a flat, even seal, the cup becomes misshapen, leaving gaps for air to enter. I've seen this happen dozens of times—people crank the adjuster until it can't turn anymore, only to find the cup is now a lopsided mess that won't stick.
3. Forgetting the "Prep Step"
New suction cup adjusters often come with a protective plastic film on the cup. It's easy to miss—especially if you're in a hurry. That film acts as a barrier, preventing the cup from making direct contact with the floor. Even if you tighten the adjuster perfectly, the film keeps the vacuum from forming. Oops.
How to Fix It
Installation is all about balance. Here's a foolproof method: Start by hand-tightening the adjuster until the cup touches the floor. Then, using a wrench (or your hand, if it's easy to grip), give it a quarter-turn more. That's enough to compress the cup and force out air without warping it. If the adjuster has a lock nut, tighten that after setting the height to prevent it from loosening over time.
And don't forget the plastic film! Before installing, run your finger over the suction cup—if it feels smooth and shiny, there's probably a film. Peel it off completely, making sure no residue is left behind. Trust me, this simple step solves 10% of "defective" adjuster complaints.

Common Culprit #3: Wear and Tear (Your Adjuster Isn't Immortal)
Suction cups are tough, but they don't last forever. Like the tires on your car, they wear down with use. If your adjuster has been in place for months (or years), the cup might be past its prime.
What's Happening
Over time, the suction cup material degrades. Here's how:
- Cracking: Rubber and silicone dry out when exposed to UV light, heat, or chemicals (like the degreasers we mentioned earlier). Small cracks form on the cup's surface, breaking the seal.
- Hardening: Instead of staying soft and pliable, the cup becomes stiff. A stiff cup can't conform to the floor's minor imperfections, so it can't create a tight vacuum.
- Flattening: Constant pressure (from the workbench's weight) can compress the cup permanently. It loses its ability to "bounce back" when tightened, so it never fully seals.
- Debris Buildup: Even if you clean the floor, tiny particles (like sand or metal shavings) can get stuck in the cup's grooves. Over time, these particles create gaps, making it harder to form a vacuum.
How to Spot Wear
Take the adjuster off the workbench and inspect the suction cup. Run your finger over it—does it feel soft and rubbery, or hard and brittle? Are there cracks, especially around the edges? If you press the cup against a smooth glass surface and let go, it should stick firmly. If it falls off immediately, the cup is worn out.
How to Fix It
Unfortunately, once a suction cup is cracked or hardened, there's no fixing it. You'll need to replace the adjuster. But not all adjusters are created equal! When shopping for replacements, look for cups made of silicone instead of rubber—silicone resists heat, UV damage, and chemicals better, so it lasts longer. For heavy-duty use (like on a lean pipe workbench loaded with tools), opt for "industrial-grade" suction cups with thicker walls and reinforced edges.

Common Culprit #4: Environmental Factors (Yes, the Weather Matters)
You might not think about it, but temperature and humidity can turn a reliable suction cup into a slippery mess. Let's talk about how the environment affects your adjuster's grip.
What's Happening
Extreme Heat
Rubber and silicone soften in high temperatures. If your workshop gets hot (think summer in a non-air-conditioned garage), the suction cup can become too pliable. Instead of forming a tight seal, it oozes slightly, allowing air to seep in. In worst cases, the cup might even melt a little, leaving a sticky residue on the floor and ruining the seal forever.
Extreme Cold
On the flip side, cold temperatures make suction cups stiff. In a freezer warehouse or a workshop during winter, the cup can't flex to conform to the floor. It becomes rigid, so even minor floor imperfections create gaps. I once worked with a bakery that used suction cup adjusters on their lean pipe workbenches in a walk-in cooler—the adjusters worked fine in the warm kitchen but slipped constantly in the cold storage area.
High Humidity
Humidity is a silent enemy. In damp environments (like a basement workshop or a coastal area), moisture condenses on the floor and the suction cup itself. This creates a thin layer of water between the cup and the floor, breaking the vacuum. The cup might stick for a few minutes, but as the moisture spreads, it slides.
How to Fix It
For hot environments, look for heat-resistant suction cups (rated for temperatures up to 150°F or higher). If your workshop gets direct sunlight, install shades or awnings to keep the floor cool. In cold spaces, switch to cold-resistant silicone cups, which stay flexible even below freezing. For humidity, use a dehumidifier to keep moisture levels below 60%. You can also wipe the suction cups with a dry cloth several times a day to remove condensation.
Common Culprit #5: Compatibility Issues (Is Your Adjuster Even Right for the Job?)
Here's a hard truth: Not all suction cup anti-slip foot adjusters work with all equipment or floors. Using the wrong adjuster for your setup is like trying to fit a square peg in a round hole—it might sort of work, but it won't last.
What's Happening
Let's break down the compatibility issues:
Weight Capacity
Every suction cup adjuster has a weight rating. If your lean pipe workbench (plus all the tools and parts on it) weighs more than the adjuster can handle, the cup will flatten under the pressure, losing its seal. For example, a small adjuster rated for 50 lbs per leg might work on a lightweight workbench, but if you load the bench with 200 lbs of tools, the adjusters will fail.
Floor Type
As we discussed earlier, suction cups need smooth surfaces. But some adjusters are designed for specific floor materials. A cup made for tile might not work on polished concrete, and vice versa. Check the manufacturer's specs—look for adjusters labeled "multi-surface" if you're unsure.
Equipment Design
Is your lean pipe workbench's frame bent or misaligned? Even a slightly warped aluminum profile can cause the legs to sit unevenly. If one adjuster is carrying more weight than the others, it'll slip first. I once helped a woodworker whose workbench legs were welded at a slight angle—the adjusters on the shorter legs were always tight, while the longer ones barely touched the floor. No amount of tightening could fix the imbalance.
How to Fix It
Start by calculating the total weight your workbench carries. Weigh the empty bench, then add the average weight of tools, parts, and materials you keep on it. Divide that total by the number of legs (most lean pipe workbenches have 4) to get the weight per adjuster. Then, check the adjuster's specs—make sure the weight per leg is less than the adjuster's rating (aim for 80% of the rating to be safe). If your current adjusters are underrated, upgrade to heavy-duty models or switch to adjustable leveling feet, which handle weight better for uneven loads.
For misaligned frames, use a level to check if the workbench is even from side to side and front to back. If not, loosen the adjusters, gently bend the aluminum profile frame back into place (if possible), and retighten. For severely bent frames, you might need to replace the aluminum profile sections.
Troubleshooting Cheat Sheet: Quick Fixes at a Glance
To make diagnosing issues even easier, here's a handy table summarizing the most common causes, symptoms, and fixes. Keep this nearby the next time your suction cup adjuster starts slipping!
| Common Cause | Symptom You'll Notice | 5-Minute Fix | Long-Term Prevention |
|---|---|---|---|
| Floor contamination (oil, dust, moisture) | Adjuster slips immediately after tightening; cup feels greasy or wet. | Wipe floor with degreaser and dry thoroughly. | Clean the floor daily around the workbench; use a mat to catch spills. |
| Over-tightening | Cup is misshapen or has creases; won't stick even on clean floors. | Loosen adjuster, then retighten with a quarter-turn after hand-tightening. | Mark the adjuster with a pen at the "correct" tightness position. |
| Worn suction cup (cracks, hardening) | Cup feels brittle; falls off when pressed against glass. | replace the adjuster with a silicone or industrial-grade model. | Inspect cups monthly; replace every 1–2 years (sooner for heavy use). |
| High humidity or extreme temperatures | Adjuster sticks in the morning but slips by afternoon (humidity); slips only in winter/summer. | Wipe cup and floor with a dry cloth; use a dehumidifier or space heater. | Upgrade to weather-resistant silicone cups; control workshop temperature. |
| Underweight or incompatible adjuster | Adjuster slips only when the workbench is loaded with tools. | Switch to adjustable leveling feet for heavy loads. | Calculate weight per leg and buy adjusters rated for 20% more than needed. |
Prevention: Keep Your Suction Cups Sticking for Years
Now that you know how to fix the problem, let's talk about preventing it. A little maintenance goes a long way toward keeping your suction cup anti-slip foot adjusters in top shape.
1. Clean Regularly
Make it a habit to wipe the suction cups and the floor underneath them once a week. Use a mild soap and water, then dry thoroughly. This prevents oil, dust, and grime from building up and breaking the seal.
2. Inspect Monthly
Take 5 minutes each month to check the cups for cracks, hardening, or wear. If you notice any damage, replace the adjuster immediately—don't wait for it to fail.
3. Avoid Overloading
Resist the urge to pile heavy items on one side of the workbench. Distribute weight evenly to prevent one adjuster from carrying too much load.
4. Store Spare Adjusters
Keep a few extra suction cup anti-slip foot adjusters in the workshop. That way, if one fails unexpectedly, you can replace it right away instead of letting a wobbly workbench slow you down.
5. Consider Alternatives for Extreme Conditions
If you work in a very hot, cold, or humid environment, or if your floor is permanently rough, adjustable leveling feet might be a better choice. They don't rely on suction, so they're more durable in tough conditions. Many lean pipe workbenches can use either adjusters or feet, so swap them out if needed!
Final Thoughts: Stability Starts with the Smallest Parts
Suction cup anti-slip foot adjusters might seem like minor components, but they play a huge role in keeping your lean pipe workbench (and your workflow) stable. By understanding the common causes of slip-ups—surface issues, installation mistakes, wear and tear, environmental factors, and compatibility problems—you can diagnose and fix the problem quickly.
Remember: A little maintenance goes a long way. Clean regularly, inspect monthly, and choose the right adjuster for your needs. And if all else fails, don't hesitate to switch to adjustable leveling feet—there's no shame in using the tool that works best for your space.
Now, go give those adjusters a check. Your workbench (and your sanity) will thank you.