- Company Articles
- Products and Technology
- Installation And Maintenance
- Troubleshooting Worn Vertical Lean Pipe Joints: Replacement Guidelines

Troubleshooting Worn Vertical Lean Pipe Joints: Replacement Guidelines
Related Product
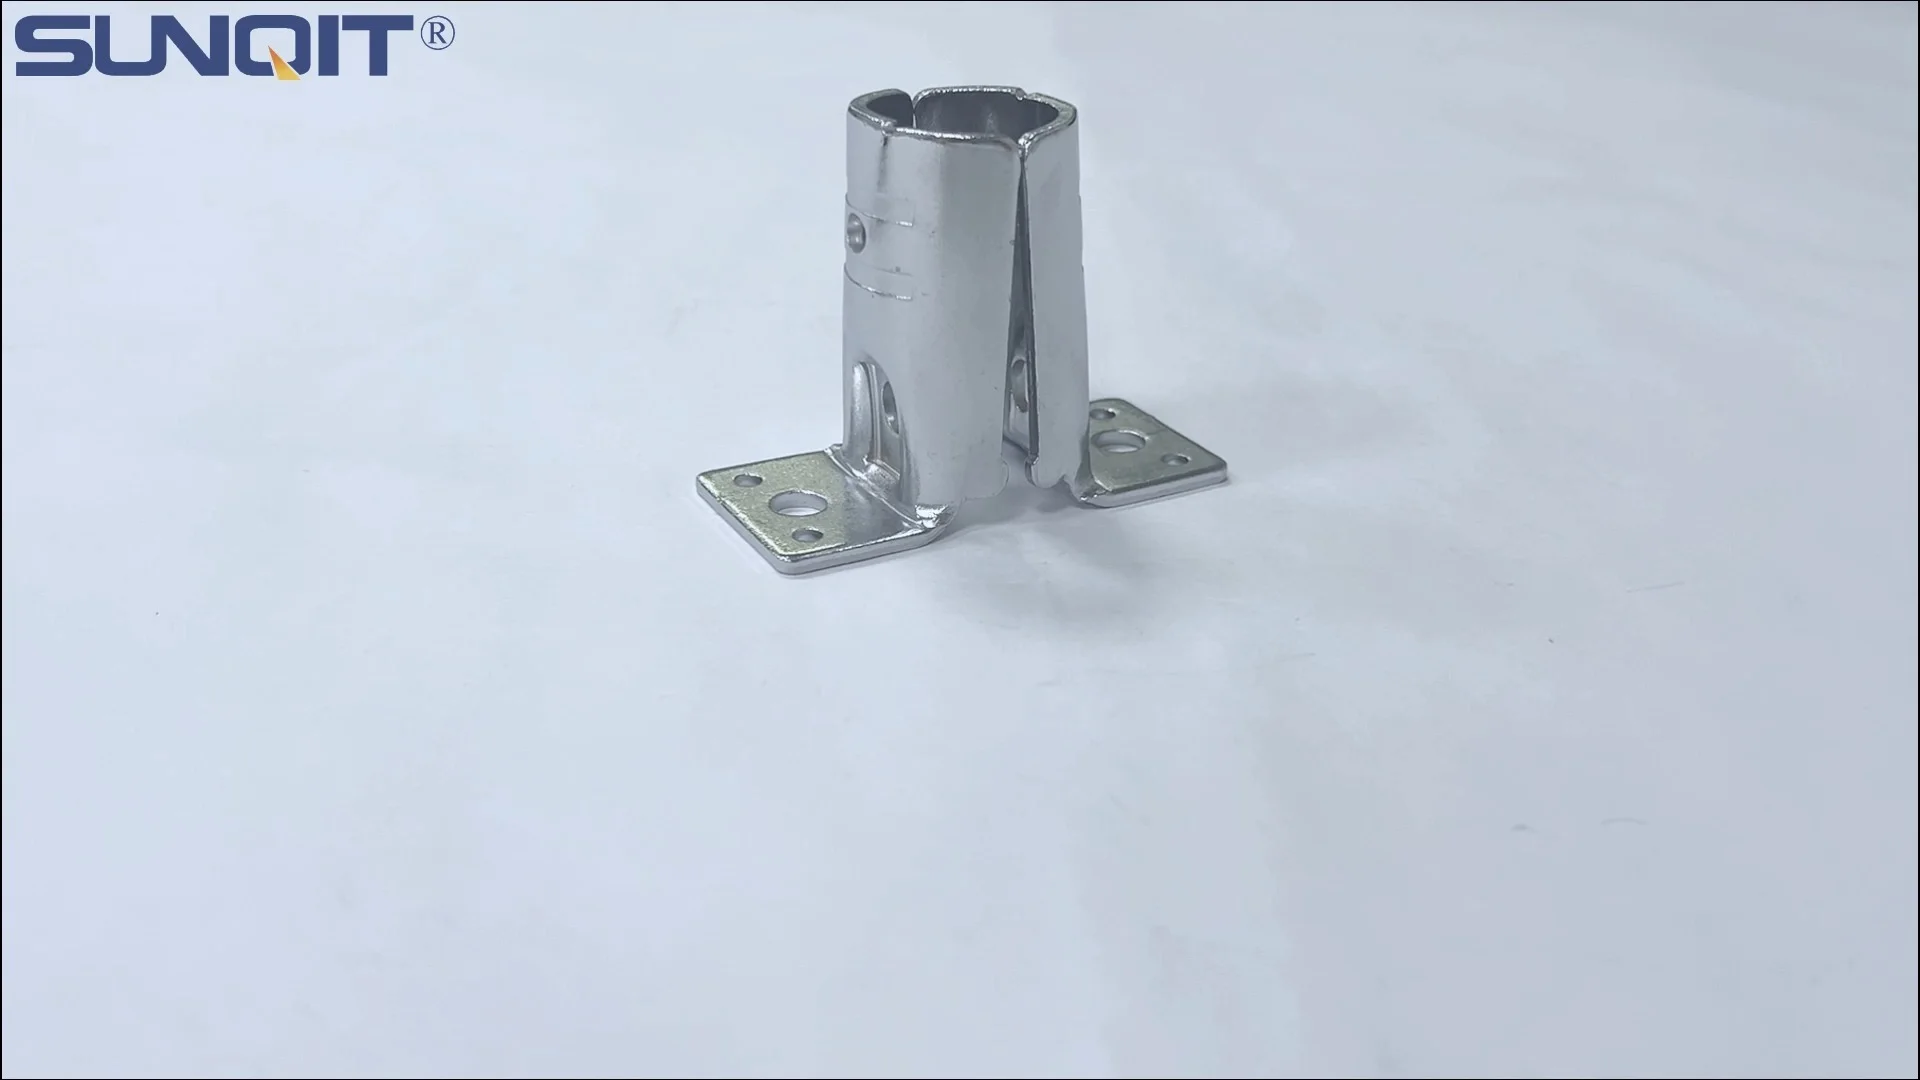
Vertical Lean Pipe Joint
Vertical lean pipe joint is used for 28mm lean pipe fixed on ground and keep it stable.
In the fast-paced world of manufacturing and assembly, every component of your workspace matters. From the workbench where your team assembles products to the flow racks that keep materials moving, stability and reliability are the backbone of efficiency. At the heart of many of these structures lies a small but critical part: the vertical lean pipe joint. These unassuming connectors are the glue that holds lean pipe systems together, ensuring that workbenches stay steady, material racks remain upright, and production lines run without hitches. But like any hardworking component, vertical lean pipe joints wear down over time—and when they do, the consequences can range from minor annoyances to major safety risks.
If you've ever noticed a workbench that wobbles when you lean on it, a material rack that sags under the weight of parts, or heard an unsettling creak when adjusting a conveyor, chances are you're dealing with a worn vertical lean pipe joint. Ignoring these signs might seem tempting—after all, who has time to fix a "small" problem when deadlines are looming? But the truth is, a failing joint can disrupt workflows, slow down production, and even put your team at risk of injury. That's why understanding how to spot, troubleshoot, and replace worn vertical lean pipe joints is essential for anyone managing a lean system.
Understanding Vertical Lean Pipe Joints: The Unsung Heroes of Lean Systems
Before diving into troubleshooting, let's take a moment to appreciate what vertical lean pipe joints actually do. In a lean system, lean pipes—often made of steel with a PE coating for durability—are used to build customizable structures like workbenches, material racks, and turnover trolleys. These pipes are connected using joints, and vertical joints, in particular, are designed to anchor vertical pipes to horizontal ones, providing upward support and lateral stability. Think of them as the knees of your workspace: they bear weight, resist movement, and keep everything aligned.
Most vertical lean pipe joints are made of metal (like zinc-plated steel) or high-strength plastic, with internal threads or clamping mechanisms that grip the pipes tightly. They come in various designs—some fixed, some swivel—but their core job remains the same: to create a rigid connection that can withstand the daily wear and tear of a busy facility. For example, a workbench in an electronics assembly line might use vertical joints to support the tabletop, while a three-row material rack relies on them to keep each shelf level and secure. Without these joints, your lean system would be little more than a pile of loose pipes.
One common misconception is that vertical joints are "set it and forget it" components. But the reality is, they're subjected to constant stress: vibrations from nearby machinery, repeated loading and unloading of materials, even temperature changes that cause pipes to expand and contract. Over time, this stress can loosen bolts, crack plastic components, or corrode metal parts—all of which weaken the joint's ability to hold. That's why regular inspection and maintenance are key to extending their lifespan.
Signs Your Vertical Lean Pipe Joints Are Wearing Out
The first step in addressing worn vertical lean pipe joints is knowing how to spot them. Worn joints rarely fail overnight; instead, they give off subtle (and sometimes not-so-subtle) warning signs. Here are the most common red flags to watch for:
1. Looseness or Wobbling
The most obvious sign is looseness. If you can wiggle a vertical pipe by hand or notice that a workbench top shifts when you press down on it, the vertical joint connecting it to the base is likely worn. This isn't just a nuisance—loose joints can cause tools or parts to slide off the workbench, leading to damaged inventory or delays. For example, a team member assembling small electronics might struggle to keep components in place on a wobbly surface, increasing the risk of errors and rework.
2. Visible Damage: Cracks, Chips, or Rust
Take a close look at the joint itself. Are there cracks in the metal or plastic? Chips around the edges? Rust or corrosion, especially in humid environments? Even small cracks can weaken the joint's structural integrity, making it prone to sudden failure under load. For instance, a vertical joint on a flow rack with a hairline crack might hold during light use but snap when someone loads a heavy box onto the shelf—sending products crashing to the floor.
3. Misalignment of Pipes
When a vertical joint wears out, it may no longer hold pipes at a perfect 90-degree angle. You might notice that a vertical pipe is leaning slightly to one side, or that horizontal pipes connected to it are no longer level. This misalignment can throw off the entire structure: a workbench with misaligned legs might rock, or a material rack with tilted shelves could cause parts to roll off unexpectedly.
4. Unusual Noises: Creaks, Squeaks, or Grinding
Your ears can be just as helpful as your eyes. A healthy vertical joint should be silent when the structure is moved or loaded. If you hear creaking, squeaking, or grinding sounds when adjusting a workbench height or pushing a turnover trolley, it's often a sign that the joint's internal components are worn. The noise comes from metal rubbing against metal (or plastic against plastic) as the joint shifts under pressure—another clear indicator that it's time to inspect.
5. Reduced Load Capacity
If a material rack that once held 50-pound boxes now sags when loaded with 30-pound ones, the vertical joints are probably to blame. Worn joints lose their ability to distribute weight evenly, causing the structure to bend or droop under loads it used to handle easily. This not only limits productivity but also creates a safety hazard—overloaded, weakened joints can collapse without warning.

Troubleshooting Worn Vertical Lean Pipe Joints: How to Diagnose the Problem
Once you've noticed signs of wear, the next step is troubleshooting to pinpoint the cause. Not all joint issues are the same—some can be fixed with a quick tightening, while others require full replacement. Here's how to diagnose the problem:
Step 1: Conduct a Visual Inspection
Start by examining the joint closely. Turn off nearby machinery to reduce vibrations, and use a flashlight to check for cracks, rust, or deformation. Pay attention to the connection points where the joint meets the lean pipe—are there gaps between the joint and the pipe? Gaps often mean the joint has loosened or the pipe itself is damaged (e.g., bent or dented). If the joint is made of plastic, look for signs of brittleness, like flaking or discoloration—this is common in joints exposed to sunlight or harsh chemicals.
Step 2: Check for Tightness
Many "worn" joints are actually just loose. Use a wrench to tighten the bolts or clamping screws on the joint. Be careful not to over-tighten—stripping the threads will only make the problem worse. After tightening, test the joint by gently wiggling the vertical pipe. If it still moves, the issue is likely more than just looseness.
Step 3: Test Load Capacity
To check if the joint can still handle its intended load, place a weight on the structure (e.g., a box of known weight on a workbench) and observe. Does the joint hold firm, or does it flex? If flexing occurs, the joint may be fatigued—meaning its material has been stretched beyond its limits, even if there are no visible cracks. Fatigued joints can't be repaired; they must be replaced.
Step 4: Identify the Root Cause
Ask yourself: Why did this joint wear out? Was it overloaded? Poorly installed? Exposed to moisture or chemicals? For example, if a joint on a workbench near a water source is rusted, corrosion is the culprit. If a joint on a material rack that's always stacked with heavy parts is cracked, overloading is likely to blame. Identifying the root cause will help you prevent future wear—whether that means adjusting loading limits, adding protective coatings, or choosing a more durable joint material.

Replacement Guidelines: How to Swap Out Worn Vertical Lean Pipe Joints
If troubleshooting confirms that your vertical lean pipe joint needs to be replaced, don't panic. With the right tools and a little know-how, replacing a joint is a straightforward process that can be done in under an hour. Here's a step-by-step guide to get the job done safely and effectively:
Step 1: Gather Your Tools and Materials
Before starting, make sure you have everything you need. Here's a quick checklist:
| Tool/Material | Purpose |
|---|---|
| Adjustable wrench or socket set | Loosening and tightening bolts |
| Rubber mallet | Gently tapping pipes to loosen stuck joints |
| Replacement vertical lean pipe joint | Ensure it matches the size and type of your existing joint (e.g., compatible with 1.5mm PE coated lean pipe) |
| Level (bubble or laser) | Checking alignment after installation |
| Clean cloth and degreaser | Cleaning pipe surfaces before installing the new joint |
| Work gloves | Protecting hands from sharp edges |
Step 2: Prepare the Work Area
Safety first! Clear the area around the structure to avoid tripping hazards. If you're working on a workbench or material rack, remove all tools, parts, and materials from it—you don't want anything falling during the replacement. If the structure is tall (like a multi-level rack), use a step stool or ladder to reach the joint safely, and have a colleague spot you if needed.
Step 3: Remove the Worn Joint
Using your wrench or socket set, loosen the bolts or screws holding the joint in place. If the joint is stuck (common with rusted metal joints), spray a small amount of penetrating oil on the threads and let it sit for 5–10 minutes. Once loose, carefully detach the joint from the vertical and horizontal pipes. If the pipes are stuck in the joint, tap the joint gently with a rubber mallet to free them—avoid using a metal hammer, as it can dent or damage the pipes.
After removing the joint, inspect the ends of the pipes for damage. Are they bent, dented, or covered in rust? If so, you may need to cut off the damaged section (using a pipe cutter) or replace the pipe entirely. A clean, straight pipe end is essential for a tight, secure joint connection.
Step 4: Install the New Joint
Start by cleaning the pipe ends with a cloth and degreaser to remove dirt, oil, or rust. This ensures a better grip between the pipe and the new joint. Next, slide the new vertical lean pipe joint onto the vertical pipe, aligning it with the horizontal pipe it will connect to. Make sure the joint is oriented correctly—most joints have a "top" and "bottom" to ensure proper weight distribution. Tighten the bolts or screws by hand first to avoid cross-threading, then use your wrench to secure them firmly (but not overly tight—snug is enough).
Step 5: Check Alignment and Stability
Once the joint is installed, use a level to confirm that the vertical pipe is straight and the horizontal pipe is level. A misaligned joint will wear out quickly, so take the time to adjust as needed. After alignment, test the joint by applying gentle pressure to the vertical pipe—there should be no movement or creaking. If everything checks out, replace any materials or tools on the structure, and you're good to go!

Choosing the Right Replacement Joint: Tips for Long-Term Success
Not all vertical lean pipe joints are created equal. To ensure your replacement joint lasts, it's important to choose the right one for your needs. Here are a few factors to consider:
Material Matters
Vertical lean pipe joints are typically made of metal (zinc-plated steel, stainless steel) or plastic (nylon, polypropylene). Metal joints are stronger and more durable, making them ideal for heavy-duty applications like material racks or workbenches that hold heavy tools. Plastic joints, on the other hand, are lighter, corrosion-resistant, and quieter—great for cleanrooms or environments where metal might scratch delicate parts. If your facility is humid or exposed to chemicals, stainless steel or plastic joints are better than standard steel, which can rust.
Compatibility with Your Lean Pipe
Make sure the joint is designed to fit your lean pipe's diameter and thickness. Most lean pipes are 28mm in diameter (a standard size), but thickness can vary (e.g., 1.2mm, 1.5mm, or 2.0mm PE coated lean pipe). A joint that's too loose will wobble; one that's too tight will damage the pipe. If you're unsure, check with your lean pipe supplier—they can help you find a compatible joint.
Supplier Reliability
Not all suppliers offer the same quality. Opt for a reputable lean pipe supplier that specializes in lean system components—they'll have joints that meet industry standards for strength and durability. Avoid generic "one-size-fits-all" joints from discount stores; they're often made with cheap materials that wear out quickly.
Preventive Maintenance: Keeping Vertical Lean Pipe Joints Strong for the Long Haul
The best way to avoid dealing with worn vertical lean pipe joints is to prevent wear in the first place. A little preventive maintenance goes a long way in extending the life of your joints and keeping your lean system running smoothly. Here are some simple habits to adopt:
Schedule Regular Inspections
Set a calendar reminder to inspect vertical lean pipe joints monthly (or quarterly, depending on usage). Have your team report any wobbling, noises, or misalignment immediately. Catching issues early means they can be fixed before they escalate.
Tighten Joints Proactively
Vibrations from machinery can loosen bolts over time. Every few months, do a quick pass with a wrench to tighten all vertical joints—this simple step can prevent many wear-related issues.
Avoid Overloading
Post clear load limits on workbenches, material racks, and trolleys, and enforce them. Overloading is one of the top causes of joint failure, so make sure your team knows not to exceed these limits.
Protect Against Corrosion
If your facility is humid or exposed to moisture, apply a rust-resistant spray to metal joints. For plastic joints, keep them away from direct sunlight, which can cause brittleness.
Conclusion: Invest in Stability, Invest in Success
Vertical lean pipe joints may be small, but their impact on your lean system is huge. By learning to spot the signs of wear, troubleshoot issues, and replace joints when needed, you'll keep your workspace stable, your team safe, and your production lines running at peak efficiency. Remember: a little time spent on maintenance today can save you hours of downtime tomorrow.
So the next time you walk through your facility, take a moment to look at those vertical joints. Give them a gentle wiggle, check for cracks, and listen for squeaks. Your team—and your bottom line—will thank you.