- Company Articles
- Products and Technology
- Installation And Maintenance
- Two Way Aluminum Pipe Joint Installation Guide: Step-by-Step for Beginners

Two Way Aluminum Pipe Joint Installation Guide: Step-by-Step for Beginners
Related Product
Two Way Aluminum Pipe Joint
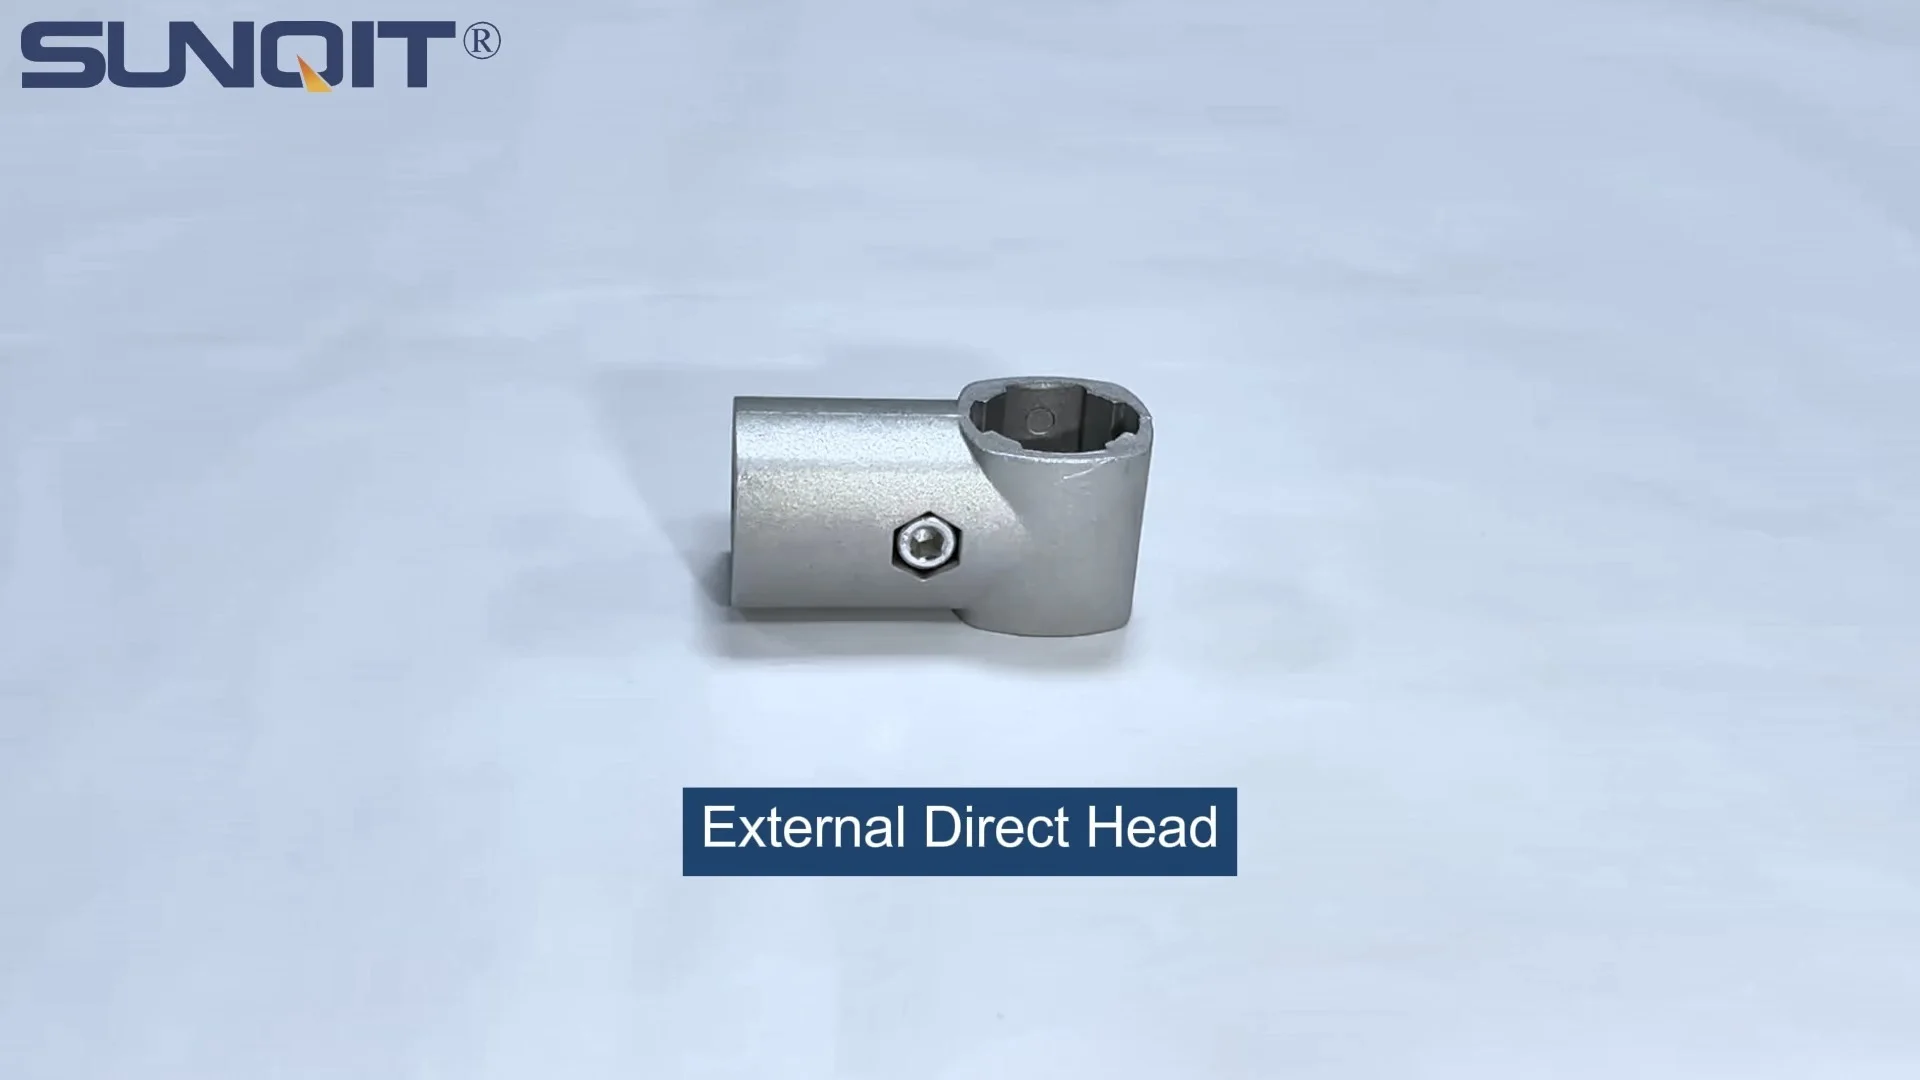
Aluminum 2 way pipe joint for 28mm aluminum pipe connection in 2 direction.
If you've ever walked into a workshop, factory floor, or even a well-organized garage, you've probably seen those sleek, modular structures—workbenches, material racks, or flow racks—that seem to fit together like giant building blocks. Chances are, many of those structures are built with aluminum lean pipe systems. Lightweight, durable, and infinitely customizable, aluminum lean pipe has become a go-to for anyone looking to build flexible, functional workspaces. And at the heart of almost every one of those structures? The two way aluminum pipe joint. It's a small component, but get its installation right, and you'll have a sturdy foundation for whatever you're building. Get it wrong, and you might end up with a wobbly mess that frustrates more than helps.
This guide is for the beginners—the folks who've just unboxed their first set of aluminum pipes and joints, stared at the pile, and thought, "Now what?" We'll walk through installing a two way aluminum pipe joint step by step, using plain language and practical tips. No jargon, no assumptions—just everything you need to know to get started. By the end, you'll not only have installed your first joint but also understand how it fits into the bigger picture of aluminum pipe systems. Let's dive in.
Why the Two Way Joint Matters
Before we grab our tools, let's talk about why this little joint is so important. Aluminum pipe systems rely on modularity—meaning you can mix and match components to build almost anything. The two way aluminum pipe joint is the simplest "connector" in this system: it joins two pipes at a straight angle (usually 180 degrees, but some designs allow for 90 degrees too, depending on the model). Think of it as the "elbow" or "straight connector" that lets you extend a pipe horizontally, vertically, or at a right angle.
Whether you're building a basic workbench, a shelving unit, or a turnover trolley, you'll use two way joints to create the main (frame). They're the backbone of stability. A poorly installed joint can throw off the entire structure—causing it to lean, wobble, or even collapse under weight. On the flip side, a properly installed joint ensures your creation is strong enough to hold tools, materials, or whatever else you need it to support. So even though it's a small part, taking the time to install it correctly is 100% worth it.
Tools and Materials You'll Need
Before you start, gather these tools and materials. You don't need anything fancy—most of these are probably already in your toolbox. If not, they're easy to pick up at a hardware store or online.
Tools
- Measuring tape : To ensure your pipes are cut to the right length (if they're not pre-cut).
- Hex key (Allen wrench) : Most aluminum pipe joints use hex screws to tighten—check the joint packaging for the correct size (usually 5mm or 6mm).
- Rubber mallet : For gently tapping pipes into joints if they're a tight fit (never use a metal hammer—it can dent the aluminum).
- Level : A small bubble level (4-6 inches) works best to check if your structure is straight after installation.
- Sandpaper (fine-grit, 220-400) : To smooth out any burrs or rough edges on the pipes (these can scratch the joint or make insertion hard).
- Gloves : Optional but recommended—aluminum pipes can have sharp edges, and gloves will protect your hands while tightening joints.
Materials
- Two way aluminum pipe joint : Make sure it's compatible with your pipe diameter (common sizes are 28mm, 30mm, or 32mm—check the label!)
- Aluminum pipes : Pre-cut to your desired length (we'll talk about measuring later). For beginners, start with 1-2 foot lengths—shorter pipes are easier to handle.
- Aluminum pipe accessories (optional) : Things like end caps (to cover sharp pipe ends), gaskets (for a tighter seal), or pipe clamps (if you're adding shelves later).
- Clean cloth : To wipe down pipes and joints—dust or oil can make tightening harder.
| Pipe Diameter (mm) | Recommended Joint Size | Hex Key Size (mm) | Torque for Tightening (Nm) |
|---|---|---|---|
| 28 | 28mm two way joint | 5 | 2.5 – 3.0 |
| 30 | 30mm two way joint | 6 | 3.0 – 3.5 |
| 32 | 32mm two way joint | 6 | 3.5 – 4.0 |
*Torque is a measure of how tight to turn the screw—too little, and the joint is loose; too much, and you might strip the threads. A torque wrench is optional, but if you don't have one, "snug but not forceful" is a good rule of thumb.
Step 1: Prep Your Workspace and Parts
Installing a joint is quick, but rushing the prep work is where most beginners go wrong. Take 5 minutes to set up, and the rest will be smooth sailing.
Clear Your Space
Find a flat, stable surface to work on—a table, workbench, or even the floor (just lay down a towel to avoid scratching the pipes). You'll need enough room to lay out your pipes and joint without them rolling away. Clutter = accidents, so push aside any tools or materials you're not using.
Check Your Parts
Open the joint package and inspect it. Look for cracks, bent screws, or rough edges—if anything looks damaged, don't use it! A faulty joint will never hold properly. Next, check your aluminum pipes. Are the ends straight? If they're cut, there might be burrs (tiny metal shavings) around the edge. Run your finger along the end—if it feels rough, grab your sandpaper and gently sand the edge until it's smooth. Burrs can scratch the inside of the joint or make it hard to insert the pipe all the way.
Measure Twice (Cut Once… If Needed)
If your pipes aren't pre-cut, now's the time to measure and cut them. Use your measuring tape to mark the length you need, then use a pipe cutter (or hacksaw with a miter box for straight cuts). Remember: it's better to cut a little long and trim later than to cut too short. Once cut, sand the ends as we mentioned earlier.
Clean Everything
Wipe down the pipes and joint with a clean cloth. Dust, oil, or fingerprints can create a slippery surface, making it harder to tighten the joint. A quick wipe ensures a good grip between the pipe and joint.
Pro Tip: Label Your Pipes!
If you're building something with multiple pipes (like a shelf with two vertical supports and a horizontal top), label each pipe with a piece of tape (e.g., "Left Vertical," "Right Vertical," "Top Horizontal"). It sounds silly, but it prevents mix-ups later!

Step 2: Align the Pipes and Joint
Now the fun part: putting it all together. The two way joint has two openings (hence "two way") where the pipes will go. Your goal is to align the pipes so they fit into these openings straight and snug.
Lay Out the Joint and Pipes
Place the two way joint flat on your workspace. If it's a straight joint (180 degrees), the openings will be in a straight line (like a "-"). If it's a right-angle joint (90 degrees), they'll be perpendicular (like a "L"). Check the joint's design—most have a small label or diagram on the packaging if you're unsure.
Lay your two pipes next to the joint, one on each side, so their ends are touching the joint's openings. This is your "dry fit"—no tightening yet! Just make sure the pipes are pointing in the direction you want (e.g., horizontally for a shelf, vertically for a leg).
Mark the Insertion Depth (Optional but Helpful)
Most two way joints have a "stop" inside—meaning the pipe only needs to go in a certain distance (usually 2-3 inches) to be secure. If you're worried about inserting it too far (or not far enough), mark the pipe with a pencil at the depth you want to insert it. For example, if the joint is 3 inches long, mark 2.5 inches from the pipe end—this gives you a visual guide when inserting.

Step 3: insert the Pipes into the Joint
With the pipes aligned, it's time to insert them into the joint. This should be firm but not forced—if you're struggling, something's wrong (we'll troubleshoot that later).
Start with One Pipe
Take one pipe and line up its end with one opening of the joint. Push gently—if it doesn't go in, check for burrs (we sanded earlier, but maybe we missed a spot). If it's still tight, tap the end of the pipe lightly with your rubber mallet (hold the pipe near the end to avoid bending it). Stop when the pipe hits the internal stop (or reaches your pencil mark).
insert the Second Pipe
Repeat the process with the second pipe and the other joint opening. Again, push gently, then tap with the mallet if needed. Now you should have a "T" shape (for 90-degree joints) or a straight line (for 180-degree joints), with both pipes inserted into the two way joint.
Check for Wobble (Loose Fit is Okay… For Now)
At this point, the pipes might wobble a little in the joint—that's normal! The joint isn't tightened yet, so the pipes should move freely. If they're too loose (like falling out when you lift the joint), the joint might be the wrong size for your pipe diameter. Double-check the pipe and joint labels—28mm pipes need 28mm joints, 30mm needs 30mm, etc. Using mismatched sizes is a common beginner mistake, but it's easy to fix by swapping the joint.
Step 4: Tighten the Joint (The Most Important Part!)
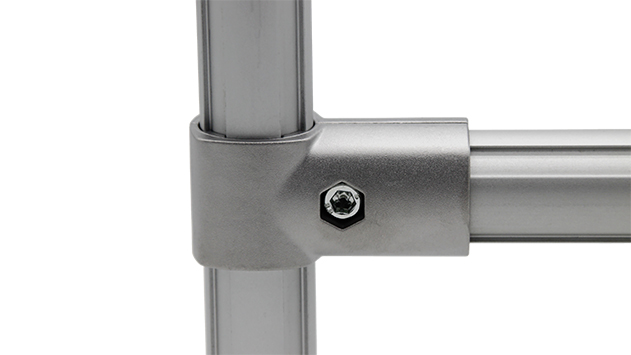
Now comes the step that makes or breaks your installation: tightening the joint. Most two way aluminum pipe joints have one or two hex screws (set screws) that, when tightened, press against the pipe, holding it in place. Here's how to do it right.
Find the Set Screws
Look at the side of the joint—you'll see small holes with hex-shaped indentations. These are the set screws. There might be one per pipe opening (so two screws total for a two way joint) or one in the middle (less common). Check the joint's design—if you're unsure, refer to the packaging or manufacturer's diagram.
insert the Hex Key
Take your hex key and insert it into the first set screw. Make sure it's fully seated—if it's loose, you might strip the screw head. Turn the key counterclockwise first to loosen the screw a little (this ensures it's not stuck).
Tighten Gradually (Don't Overdo It!)
Turn the hex key clockwise to tighten the screw. Go slow—1/4 turn at a time. As you tighten, you'll feel resistance. Stop when the pipe no longer wobbles in the joint. For most joints, this takes 2-3 full turns from the starting position. Refer to the torque table earlier if you have a torque wrench—for example, 2.5-3.0 Nm for 28mm pipes.
Repeat with the second set screw (if there is one). Tighten both screws evenly—don't tighten one all the way, then the other. This ensures the pipe is held straight, not crooked.
Check for Movement
Once tightened, try to twist or pull the pipes. They should not move at all. If they do, tighten the screws a little more (but stop if you feel the screw getting too tight—stripping the threads is bad news!). If the pipe still moves, check if it's inserted all the way to the internal stop—if it's not, the screw can't grip properly. Pull the pipe out, reinsert it fully, then retighten.
Pro Tip: Use a "Crisscross" Pattern for Multiple Screws
If your joint has two screws per pipe (uncommon, but some heavy-duty models do), tighten them in a crisscross pattern (like tightening lug nuts on a car). Tighten the top screw a little, then the bottom, then top again, etc. This distributes pressure evenly and prevents bending the pipe.
Step 5: Check for Straightness (Use the Level!)
A joint that's tight but crooked is almost as bad as a loose joint. Even if the pipes feel secure, they might be at a slight angle, which can throw off your entire structure. Grab your level to check.
For Straight (180-Degree) Joints
Lay the assembled pipe-and-joint structure on a flat surface. Place the level on top of the pipes—if the bubble is in the middle, you're good. If not, loosen the screws slightly, adjust the pipes until they're straight, then retighten.
For Right-Angle (90-Degree) Joints
Hold the structure upright (one pipe vertical, the other horizontal). Place the level on the horizontal pipe—bubble should be centered. Then place the level on the vertical pipe—bubble should also be centered. If either is off, loosen the screws, adjust, and retighten.
Step 6: Add Aluminum Pipe Accessories (If Needed)
Now that your joint is installed, you might want to add aluminum pipe accessories to finish the job. For example:
- End caps : Snap or screw these onto the exposed ends of the pipes to cover sharp edges (safer!) and give a clean look.
- Pipe clamps : These attach to the pipes and let you add shelves, tool hooks, or other accessories later.
- Gaskets : If you're using the structure outdoors or in a damp area, rubber gaskets between the pipe and joint can prevent corrosion.
Most accessories install with hex screws or snap into place—follow the same "tighten evenly" rule we used for the joint.
Troubleshooting: Common Mistakes (and How to Fix Them)
Even with careful installation, things can go wrong. Here are the most common issues beginners run into, and how to fix them.
Problem:
The pipe won't insert into the joint.
Solution: Check for burrs on the pipe end (sand them off). If the joint is metal, it might have a manufacturing defect—try a different joint. If all joints are tight, your pipe might be slightly bent (roll it on a flat surface to check—if it wobbles, it's bent).
Solution: Check for burrs on the pipe end (sand them off). If the joint is metal, it might have a manufacturing defect—try a different joint. If all joints are tight, your pipe might be slightly bent (roll it on a flat surface to check—if it wobbles, it's bent).
Problem:
The joint is tight, but the pipe still twists.
Solution: The set screw might not be pressing directly on the pipe. Loosen the screw, rotate the joint slightly (so the screw is in a new position), then retighten. Sometimes the pipe has a smooth spot—rotating the joint lets the screw grip a rougher area.
Solution: The set screw might not be pressing directly on the pipe. Loosen the screw, rotate the joint slightly (so the screw is in a new position), then retighten. Sometimes the pipe has a smooth spot—rotating the joint lets the screw grip a rougher area.
Problem:
The set screw stripped (rounded out, so the hex key won't grip).
Solution: Oops—you over-tightened. Use a rubber band over the hex key for extra grip, or try a "stripped screw extractor" (cheap at hardware stores). To prevent this, stop tightening when you feel resistance!
Solution: Oops—you over-tightened. Use a rubber band over the hex key for extra grip, or try a "stripped screw extractor" (cheap at hardware stores). To prevent this, stop tightening when you feel resistance!
Problem:
The structure leans to one side after adding weight.
Solution: Check if the joint is loose (retighten), or if the pipes are too thin for the weight. Aluminum lean pipe is strong, but it has limits—if you're holding heavy tools, use thicker-walled pipes or add extra supports.
Solution: Check if the joint is loose (retighten), or if the pipes are too thin for the weight. Aluminum lean pipe is strong, but it has limits—if you're holding heavy tools, use thicker-walled pipes or add extra supports.
Maintenance: Keep Your Joints (and Structure) Strong
Installing the joint is just the first step—with a little maintenance, your aluminum pipe structure will last for years.
Tighten Screws Regularly
Over time, vibrations (from tools, machinery, or just moving the structure) can loosen set screws. Every 3-6 months, give the screws a quick tighten with your hex key. It takes 30 seconds and prevents big problems later.
Clean and Inspect for Rust (If Using Steel Joints)
Most aluminum pipe joints are aluminum or coated steel, but if you're using plain steel joints, wipe them down with a dry cloth if they get wet. Rust can weaken the joint—if you see rust, sand it off and apply a thin coat of anti-rust spray.
replace Worn Joints
If a joint starts to bend, crack, or the set screws no longer hold, replace it. Joints are cheap, and a new one is better than a collapsed structure.
What Now? Build Something!
You've installed your first two way aluminum pipe joint—congrats! Now that you've mastered the basics, the sky's the limit. Start small: build a simple workbench (two vertical pipes, two horizontal pipes on top, joined with two way and four way joints), or a small material rack for your garage. As you get comfortable, you can add more joints (three way, four way) and aluminum pipe accessories to make it more complex.
Remember: every expert was once a beginner. The more you practice installing joints, the faster and more confident you'll get. And who knows? Maybe one day you'll look at that workbench or flow rack you built and think, "I did that—with a little help from a two way joint."
Final Thoughts
Installing a two way aluminum pipe joint isn't rocket science, but it does require patience and attention to detail. By following these steps—prepping your parts, aligning carefully, tightening evenly, and checking for straightness—you'll build structures that are sturdy, functional, and something to be proud of. Aluminum lean pipe systems are all about flexibility, and now that you know how to use one of their most basic components, you're ready to start creating spaces that work for you.
So grab your pipes, joint, and hex key—and start building. You've got this!