- Company Articles
- Products and Technology
- Product knowledge
- Two Way Lean Pipe Joint Chrome for Workbench E: Assembly Tips

Two Way Lean Pipe Joint Chrome for Workbench E: Assembly Tips
Related Product
Two Way Lean Pipe Joint Chrome
Two way lean pipe joint for 2 pcs 28MM lean pipe connection in straight angle, which used widely in workbench, flow rack, hand trolley frame connection.
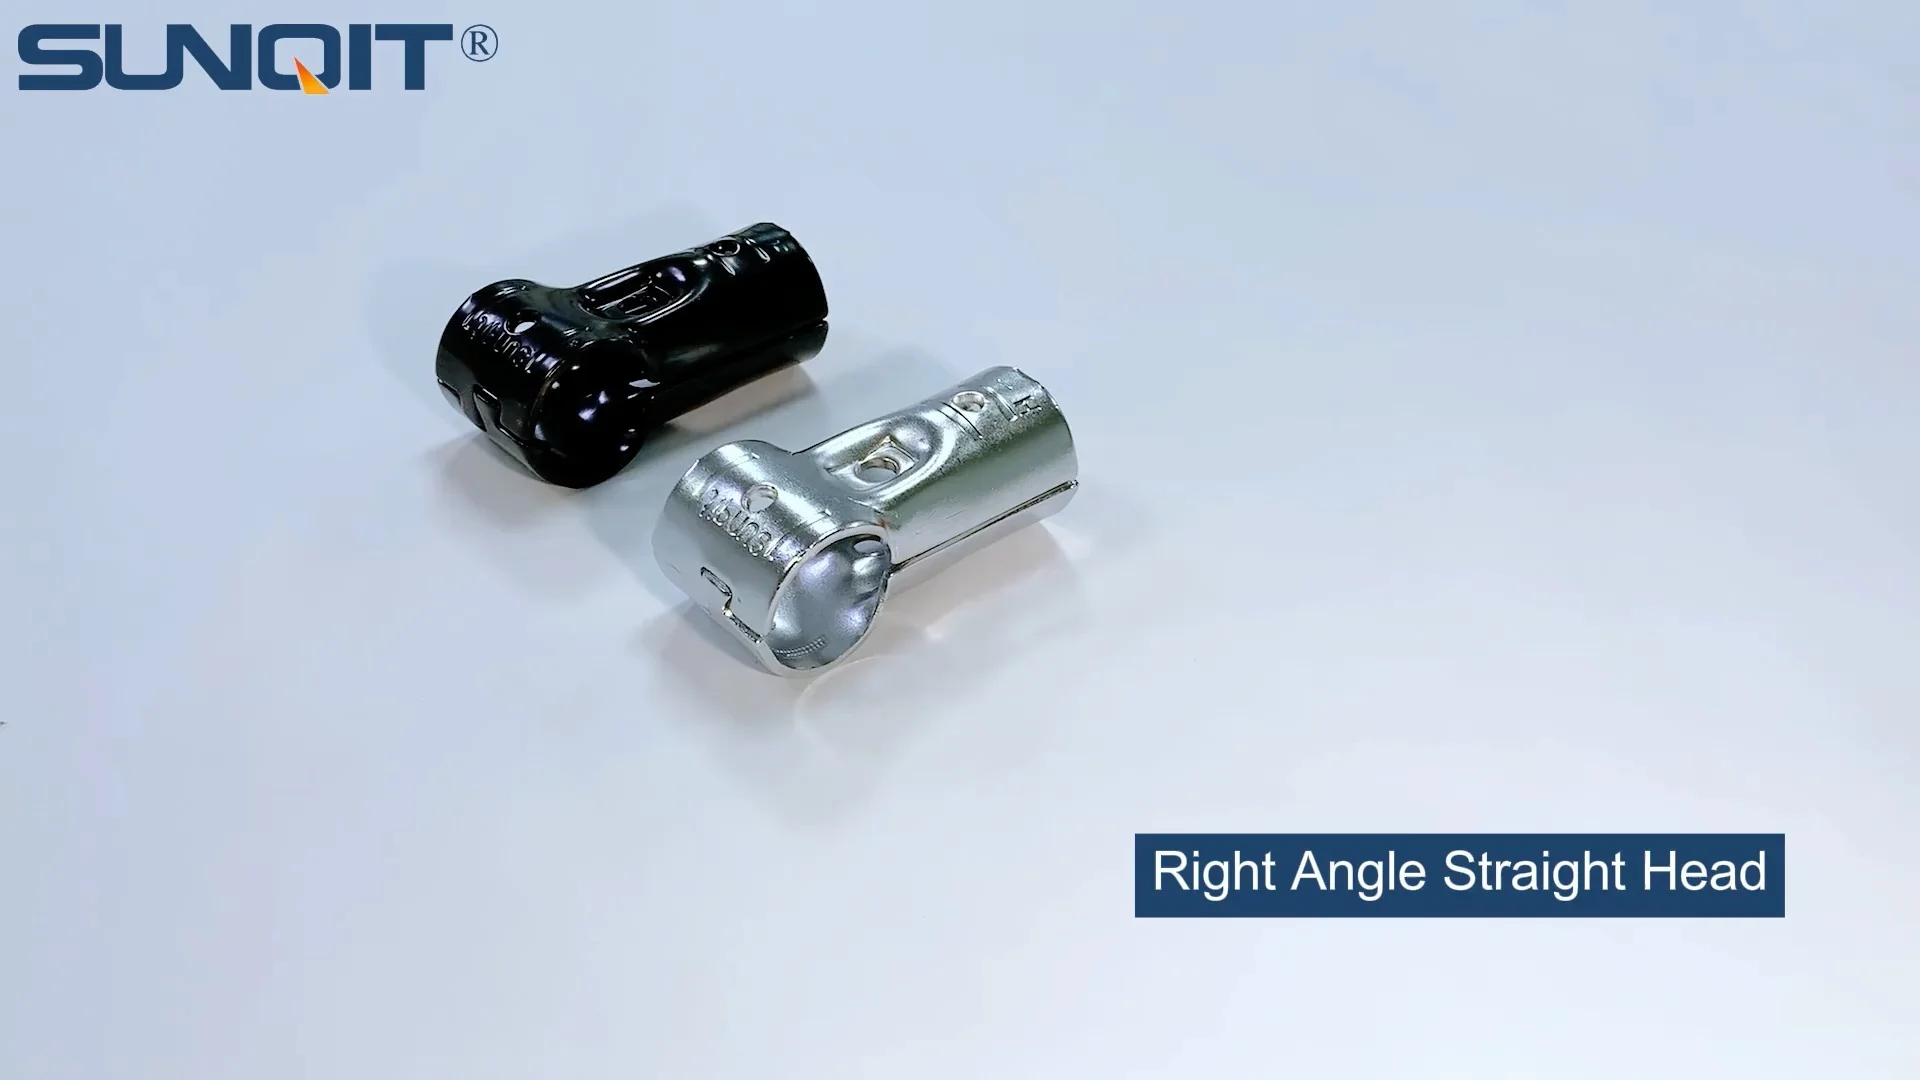
Walk into any busy production facility, and you'll notice one thing that ties every efficient workspace together: the workbench. It's more than just a table—it's the heartbeat of daily operations, where parts are assembled, tools are organized, and ideas turn into finished products. But not all workbenches are created equal. When it comes to flexibility, durability, and adaptability, few options compare to the Workbench E (single deck-without caster) . Designed for lean manufacturing environments, this workbench relies heavily on precision components, and none are more critical than the Two Way Lean Pipe Joint Chrome . Today, we're diving deep into how to assemble Workbench E like a pro, with a focus on mastering the two-way joint that holds it all together. Whether you're a seasoned facility manager or a new team lead tasked with setting up your first lean workspace, these tips will help you build a workbench that's not just sturdy, but built to grow with your needs.
Why Workbench E and Two Way Lean Pipe Joint Chrome Matter in Lean Systems
Before we get our hands dirty with assembly, let's talk about why this specific setup matters. Lean manufacturing is all about eliminating waste—time, space, materials—and Workbench E is a poster child for that philosophy. Its single-deck design keeps surfaces uncluttered, while the absence of casters (for now) ensures stability during precision tasks like electronics assembly or small-part sorting. But what truly makes it lean is its modularity, thanks in large part to the lean pipe framework and components like the Two Way Lean Pipe Joint Chrome.
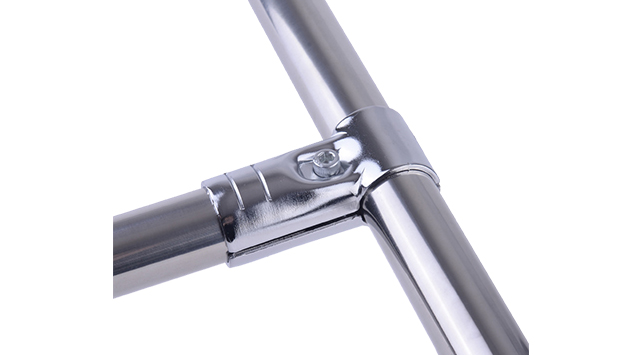
The Two Way Lean Pipe Joint Chrome isn't just a connector; it's the unsung hero of modular workbench design. Chrome-plated for corrosion resistance (critical in busy shops where spills or humidity are common), this joint lets you connect two lean pipes at a 90-degree angle with minimal effort. Unlike fixed metal brackets that require welding or drilling, these joints twist into place, allowing for quick adjustments if your workflow changes. I've seen facilities where a single workbench gets reconfigured three times in a year—adding a shelf here, extending a side rail there—and without reliable joints like these, that flexibility would be impossible.
And let's not overlook the bigger picture: Workbench E is part of a larger lean system . It pairs seamlessly with flow racks, conveyors, and turnover trolleys, creating a continuous material flow that cuts down on unnecessary movement. But none of that works if the workbench itself is wobbly or poorly assembled. A loose joint today could lead to a sagging shelf tomorrow, which might slow down production or, worse, damage parts. That's why getting the assembly right—especially the Two Way Lean Pipe Joint Chrome—is so critical.
Breaking Down the Components: What You'll Need
Before you start tightening joints, let's make sure you have all the pieces. Nothing kills momentum faster than realizing you're missing a key part halfway through assembly. Here's a quick rundown of the core components for Workbench E, with a spotlight on the star of the show:
- Workbench E (single deck-without caster) Kit: This includes the wooden or composite single deck (usually 1200x600mm, but check your specs), four vertical lean pipes (typically 1.5mm PE coated lean pipe for durability), and the frame accessories.
- Two Way Lean Pipe Joint Chrome: You'll need four of these—one for each corner where the vertical pipes meet the horizontal frame. These joints have two threaded ends and a central swivel mechanism, allowing for 90-degree connections.
- Lean Pipe: Usually 28mm in diameter, these pipes form the frame. Opt for chrome-plated or PE-coated steel; both resist scratches and are easy to clean.
- End Caps: Small plastic caps that go on the ends of lean pipes to prevent snags and keep dust out. They might seem trivial, but try sliding a hand along an uncovered pipe end—you'll thank me later.
- Aluminum Profile Accessories: While Workbench E's frame is lean pipe-based, you might need aluminum angle brackets or gussets if you're adding extra supports (more on that later).
Pro tip: Lay out all parts on a clean, flat surface before starting. I like to use a large piece of cardboard to protect the deck from scratches while I work. Take 5 minutes to cross-check each item against the kit list—most suppliers include a checklist, and it's better to catch a missing joint now than when you're holding a pipe 6 inches off the ground.
Pre-Assembly Prep: Setting Yourself Up for Success
Assembly isn't just about screwing parts together—it's about setting yourself up for success. Here's what I recommend before you even pick up a tool:
1. Clear the Workspace
Workbench E might be a single-deck unit, but you'll need room to maneuver. Clear a space at least 2x2 meters—enough to lay out the deck, pipes, and joints without tripping over cords or boxes. If you're working in a shared area, tape off the space with painter's tape to keep others from accidentally moving parts. Trust me, there's nothing more frustrating than hunting for a misplaced joint under a pile of boxes.
2. Gather the Right Tools
You don't need a fully stocked toolbox, but a few key tools will make all the difference. Here's a quick checklist:
| Tool | Purpose | Pro Tip |
|---|---|---|
| Hex Key (Allen Wrench) | Tightening Two Way Lean Pipe Joint Chrome bolts | Use a ball-end hex key for hard-to-reach angles—worth the extra $5! |
| Rubber Mallet | Tapping pipes into joints without damaging chrome plating | Wrap the mallet head in a microfiber cloth to avoid scuffing pipes |
| Level (2ft or longer) | Ensuring the frame is straight and the deck is level | Check both horizontally and vertically—lean pipes can twist if not aligned |
| Measuring Tape | Verifying pipe lengths and spacing | Measure twice, cut once (though pre-cut kits should eliminate this step!) |
| Thread Locking Fluid (Optional) | Preventing bolts from loosening over time | Use blue thread locker (removable) for adjustments later—red is permanent! |
3. Inspect Parts for Defects
Even the best suppliers have occasional duds. Before assembly, inspect each Two Way Lean Pipe Joint Chrome for cracks in the chrome plating or stripped threads. Spin the joint—does it rotate smoothly? If it's stiff or gritty, it might be a manufacturing defect.,.,, lean pipe supplier .:5,.

Step-by-Step Assembly: Building Workbench E with Two Way Lean Pipe Joint Chrome
Now, let's get to the fun part: building the workbench. Follow these steps, and you'll have a sturdy, level workbench in under an hour (yes, really!).
Step 1: Lay the Foundation—Assemble the Frame
Start by laying the single deck flat on the floor, top side down. This will be your "work surface" for building the frame. Take two of the vertical lean pipes and attach a Two Way Lean Pipe Joint Chrome to one end of each. The joint has two openings: one for the vertical pipe and one for the horizontal pipe. Screw the joint onto the vertical pipe until it's hand-tight—you'll snug it up later with the hex key.
Next, take a horizontal lean pipe (these are usually shorter than the vertical ones—check your kit specs) and connect it to the open end of one of the two-way joints. Now you have an "L" shape: vertical pipe on one end, horizontal on the other. Repeat this with the remaining vertical and horizontal pipes to create two identical "L" frames—these will be the front and back of your workbench.
Here's where alignment matters: Stand the two "L" frames upright, with the horizontal pipes facing each other. Measure the distance between the vertical pipes—this should match the length of the remaining horizontal pipes (the side rails). If it's off by more than a few millimeters, double-check the joints—they might be twisted. A quick tap with the rubber mallet can help realign them.
Step 2: Connect the Side Rails
With the front and back frames in place, it's time to connect them with the side rails. Take a horizontal pipe and slide one end into the open joint of the front frame. Then, walk to the other side and do the same with the back frame. Now you have a rectangular frame—this is the skeleton of your workbench. But don't tighten anything yet! We need to ensure it's square first.
To check for square, measure the diagonals of the frame. If both measurements are equal, the frame is square. If not, gently push or pull the corners until the diagonals match. This step is critical—an un-square frame will lead to a wobbly workbench and uneven deck. Once square, use the hex key to tighten all Two Way Lean Pipe Joint Chrome bolts. Tighten them in a crisscross pattern (like tightening lug nuts on a car) to avoid uneven pressure.
Step 3: Attach the Deck
Now, carefully flip the frame upright—this is a two-person job! Place it on a flat surface, then lift the single deck and align it with the top of the frame. Most Workbench E kits have pre-drilled holes in the deck that line up with the frame's horizontal pipes. If not, use clamps to hold the deck in place temporarily while you mark drilling points (though pre-drilled is standard for lean kits).
Once aligned, secure the deck to the frame using the provided screws or brackets. For extra stability, I recommend adding a bracket at each corner—even if the kit doesn't specify it. A few extra screws now will prevent the deck from shifting during heavy use. After attaching, use your level to check that the deck is flat—adjust the frame legs (if adjustable) or add shims under the vertical pipes if needed.
Step 4: Add Finishing Touches
Almost done! Pop the plastic end caps onto the open ends of the lean pipes—this keeps out dust and prevents snags. If you plan to add accessories later (like a tool rail or shelf), now's the time to mark where future joints might go. Use a pencil to lightly mark pipe positions—chrome plating is easy to clean, so the marks will wipe off later.
Troubleshooting Common Two Way Lean Pipe Joint Chrome Issues
Even with careful assembly, things can go wrong. Here are the most common issues I've seen with Two Way Lean Pipe Joint Chrome and how to fix them:
Problem: Joints Feel Loose After Tightening
If a joint wobbles even after tightening, the culprit is usually dirt or debris in the threads. Disassemble the joint, wipe the threads with a clean cloth, and apply a tiny drop of machine oil (WD-40 works too). Reassemble and tighten—this should create a snug fit. If the problem persists, check the joint for stripped threads. Chrome plating can wear thin with repeated use, so replacing the joint might be necessary.
Problem: Pipes Don't Align with Joint Openings
This happens when the lean pipe is slightly bent or the joint is misthreaded. First, check the pipe for bends—roll it on a flat surface; if it wobbles, it's bent. Most lean pipes are flexible enough to straighten by hand (gently!), but if it's severe, replace it. If the pipe is straight, try threading the joint backward a full turn, then forward again—this can realign cross-threads.
Problem: Deck Sags in the Middle
A sagging deck is usually due to insufficient support. Workbench E's single deck relies on the frame for rigidity, but if you're using heavy tools or materials, add a center support rail. Use two additional Two Way Lean Pipe Joint Chrome and a short lean pipe to create a cross-brace between the side rails. This distributes weight evenly and prevents sagging over time.
Pro Tips for Long-Term Durability
You've built your workbench—now how do you keep it in top shape? Here are my go-to tips for ensuring your Two Way Lean Pipe Joint Chrome and Workbench E last for years:
1. Tighten Joints Regularly
Even the best joints loosen over time with vibration. Schedule a monthly "tightening check"—grab your hex key and give each Two Way Lean Pipe Joint Chrome a quarter-turn. It takes 5 minutes and prevents major issues down the line.
2. Clean Chrome Joints to Prevent Corrosion
Chrome plating resists rust, but it's not invincible. Wipe down joints with a damp cloth monthly, and avoid using harsh chemicals (like bleach) near the workbench. If you notice water spots, buff them with a soft sponge and mild soap—this keeps the chrome shiny and corrosion-free.
3. Plan for Future Modifications
Lean systems evolve, and your workbench should too. Leave extra space between joints if you think you'll add shelves or hooks later. The Two Way Lean Pipe Joint Chrome is compatible with other lean pipe accessories, so you can easily expand—just make sure to reinforce the frame if adding weight.
Final Thoughts: Building a Workbench That Grows With You
Assembling Workbench E with Two Way Lean Pipe Joint Chrome isn't just about putting parts together—it's about building a foundation for efficiency. When done right, this workbench becomes more than a surface; it's a tool that adapts to your team's needs, reduces waste, and keeps production flowing smoothly. Remember, the key is patience: take the time to align pipes, tighten joints properly, and plan for the future. And if you ever hit a snag, refer back to these tips—you've got this.
At the end of the day, lean manufacturing is about people as much as it is about processes. A well-built workbench makes your team's job easier, safer, and more enjoyable. So go ahead—fire up that assembly line, and watch as your new Workbench E becomes the backbone of your lean system. Here's to fewer headaches, smoother workflows, and a workspace that works as hard as you do.