- Company Articles
- Products and Technology
- Installation And Maintenance
- Two Way Lean Pipe Joint Maintenance Checklist for Manufacturing Facilities

Two Way Lean Pipe Joint Maintenance Checklist for Manufacturing Facilities
Related Product
Two Way Lean Pipe Joint
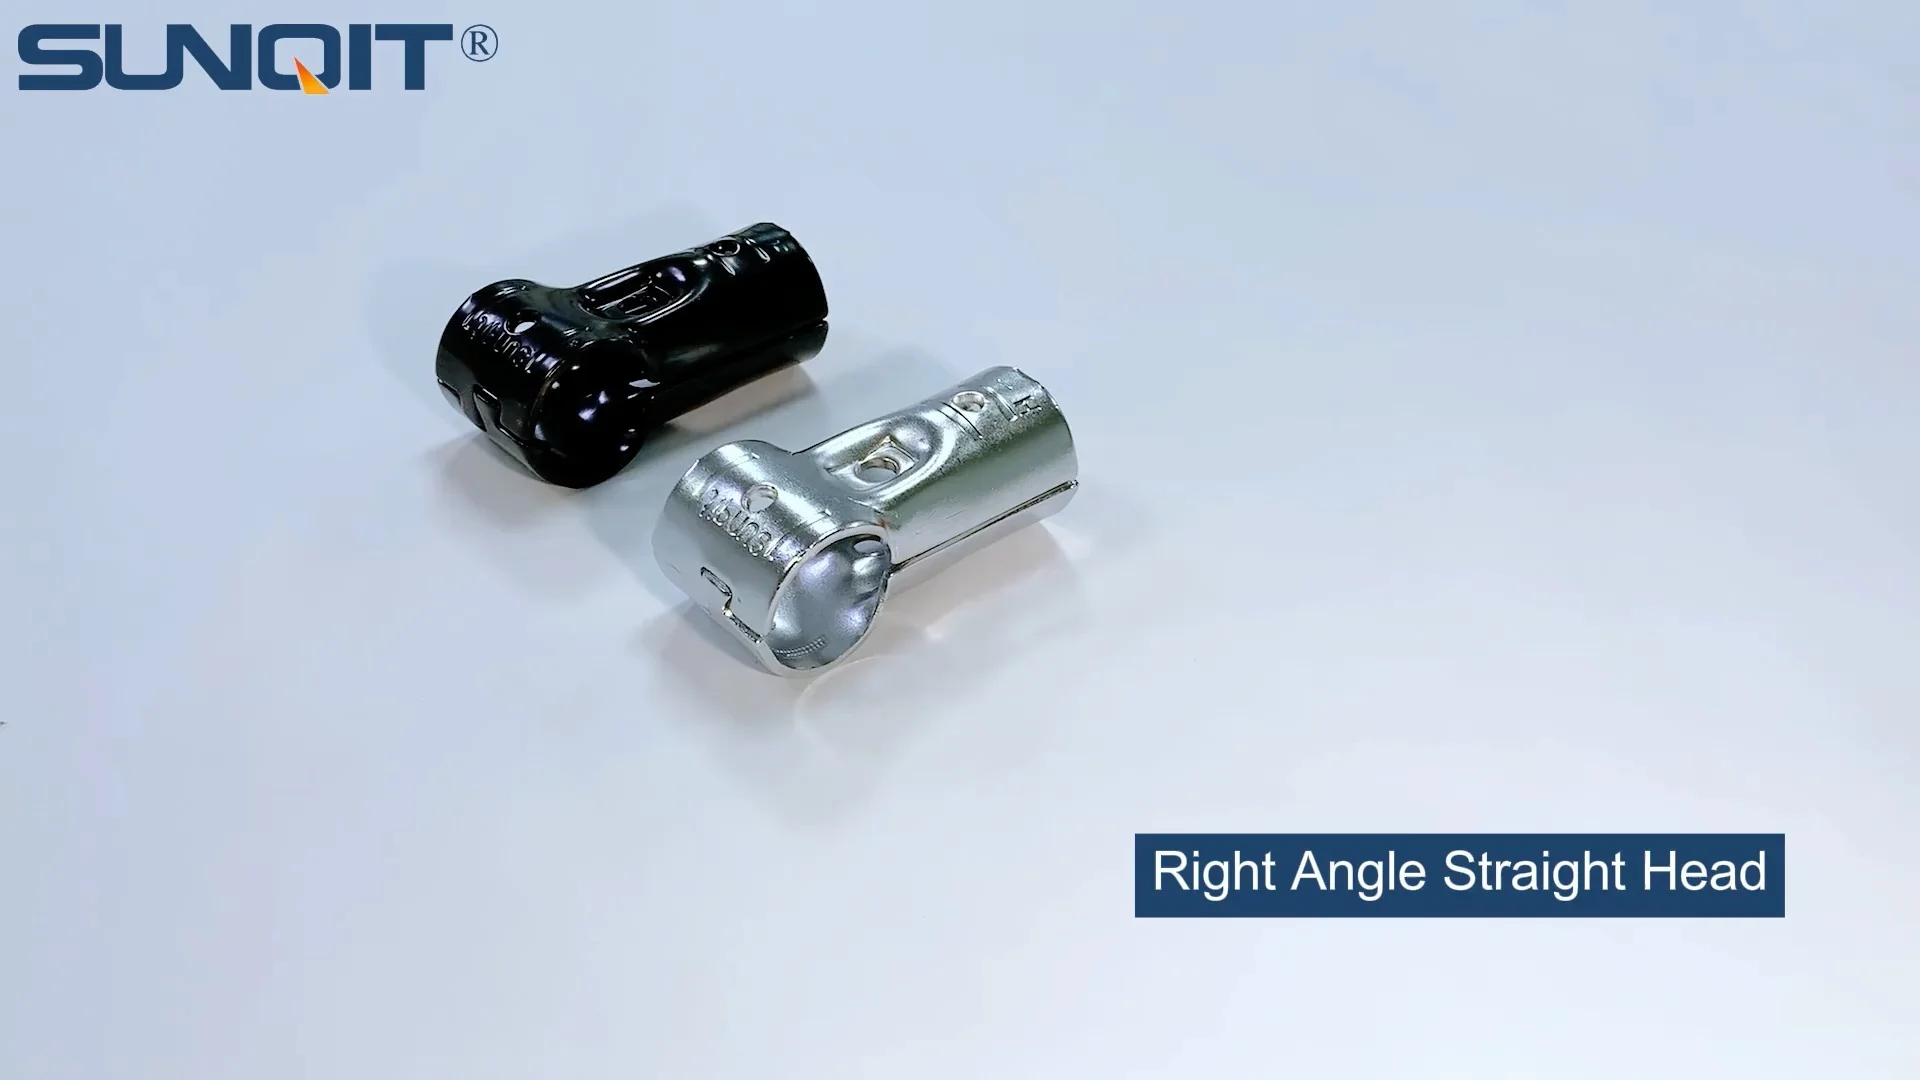
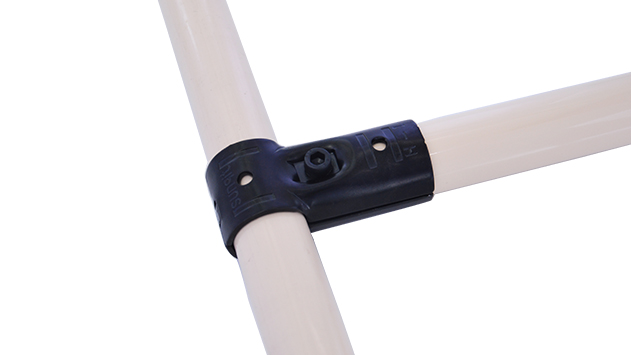
Two way lean pipe joint for 2 pcs 28MM lean pipe connection in straight angle, which used widely in workbench, flow rack, hand trolley frame connection.
Walk through any busy manufacturing facility, and you'll see the heartbeat of production in motion: assembly lines humming, workers moving with purpose, and materials flowing seamlessly from one station to the next. Behind this orchestrated chaos lies a silent hero: lean manufacturing systems. These systems—built from components like workbenches, flow racks, and material trolleys—rely on precision, flexibility, and durability to keep operations running smoothly. And at the core of these systems, holding everything together, are the unsung workhorses: lean pipe joints . Specifically, the two way lean pipe joint, a small but mighty connector that bridges pipes, supports shelves, and ensures stability across your facility's most critical equipment.
While they may seem, two way lean pipe joints play a pivotal role in maintaining the integrity of your lean systems. A loose joint can turn a sturdy workbench into a wobbly hazard; a corroded connector can compromise the flow of materials on a roller track; a misaligned joint can slow down production as workers struggle with unstable equipment. In short, neglecting these small components can lead to big problems: unplanned downtime, safety risks, and plummeting efficiency. That's why a proactive maintenance checklist isn't just a good idea—it's essential for keeping your facility productive, safe, and profitable.
Why Two Way Lean Pipe Joint Maintenance Matters
Before diving into the "how" of maintenance, let's talk about the "why." For manufacturers, every minute of downtime translates to lost revenue. According to industry estimates, unplanned downtime can cost factories anywhere from $5,000 to $20,000 per hour, depending on the industry and scale of operations. Many of these disruptions stem from preventable issues—like a failed lean pipe joint that causes a workbench to collapse or a flow rack to jam. By investing time in regular maintenance, you're not just fixing parts; you're protecting your bottom line.
Safety is another critical factor. Loose or damaged joints can lead to equipment failure, which in turn puts workers at risk of injury. A wobbly material trolley, for example, might tip over, spilling heavy parts and causing strains or bruises. In more severe cases, a collapsed workbench could trap hands or feet, leading to serious harm. OSHA reports that poorly maintained equipment is a leading cause of workplace accidents in manufacturing, making joint maintenance a key part of your safety compliance strategy.
Efficiency is the third pillar. When lean pipe joints are in top shape, your systems work as intended: materials glide smoothly along flow racks, workbenches stay level for precise assembly, and trolleys move easily across the factory floor. But when joints wear down, friction increases, movement slows, and workers waste time adjusting equipment or fixing jams. Over time, these small inefficiencies add up, dragging down productivity and making it harder to meet production targets.
Common Issues with Two Way Lean Pipe Joints
To maintain your joints effectively, you first need to know what to look for. Two way lean pipe joints face a variety of stresses in daily use, leading to predictable wear and tear. Here are the most common issues facility managers and maintenance teams should watch for:
- Loosening from Vibration: Manufacturing floors are noisy, and that noise comes with constant vibration. Over weeks and months, this vibration can loosen the bolts or fasteners in two way joints, causing them to shift or wobble. Left unchecked, loose joints can lead to misalignment of connected pipes, putting extra stress on the entire structure.
- Corrosion and Rust: Humidity, coolants, lubricants, and even cleaning chemicals can expose lean pipe joints to moisture and corrosive substances. Steel or iron joints are especially prone to rust, which weakens the metal and can eventually cause the joint to fail. Even aluminum or stainless steel joints can corrode if exposed to harsh environments.
- Wear on Moving Parts: Some two way joints have rotating or sliding components, like those used in adjustable workbenches or tilting flow racks. These parts can wear down over time, leading to stiffness, jamming, or play (excess movement). For example, a joint that once adjusted smoothly might become stuck or wobbly after months of use.
- Misalignment from Overloading: Every lean pipe system has a weight limit, and exceeding it can bend or warp joints. A workbench loaded with heavy tools beyond its capacity, for instance, might cause the two way joints connecting its legs to the frame to bow, leading to instability. Over time, this misalignment can stress adjacent joints, creating a chain reaction of damage.
- Damage from Impact: Accidents happen. A forklift might bump a material trolley, or a worker could drop a heavy part on a flow rack. These impacts can dent, bend, or crack joints, even if the damage isn't immediately visible. A small dent might seem harmless, but it can weaken the joint's structural integrity, making it more likely to fail under stress.
The Two Way Lean Pipe Joint Maintenance Checklist
Now that you know what to watch for, let's outline a step-by-step maintenance checklist. This checklist is designed to be flexible, with tasks tailored to different frequencies (daily, weekly, monthly, and annually) to ensure you catch issues early. Remember: consistency is key. Even a quick daily inspection can prevent major breakdowns.
| Task Category | Frequency | Steps to Complete | Key Notes |
|---|---|---|---|
| Visual Inspection | Daily (by operators) & Weekly (by maintenance) |
1. Check for visible damage: cracks, dents, or rust on the joint body.
2. Look for loose bolts, nuts, or fasteners. 3. Verify alignment: ensure connected pipes are straight and level. 4. Test movement (if applicable): check rotating joints for stiffness or excessive play. |
Operators should report issues immediately (e.g., "Workbench A has a wobbly joint"). Maintenance should document findings in a log. |
| Tightening Fasteners | Weekly |
1. Use an adjustable wrench or torque wrench to tighten loose bolts.
2. Follow manufacturer torque specs (typically 15-25 Nm for steel joints; check supplier guidelines). 3. Avoid over-tightening, which can strip threads or crack the joint. |
Torque specs vary by material (aluminum joints may require lower torque than steel). Keep a cheat sheet near maintenance stations. |
| Cleaning | Weekly (or bi-weekly in dirty environments) |
1. Use a wire brush to remove rust, dirt, or debris from joint surfaces.
2. Wipe with a damp cloth and mild detergent to clean oil or chemical residues. 3. Dry thoroughly to prevent moisture buildup. |
Pay extra attention to joints near coolant stations or areas with heavy dust—these need more frequent cleaning. |
| Lubrication | Monthly (or quarterly for non-moving joints) |
1. Apply a small amount of silicone-based lubricant to moving parts (e.g., rotating joints).
2. Wipe away excess lubricant to prevent attracting dust. 3. For threaded joints, apply anti-seize compound to prevent corrosion and make future disassembly easier. |
Avoid oil-based lubricants, which can degrade plastic components in some joints. Use food-grade lubricant if joints are near food-processing areas. |
| Corrosion Treatment | Monthly (or as needed) |
1. Inspect for rust or corrosion spots.
2. For minor rust, sand with fine-grit sandpaper, then apply anti-corrosion spray. 3. For severe corrosion (pitting or holes), mark the joint for replacement. |
Stainless steel or aluminum joints are more corrosion-resistant, but still need protection in humid environments. |
| Alignment Check | Monthly |
1. Use a spirit level to check if connected pipes are straight and horizontal/vertical.
2. Measure distances between joints to ensure symmetry (e.g., workbench legs should be evenly spaced). 3. Adjust misaligned joints by loosening, realigning, and retightening fasteners. |
Misalignment often starts small—catching it early prevents stress on adjacent joints. |
| Load Testing | Quarterly |
1. Apply the maximum rated load to the system (e.g., place weighted boxes on a flow rack).
2. Observe joints for bending, creaking, or shifting under load. 3. Remove the load and check if joints return to their original position. |
Never exceed the system's weight limit during testing—this can cause permanent damage. |
| Replacement of Worn Parts | Annually (or as needed) |
1. Review maintenance logs to identify joints with recurring issues (e.g., frequent loosening).
2. replace joints with signs of irreparable damage (cracks, severe corrosion, stripped threads). 3. Use OEM or high-quality replacement joints from trusted lean pipe joint suppliers. |
Keep a stock of spare joints to minimize downtime during replacements. |
Pro Tip:
Integrate maintenance into your operators' daily routines. Since they use the equipment most frequently, they're often the first to notice issues like a wobbly workbench or a sticky joint. Train them to perform quick visual checks at the start and end of shifts, and reward proactive reporting to build a culture of accountability.

Essential Tools for Lean Pipe Joint Maintenance
To execute your maintenance checklist effectively, you'll need the right tools. Having these items on hand will save time and ensure tasks are done correctly. Here's a list of must-haves for any maintenance kit:
- Adjustable Wrench: For tightening or loosening bolts on most joint types. Look for one with a comfortable grip to reduce hand fatigue during repetitive tasks.
- Torque Wrench: Critical for ensuring bolts are tightened to the correct specification—prevents over-tightening (which can crack joints) or under-tightening (which leads to loosening).
- Wire Brush: Ideal for scrubbing away rust, dirt, or debris from joint surfaces before cleaning or lubrication.
- Mild Detergent and Rags: For cleaning oil, grease, or chemical residues. Avoid harsh solvents, which can damage plastic or rubber components in some joints.
- Silicone-Based Lubricant: Best for moving parts, as it resists water and doesn't attract dust like oil-based lubricants. Look for a spray bottle for easy application.
- Anti-Corrosion Spray: Protects metal joints from rust, especially in humid or chemical-exposed areas. Choose a formula compatible with your joint material (steel, aluminum, etc.).
- Spirit Level: For checking alignment of connected pipes and ensuring workbenches or racks are level.
- Replacement Joints and Fasteners: Keep a small inventory of common lean pipe joint sizes and bolts. This avoids delays when a joint needs immediate replacement.
- Penetrating Oil: Useful for loosening stuck or rusted bolts. Apply and let sit for 10-15 minutes before attempting to turn.

Troubleshooting Common Lean Pipe Joint Problems
Even with regular maintenance, issues can pop up. Here's how to troubleshoot some of the most common problems with two way lean pipe joints:
Problem: Joint is Loose Despite Tightening
If a joint keeps loosening after you've tightened it, the issue may be stripped threads on the bolt or inside the joint. Over-tightening is often the culprit here—excess torque can wear down the threads, making it impossible to get a secure grip. To fix this: first, check if the bolt is stripped (look for flattened or missing threads). If so, replace the bolt with a new one of the same size and material. If the joint's internal threads are stripped, the entire joint will need to be replaced—stripped threads can't be repaired, and continuing to use the joint poses a safety risk.
Problem: Joint is Stuck or Hard to Adjust
Stiff joints are common in systems with little movement or in dirty environments where debris builds up. Start by cleaning the joint thoroughly with a wire brush and detergent to remove dirt or rust. If it's still stuck, apply penetrating oil to the moving parts and let it sit for 15-20 minutes. Gently tap the joint with a rubber mallet to help the oil seep in, then try adjusting again. Avoid using excessive force—this can bend or crack the joint. If the joint remains stuck, it may be worn out and need replacement.
Problem: Joint is Bent or Warped
Bent joints are usually caused by overloading or impact. Attempting to bend a joint back into shape is risky—metal fatigue can weaken the material, making it more likely to fail under stress. Instead, replace the joint immediately. When installing the new joint, check the alignment of the connected pipes to ensure they're straight—misalignment may have caused the original joint to bend in the first place.
Problem: Corrosion is Spreading
Minor rust can be treated with a wire brush and anti-corrosion spray, but if corrosion has pitted the joint or spread to critical areas (like the bolt holes), replacement is necessary. Pitting weakens the joint's structural integrity, and even a small hole can lead to sudden failure. To prevent future corrosion, identify the source of moisture (e.g., a leaky coolant line, high humidity) and address it—adding a dehumidifier or rerouting the coolant line can protect nearby joints.
Best Practices for Long-Term Joint Health
Maintenance isn't just about fixing problems—it's about preventing them. Here are some best practices to keep your two way lean pipe joints (and the systems they support) in top condition for years to come:
Invest in Quality Lean Pipe and Accessories
Not all lean pipe joints are created equal. Cheap, low-quality joints may save money upfront, but they wear out faster, corrode more easily, and require frequent replacement. Opt for joints made from durable materials (like high-grade steel, aluminum, or stainless steel) and sourced from reputable suppliers. The same goes for accessories like bolts, washers, and lubricants—using OEM or recommended parts ensures compatibility and longevity.
Train Your Team
Your maintenance staff isn't the only team that can spot issues—operators who use the equipment daily are often the first to notice a wobbly workbench or a sticky flow rack. Train operators to perform basic visual inspections and report problems immediately. Hold quarterly refresher sessions to reinforce what to look for (e.g., "A joint that creaks when you push the trolley is a red flag"). The more eyes on the equipment, the faster issues get addressed.
Keep Detailed Maintenance Logs
A maintenance log is more than just paperwork—it's a tool for identifying patterns and predicting failures. Record every task: when you tightened a joint, cleaned a component, or replaced a part. Over time, you'll start to see trends: "Joints on the third shift's workbench loosen faster" or "Joints near the paint booth corrode within 6 months." Use this data to adjust your maintenance schedule—maybe that third shift workbench needs twice-weekly tightening, or the paint booth joints need extra anti-corrosion treatment.
Integrate Joint Maintenance with Workbench and Caster and Accessories Care
Two way lean pipe joints rarely work in isolation—they're part of larger systems like workbenches, trolleys, and flow racks. To keep these systems running smoothly, coordinate joint maintenance with care for related components. For example: if a workbench has caster and accessories , the joints connecting the caster stems to the bench frame take extra stress from movement. These joints should be checked more frequently than stationary ones. Similarly, workbenches with heavy tool shelves put additional load on their support joints—load testing these monthly (instead of quarterly) can prevent failure.
Plan for Replacements Proactively
Even with perfect maintenance, joints will eventually wear out. Set a replacement schedule based on manufacturer guidelines and your own usage data (e.g., "replace steel joints every 3 years, aluminum joints every 5 years"). Order replacements in advance so you're not scrambling to find parts when a joint fails. This proactive approach minimizes downtime and ensures you're never caught off guard.
Conclusion: Small Joints, Big Impact
Two way lean pipe joints may be small, but their impact on your manufacturing facility is enormous. They're the glue that holds your lean systems together, enabling the efficiency, safety, and productivity that keep your business competitive. By following this maintenance checklist—staying vigilant with inspections, cleaning, and repairs—you'll extend the life of your joints, reduce downtime, and create a safer, more efficient workplace.
Remember, maintenance isn't a one-time task; it's an ongoing commitment. By integrating these practices into your facility's routine, you're not just maintaining equipment—you're investing in the success of your operations. So the next time you walk through your factory floor, take a moment to appreciate those humble lean pipe joints. With a little care, they'll keep your production line moving, your workers safe, and your profits growing for years to come.