- Company Articles
- Products and Technology
- Product knowledge
- Understanding Load Limits of Suction Cup Anti-Slip Foot Adjusters

Understanding Load Limits of Suction Cup Anti-Slip Foot Adjusters
Related Product
Suction Cup Anti-slip Foot Adjuster
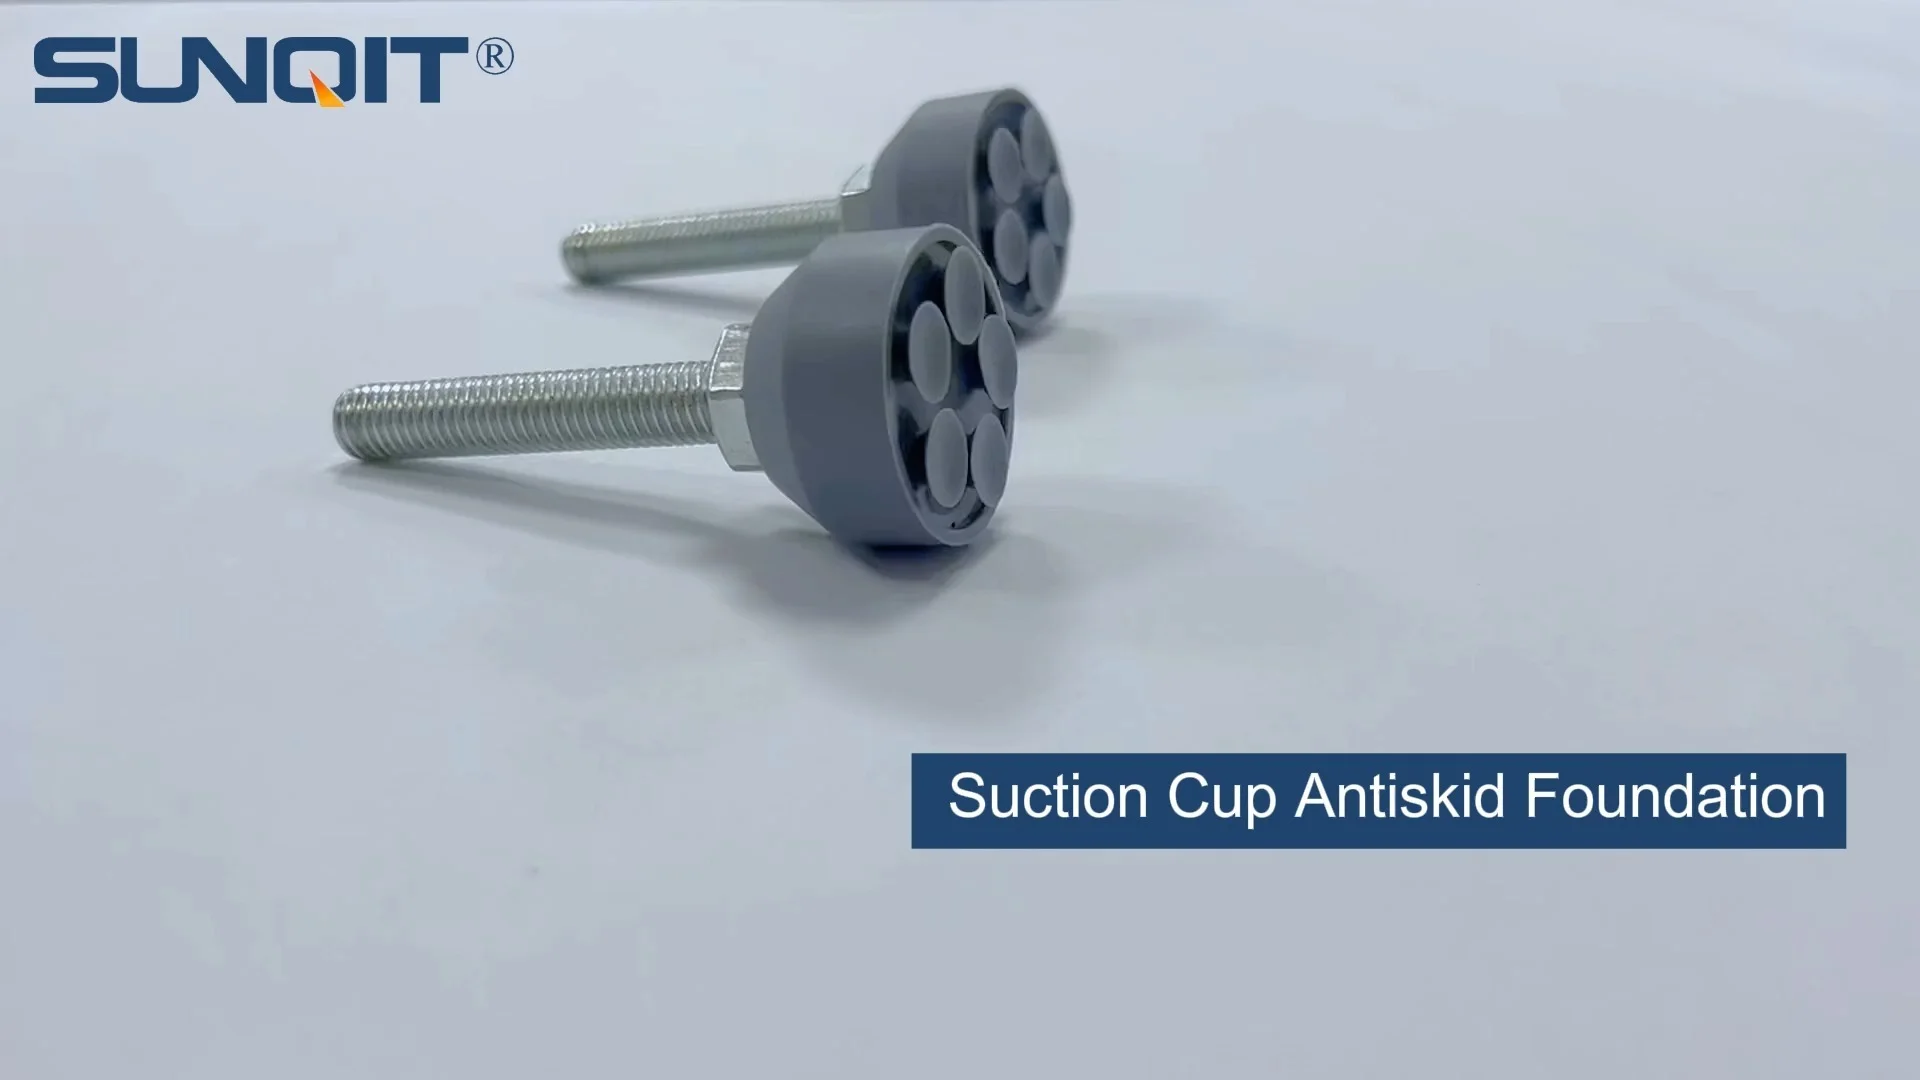
D=35mm suction cup anti-slip foot adjusterï¼screw M10*55ï¼with a blot, used for workbench, flowrack pipe contact with groud.
In the bustling world of manufacturing, assembly lines, and workshop setups, stability isn't just a nicety—it's the backbone of efficiency, safety, and precision. Whether you're working at a lean pipe workbench assembling delicate electronics or managing a heavy-duty aluminum profile workstation, the last thing you need is unexpected wobbling, sliding, or tipping. That's where but critical components like suction cup anti-slip foot adjusters come into play. These small devices might not grab headlines, but they're the unsung heroes keeping your workbench steady, your tools secure, and your team safe. Today, we're diving deep into one of their most important specs: load limits. What are they? Why do they matter? And how do you make sure you're choosing the right ones for your setup? Let's break it down.
What Are Suction Cup Anti-Slip Foot Adjusters, Anyway?
Before we get into load limits, let's make sure we're all on the same page about what these devices actually do. Suction cup anti-slip foot adjusters are small, often cylindrical components designed to attach to the bottom of equipment—think workbenches, material racks, or even mobile trolleys when they're stationary. They typically have two main parts: a threaded stem that screws into the equipment's base (allowing you to adjust height for leveling) and a suction cup or rubberized base that presses against the floor. The "anti-slip" part comes from the suction cup's ability to grip smooth surfaces, while the "adjuster" lets you tweak height to compensate for uneven floors. Simple, right? But don't let their simplicity fool you—their performance hinges entirely on their ability to handle the weight (or "load") of whatever they're supporting.
You'll find these adjusters in all sorts of places, but they're especially common in setups where flexibility meets stability. For example, aluminum profile workstations—popular for their modularity and lightweight strength—often use them to counteract any wobble from caster wheels when the unit is parked. Similarly, lean pipe workbenches, which are built from lightweight tubes and joints, rely on these adjusters to keep from shifting under the weight of tools, materials, or even a worker leaning on the surface. In short, they're the quiet guardians ensuring that your workspace stays put, no matter what you throw at it.
Load Limits 101: What They Mean and Why They're Critical
So, what exactly is a "load limit"? Put simply, it's the maximum weight a suction cup anti-slip foot adjuster can safely support without failing. Manufacturers test this rigorously, and they'll list two key numbers: static load capacity and dynamic load capacity. Static load is the weight the adjuster can handle when the equipment is stationary—think a workbench loaded with tools and parts that aren't moving. Dynamic load, on the other hand, is the weight it can manage when there's movement involved, like a trolley being pushed (though in most cases, adjusters are only engaged when the trolley is stopped, so static load is usually the bigger concern here). Both numbers matter, but for most workbench and workstation setups, static load is the primary spec to watch.
Why does this matter? Let's start with safety. If an adjuster is overloaded, it can deform, crack, or lose its grip. That might lead to the equipment tipping, tools sliding off, or even the workbench itself collapsing. In a factory setting, that's a recipe for broken parts, damaged machinery, or worse—injuries. Then there's efficiency. A wobbly workbench makes precision tasks nearly impossible. Imagine trying to solder a tiny component or measure parts accurately when the surface beneath you shifts with every movement. Over time, that leads to errors, rework, and wasted time. Finally, there's longevity. An overloaded adjuster wears out faster, meaning you'll be replacing them more often. And if the adjuster fails completely, it could damage the equipment's base or legs, leading to costly repairs down the line.

Factors That Affect Load Capacity: It's Not Just About the Weight
Load limits aren't set in stone—they're influenced by a handful of factors that can either boost or reduce an adjuster's ability to hold weight. Let's walk through the biggest ones so you can make smarter choices for your setup.
1. Material Matters: Plastic, Rubber, or Metal?
The material of the suction cup and the adjuster's body plays a huge role. Most suction cups are made of rubber or a rubber-like plastic (think polyurethane), which is flexible and grippy. Softer rubbers tend to conform better to uneven surfaces, but they might not hold up as well under heavy loads as firmer materials. Metal-bodied adjusters (often aluminum or steel) are sturdier than plastic ones, so they can handle more weight without bending. For example, a plastic adjuster with a small rubber cup might be rated for 50 lbs, while a steel-bodied adjuster with a large, firm suction cup could handle 200 lbs or more. Always check the material specs—they're a quick clue to how tough the adjuster is.
2. Suction Cup Design: Size, Shape, and Texture
Bigger isn't always better, but in the case of suction cups, size does matter—up to a point. A larger cup has more surface area in contact with the floor, which means more friction and better grip. A 3-inch diameter cup will generally handle more weight than a 1-inch cup, assuming the materials are the same. But shape also plays a role. Some cups are flat, others are slightly domed, and some have ribs or textures on the bottom. Domed cups can better seal around small imperfections in the floor, while ribbed textures might improve grip on rough surfaces. However, for smooth floors (like concrete or tile), a flat, smooth cup often provides the best seal—and thus the highest load capacity.
3. Surface Type: Smooth vs. Rough, Clean vs. Dirty
Even the strongest adjuster will fail if it's on the wrong surface. Suction cups rely on a tight seal to grip, so they work best on smooth, non-porous surfaces like polished concrete, tile, or metal. On rough surfaces—think unfinished wood, gravel, or cracked concrete—the cup can't seal properly, so the load capacity drops drastically. For example, an adjuster rated for 150 lbs on tile might only handle 50 lbs on a rough concrete floor. Dirt, oil, or debris on the floor (or on the suction cup itself) is another enemy. A layer of dust or a drop of machine oil can break the seal, turning a 200-lb adjuster into a useless, slippery mess. Always clean both the cup and the floor before installing—your load capacity depends on it.
4. Environmental Conditions: Heat, Cold, and Moisture
Your workspace's environment can also throw a wrench into load limits. Extreme temperatures, for example, can soften or harden the suction cup material. A rubber cup that works great at room temperature might become brittle in a cold warehouse, losing its grip, or sticky in a hot factory, which can also reduce friction. Moisture is another factor—while some adjusters are designed for damp environments (like food processing plants), standing water or high humidity can weaken the suction seal. If your workspace is hot, cold, or humid, look for adjusters rated for those conditions. Some manufacturers even make "all-weather" cups that hold up in extreme temps, which is worth the extra cost if your environment is tough.
5. Installation Torque: How Tight Is Too Tight?
You might not think about it, but how tightly you screw the adjuster into the equipment's base affects its load capacity. If it's too loose, the adjuster can wiggle, reducing the suction cup's contact with the floor. If it's too tight, you might warp the cup or strip the threads, weakening the adjuster's structure. Most manufacturers recommend a specific torque (measured in inch-pounds) for installation—say, 10-15 in-lbs. Using a torque wrench to get it right ensures the cup is pressed firmly against the floor without damaging the adjuster. It's a small step, but it can make a big difference in how much weight the adjuster can handle.

Calculating Your Load: How to Figure Out What You Need
Now that you know what affects load capacity, the next step is figuring out how much load your adjusters actually need to handle. This isn't just about guessing—you need to calculate it properly to avoid overloading. Here's how to do it:
Step 1: Weigh the Empty Equipment
Start with the basics: the weight of the workbench, workstation, or trolley itself. For a lean pipe workbench, this might be 50-100 lbs. For a larger aluminum profile workstation with shelves and drawers, it could be 200 lbs or more. If you don't have the manual, weigh it using a industrial scale or a hand truck scale—you need an accurate number here.
Step 2: Add the Weight of Tools and Materials
Next, think about what you'll put on the equipment. Tools (drills, soldering irons, clamps), materials (boxes of parts, raw materials), and even workers leaning on the surface all add up. Let's say your lean pipe workbench has a drill press (30 lbs), a toolbox (20 lbs), and a box of components (50 lbs). That's 100 lbs of tools and materials. Then, if a worker occasionally leans on the edge (adding another 150 lbs of dynamic weight), you need to account for that too. Add all these up: empty workbench (75 lbs) + tools/materials (100 lbs) + worker lean (150 lbs) = 325 lbs total.
Step 3: Divide by the Number of Adjusters
Most workbenches or workstations have 4 adjusters (one at each corner), but some larger setups might have 6 or 8. Divide the total load by the number of adjusters to get the load per adjuster. In the example above, 325 lbs ÷ 4 adjusters = 81.25 lbs per adjuster. But here's the catch: you should never max out an adjuster's load limit. Always leave a safety margin—usually 20-30%. So 81.25 lbs + 30% = 105.6 lbs. That means you need adjusters rated for at least 106 lbs each. This buffer ensures that if you accidentally overload the workbench (say, adding an extra box of parts), the adjusters can handle it without failing.
Step 4: Consider Dynamic vs. Static Loads
Remember earlier when we talked about static vs. dynamic loads? Static is when the equipment is still, dynamic is when it's moving (or when there's sudden movement, like a tool being dropped). If your workstation has caster wheels and is moved around occasionally, the adjusters will only be engaged when it's parked (static load). But if you're using the adjusters on a mobile trolley that's pushed while loaded, you'll need to factor in dynamic load capacity too. In most cases, though, static load is the main concern for workbenches and stationary setups.

Choosing the Right Adjuster: What to Look For in Spec Sheets
Now that you know your required load per adjuster, it's time to shop. But spec sheets can be confusing—here's what to focus on:
- Static Load Capacity: This is the big one. Make sure it's at least 30% higher than your calculated load per adjuster.
- Material: Steel or aluminum bodies are better for heavy loads; plastic is fine for lighter setups.
- Suction Cup Diameter: Larger cups (2-3 inches) are better for heavier loads and smoother surfaces.
- Surface Compatibility: Some adjusters are only for smooth floors (tile, concrete), others work on slightly rough surfaces. Check the "recommended surface" section.
- Certifications: Look for adjusters tested to industry standards (like ISO or ANSI) for load capacity. This ensures the specs aren't just marketing hype.
To make this easier, here's a quick comparison of common suction cup anti-slip foot adjusters and their load capacities:
| Model | Body Material | Suction Cup Diameter | Static Load Capacity (lbs) | Best For |
|---|---|---|---|---|
| Basic Plastic (Economy) | ABS Plastic | 1.5 inches | 50 | Lightweight workbenches, smooth tile floors |
| Standard Rubber (Mid-Range) | Aluminum | 2.5 inches | 150 | Lean pipe workbenches, polished concrete floors |
| Heavy-Duty Steel (Industrial) | Steel | 3 inches | 300 | Aluminum profile workstations, high-weight loads |
| All-Weather (Extreme Environments) | Stainless Steel | 2.5 inches | 200 | Cold/hot warehouses, damp surfaces |
Installation Mistakes to Avoid: Don't Sabotage Your Adjusters
Even the best adjuster will fail if installed wrong. Here are the most common mistakes to watch out for:
Mistake #1: Underestimating the Load
This is the biggest one. It's easy to guess the weight of your workbench, but forgetting to add tools, materials, or worker weight can lead to choosing adjusters that are too weak. Always calculate the total load properly—measure, don't guess.
Mistake #2: Ignoring the Floor Surface
Installing a smooth-surface adjuster on a rough concrete floor is a recipe for failure. The cup can't seal, so it slips, even if the load is under the limit. If your floor is uneven or rough, look for adjusters with textured cups or ones designed for "non-smooth" surfaces.
Mistake #3: Over-Tightening or Under-Tightening
Over-tightening can warp the suction cup or strip the threads, while under-tightening leaves the adjuster loose. Use a torque wrench to hit the manufacturer's recommended torque (usually listed in the manual). If you don't have a torque wrench, tighten until the cup is firmly pressed against the floor, then give it a quarter-turn more—no more.
Mistake #4: Mixing Different Adjusters
Don't mix and match adjusters from different brands or models. One might be rated for 100 lbs, another for 50 lbs, leading to uneven weight distribution. Stick to the same model across all corners of your workbench.
Mistake #5: Forgetting to Clean the Surface
Dust, oil, or grease on the floor or suction cup will break the seal. Wipe both down with a damp cloth before installing, and clean them regularly after that. It's a simple step, but it makes a huge difference in grip.
Real-World Example: When Load Limits Go Wrong (and How to Fix It)
Let's walk through a true story to see why load limits matter. A small electronics manufacturer recently upgraded their assembly line with new lean pipe workbenches. They wanted to save money, so they bought budget plastic suction cup anti-slip foot adjusters rated for 75 lbs each. The workbenches themselves weighed 60 lbs, and they added tools and materials totaling 100 lbs—so 160 lbs total, divided by 4 adjusters = 40 lbs per adjuster. "That's way under 75 lbs," they thought. But they forgot to account for workers leaning on the benches (another 150 lbs) and occasional heavy batches of components (adding 50 lbs). Total load: 60 + 100 + 150 + 50 = 360 lbs. Divided by 4 adjusters: 90 lbs per adjuster—over the 75 lb limit.
Within a month, workers started complaining about wobbly benches. A few tools slid off, and one bench even tipped slightly when a worker leaned on the edge, damaging a batch of circuit boards. An inspection revealed the plastic adjusters were warped, and the suction cups had lost their grip. The fix? They upgraded to aluminum-bodied adjusters with 2.5-inch cups, rated for 150 lbs each. With the safety margin, that gave them 150 lbs × 4 = 600 lbs total capacity—more than enough for their 360 lbs load. The wobbling stopped, tools stayed put, and the team could focus on assembly instead of worrying about stability.
Maintenance: Keeping Your Adjusters in Top Shape
Even the best adjusters won't last forever—they need regular care to keep performing. Here's how to maintain them:
- Inspect Monthly: Check for cracks, tears, or hardening in the suction cup. If the cup is brittle or has holes, replace it immediately.
- Clean Regularly: Wipe the cup and floor with mild soap and water to remove dust, oil, or debris. Avoid harsh chemicals—they can degrade the rubber.
- Check Torque: Over time, adjusters can loosen. Re-tighten them to the recommended torque every 3 months.
- replace When Worn: If the adjuster's thread is stripped, the height adjustment won't work, or the cup won't grip, replace it. Don't wait for failure—prevent it.
Final Thoughts: Stability Starts with the Right Adjuster
Suction cup anti-slip foot adjusters might be small, but they're a critical part of any stable workspace. By understanding load limits, the factors that affect them, and how to calculate your needs, you can keep your workbench (and your team) safe, efficient, and productive. Remember: it's not just about picking the cheapest option—it's about choosing the right adjuster for your load, surface, and environment. A little time spent calculating load limits and selecting the right product will save you from costly mistakes, injuries, and frustration down the line. So next time you're setting up a workstation, take a second to think about those little feet holding it up. They might just be the most important part of the whole setup.