- Company Articles
- Products and Technology
- Product knowledge
- Understanding Tread Pattern Compatibility with Your Castor Install Base

Understanding Tread Pattern Compatibility with Your Castor Install Base
Related Product
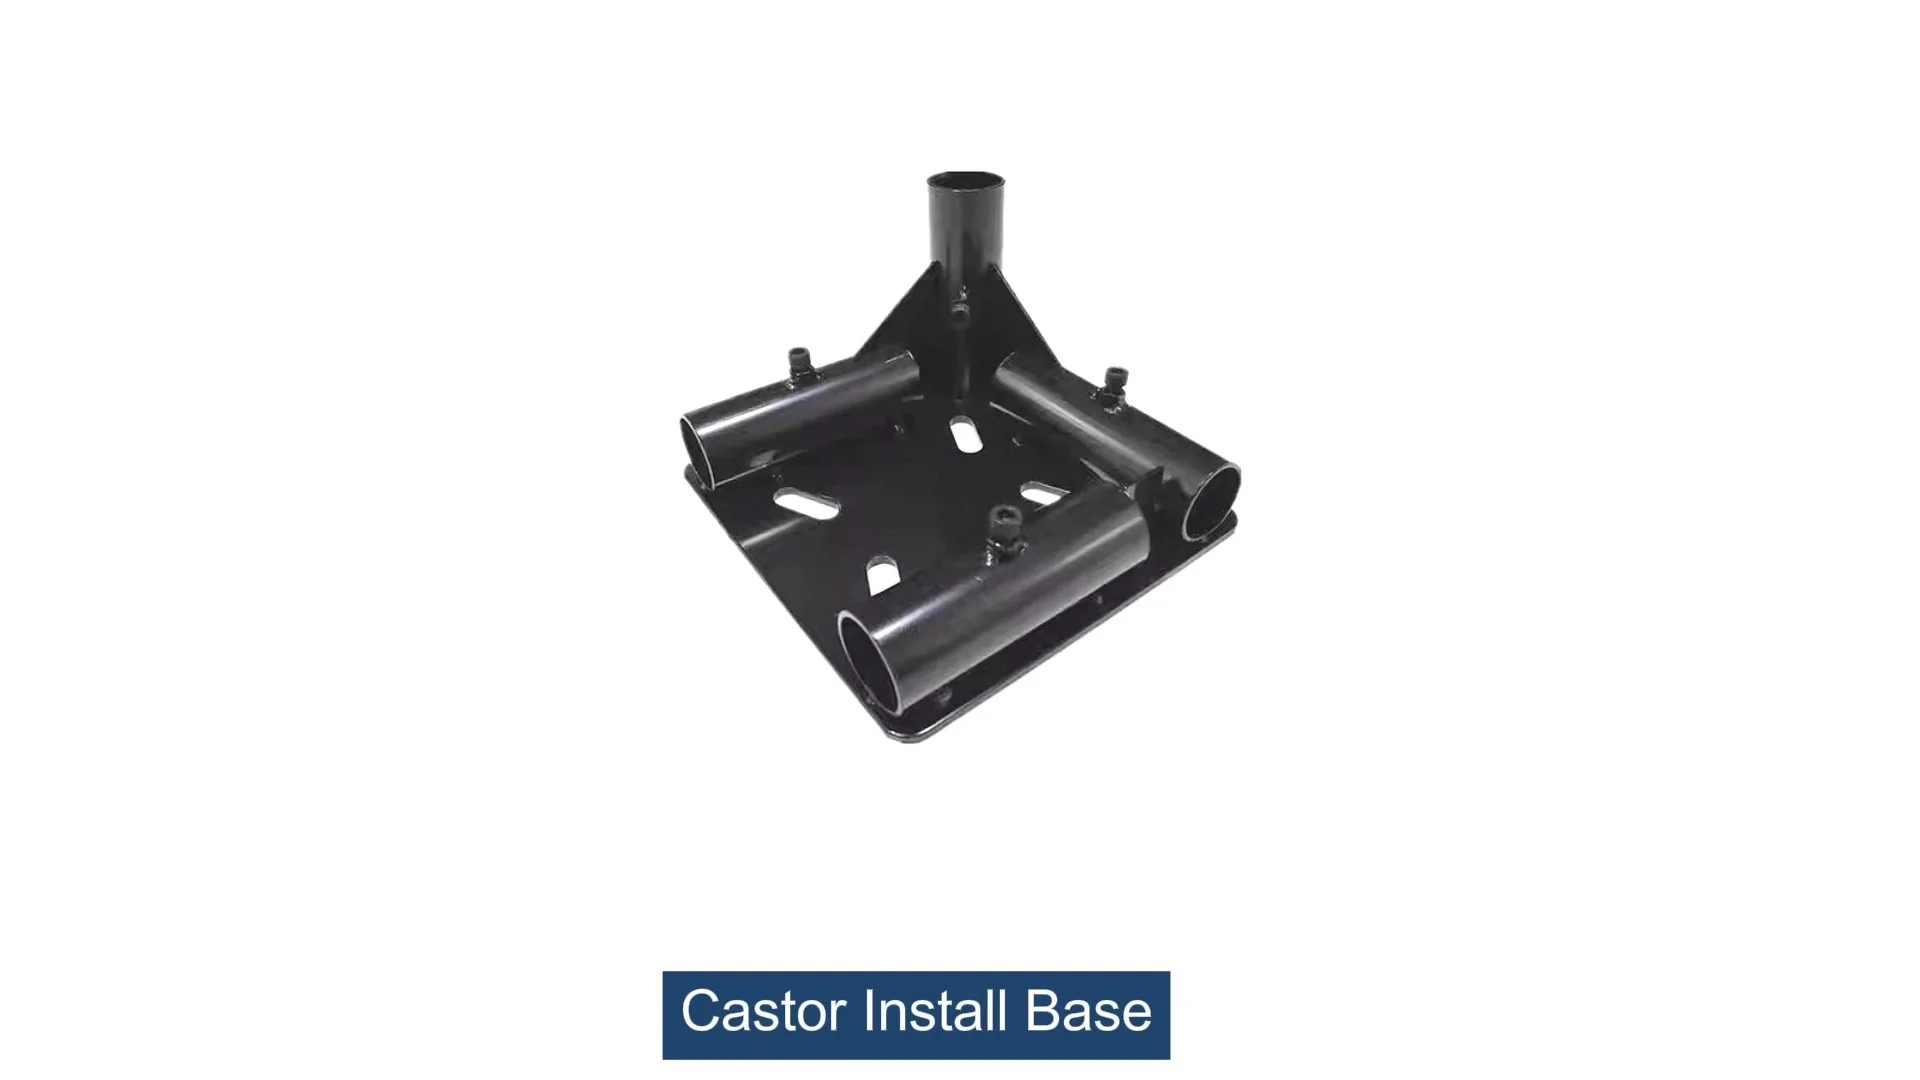
Castor Install Base
Castor install base, used for connection between pipe and castor, it can connect 4 pcs pipe by 1 pcs castor base, to make the structure strong and stable.
Ever walked into a busy workshop or warehouse and noticed how smoothly some carts glide across the floor, while others seem to struggle—squeaking, wobbling, or even leaving scuff marks? Chances are, the difference isn't just in the caster wheels themselves, but in how well their tread patterns work with their castor install base. It's a detail that's easy to overlook, but getting it right can mean the difference between a workspace that hums with efficiency and one that's plagued by constant delays and repairs.
Let's start with a relatable scenario: Imagine you've just invested in a brand-new workbench for your garage. You picked one with heavy-duty steel legs, a sturdy wooden top, and even splurged on "high-quality" casters to make it easy to move. But after a week, you notice something's off. The workbench drifts to one side when you push it, the wheels leave black streaks on your concrete floor, and one caster even feels loose, like it's about to fall off. Frustrated, you check the wheels—they look fine. Then you look closer at how they're attached: the castor install base, a metal plate bolted to the workbench leg, has a few bent corners, and the bolts are already starting to strip. You realize too late: the tread pattern on the caster wheels (soft rubber, designed for hardwood floors) was never meant for your concrete garage, and the flimsy install base couldn't handle the weight of your tools. Compatibility matters, and it's time we talked about why.
What Are Tread Patterns, and Why Do They Matter?
First things first: let's demystify tread patterns. Simply put, the tread pattern is the raised design on the surface of a caster wheel. Think of it like the tread on a car tire—its job is to grip the floor, absorb shock, reduce noise, and protect the surface it's rolling on. But unlike car tires, caster wheel treads come in a dizzying array of designs, each tailored to specific environments and tasks.
Tread patterns vary in depth, spacing, and shape. A smooth tread, for example, has no grooves—it's just a flat, continuous surface. This works well on clean, smooth floors like polished concrete or hardwood because it maximizes contact area, reducing slippage. Then there are ribbed treads, with parallel lines running around the wheel; these are great for indoor spaces where noise reduction is key, like offices or hospitals. Knobby treads, with deep, irregular lugs, are built for rough terrain—think gravel, dirt, or uneven factory floors. And herringbone patterns, with V-shaped grooves, excel at channeling away debris like dust or water, making them ideal for warehouses with spill-prone areas.
But here's the catch: a tread pattern that performs brilliantly in one setting can be a disaster in another. A knobby tread, designed for grip on gravel, will feel clunky and loud on a smooth office floor. A smooth rubber tread, perfect for hardwood, will wear down quickly on concrete and may even leave marks. And if the tread material (rubber, polyurethane, plastic, or metal) isn't matched to the floor type, you could end up with everything from premature wheel failure to costly floor repairs.
Real-World Example: The Case of the Squeaky Warehouse Carts
A friend of mine manages a small electronics warehouse. A few years ago, they upgraded their material handling carts to "improve efficiency." They chose caster wheels with a soft polyurethane tread (to protect their epoxy-coated floors) and mounted them on a lightweight aluminum castor install base to save on cost. At first, things went well—the carts were quiet, and the floors stayed scratch-free. But within three months, problems arose. The aluminum install bases began to bend under the weight of heavy boxes, causing the wheels to tilt. The soft polyurethane tread, now at an angle, wore unevenly, creating a "wobble" effect. Worse, the tilted wheels started to catch on floor seams, leading to frequent jams. The solution? Switching to a steel castor install base (to handle the weight) and a slightly firmer polyurethane tread with a herringbone pattern (to better distribute pressure and resist tilting). Problem solved—all because they matched the tread to the install base and environment.
The Castor Install Base: More Than Just a "Mount"
Now that we understand tread patterns, let's turn to their partner in crime: the castor install base. If the tread pattern is the "grip" of the caster system, the install base is the "backbone." It's the component that connects the wheel to the equipment—whether it's a workbench, cart, or shelving unit. And while it might seem like a simple metal plate or stem, its design, material, and mounting style have a huge impact on how well the caster performs.
Castor install bases come in two main types: plate mounts and stem mounts. Plate mounts are flat metal plates with pre-drilled holes, designed to be bolted directly to the bottom of equipment. They're sturdy and versatile, making them the go-to choice for heavy-duty applications like industrial carts or workbenches. Stem mounts, on the other hand, have a cylindrical rod (the "stem") that inserts into a hole or socket on the equipment. They're lighter and easier to install, often used for lighter loads like office chairs or small utility carts.
Material matters too. Steel install bases are tough and can handle high weights, but they're heavy and prone to rust if not coated. Aluminum bases are lightweight and corrosion-resistant, but they're not as strong as steel—great for indoor use but risky for heavy loads. Then there are reinforced plastic bases, which are cheap and lightweight but only suitable for very light applications, like shopping carts in a retail store.
The key role of the install base is to distribute the weight of the equipment evenly across the caster wheel. If the base is too weak or poorly designed, it will bend or twist under load, causing the wheel to lean. This, in turn, puts uneven pressure on the tread pattern—so even if you've chosen the "perfect" tread, a bad install base can render it useless. Imagine wearing running shoes with excellent traction, but your feet are tilted inward because your shoe soles are warped. You'd slip, trip, and wear out the shoes unevenly. The same logic applies to casters: the install base keeps the wheel aligned, ensuring the tread makes full, flat contact with the floor.

Why Compatibility Between Tread Pattern and Install Base Can't Be Ignored
So, we've covered tread patterns and install bases separately. Now, let's talk about why they need to work together. Compatibility here isn't just a "nice-to-have"—it's critical for safety, efficiency, and cost savings. Here's why:
Safety First: A mismatched pair can lead to instability. If the install base is too flimsy for the tread's grip, the wheel might lock up or skid when you try to stop, causing the equipment to tip. Conversely, a rigid steel base with a soft, flexible tread could create a "bouncy" ride, making it hard to control heavy loads. In a warehouse, this could mean damaged goods—or worse, employee injuries.
Longevity: Tread patterns and install bases that don't play well together wear out faster. A soft rubber tread on a weak install base will develop flat spots from uneven pressure. A knobby tread on a heavy steel base, rolling over smooth floors, will have its lugs torn off prematurely. Either way, you're looking at frequent replacements, which adds up in time and money.
Efficiency: Ever pushed a cart that feels like it's stuck in mud, even on a smooth floor? Chances are, the tread pattern is fighting against the install base. A herringbone tread, designed to channel debris, needs a stable base to maintain its alignment; if the base wobbles, the tread can't do its job, and you end up exerting extra effort to move the cart. Multiply that by dozens of carts and hundreds of trips a day, and suddenly you're looking at wasted labor and slower production.
Floor Protection: The wrong combination can ruin your floors. A hard plastic tread on a rigid steel base, rolling over hardwood, will scratch and dent. A soft rubber tread on a loose install base might "drag" instead of rolling, leaving scuff marks. For businesses with expensive flooring (like retail stores or labs), this isn't just a cosmetic issue—it's a maintenance nightmare.

Matching Tread Patterns to Install Bases: A Practical Guide
Now that we know why compatibility matters, let's dive into how to actually match a tread pattern to an install base. It's not about picking the "best" tread or the "strongest" base—it's about picking the pair that fits your specific needs. To simplify, let's break it down by environment, load, and floor type.
| Tread Pattern Type | Ideal Install Base Type | Load Capacity Range | Best Floor Type | Pros | Cons |
|---|---|---|---|---|---|
| Smooth Tread (Rubber/Polyurethane) | Plate Mount (Steel/Aluminum) | Light to Medium (Up to 500 lbs) | Polished Concrete, Hardwood, Tile | Quiet, non-marking, excellent grip on smooth surfaces | Wears quickly on rough floors; poor debris resistance |
| Ribbed Tread (Rubber) | Stem Mount (Steel) | Light (Up to 300 lbs) | Indoor: Offices, Hospitals, Schools | Reduces noise, good for clean, dry environments | Not ideal for wet floors; limited traction on uneven surfaces |
| Knobby Tread (Rubber/Polyurethane) | Heavy-Duty Plate Mount (Steel) | Medium to Heavy (500–2000 lbs) | Rough Concrete, Gravel, Outdoor Surfaces | Superior grip on uneven terrain; durable | Loud on smooth floors; can damage soft surfaces (e.g., vinyl) |
| Herringbone Tread (Polyurethane) | Reinforced Plate Mount (Steel/Aluminum) | Medium (300–1000 lbs) | Warehouses, Factories (with debris/water) | Channels debris/water; good traction in wet conditions | Needs stable base to maintain alignment; not as quiet as smooth treads |
| Polyurethane Flat Tread | Aluminum Plate Mount | Light to Medium (Up to 800 lbs) | Epoxy Floors, Labs, Clean Rooms | Non-marking, chemical resistant, smooth ride | Not for heavy loads; can crack under extreme pressure |
Let's take a closer look at a few common combinations to see how this works in practice.
Case Study 1: The Garage Workbench Revisited
Remember the earlier example with the garage workbench? The problem was twofold: the soft rubber tread (meant for hardwood) couldn't handle concrete, and the lightweight install base couldn't support the workbench's weight. The solution? Switch to a polyurethane flat tread (durable enough for concrete, non-marking) mounted on a steel plate install base (sturdy enough to hold tools). The result: the workbench glides smoothly, leaves no marks, and the casters have held up for over a year with zero issues.
Case Study 2: The Hospital Cart Dilemma
A local hospital once struggled with noisy patient transport carts. They were using ribbed rubber treads on aluminum stem mounts, which were lightweight but prone to bending. The bent mounts caused the treads to rub unevenly, creating a loud squeaking sound that disturbed patients. The fix? Upgrading to reinforced steel stem mounts (to prevent bending) and keeping the ribbed treads (for noise reduction). Now the carts roll silently, and the treads wear evenly.

Common Mistakes to Avoid
Even with the best intentions, it's easy to make mistakes when pairing tread patterns and install bases. Here are the ones I see most often:
Choosing Tread Based Solely on Price: It's tempting to opt for the cheapest caster wheels, but low-cost treads are often made from inferior materials (like hard plastic) that don't match well with most install bases. A $5 wheel might seem like a steal, but if it wears out in a month and damages your floor, it's not worth it.
Ignoring the Install Base's Load Rating: Install bases have weight limits, just like treads. A heavy-duty knobby tread rated for 2000 lbs is useless if the install base can only handle 500 lbs. Always check both ratings and ensure the base can support the tread's maximum load plus the equipment's weight.
Overlooking Floor Type: I once visited a bakery where they used knobby tread casters on their ingredient carts, thinking "grip = better." But their floors were smooth tile, and the knobby treads trapped flour, creating a slippery mess. They switched to smooth polyurethane treads on steel bases, and the problem vanished. Moral: always consider the floor first.
Forgetting About Swivel Action: If your caster has a swivel function (most do), the install base needs to support that movement. A rigid base with a swivel tread can cause the wheel to bind, making it hard to turn. Look for bases with ball bearings or lubricated swivel joints to ensure smooth movement.
Neglecting Caster Accessories: Accessories like brake pads, wheel guards, or lubricants can enhance compatibility. A soft tread might need a brake pad with extra grip to stop quickly, while a hard tread could benefit from a guard to protect against debris. Don't skimp on these—they're the "glue" that holds the system together.
Maintenance Tips for Long-Lasting Compatibility
Even the best-matched tread pattern and install base need care to stay compatible. Here's how to keep them in sync:
Inspect Regularly: Check the install base for cracks, bends, or loose bolts. A quick tightening of the bolts can prevent misalignment. Also, look at the tread for uneven wear—flat spots or torn lugs are signs the base and tread aren't working together.
Clean the Tread: Debris trapped in the tread (like dirt, hair, or small rocks) can throw off alignment, especially with herringbone or knobby patterns. Use a brush or compressed air to clean the treads weekly.
Lubricate the Install Base: If your casters swivel, lubricate the base's joints with a silicone-based lubricant (avoid oil, which attracts dust). This keeps the base moving smoothly, ensuring the tread stays aligned.
replace in Pairs: If one caster wears out, replace both on the same axle. Mismatched treads or bases on either side of a cart will create instability, even if the new ones are "compatible."
Choosing the Right Combination: A Step-by-Step Process
Ready to pick the perfect pair? Follow these steps:
Step 1: Assess Your Environment – What type of floor do you have? Smooth or rough? Clean or debris-prone? Indoor or outdoor? Note any challenges, like moisture, chemicals, or noise restrictions.
Step 2: Calculate the Load – Weigh your equipment (including any tools, goods, or materials it will carry). Add 20% to this weight to account for unexpected loads (better safe than sorry).
Step 3: Choose the Tread Pattern – Use the table above to match your floor type and load to a tread pattern. For example, a smooth concrete warehouse with heavy loads? Herringbone polyurethane on a steel base.
Step 4: select the Install Base – Ensure the base's material (steel, aluminum, etc.) and mount type (plate, stem) match the tread's needs and your equipment's design. A workbench with thick legs might need a plate mount; a lightweight cart could use a stem mount.
Step 5: Test Before Committing – Buy a single set of casters and test them in your environment. Push the equipment around, check for noise, wear, and stability. If they work, order more. If not, adjust your choice.
Final Thoughts: It's All About Balance
At the end of the day, tread pattern compatibility with your castor install base is about balance. It's the harmony between the wheel's ability to grip and glide, and the base's ability to support and align. It's not the most glamorous topic, but it's the backbone of a functional workspace—whether you're rolling a workbench in your garage or managing a fleet of warehouse carts.
So, the next time you're shopping for casters, take a moment to look beyond the wheel. Check the install base. Ask about tread patterns. And remember: the best caster isn't just a wheel—it's a team, working together to make your job easier, safer, and more efficient. Your floors, your wallet, and your sanity will thank you.