- Company Articles
- Products and Technology
- Installation And Maintenance
- Vertical Lean Pipe Joint Installation Guide for Workbench E Assembly

Vertical Lean Pipe Joint Installation Guide for Workbench E Assembly
Related Product
Vertical Lean Pipe Joint
Vertical lean pipe joint is used for 28mm lean pipe fixed on ground and keep it stable.
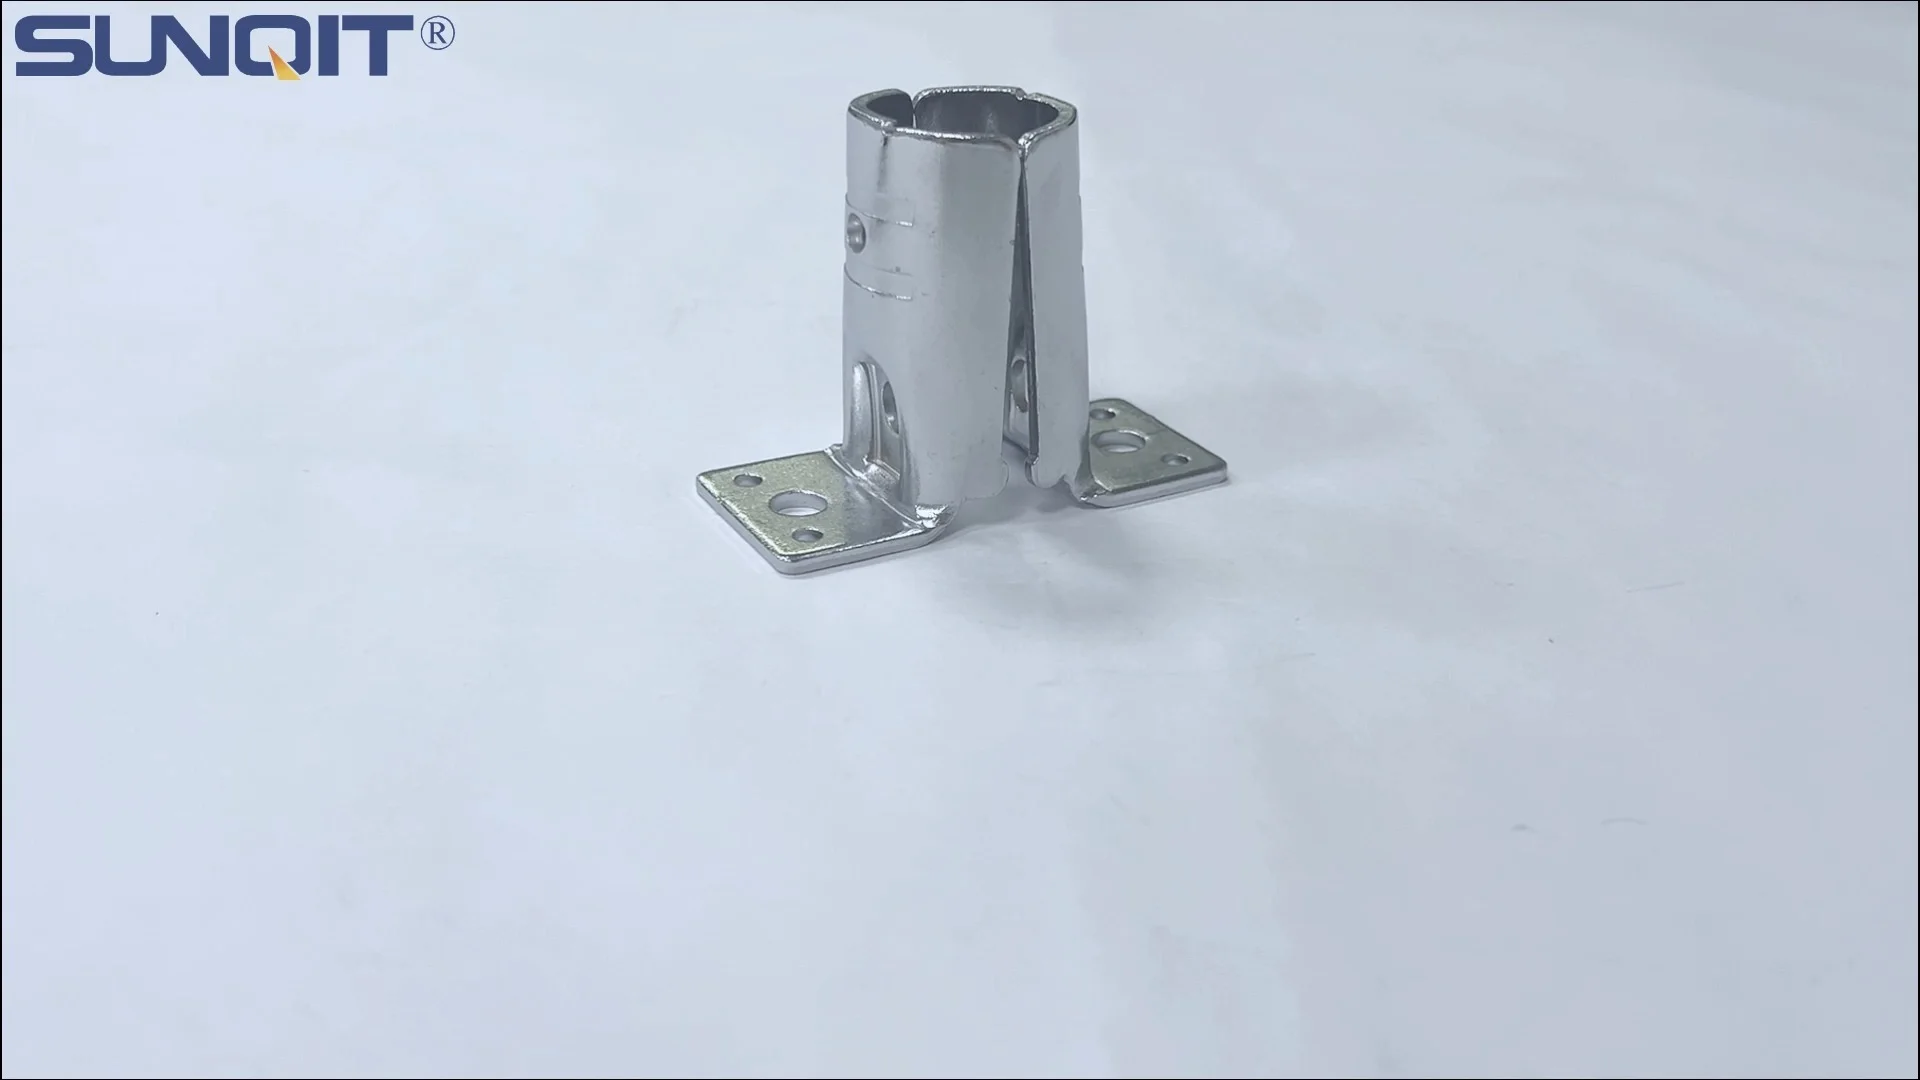
If you've recently unboxed your Workbench E (single deck-without caster), you're probably eager to get it set up and ready for action—whether that's assembling electronics, organizing tools, or streamlining your production line. But before you dive in, let's talk about the unsung hero of this workbench: the vertical lean pipe joint. These small but mighty components are the backbone of your workbench's stability, ensuring it can handle daily use without wobbling, shifting, or compromising safety. In this guide, we'll walk through every step of installing vertical lean pipe joints for Workbench E, from gathering tools to troubleshooting common hiccups. Let's get started!
Why Vertical Lean Pipe Joints Matter for Workbench E
Workbench E (single deck-without caster) is designed for durability and flexibility, thanks in large part to its lean pipe construction. Unlike fixed workbenches, lean pipe systems use modular components—like vertical joints and lean pipe—to let you customize the structure to your needs. But none of that matters if the vertical joints aren't installed correctly. These joints connect the vertical lean pipes to the workbench's base and deck, distributing weight evenly and keeping the entire setup upright. A loose or misaligned joint can lead to a wobbly workbench, damaged tools, or even accidents. So take your time with this process—your future self (and your workflow) will thank you.
Tools and Materials You'll Need
Before you start, let's make sure you have everything on hand. Rushing to hunt for a missing wrench mid-installation is frustrating, so grab these items first:
| Tools | Materials |
|---|---|
| Adjustable wrench (or socket set, 8-12mm) | Vertical lean pipe joints (included with Workbench E) |
| Spirit level (12-inch or longer) | Lean pipe (28mm diameter, cut to Workbench E specifications) |
| Tape measure | Hex screws (M8 x 16mm, included with joints) |
| Rubber mallet (soft-faced) | Lock washers (included with joints) |
| Phillips-head screwdriver (or electric driver with Phillips bit) | Lean pipe accessories (optional: end caps, anti-slip pads) |
| Wire brush (for cleaning threads) | Thread locker (blue, medium strength, optional but recommended) |
Pro Tip:
Check your Workbench E packaging for a parts list! Most lean pipe suppliers include all necessary joints, screws, and lean pipe in the kit, but it's smart to verify before starting. If something's missing, reach out to your supplier—they'll likely send a replacement quickly.

Step 1: Unbox and Inspect All Components
First things first: unbox Workbench E and lay out all parts on a clean, flat surface (like a garage floor or large table). This includes the deck, base frame, vertical lean pipes, and—most importantly—the vertical lean pipe joints. Take a minute to inspect each component for damage:
- Vertical joints: Look for cracks in the plastic or metal, stripped threads, or bent connection points. If a joint has a broken thread, it won't hold screws securely—set it aside and contact your lean pipe supplier for a replacement.
- Lean pipe: Check for dents, rust, or uneven cuts. The pipes should be straight (no bends!) and the ends should be clean (no burrs that could scratch you or prevent a tight fit in the joint).
- Screws and washers: Ensure there are enough hex screws and lock washers. Lock washers are critical—they prevent screws from loosening over time due to vibration.
If everything looks good, sort the parts by type (joints in one pile, pipes in another) to avoid confusion later. This small step saves tons of time when you're in the middle of installation.

Step 2: Prepare the Workbench Base Frame
Workbench E's base frame is the foundation for your vertical joints, so it needs to be level and stable before you attach anything. Start by placing the base frame on the floor where you plan to keep the workbench permanently. (Pro tip: Avoid installing it on carpet if possible—hard floors like concrete or wood provide better stability.)
Use your spirit level to check if the base is even. Place the level along the length and width of the frame. If one side is higher than the other, adjust by placing shims (small pieces of wood or plastic) under the lower legs. You might need to move the frame a few times to get it right, but trust us: a level base prevents vertical joints from bearing uneven weight later.
Once the base is level, mark the positions where the vertical joints will go. Workbench E typically has four vertical pipes (one at each corner of the base frame), so you'll need four vertical joints. Check the instruction manual (or the pre-drilled holes on the base) to find the exact spots—these are usually 5-10cm from each corner, depending on the model.

Step 3: Attaching Vertical Lean Pipe Joints to the Base Frame
Now it's time to mount the vertical lean pipe joints to the base frame. This is where precision matters most, so go slow and double-check your work.
3.1 Align the Joint with Pre-Drilled Holes
Each vertical lean pipe joint has a flanged base with holes that line up with the pre-drilled holes on the Workbench E base frame. Place the joint over the marked position, making sure the holes in the joint's base match the holes in the frame. If they don't line up, don't force it! You might have rotated the joint—try turning it 90 degrees. Most vertical joints are designed to swivel slightly, but the holes should align when the joint is in the "vertical" position (the opening for the lean pipe should point straight up).
3.2 insert and Tighten Hex Screws
Once aligned, take a hex screw and lock washer. Slide the washer onto the screw (the "teeth" of the washer should face down, toward the base frame), then insert the screw into the joint's hole. Use your Phillips screwdriver or electric driver (set to low torque!) to tighten the screw until it's snug. Repeat this for all holes in the joint's base—most have 2-4 screws for stability.
Warning:
Don't overtighten! Stripping the threads in the base frame is a common mistake. Stop when you feel resistance—you should still be able to turn the screw with a little effort, but it shouldn't spin freely. If you're using an electric driver, switch to manual mode for the final turn to avoid overdoing it.
3.3 Check for (Verticality) with the Spirit Level
Before moving to the next joint, confirm the first one is perfectly vertical. Place your spirit level against the side of the joint (not the pipe yet—just the joint itself). The bubble should sit exactly in the center of the level's vial. If it's leaning left or right, loosen the screws slightly, adjust the joint, and retighten. This step takes patience, but a vertical joint now means no wobbles later.
Repeat this process for the remaining three vertical joints. After all four are attached, double-check that they're all the same height—measure from the base frame to the top of each joint with your tape measure. They should be within 1-2mm of each other; if not, adjust the screws to raise or lower a joint slightly.
Step 4: Inserting Lean Pipe into Vertical Joints
With the vertical joints secured to the base, it's time to add the lean pipe. These pipes connect the base joints to the workbench deck, so they need to fit snugly into the vertical joints.
4.1 Prepare the Lean Pipe Ends
Take one length of lean pipe (cut to Workbench E's height specification—usually 80-100cm for a standard workbench). Use a wire brush to clean the end of the pipe—this removes dirt, oil, or burrs that could prevent it from seating fully in the joint. If the pipe has a plastic end cap (common in lean pipe accessories kits), remove it for now—you can reattach it later if needed.
4.2 insert the Pipe into the Vertical Joint
Hold the lean pipe vertically and lower it into the vertical joint. Push gently—you should feel resistance, but the pipe shouldn't require excessive force. If it's too tight, check for debris in the joint or a bent pipe end. If it's too loose, the pipe might be the wrong diameter (Workbench E typically uses 28mm lean pipe, but confirm with your supplier if unsure).
Once the pipe is in the joint, use your rubber mallet to tap the top of the pipe lightly. This seats it firmly against the joint's internal stop, ensuring it won't slip down later. Don't hit it hard—you don't want to damage the pipe or joint.
4.3 Secure the Pipe with the Joint's Locking Mechanism
Most vertical lean pipe joints have a locking screw or clamp to hold the pipe in place. Look for a small hex screw on the side of the joint (near the top). Use your adjustable wrench or hex key to tighten this screw until it presses firmly against the lean pipe. You should feel the pipe "lock" into place—try twisting it gently; it shouldn't rotate or move up/down.
Repeat this for all four lean pipes. After inserting and locking, stand back and check that all pipes are straight and the same height. If one pipe is taller, loosen its locking screw, tap it down with the mallet, and retighten.
Step 5: Attaching the Workbench Deck to the Vertical Pipes
Now that the vertical pipes are secure, it's time to add the workbench deck (the top surface). Workbench E's deck is usually a single piece of plywood, MDF, or aluminum, with holes pre-drilled to match the top of the vertical pipes.
5.1 Lift the Deck Onto the Vertical Pipes
This step is easier with a helper—workbench decks can be heavy! Lift the deck and align its pre-drilled holes with the top of the vertical lean pipes. Lower the deck slowly, making sure each pipe slides through its corresponding hole. If the holes don't line up, don't force the deck—check that the vertical pipes are straight (use your spirit level again) and adjust as needed.
5.2 Secure the Deck with Top Joints
Once the deck is in place, you'll need to secure it to the vertical pipes using top joints (these might be included with Workbench E or sold separately as lean pipe accessories). Top joints are similar to vertical joints but designed to clamp onto the pipe and deck. Place a top joint over each vertical pipe, just above the deck, and tighten its locking screw to hold the deck in place. For extra stability, add a hex screw through the joint and into the deck (if pre-drilled).
Step 6: Final Stability Check
You're almost done! Now it's time to test the workbench to make sure everything holds. Here's how:
- Shake test: Stand behind the workbench and push gently on one corner. The workbench should wobble slightly but return to center—no excessive movement or creaking.
- Weight test: Place a heavy object (like a toolbox, 20-30kg) on the deck. Let it sit for 5 minutes, then check if the vertical joints or pipes have shifted. If the deck sags, tighten the top joints.
- Level check: Use your spirit level on the deck to ensure it's flat. If one side dips, adjust the top joints or shim the base slightly.
If everything passes these tests, congratulations—your vertical lean pipe joints are installed correctly! If not, don't panic—we'll troubleshoot common issues next.
Troubleshooting Common Installation Issues
Even with careful work, things can go wrong. Here's how to fix the most frequent problems:
Issue 1: Vertical Joints Won't Tighten to the Base Frame
If the hex screws spin without tightening, the threads in the base frame might be stripped. Try switching to a slightly longer screw (M8 x 20mm) to grab fresh wood/metal. If that doesn't work, contact your lean pipe supplier for a replacement base frame—stripped threads are rare but can happen with factory defects.
Issue 2: Lean Pipe Wobbles in the Vertical Joint
This usually means the joint's locking screw isn't tight enough, or the pipe is the wrong diameter. First, tighten the locking screw further (but don't strip it). If that fails, wrap a small piece of electrical tape around the pipe end (before inserting) to add thickness—this creates a tighter fit.
Issue 3: Workbench Leans to One Side
A leaning workbench is almost always due to an unlevel base. Go back to Step 2 and recheck the base frame with your spirit level. Add shims under the lower legs until the base is even, then retighten all vertical joints.
Maintaining Your Vertical Lean Pipe Joints
Installing the joints is just the first step—regular maintenance will keep Workbench E stable for years. Here's what to do:
- Monthly checks: Tighten all joint screws (base, locking, top joints) with a wrench—vibration from daily use can loosen them over time.
- Clean joints: Wipe down vertical joints with a damp cloth to remove dust and debris. If you work in a humid environment, apply a light coat of anti-rust spray to metal joints.
- replace worn parts: If a joint's locking screw strips or the plastic cracks, replace it immediately. Most lean pipe suppliers sell replacement joints and lean pipe accessories individually.
Final Thoughts
Installing vertical lean pipe joints for Workbench E (single deck-without caster) might seem tedious, but it's worth the effort. A properly installed workbench is more than just a table—it's a reliable partner in your daily workflow, keeping tools organized and projects moving smoothly. Remember, if you ever need replacement parts (like extra vertical joints or lean pipe), reach out to a trusted lean pipe supplier—they'll have the expertise to help you find exactly what you need.
Now go enjoy your sturdy, stable Workbench E. Happy assembling!