- Company Articles
- Products and Technology
- Installation And Maintenance
- Vertical Lean Pipe Joint Maintenance Schedule: Prolonging Service Life

Vertical Lean Pipe Joint Maintenance Schedule: Prolonging Service Life
Related Product
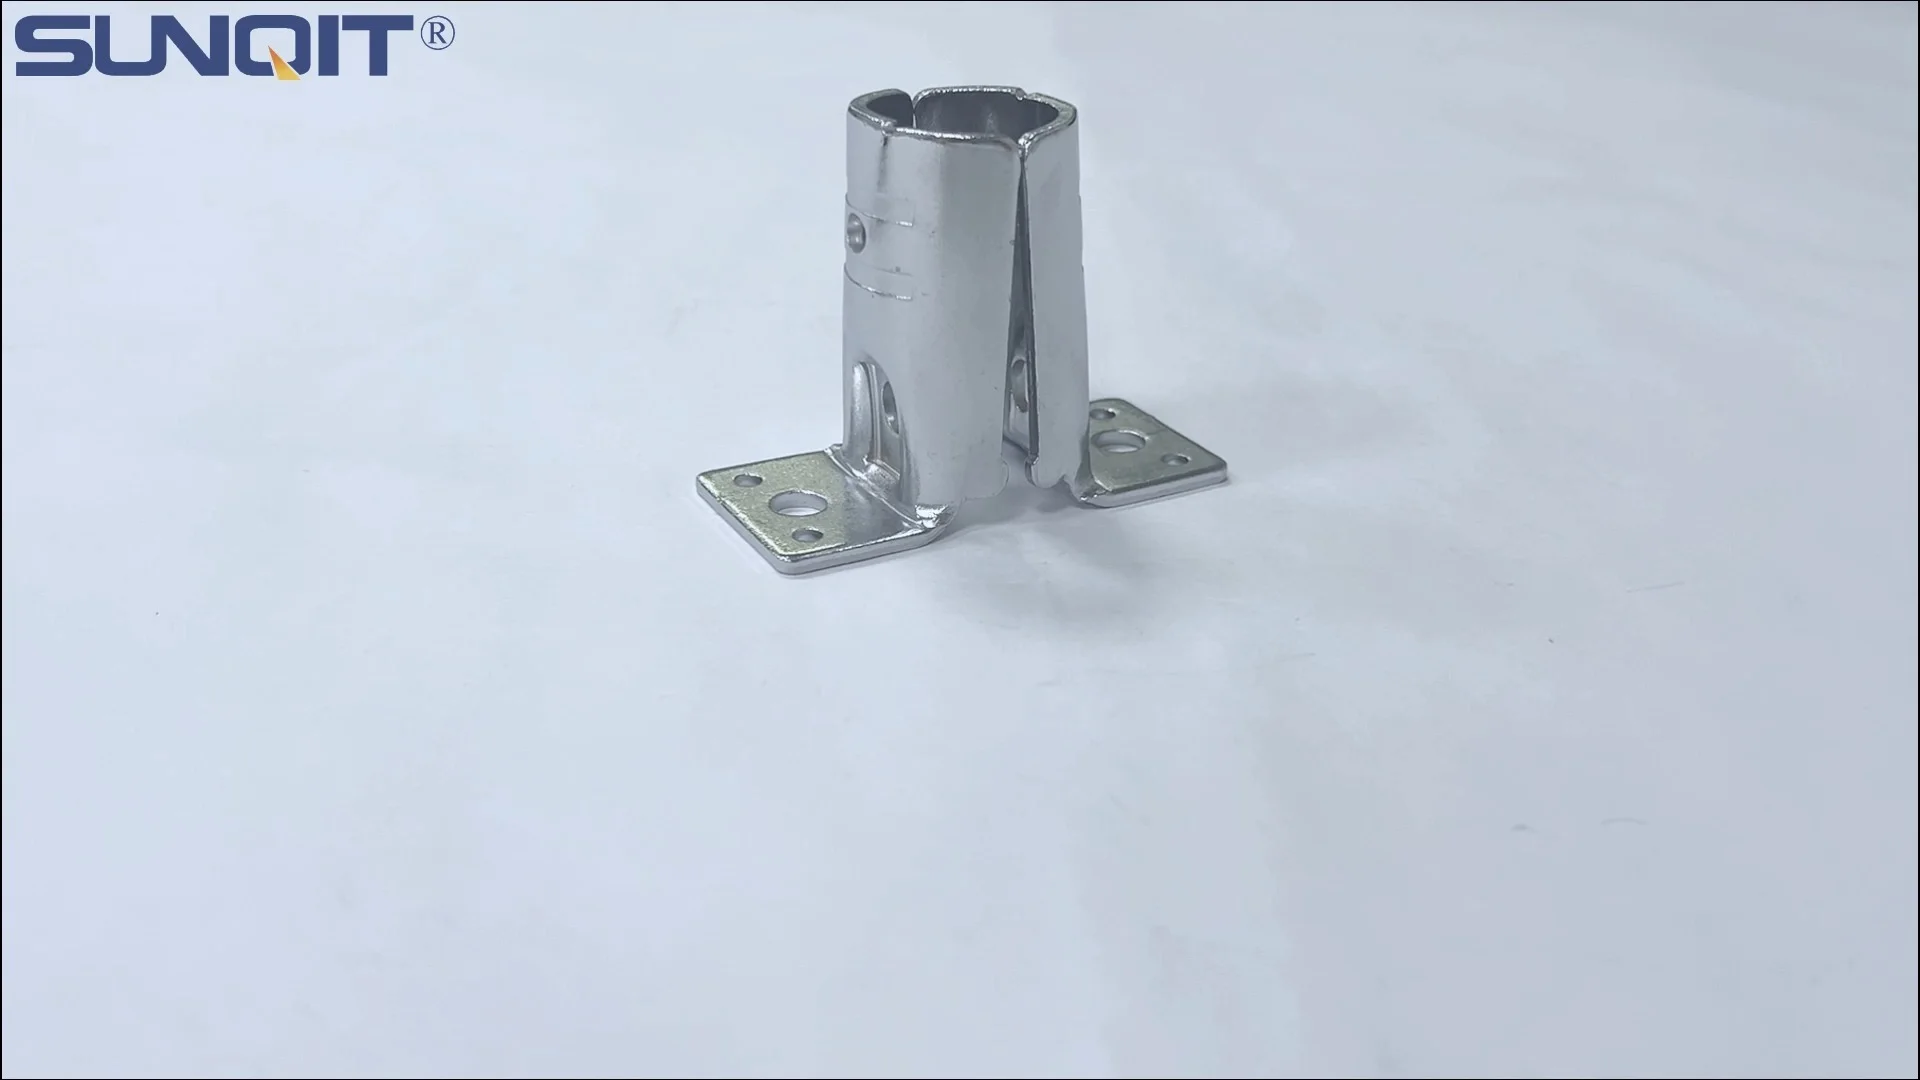
Vertical Lean Pipe Joint
Vertical lean pipe joint is used for 28mm lean pipe fixed on ground and keep it stable.
Walk into any modern manufacturing facility, warehouse, or assembly line, and you'll likely spot them: sturdy, versatile structures built from lean pipes—workbenches where technicians assemble electronics, material racks holding components, or turnover trolleys gliding smoothly across the floor. At the heart of these structures, holding everything together with quiet reliability, are the unsung heroes: vertical lean pipe joints. These small but critical components bear the weight of your operations, ensuring stability in workbenches, alignment in flow racks, and safety in every lean system. But like any hardworking part of your setup, they need care. Neglect them, and you're looking at wobbling workstations, slowed production, and even costly accidents. Today, we're diving into a practical, no-nonsense maintenance schedule to keep your vertical lean pipe joints—and by extension, your entire lean system—in top shape for years to come.
Why Bother with Joint Maintenance? It's About More Than Just Tightening Bolts
Let's start with a scenario we've all heard (or lived through): A busy Monday morning, production targets looming, when suddenly—*creak*. A workbench in the corner starts to wobble. A quick check reveals a loose vertical lean pipe joint; by lunch, it's worse. By afternoon, the team has to halt assembly to fix it, eating into deadlines and morale. Sound familiar? That's the cost of neglecting joint maintenance. But it's not just downtime. Loose or damaged joints compromise safety: a material rack with corroded joints could collapse, risking injury to workers or damage to expensive inventory. And let's talk dollars: replacing a single joint costs a few dollars, but replacing an entire workbench or dealing with a lawsuit? Thousands. Maintenance isn't an expense—it's an investment in keeping your operations running smoothly, safely, and affordably.
Vertical lean pipe joints, whether chrome-plated or standard, are designed to withstand daily wear and tear, but they're not indestructible. They face constant stress: the weight of tools on a workbench, the vibration of machinery nearby, even the humidity in the air. Over time, bolts loosen, surfaces corrode, and tiny cracks form. The good news? With a little regular attention, you can catch these issues early, extend their lifespan by years, and avoid those "Monday morning surprises."
Weekly Quick Checks: The "Sniff Test" for Joint Health
Think of weekly checks as your joint's "wellness exam"—quick, non-invasive, and designed to spot red flags early. You don't need fancy tools here; just a few minutes, a good eye, and maybe a pair of gloves to protect your hands. Here's how to do it:
Step 1: Visual Inspection (5–10 Minutes per Area)
Start by walking around each lean structure—workbenches, material racks, trolleys—and focus on the vertical lean pipe joints. Look for obvious issues: rust spots (especially on non-chrome joints), cracks in the plastic or metal, or debris like dust, oil, or grease buildup. Chrome-plated joints, like the vertical lean pipe joint chrome models, are more resistant to rust, but they're not immune—check for chips in the chrome, which expose the underlying metal to corrosion.
Pro tip: Use a flashlight to check hard-to-see areas, like joints hidden behind tools or boxes. Shadows can hide early signs of wear!
Step 2: The "Gentle Wiggle" Test
With gloved hands, gently grasp the vertical pipe above the joint and give it a slight wiggle—side to side, front to back. A healthy joint should feel solid, with no movement. If it shifts even a little, that's a sign the bolts are loosening. Note the location; we'll tighten those in the monthly inspection.
Step 3: Check Accessories (Because Joints Don't Work Alone)
Joints rarely work in isolation—they're part of a system that includes bolts, washers, and sometimes casters or roller tracks. While you're at it, glance at nearby accessories: Are the bolts holding the joint to the pipe intact? Any missing washers? If the structure has casters (hello, turnover trolleys!), give them a quick spin to ensure they're rolling smoothly—caster issues can put extra stress on joints by causing uneven weight distribution.
Weekly checks are quick, but they're the first line of defense. Jot down notes in a log (digital or old-school notebook) to track recurring issues—if the same joint loosens every week, there might be a deeper problem, like stripped threads.

Monthly Deep Dive: Tightening, Lubricating, and Fighting Corrosion
Weekly checks catch the obvious; monthly inspections dig deeper. Set aside an hour or two (depending on the number of structures) to tackle these tasks—your future self (and your budget) will thank you.
Toolkit Prep: What You'll Need
- Adjustable wrench or socket set (match the bolt size—most vertical lean pipe joints use M6 or M8 bolts)
- Wire brush (for rust spots)
- Mild detergent (like dish soap) and a soft cloth
- Corrosion inhibitor spray (for metal joints)
- Lubricant (silicone-based, not oil—oil attracts dust)
Task 1: Tighten Those Bolts (But Don't Overdo It!)
Remember those wobbly joints from your weekly checks? Now's the time to tighten them. Use the wrench to gently turn bolts clockwise until snug—*but stop when you feel resistance*. Over-tightening can strip threads or crack the joint itself, especially if it's plastic or lightweight aluminum. A good rule: "snug, not superhuman." For chrome-plated joints, be careful not to scratch the finish with the wrench—wrap the tool in a cloth if needed.
Pro tip: If a bolt keeps loosening, add a drop of thread locker (blue, not red—red is permanent!) to keep it in place. Just avoid over-applying; excess can seep into the joint and attract dirt.
Task 2: Battle Corrosion
Even with weekly checks, rust can sneak in—especially in humid environments or near water sources (looking at you, food processing plants). For small rust spots on non-chrome joints, scrub gently with a wire brush to remove flaky rust, then wipe with a damp cloth and dry thoroughly. Follow up with a light spray of corrosion inhibitor to protect the surface.
Chrome-plated joints need extra care here: If the chrome is chipped, touch up the exposed area with a rust-resistant paint pen—this creates a barrier until you can replace the joint. Chrome resists rust, but once the surface is compromised, it's vulnerable.
Task 3: Lubricate Moving Parts (If Applicable)
Some vertical lean pipe joints have moving components, like swivel or rotatory joints (yes, even vertical ones—think adjustable-height workbenches). These need lubrication to prevent squeaking and reduce friction. Use a silicone-based lubricant (avoid oil, which gums up with dust) and apply a tiny drop to the joint's pivot points. Wipe away excess with a cloth—you want a thin film, not a puddle.
Monthly inspections are also a good time to rotate "high-stress" joints if possible. For example, if you have a material rack with three vertical joints, and one is always holding more weight, swap the positions of the joints (if the structure allows) to distribute wear evenly. It's like rotating tires on a car—simple, but effective.

Quarterly Deep Clean: Giving Joints (and Accessories) a Fresh Start
Every three months, it's time to roll up your sleeves and give your vertical lean pipe joints (and their accessories) a thorough cleaning. This isn't just about shine—it removes grime that can trap moisture, corrosion, or interfere with joint movement.
When to Remove Joints (and When Not To)
For most setups, you don't need to fully disassemble the structure—just clean around the joints. But if a joint is in a high-dust area (like near a sanding station) or has visible grease buildup, carefully remove it: loosen the bolts, slide the joint off the pipe, and set it aside. *Pro tip: Take a photo before disassembling!* It's easy to forget how parts fit together, especially if you're new to lean pipe systems.
Cleaning Steps for Joints and Accessories
- Wash: Mix a few drops of mild detergent with warm water. Dip a soft cloth into the solution and wipe down the joint, paying attention to crevices where dust hides. For tough grime, use a toothbrush (soft-bristled!) to scrub gently—avoid abrasive pads, which can scratch chrome or plastic surfaces.
- Rinse: Wipe with a damp cloth (no soap) to remove residue, then dry immediately with a clean towel. Moisture is the enemy here—even a small water spot can lead to rust.
- Inspect Accessories: While the joint is off, check washers, gaskets, or plastic inserts (common in aluminum lean pipe joints). If they're cracked, brittle, or misshapen, replace them—these small parts ensure a tight, stable fit between the joint and pipe.
- Reassemble: Slide the clean joint back onto the pipe, tighten bolts to the recommended torque (check the manufacturer's specs if you have them), and give it a gentle wiggle to confirm stability.
Quarterly cleaning is also a great time to inventory spare parts. Do you have extra vertical lean pipe joints, bolts, or washers on hand? Running out mid-repair can turn a 10-minute fix into a half-day delay. Stock up on essentials—lean pipe and accessories are cheap insurance against downtime.

Annual Replacement: Knowing When to Let Go (and Upgrade)
Even with perfect maintenance, all good things must end—and vertical lean pipe joints are no exception. Annual inspections help you spot when a joint is past its prime, so you can replace it before it fails.
Signs It's Time to replace a Joint
- Stripped threads: If bolts spin freely without tightening, the internal threads in the joint are worn out—no amount of thread locker will fix this.
- Cracks or deformation: Visible cracks in the joint body, or warping from heat or impact, mean structural integrity is compromised. A cracked joint can't hold weight safely.
- Severe corrosion: If rust has eaten through more than 10% of the joint's surface, or if chrome plating is peeling off in large flakes, replacement is safer than repair.
- Excessive play: Even after tightening, if the joint still wobbles more than 1/4 inch, the internal mechanism (like ball bearings in swivel joints) is likely worn out.
Choosing the Right Replacement
When replacing, match the joint type to your needs. If your facility is humid or uses water (e.g., automotive wash stations), opt for a vertical lean pipe joint chrome model—chrome's corrosion resistance will outlast standard steel. For cleanrooms or food-grade environments, stainless steel joints are worth the investment (though pricier). And don't skimp on quality: cheap joints from unknown suppliers often have inconsistent threading or weak materials, leading to premature failure.
Pro tip: When replacing, consider upgrading! Newer aluminum lean pipe joints are lighter than steel but just as strong, and they resist corrosion naturally. If your current setup uses steel, swapping a few joints for aluminum can reduce weight stress on the entire structure.
Troubleshooting Common Issues: Quick Fixes for Annoying Problems
Even with a solid maintenance routine, issues pop up. Here's how to tackle the most common ones:
Problem: Joint Keeps Loosening
Cause: Stripped threads, insufficient bolt length, or vibration from nearby machinery.
Fix: If threads are stripped, replace the joint. If not, try a longer bolt (ensure it doesn't protrude too far and scratch workers!) or add a lock washer between the bolt head and joint. For vibration, apply a small amount of thread locker (blue, removable) to the bolt threads before tightening.
Problem: Rust on Chrome Joints
Cause: Chips in the chrome plating exposing the steel underneath.
Fix: Sand the rust spot gently with fine-grit sandpaper (220 grit), wipe clean, and apply a rust-resistant enamel paint (match the chrome color as best you can). For larger chips, replace the joint—chrome repair kits work for small spots but aren't durable for high-stress areas.
Problem: Joint is Stuck (Won't Rotate or Adjust)
Cause: Grime buildup or lack of lubrication.
Fix: Clean the joint with mild detergent and a toothbrush, then apply silicone lubricant to the pivot points. If it's still stuck, check for corrosion—rust can freeze moving parts together. Soak the joint in white vinegar for 30 minutes (vinegar dissolves rust), then gently tap with a rubber mallet to loosen.
Maintenance Schedule at a Glance
| Frequency | Tasks | Tools Needed | Key Notes |
|---|---|---|---|
| Weekly | Visual inspection for rust, cracks, debris; gentle wiggle test; check accessories (bolts, casters) | Flashlight, gloves | Log recurring issues (e.g., loose joints) |
| Monthly | Tighten bolts; remove rust with wire brush; lubricate moving parts; apply corrosion inhibitor | Wrench, wire brush, detergent, lubricant | Avoid over-tightening bolts to prevent stripping |
| Quarterly | Deep clean joints (remove if needed); inspect/replace washers/gaskets; inventory spare parts | Soft cloth, toothbrush, mild detergent, spare accessories | Dry joints thoroughly to prevent rust |
| Annually | Check for stripped threads, cracks, severe corrosion; replace worn joints | Inspection checklist, replacement joints | Upgrade to chrome or aluminum joints for high-stress areas |
Best Practices: Making Maintenance a Habit (Not a Chore)
Maintenance works only if it's consistent. Here's how to turn these tasks into habits your team will actually follow:
Assign Ownership
Put someone in charge—maybe a team lead or dedicated maintenance tech. When responsibility is clear, tasks don't fall through the cracks. Even better, rotate "maintenance captain" duties monthly to keep everyone engaged.
Keep Tools Accessible
Store your wrench, lubricant, and cleaning supplies in a labeled toolbox near the lean structures. If tools are hard to find, no one will bother using them.
Celebrate Small Wins
Did the team go three months without a loose joint? A pizza lunch or shoutout in the company newsletter goes a long way. Positive reinforcement turns "one more thing to do" into "our routine."
Train New Hires
Include joint maintenance in onboarding for new production or warehouse staff. Show them how to do a wiggle test, tighten a bolt, or spot rust—empowering everyone to report issues early.
Final Thoughts: Your Joints Deserve Love (and So Do Your Operations)
Vertical lean pipe joints might seem small, but they're the backbone of your lean system. A little time spent on weekly checks, monthly tightenings, and quarterly cleanings can save you from costly downtime, safety risks, and replacement bills. Remember: maintenance isn't about perfection—it's about consistency. Even 10 minutes a week can extend a joint's life by years.
So grab your wrench, your cloth, and that maintenance log. Your workbenches, material racks, and team (not to mention your budget) will thank you. Here's to smooth operations, stable structures, and joints that stand the test of time.