- Company Articles
- Products and Technology
- Installation And Maintenance
- Vertical Lean Pipe Joints for Conveyor Systems: Integration Best Practices

Vertical Lean Pipe Joints for Conveyor Systems: Integration Best Practices
Related Product
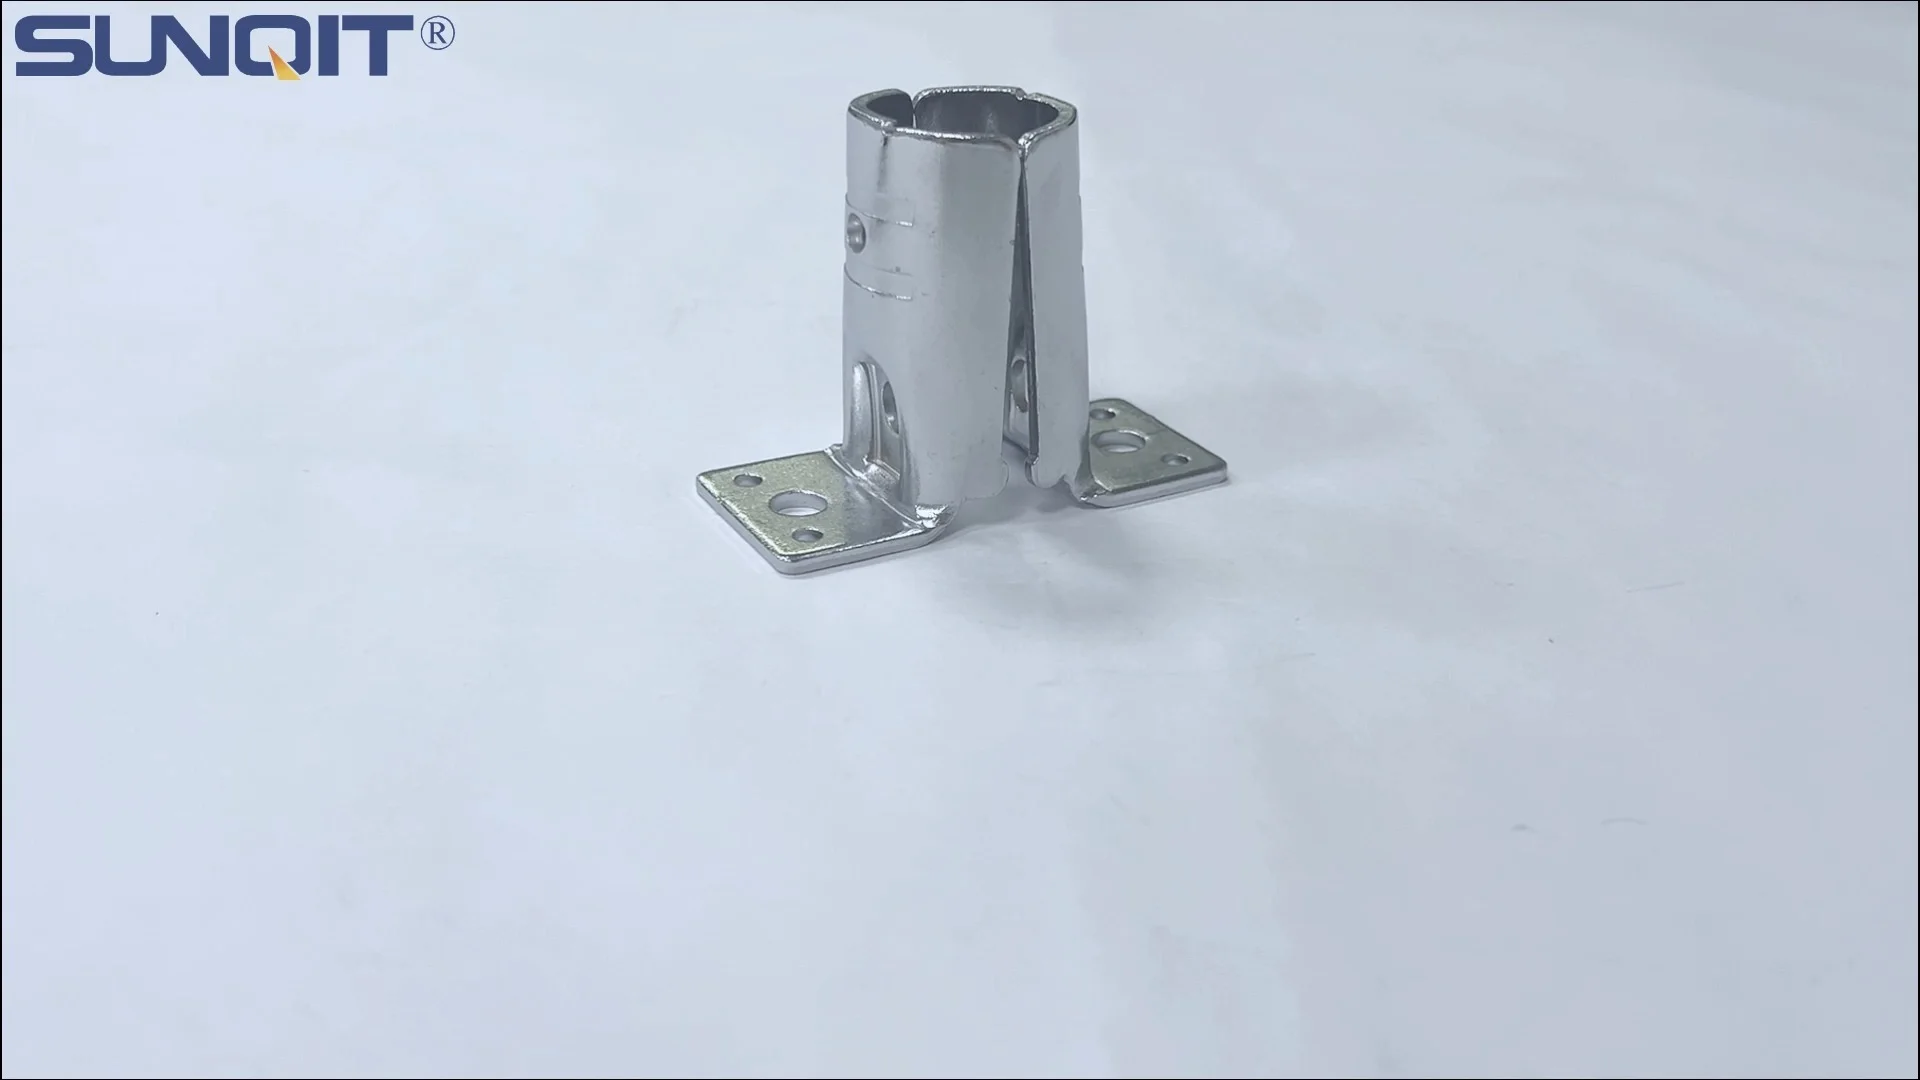
Vertical Lean Pipe Joint
Vertical lean pipe joint is used for 28mm lean pipe fixed on ground and keep it stable.
Walk through any modern manufacturing facility, and you'll notice the silent workhorses keeping production moving: conveyor systems. These intricate networks of belts, rollers, and tracks ensure materials glide from one workstation to the next, minimizing delays and maximizing efficiency. But behind their seamless operation lies a critical, often overlooked component: the joints that hold everything together. Among these, vertical lean pipe joints stand out as unsung heroes, providing the structural backbone that keeps conveyor systems stable, adaptable, and aligned. Whether you're building a new line or upgrading an existing one, integrating vertical lean pipe joints effectively can mean the difference between a smooth, reliable workflow and a frustrating cycle of jams, breakdowns, and wasted time. In this article, we'll dive into the world of vertical lean pipe joints, exploring their role in conveyor systems, sharing step-by-step integration best practices, and uncovering how the right approach can transform your production floor.
Understanding Vertical Lean Pipe Joints: More Than Just a Connection
Before we jump into integration, let's take a moment to appreciate what vertical lean pipe joints actually do. At first glance, they might seem like simple metal connectors—just pieces that hold two pipes together. But in reality, they're engineered to balance three key needs: strength, flexibility, and precision. In conveyor systems, vertical joints are tasked with supporting the weight of materials as they move upward or downward, maintaining alignment across long stretches of roller track, and adapting to changes in layout as production needs evolve.
Take, for example, a typical automotive parts plant. Here, conveyor systems often carry heavy components like engine blocks or door panels, sometimes lifting them to upper levels for assembly. In these scenarios, vertical lean pipe joints must withstand not just static weight but also dynamic forces—vibrations from moving parts, sudden starts and stops, and even the occasional bump from a forklift. A poorly designed or integrated joint here could lead to misalignment, causing parts to jam or fall, halting production and risking worker safety.
Modern vertical lean pipe joints, like the vertical lean pipe joint chrome variant, are built to address these challenges. Chrome plating adds corrosion resistance, making them ideal for humid or dusty environments, while their modular design allows for quick adjustments. Unlike rigid welded connections, these joints let you reconfigure conveyor heights or angles without cutting pipes or rewelding, a boon for facilities that need to adapt to new product lines or seasonal demand spikes. Think of them as the "swiss army knife" of conveyor components—versatile, durable, and ready to handle whatever the production floor throws at them.
Key Considerations Before Integration: Laying the Groundwork
Integrating vertical lean pipe joints into a conveyor system isn't a "set it and forget it" task. It requires careful planning to ensure the joints work in harmony with other components like roller track, aluminum profile, and even adjacent workbenches. Here are the critical factors to keep in mind before you pick up a wrench:
1. Load Capacity: Know What You're Lifting
The first question to ask is: What will your conveyor carry? A system moving small electronic components (lightweight, fragile) has very different needs than one transporting steel beams (heavy, dense). Vertical lean pipe joints are rated for specific weight limits, and exceeding these can lead to bending, cracking, or catastrophic failure. Start by calculating the maximum load per linear foot of conveyor—include the weight of the materials, the roller track itself, and any components like side guides. Then, choose joints rated for at least 20% more than this total to account for unexpected stress (yes, that occasional overloaded bin happens more often than you'd think).
2. Material Compatibility: Matching Joints to Your Environment
Conveyor systems don't live in a vacuum. A food processing plant might require stainless steel components to meet hygiene standards, while a dry electronics facility could use standard steel. If your environment is humid, dusty, or exposed to chemicals, opt for corrosion-resistant joints like the vertical lean pipe joint chrome. Chrome plating acts as a barrier against moisture and debris, extending the joint's lifespan and reducing maintenance headaches. Similarly, if your conveyor interacts with electrostatic-sensitive components (like circuit boards), consider pairing joints with aluminum profile frames—aluminum's conductivity helps dissipate static, protecting delicate parts from damage.
3. Alignment with Roller Track and Workflow
A conveyor is only as good as its alignment. Even a slight misalignment between vertical joints can cause roller track to tilt, leading to materials sliding off or jamming. Before installation, map out your conveyor's path in detail, noting elevation changes, turns, and connection points to other equipment (like a lean pipe workbench at the end of the line). Use laser levels or string lines to mark vertical positions, ensuring joints are plumb (perfectly vertical) and spaced evenly. Remember: conveyor systems are a team effort—vertical joints must align not just with each other, but with the roller track's pitch (angle) and the overall workflow. A joint that's off by even 2 degrees can create a "speed bump" in material flow, slowing production to a crawl.
4. Future-Proofing: Building for Adaptability
The best conveyor systems are those that grow with your business. Maybe next year you'll need to add a second level, or extend the line by 10 feet, or reconfigure for a new product. Vertical lean pipe joints excel here, but only if you plan for adaptability upfront. Avoid over-tightening joints during initial installation—leave a small gap for adjustment later. Choose modular joint designs that allow you to add cross-braces or extend pipes without replacing the entire assembly. And keep a stock of spare joints and accessories (like extra chrome-plated connectors) on hand—you'll thank yourself when that urgent reconfiguration request comes in.

Step-by-Step Integration Process: From Planning to Production
Now that we've covered the "why" and "what" of vertical lean pipe joint integration, let's get into the "how." Below is a detailed, actionable guide to installing these joints in your conveyor system, broken down into phases to keep you organized and on track.
| Integration Phase | Key Actions | Tools & Materials Needed | Pro Tips |
|---|---|---|---|
| 1. Assessment & Measurement | Map conveyor path, measure vertical heights, mark joint positions on floor/ walls. Confirm load capacity requirements with engineering team. | Tape measure, laser level, chalk line, load calculator worksheet. | Take measurements twice—"measure once, cut twice" is a costly mistake here. Note obstacles like pillars or overhead pipes that might affect joint placement. |
| 2. Material Selection | Choose vertical lean pipe joints (e.g., vertical lean pipe joint chrome for durability). select pipe material (steel, aluminum) and diameter based on load. | Material specs sheet, sample joints for testing fit. | Test-fit joints with pipes before purchasing bulk—some brands have slight size variations that can cause issues. |
| 3. Preparation | Clean pipe ends (remove rust, debris), cut pipes to length (if needed). Gather tools and secure work area (block off conveyor zone to prevent accidents). | Hacksaw/ pipe cutter, wire brush, work gloves, safety glasses. | Deburr pipe ends after cutting to avoid sharp edges that could damage roller track or injure workers. |
| 4. Installation | Align first vertical pipe with chalk line, secure base joint to floor (use anchors for concrete). Attach vertical lean pipe joint, then connect upper pipe. Repeat for all vertical supports. | Wrenches, level (bubble or digital), floor anchors, torque wrench. | Use a torque wrench to tighten joint bolts to manufacturer specs—over-tightening can strip threads; under-tightening leads to looseness. |
| 5. Alignment with Roller Track | Mount roller track brackets to vertical joints. Adjust joint angles to match roller track pitch (e.g., 5 degrees for gravity-fed systems). Secure brackets with lock washers. | Angle finder, bracket hardware, lock washers, hex keys. | Roll a test weight (like a empty tote bin) along the track to check for jams—if it stops, recheck joint alignment. |
| 6. Calibration & Testing | Check all joints for plumb/ level. Test conveyor with full-load simulation (use sandbags or actual product). Monitor for vibrations or unusual noises. | Load test weights, vibration meter (optional), stethoscope (to listen for loose joints). | Test during off-hours to avoid disrupting production. Document test results for future reference. |
| 7. Quality Control & Sign-Off | Inspect joints for cracks, loose bolts, or corrosion. Have safety team review installation. Train operators on joint inspection protocols. | Inspection checklist, safety audit form, operator training materials. | Label joints with ID numbers for easy tracking during maintenance checks. |
Phase 1: Assessment & Measurement
Start by walking the conveyor path with your team. Use a laser level to project a straight line along the floor where the conveyor will run—this helps identify dips or uneven areas that might affect vertical joint placement. For vertical sections (e.g., lifting materials to a mezzanine), measure the exact height from floor to upper conveyor level, adding 2-3 inches for adjustment room. Mark each joint position with chalk, and note whether they'll be floor-mounted, wall-mounted, or ceiling-supported. If your conveyor connects to a
lean pipe workbench
, measure the distance from the bench edge to the first vertical joint to ensure materials can slide smoothly from the bench to the roller track.
Phase 2: Material Selection
With measurements in hand, select your vertical lean pipe joints. For most industrial applications, the
vertical lean pipe joint chrome
is a solid choice—it's strong, resists rust, and stands up to frequent adjustments. If your facility uses
aluminum profile
for frames (common in electronics or cleanrooms), look for joints compatible with aluminum pipes to avoid galvanic corrosion (a reaction between dissimilar metals). Don't skimp on pipe thickness: a 1.5mm wall thickness is standard for medium loads, but heavy-duty applications (over 500 lbs per linear foot) may require 2.0mm pipes. Ask your supplier for load charts—reputable brands will provide data on how many pounds each joint can support vertically.
Phase 3: Preparation
Before installing anything, prep your pipes and work area. If you're cutting pipes to length, use a pipe cutter (not a hacksaw) for clean, straight edges—ragged cuts make joints harder to align. Use a wire brush to remove rust or paint from pipe ends, as debris can prevent joints from seating properly. In busy facilities, cordon off the installation zone with caution tape and post a "No Access" sign to keep workers and equipment out. Finally, lay out all joints and pipes in order of installation—this "dry fit" step helps you spot missing parts (like a forgotten elbow joint) before you're halfway through the process.
Phase 4: Installation
Now, it's time to set the first vertical pipe. If floor-mounted, drill holes for anchors and secure the base joint—use a level to ensure it's perfectly vertical (both side-to-side and front-to-back). Attach the vertical lean pipe joint to the top of the base pipe, then slide the upper pipe into the joint. Tighten the joint's set screws just enough to hold the pipe in place—you'll fully secure it after alignment. Repeat this for all vertical supports, working in sections (e.g., install 10 feet of conveyor at a time) to avoid getting overwhelmed. For wall-mounted joints, use heavy-duty brackets rated for the load—drywall anchors won't cut it here; go for toggle bolts or concrete screws if mounting to masonry.
Phase 5: Alignment with Roller Track
Once the vertical joints are up, it's time to attach the
roller track
. Most roller track systems mount to brackets that bolt directly to vertical lean pipe joints. Use a laser level to ensure the track is level (for horizontal sections) or has the correct pitch (for gravity-fed sections—typically 3-5 degrees). If the track slopes upward, confirm the vertical joints can handle the added stress of materials being pulled uphill (this is where that 20% load capacity buffer comes in). Tighten all bracket bolts with lock washers to prevent loosening from vibration, and give the track a gentle shake to test stability—if it wobbles, check the joint connections.
Phase 6: Calibration & Testing
With the track installed, it's time to put the system through its paces. Start with a "light load" test: place empty totes or boxes on the roller track and let them glide through. Watch for sticking points—these often indicate a joint is slightly misaligned. Next, do a full-load test using actual product or sandbags equal to the maximum weight. Run the conveyor for 30 minutes, listening for squeaks (a sign of metal-on-metal friction) or rattles (loose joints). If you notice vibrations, check if joints are touching other metal components—adding rubber gaskets can dampen noise and prevent wear.
Phase 7: Quality Control & Sign-Off
The final step is to document and approve the installation. Walk the entire conveyor line with your safety team, inspecting each vertical lean pipe joint for cracks, bent screws, or corrosion. Fill out an inspection checklist, noting joint IDs, torque values, and test results. Train operators on how to spot loose joints (e.g., unusual noises, track misalignment) and whom to notify. Finally, get sign-off from production and maintenance managers—this ensures everyone is on the same page and accountable for keeping the system running smoothly.

Troubleshooting Common Integration Challenges
Even with careful planning, integration hiccups happen. Below are solutions to the most frequent issues facilities face when installing vertical lean pipe joints in conveyor systems.
Challenge 1: Joints Loosening Over Time
Problem:
After a few weeks of operation, vertical joints start to wiggle, causing roller track misalignment.
Cause:
Vibration from moving materials can loosen set screws or bolts, especially if they weren't tightened to spec.
Solution:
Use thread-locking adhesive (like Loctite) on joint screws—apply a small drop before tightening to prevent loosening. For bolts, add lock washers or nylon-insert nuts, which grip threads better than standard nuts. Schedule weekly "tightness checks" for the first month, then monthly after that.
Challenge 2: Corrosion in Humid Environments
Problem:
Vertical joints develop rust spots, weakening their structural integrity.
Cause:
Exposure to moisture, condensation, or chemicals (e.g., in food processing or automotive painting areas).
Solution:
replace standard joints with
vertical lean pipe joint chrome
or stainless steel variants—chrome plating acts as a moisture barrier, while stainless steel resists corrosion entirely. Wipe down joints monthly with a dry cloth to remove dust and moisture, and apply a light coat of anti-rust spray (avoid oil-based sprays near food or electronics).
Challenge 3: Roller Track Jamming at Joints
Problem:
Materials get stuck where the roller track meets a vertical joint.
Cause:
Misalignment between the track and joint, or a gap between track sections due to improper spacing.
Solution:
Use a straightedge to check track alignment across the joint—if there's a "step" between track sections, loosen the joint and adjust the pipe height. For gaps, add a small shim (plastic or metal) between the track and joint bracket to create a smooth transition. Test with a variety of material sizes (small boxes, large totes) to ensure nothing catches.
Challenge 4: Overloading Joints
Problem:
Joints bend or crack under heavy loads, even though they were rated for the weight.
Cause:
Underestimating dynamic loads (e.g., materials slamming onto the conveyor from a height) or uneven weight distribution.
Solution:
Recalculate load capacity, factoring in impact forces (use a dynamic load calculator online). Add additional vertical joints to spread weight—closer spacing (every 3-4 feet instead of 6 feet) reduces stress on individual joints. Install shock absorbers at loading points to cushion impacts, and train workers not to drop materials onto the conveyor.

Real-World Success Stories: How Proper Integration Drives Results
To illustrate the impact of effective vertical lean pipe joint integration, let's look at two real-world examples—one from automotive manufacturing and another from e-commerce fulfillment. These stories highlight how attention to detail in joint installation transformed inefficient, error-prone conveyor systems into models of reliability.
Case Study 1: Automotive Parts Plant Eliminates Downtime with Chrome Joints
A mid-sized automotive parts manufacturer in Michigan was struggling with frequent conveyor breakdowns on their axle assembly line. The line used older, unplated vertical joints that rusted easily in the humid plant, leading to seized set screws and misaligned roller track. Materials jammed 3-4 times per shift, costing the plant an estimated $15,000 in lost production monthly. After consulting with a lean manufacturing expert, they replaced all vertical joints with
vertical lean pipe joint chrome
and retrained their maintenance team on proper torque and alignment. Within 30 days, breakdowns dropped to zero, and the plant saved over $180,000 in the first year. The chrome joints also reduced cleaning time—instead of scrubbing rust off old joints weekly, workers now simply wipe them down with a cloth during routine checks.
Case Study 2: E-Commerce Fulfillment Center Boosts Throughput with Modular Joints
An e-commerce fulfillment center in Texas needed to expand their conveyor system to handle holiday demand, but their existing rigid welded vertical supports made reconfiguration impossible. They turned to vertical lean pipe joints for a modular solution, allowing them to add 200 feet of roller track and raise sections to upper levels in just 48 hours. By using joints compatible with their existing
aluminum profile
frames, they avoided replacing the entire system, saving $75,000 in materials. The new joints also made it easy to adjust conveyor heights for different package sizes, reducing manual lifting by workers and cutting injury reports by 30%. During peak season, the line processed 15% more orders per day with no additional labor—proof that adaptability pays off.
Maintenance Best Practices: Keeping Joints (and Conveyors) Running Strong
Integration is just the start—proper maintenance is key to ensuring vertical lean pipe joints last for years and keep your conveyor system reliable. Below are actionable tips to incorporate into your maintenance routine:
1. Schedule Regular Inspections
Assign a maintenance tech to inspect vertical joints weekly. Check for loose bolts, rust spots, or cracks in the chrome plating (if using
vertical lean pipe joint chrome
). Tighten any loose screws to the manufacturer's torque specs—use a torque wrench, not a pipe wrench, to avoid stripping. For hard-to-reach joints (e.g., ceiling-mounted), use a smartphone camera with zoom to spot issues without climbing ladders.
2. Clean Joints to Prevent Buildup
Dust, grease, and debris can accumulate in joint crevices, causing binding or corrosion. Wipe joints monthly with a damp cloth, and use a small brush (toothbrush-sized) to clean out set screw holes. In dusty environments (like woodworking or mining), use compressed air to blow out debris—just wear safety glasses to protect your eyes.
3. Lubricate Moving Parts
While vertical lean pipe joints themselves aren't moving parts, the roller track and brackets they support are. Apply a light machine oil or silicone spray to joint pivot points (if using adjustable joints) and to the bolts connecting joints to track brackets. Avoid over-lubricating—excess oil can attract dust, creating a gritty paste that wears down components.
4. replace Worn Joints Proactively
Even the best joints wear out eventually. Keep a stock of replacement
vertical lean pipe joint chrome
and standard joints on hand, and replace any joint that shows signs of fatigue: cracks, bent threads, or permanent bending. A good rule of thumb: if a joint requires tightening more than twice in a month, it's time to replace it. Proactive replacement costs a fraction of the downtime caused by a joint failure.
5. Train Operators to Spot Issues
Your frontline workers—those loading and unloading the conveyor—are the first to notice problems. Train them to recognize signs of joint trouble: unusual noises (squeaks, rattles), track misalignment (materials drifting to one side), or visible rust. Create a simple reporting system (e.g., a mobile app or paper log) for them to flag issues, and reward employees who catch problems early—this fosters a culture of ownership and keeps small issues from becoming big failures.
Conclusion: The Unsung Hero of Conveyor Reliability
Vertical lean pipe joints may not be the most glamorous components in your production facility, but they are undeniably critical. As we've explored, their role in supporting conveyor systems goes far beyond simple connection—they enable flexibility, withstand heavy loads, and keep materials moving safely and efficiently. By following the integration best practices outlined here—from careful planning and material selection to precise installation and proactive maintenance—you can transform your conveyor system from a source of frustration to a competitive advantage.
Remember, the goal isn't just to "install joints"—it's to build a conveyor system that adapts to your needs, reduces waste, and empowers your team to do their best work. Whether you're using vertical lean pipe joint chrome for durability, integrating with aluminum profile for ESD protection, or connecting to a lean pipe workbench for seamless workflow, the principles remain the same: measure twice, choose quality materials, and never underestimate the power of a well-integrated joint.
So, the next time you walk past your conveyor system, take a moment to appreciate those vertical lean pipe joints. They're not just holding up pipes—they're holding up your production, your efficiency, and your bottom line. Invest in them, care for them, and they'll keep your facility moving forward for years to come.