- Company Articles
- Products and Technology
- Product knowledge
- Vertical Lean Pipe Joints for DIY Workshops: Home Use Tips

Vertical Lean Pipe Joints for DIY Workshops: Home Use Tips
Related Product
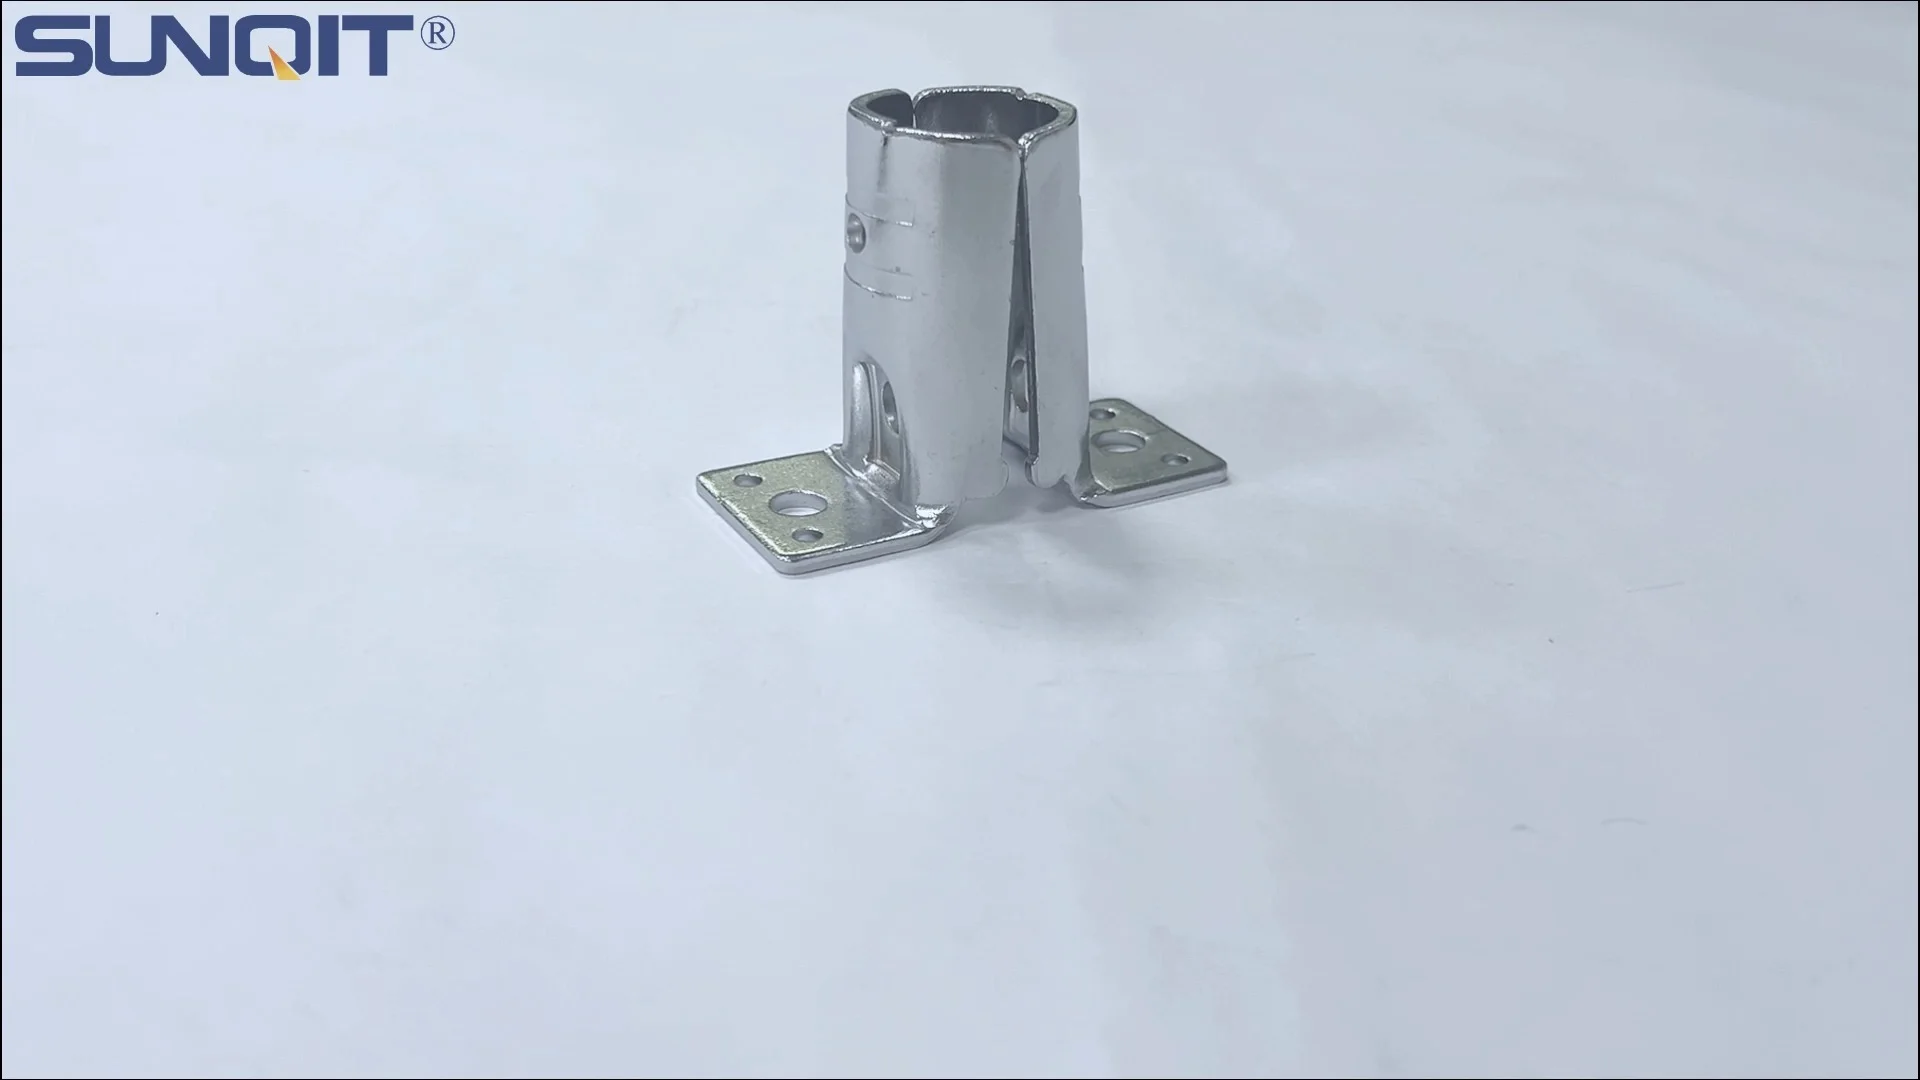
Vertical Lean Pipe Joint
Vertical lean pipe joint is used for 28mm lean pipe fixed on ground and keep it stable.
There's something uniquely satisfying about walking into a workshop that feels like an extension of your creativity. Whether you're a hobbyist woodworker, a electronics tinkerer, or a weekend crafter, your workshop is where ideas take shape—but only if it's organized, functional, and flexible enough to keep up with your projects. If you've ever found yourself tripping over tools, struggling to reach materials, or wishing you could rearrange your space in 10 minutes flat, you're not alone. Clutter and rigidity are the arch-enemies of productivity, and that's where vertical lean pipe joints come in. These unassuming little connectors might just be the secret to transforming your chaotic corner into a streamlined, DIY-friendly haven.
In this guide, we're diving deep into the world of vertical lean pipe joints and how they can revolutionize your home workshop. We'll cover everything from choosing the right materials (spoiler: aluminum lean pipe is a game-changer) to building your first custom project, like a lean pipe workbench that adapts to your needs. We'll even talk about adding mobility with caster wheels and organizing materials with roller tracks—because a workshop that moves and flows with you is a workshop that sparks joy. Let's roll up our sleeves and get started.
Meet Your New Workshop Ally: Vertical Lean Pipe Joints
First things first: What exactly are vertical lean pipe joints? At their core, they're modular connectors designed to join lengths of lean pipe (also called "lean tubes") at vertical angles, creating sturdy, customizable structures. Think of them as the building blocks of your workshop—no welding, no heavy tools, just simple, click-and-lock (or twist-and-tighten) assembly. Unlike rigid shelving units or prefab workbenches that come in one size and style, vertical lean pipe joints let you design furniture and storage that fits your space, your projects, and your changing needs.
Why "vertical" specifically? Because in home workshops, space is often limited. Floor space is precious, so going vertical is the smart way to maximize storage without crowding your work area. Vertical joints let you build tall shelving, hanging racks, or multi-tiered workbenches that reach upward, keeping tools and materials within arm's reach but out of the way of your actual workspace. And since they're modular, you can start small—a simple shelf—and expand later by adding more pipes and joints. It's like playing with adult Legos, but with a purpose.
I remember my first experience with lean pipe joints vividly. A few years back, my garage workshop was a disaster: a rickety wooden workbench that wobbled when I used a drill, a pile of tools on the floor, and shelves that were either too deep to see what was in the back or too shallow to hold anything useful. I stumbled on a video of someone building a custom workbench with lean pipes and joints, and I was skeptical at first. "How strong can plastic and metal connectors be?" I thought. But after ordering a basic kit (including a few vertical lean pipe joints), I spent a Saturday afternoon assembling a 4-foot workbench. Two hours later, I had a sturdy surface that didn't wobble, with built-in shelving above and a small rack for my drills. It was a revelation. That workbench has since morphed into a mobile cart (thanks to caster wheels), a tool organizer, and even a temporary assembly line for a small woodworking project. All because those vertical joints let me reconfigure it in minutes.
Pro Tip: Vertical lean pipe joints aren't just for straight lines! Many models swivel or pivot, letting you create angled structures (like sloped shelving for easy material access) or even curved designs. Look for "internal rotary aluminum joint" styles if you want maximum flexibility—they're perfect for customizing angles on the fly.
Choosing the Right Materials: Why Aluminum Lean Pipe Stands Out
Now that you're sold on vertical lean pipe joints, the next step is picking the right pipe to pair with them. Lean pipes come in a few materials: stainless steel, plastic-coated steel, and aluminum. Each has its pros and cons, but for home workshops, aluminum lean pipe is hands down the best choice. Let's break down why.
Lightweight but strong: Aluminum is significantly lighter than stainless steel, which matters when you're hauling pipes around your workshop or reconfiguring your setup solo. I've moved my aluminum lean pipe workbench across the garage by myself more times than I can count—something I'd never attempt with a steel version. But don't let the lightness fool you: Aluminum lean pipe is surprisingly strong, with most models supporting 50-100 pounds per linear foot. That's more than enough for power tools, lumber, or boxes of hardware.
Corrosion-resistant: If your workshop is in a garage or basement (hello, humidity!), rust is a real threat. Stainless steel resists rust too, but aluminum takes it a step further—it forms a natural oxide layer that protects against corrosion, even if it gets wet. I once left an aluminum pipe outside during a rainstorm by accident (oops), and when I brought it in a day later, there wasn't a single spot of rust. Try that with a plastic-coated steel pipe, and you'll be scraping off flaky rust in no time.
Easy to work with: You don't need a hacksaw or power tools to cut aluminum lean pipe to length. A simple pipe cutter (the kind you'd use for copper plumbing) works like a charm, and the clean, burr-free edges make it safe to handle. Compare that to stainless steel, which is tough to cut and often leaves sharp edges, or plastic-coated pipes, which can crack if you cut them improperly.
Compatible with all joints: Aluminum lean pipe plays nice with just about every type of vertical lean pipe joint, from basic fixed-angle connectors to fancy internal rotary joints. Most suppliers design their joints to fit standard pipe diameters (usually 28mm or 30mm), so you won't have to worry about mismatched parts. Plus, aluminum's smooth surface means joints slide on easily and tighten securely—no struggling with stuck connectors.
| Material | Weight (per 1m pipe) | Corrosion Resistance | Ease of Cutting | Best For |
|---|---|---|---|---|
| Aluminum Lean Pipe | 0.8-1.2kg | Excellent (natural oxide layer) | Easy (pipe cutter, no burrs) | Home workshops, mobile setups, humid environments |
| Stainless Steel Pipe | 2.5-3.0kg | Good (but heavier) | Hard (needs power tools, sharp edges) | Industrial settings, heavy-duty loads |
| Plastic-Coated Steel | 1.8-2.2kg | Poor (coating can crack, steel rusts) | Medium (coating may chip) | Temporary setups, low-budget projects |
When shopping for aluminum lean pipe, look for "basic aluminum tube" options—they're the most affordable and versatile for home use. Avoid thin-walled pipes (less than 1.2mm thick) if you're building something that needs to support weight, like a workbench. Aim for 1.5mm or thicker walls for sturdiness. And don't forget the accessories! Aluminum pipe accessories like end caps (to cover sharp edges) and internal rotary aluminum joints (for swiveling connections) will make your projects even more functional.

Building Your First Project: A Custom Lean Pipe Workbench
Now that you've got your materials sorted, let's build something practical: a lean pipe workbench. This is the perfect starter project because it's simple, useful, and teaches you the basics of working with vertical lean pipe joints. Plus, when you're done, you'll have a work surface that's exactly the height, width, and depth you need—no more settling for "close enough" store-bought options.
Step 1: Plan Your Workbench Dimensions
Start by measuring your space. How much room do you have? A standard garage workshop might fit a 4ft x 2ft workbench, but if you're tight on space, go smaller (3ft x 1.5ft works too). Next, decide on height: most people find 36-40 inches comfortable, but adjust based on your height. I'm 5'4", so I built mine at 36 inches—no more hunching over projects! Write down your dimensions: length (L), width (W), height (H).
Step 2: Gather Your Materials
For a basic 4ft x 2ft x 36in workbench, you'll need:
- 4 pieces of aluminum lean pipe (length = H, for the legs: 36in each)
- 4 pieces of aluminum lean pipe (length = L, for the top frame: 48in each)
- 4 pieces of aluminum lean pipe (length = W, for the top frame: 24in each)
- 8 vertical lean pipe joints (to connect the top frame corners)
- 4 vertical lean pipe joints (to connect the legs to the top frame)
- 1 sheet of plywood or MDF (48in x 24in x 0.75in, for the worktop)
- 4 caster wheels (optional, but highly recommended for mobility)
- Hex key (usually included with the joints)
- Pipe cutter (if you need to trim pipes to length)
Pro tip: Buy an extra pipe or two and a few spare joints—you'll thank yourself if you make a mistake or want to add a shelf later.
Step 3: Assemble the Top Frame
Lay out the 48in and 24in pipes on the floor in a rectangle. Take a vertical lean pipe joint and slide it onto one end of a 48in pipe. Then, slide a 24in pipe into the perpendicular socket of the joint—this forms a corner. Tighten the joint with the hex key until it's snug but not over-tightened (you can always adjust later). Repeat this for all four corners, connecting the pipes into a rectangular frame. Once the frame is assembled, give it a gentle shake to check for wobbles—if it moves, tighten the joints a bit more.
Step 4: Add the Legs
Flip the top frame upside down. Take one of the 36in leg pipes and attach a vertical lean pipe joint to one end. Then, position the leg at the corner of the frame, sliding the joint onto the frame's corner pipe. Tighten the joint, and repeat for the remaining three legs. Now, stand the frame upright—your workbench is starting to take shape! Check that all legs are the same length and the frame is level (use a spirit level if you're picky, like me). If one leg is shorter, loosen the joint and adjust the pipe's position.
Step 5: Attach the Worktop
Lay the plywood sheet on top of the frame. Center it so there's an equal overhang on all sides (about 1-2 inches looks clean). Use wood screws to attach the worktop to the frame—pre-drill holes first to avoid splitting the wood. I used 1.5in screws, spacing them every 8-10 inches along the frame pipes. For extra stability, add a few screws through the vertical joints into the worktop—this prevents the top from shifting.
Step 6: Add Caster Wheels (Optional but Awesome)
If you want your workbench to roll, now's the time to add caster wheels. Flip the workbench back over and attach one caster to the bottom of each leg using the included hardware. Make sure two of the casters have brakes—this keeps the bench from rolling away when you're using it. I can't overstate how game-changing this is: I roll my workbench next to my miter saw when cutting wood, then push it out of the way when I need to park my car. Mobility = freedom.
Beginner's Mistake to Avoid: Over-tightening the joints! It's tempting to crank them as hard as possible, but aluminum lean pipe can dent if you tighten the joints too much. Tighten until the joint doesn't spin, then give it a quarter-turn more—you'll get a secure fit without damaging the pipe.

Organizing Materials with Roller Tracks
A workbench is great, but what about all the materials you need to keep within reach? Lumber, metal sheets, boxes of screws—if they're stacked on the floor or buried in a corner, you'll waste time hunting them down. That's where roller tracks come in. These simple, gravity-fed systems let materials slide right to you, making loading and unloading a breeze. And yes, you guessed it—they're easy to build with vertical lean pipe joints and aluminum lean pipe.
Roller tracks consist of a sloped frame with small wheels (rollers) that let materials glide. They're perfect for storing plywood, metal rods, or even finished projects that need to move from one station to another. For home workshops, 38 aluminum roller track is a popular choice—it's lightweight, corrosion-resistant, and compatible with aluminum lean pipe joints. You can find roller tracks in different colors (yellow, black, white) to match your workshop's vibe, but I prefer grey—less likely to show dust!
Building a Simple Roller Track Shelf
Here's how to add a roller track shelf to the side of your lean pipe workbench (it takes about 30 minutes):
- Measure and cut pipes: You'll need 4 short aluminum lean pipes (2 for the top frame, 2 for the bottom frame) and 4 vertical support pipes. The length depends on how much material you want to store—6ft is a good start for most people.
- Build the frame: Use vertical lean pipe joints to create two rectangular frames (top and bottom) with the short pipes. Then, connect the frames with the vertical support pipes, angling the top frame slightly higher than the bottom (a 5-10° slope is enough for gravity to work).
- Attach roller tracks: Screw the 38 aluminum roller track to the top and bottom frames. Make sure the rollers are facing upward and aligned so materials slide smoothly. I used plastic roller track guide rails (grey, to match the rollers) to keep materials from falling off the sides—worth the extra $10 for peace of mind.
- Mount to the workbench: Use L-brackets or extra vertical lean pipe joints to attach the roller track shelf to the side of your workbench. Now, when you need a sheet of plywood, just slide it down the rollers—no heavy lifting required!
I use my roller track shelf for storing 2x4s and plywood scraps, and it's cut my project setup time in half. No more dragging heavy boards across the floor—they glide right to the edge of the workbench. Plus, since it's built with lean pipe, I can easily adjust the slope or add more tracks if I need to store longer materials later.

Pro Tips for Working with Vertical Lean Pipe Joints
Now that you've got the basics down, let's talk about how to take your lean pipe projects to the next level. These tips will save you time, frustration, and maybe even a few trips to the hardware store.
1. Mix and Match Joint Types for Flexibility
Not all vertical lean pipe joints are created equal. Fixed-angle joints are great for sturdy, permanent structures (like workbench legs), but swivel or internal rotary aluminum joints are better for parts that need to move. For example, I added a swivel joint to the roller track shelf mentioned earlier, so I can swing it out of the way when I need extra floor space. Keep a few different joint types on hand—you'll be surprised how often you'll want to tweak a design.
2. Use Pipe Clamps for Extra Stability
For structures that hold heavy loads (like a shelf full of power tools), add pipe clamps between vertical joints. These small, C-shaped clamps tighten around two parallel pipes, reducing wobble and increasing weight capacity. I used them on my workbench's lower shelf (which holds my drill press and sander), and it hasn't budged an inch—even when I'm using the sander at full speed.
3. Label Your Pipes (Yes, Really)
If you plan to take apart and reconfigure your lean pipe structures (and you should—flexibility is the point!), label your pipes with tape or a marker. Write down which part of the structure they belong to ("workbench leg, left front") so you don't have to guess later. I learned this the hard way after disassembling my first workbench and spending 20 minutes trying to figure out which pipe was which.
4. Don't Overcomplicate It
Lean pipe systems are meant to be simple. You don't need to build a 10-tiered shelf with 50 joints on your first try. Start small—a workbench, a tool rack, or a roller track shelf—and build from there. As you get more comfortable with the joints, you can get creative. My current workshop setup started with a single workbench and now includes a mobile tool cart, a parts bin organizer, and a hanging rack for extension cords—all built with the same basic pipes and joints.
Maintenance: Keeping Your Lean Pipe System in Top Shape
Aluminum lean pipe and vertical joints are low-maintenance, but a little care goes a long way in keeping them functional for years. Here's what to do:
- Clean pipes regularly: Wipe down aluminum pipes with a damp cloth to remove dust and grime. If they get greasy (looking at you, mechanics), use a mild soap and water—avoid harsh chemicals that can damage the oxide layer.
- Tighten joints occasionally: Over time, joints can loosen from vibration (like using a power tool on the workbench). Give each joint a quick check with the hex key every few months—tighten any that spin easily.
- Lubricate moving parts: If you're using swivel or rotary joints, add a drop of machine oil to the pivot points once a year to keep them moving smoothly. I use 3-in-One oil, but any light machine oil works.
- replace worn caster wheels: If you added caster wheels, check the bearings occasionally. If they start to squeak or don't roll smoothly, replace them—most hardware stores carry generic caster wheels that fit lean pipe legs.
Beyond the Workbench: Other Lean Pipe Projects for Your Workshop
Once you've mastered the workbench, the possibilities are endless. Here are a few more project ideas to inspire you:
1. Mobile Tool Cart
Build a small cart (2ft x 1.5ft) with caster wheels and vertical lean pipe joints. Add shelves for tools, a pegboard on the side for hand tools, and a handle made from aluminum lean pipe. I use mine to roll tools to wherever I'm working—no more running back and forth between the workbench and the project.
2. Parts Bin Organizer
Use vertical joints to build a multi-tiered rack, then attach plastic bins (the kind with handles) using pipe clamps. Label the bins by part type (screws, nuts, washers) for easy access. I mounted mine above my workbench, and now I can grab what I need without digging through a jumbled drawer.
3. Hanging Bike Rack
Short on floor space? Build a vertical bike rack using aluminum lean pipe and vertical joints. Mount it to the wall, and hang your bike by the front wheel—out of the way but easy to grab for a ride. I built one for my mountain bike, and it freed up an entire corner of my garage.
Final Thoughts: Your Workshop, Your Rules
At the end of the day, the best thing about vertical lean pipe joints is that they put you in control. Your workshop shouldn't be dictated by what's available at the store—it should reflect how you work, what you build, and what you need to be creative. With a few lengths of aluminum lean pipe, some vertical joints, and a little imagination, you can transform a cluttered corner into a space that inspires you to pick up a tool and make something amazing.
So go ahead—order that first kit of vertical lean pipe joints. Start small, make mistakes, and tweak as you go. Your future self (the one with the organized, functional, and totally custom workshop) will thank you.