- Company Articles
- Products and Technology
- Installation And Maintenance
- Video Tutorial: Installing 2020 Aluminum Profile End Caps on Material Racks

Video Tutorial: Installing 2020 Aluminum Profile End Caps on Material Racks
Related Product
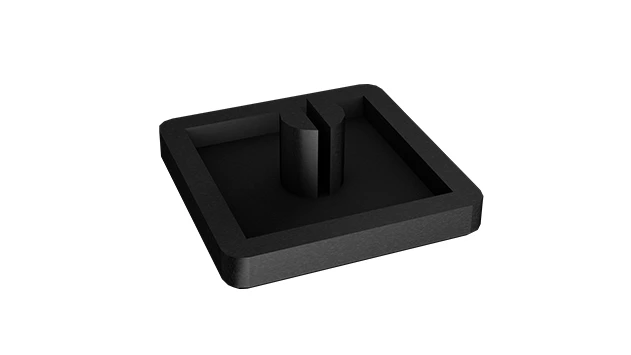
2020 Aluminum Profile End Cap
The aluminum profile end cap adds a finishing touch to your project and closes off profile ends to limit dust and debris buildup, also it can avaid some scratch for material and labor during the assemble work.
Let's start with a simple truth: when it comes to setting up a workshop, warehouse, or production line, the little details often make the biggest difference. You've invested in sturdy aluminum profiles to build material racks, workbenches, or assembly stations—now, how do you ensure those profiles stay safe, functional, and looking sharp for years to come? The answer lies in one small but mighty component: the 2020 aluminum profile end cap. These unassuming pieces of aluminum profile accessories might seem trivial, but they're the unsung heroes of workplace safety and equipment longevity. In this guide, we're breaking down everything you need to know to install them like a pro, with a focus on material racks (because let's face it, those racks take a lot of daily wear and tear).
Why Bother with End Caps? The Case for Small Accessories
Before we dive into the "how," let's talk about the "why." You might be thinking, "Do I really need to install end caps? Can't I just leave the profile ends exposed?" Trust me, I've heard that question more times than I can count—and the short answer is: no, you shouldn't skip them. Here's why:
Safety First: Aluminum profiles are cut to length during manufacturing, and even with precision cutting, the ends can have tiny burrs or sharp edges. Run your hand along an exposed profile end (gently!) and you'll feel what I mean. Now imagine a coworker rushing to grab a box off a material rack, their arm brushing against that edge—that's a recipe for a cut or scrape. End caps cover those edges, turning potential hazards into smooth, safe surfaces.
Protect Your Investment: Aluminum is durable, but it's not invincible. Exposed profile ends collect dust, dirt, and moisture over time. That debris can work its way into the internal channels of the profile (especially if it's a T-slot design), making it harder to attach accessories later or even weakening the structural integrity. End caps act as a barrier, keeping gunk out and your profiles in top shape.
Aesthetics Matter: Let's be honest—exposed, rough-cut profile ends look unfinished. If you take pride in your workspace (and why wouldn't you?), end caps give your material racks a polished, professional look. It's the difference between a "thrown-together" setup and one that says, "We care about quality here."
So, to sum up: end caps are cheap insurance. They cost next to nothing compared to replacing a damaged profile or dealing with a workplace injury, and they take minutes to install. Now, let's get to work.
Gearing Up: What You'll Need for the Job
Before you start, gather your tools and materials. You won't need anything fancy—most of these items are probably already in your toolbox. Here's the checklist:
- 2020 Aluminum Profile End Caps: Duh, right? But double-check the packaging to make sure they're labeled "2020"—profiles come in different sizes (3030, 4040, etc.), and using the wrong size end cap is a common mistake. You'll need one end cap for every exposed profile end on your material rack.
- Soft Cloth or Microfiber Towel: To clean the profile ends before installation. Lint-free is best—you don't want to leave fuzz behind that could interfere with the fit.
- Rubber Mallet: For gently tapping the end caps into place. Avoid metal hammers—they can dent the end cap or scratch the profile.
- Safety Gloves: Optional but recommended. Even with end caps, handling profiles can involve sharp edges during prep, so better safe than sorry.
- Isopropyl Alcohol (Optional): If the profile ends are greasy or extra dirty, a quick wipe with alcohol will help the end cap adhere better. Just let it dry completely before installing.
- Small Flathead Screwdriver (Optional): Useful if an end cap is too tight and needs a little prying to seat properly (but go easy—you don't want to crack the end cap).
Pro tip: Lay out all your end caps on a clean work surface before starting. This way, you can count them to make sure you have enough—there's nothing worse than getting halfway through and realizing you're short by two caps.

Step-by-Step: Installing End Caps on Your Material Rack
Now, let's walk through the installation process. We'll use a standard material rack as our example, but the steps apply to any aluminum profile setup—workbenches, shelving units, you name it. For context, let's imagine we're working with a Material Rack B (3 row and 3 floor), a common design with vertical uprights, horizontal crossbars, and multiple shelves. This rack has plenty of exposed profile ends, so it's a perfect case study.
Step 1: Inspect the Material Rack and Profile Ends
First, take a walk around your material rack and identify all the exposed profile ends. On a 3-row, 3-floor rack like Material Rack B, these will be on:
- Vertical uprights (the tall posts that hold up the rack): top and bottom ends.
- Horizontal crossbars (the bars that connect the uprights and support the shelves): left and right ends.
- Support braces (if your rack has them): any ends that aren't already attached to another profile.
As you inspect, note any profile ends that are bent, dented, or have large burrs. A small burr can be filed down with a fine-grit sandpaper (800-grit or higher) to ensure the end cap sits flush. If a profile is badly bent, you might need to replace it—an end cap can't fix structural damage.
Step 2: Clean the Profile Ends
Grab your soft cloth and give each exposed profile end a good wipe-down. Start by wiping in a circular motion to loosen dust and debris, then wipe straight across to remove it. If there's grease or oil (common in workshops), dampen the cloth with a little isopropyl alcohol—just a few drops, you don't want it dripping—and gently rub the area. Let it air dry for 30 seconds to a minute; alcohol evaporates fast, so this won't take long.
Why clean? Think of it like applying a sticker: if the surface is dirty, the sticker won't stick well. Same with end caps—dust or grease creates a barrier, making it easier for the end cap to pop off later, especially if the rack gets bumped or vibrated (which it will).
Step 3: Align the End Cap with the Profile
Take one 2020 aluminum profile end cap and hold it up to the cleaned profile end. Most end caps have a slightly tapered design—one side is narrower, and it widens to fit snugly inside the profile. Look for the "lip" on the end cap; that's the part that will sit flush against the profile's outer edge when installed correctly.
If your end cap has a hole or slot (some do, for ventilation or to accommodate T-slot bolts), make sure that aligns with the profile's T-slot if needed. For most material racks, though, alignment is straightforward: just make sure the end cap is centered on the profile end.
Step 4: Press or Tap the End Cap into Place
Now, let's get that end cap on. Start by pressing it firmly with your thumb—many end caps are "press-fit" and will seat partially with just hand pressure. If it's tight, don't force it—you could damage the end cap or profile. Instead, gently tap the end cap with your rubber mallet. Hold the mallet at a slight angle (about 45 degrees) and tap around the edges of the end cap, not just the center. This ensures even pressure, so the end cap goes on straight.
Pro tip: If the end cap is really snug, place a small piece of cardboard or a soft cloth over it before tapping—this prevents the mallet from leaving marks. You want the end cap to sit flush with the profile edge; if it's sticking out, tap it a little more until it's even.
Step 5: Check for a Secure Fit
Once the end cap is on, give it a gentle wiggle. It should feel tight—no movement or rattling. If it spins or slides off easily, it's not seated properly. Here's what to do:
- Too Loose: Maybe the profile end is worn or the end cap is defective. Try a different end cap—sometimes manufacturing tolerances vary slightly. If that still doesn't work, a tiny dab of silicone adhesive (clear, waterproof) on the inside of the end cap can help. Just apply a pea-sized amount, spread it evenly, and press the end cap on. Let it dry for 24 hours before using the rack.
- Too Tight: If you can't get the end cap to seat flush, check if the profile end is bent or has a burr you missed. Sand it lightly with fine-grit sandpaper, clean again, and try once more. Never hammer so hard that the end cap cracks—aluminum end caps are sturdy, but they're not indestructible.
Step 6: Repeat for All Exposed Ends
Now, rinse and repeat. Work your way around the material rack, installing end caps on every exposed profile end. Take your time—rushing leads to mistakes, like missing an end cap or installing one crookedly. If you're installing end caps on a large rack (like Material Rack B with 3 rows and 3 floors), take breaks to stretch—those repetitive tapping motions can tire your hands!

Material Rack B Example: How Many End Caps Do You Need?
Let's put this into practice with Material Rack B (3 row and 3 floor), a popular choice for warehouses storing small parts or tools. To calculate how many end caps you'll need, break down the rack's structure:
Vertical Uprights: Most 3-row, 3-floor racks have 4 vertical uprights (one at each corner). Each upright has 2 exposed ends (top and bottom), so 4 uprights x 2 ends = 8 end caps.
Horizontal Crossbars: On each floor, there are 3 rows, and each row has 2 crossbars (front and back) to support the shelves. With 3 floors, that's 3 floors x 3 rows x 2 crossbars = 18 crossbars. Each crossbar has 2 ends, so 18 x 2 = 36 end caps.
Support Braces: Many racks have diagonal or horizontal braces between uprights for stability. If your Material Rack B has 2 braces per side (front and back), that's 4 braces total. Each brace has 2 ends, so 4 x 2 = 8 end caps.
Total: 8 + 36 + 8 = 52 end caps. That might sound like a lot, but buying in bulk is cheaper, and having extras on hand is smart—end caps can pop off over time, especially on high-traffic racks.
End Caps vs. Other Aluminum Profile Accessories: A Quick Comparison
End caps are just one of many aluminum profile accessories—so how do they stack up against others, like rubber strips or plastic covers? Let's break it down in a table:
| Accessory Type | Primary Purpose | Material | Installation Difficulty | Best For |
|---|---|---|---|---|
| 2020 Aluminum Profile End Cap | Covers sharp edges, protects against debris | Aluminum or plastic (aluminum is more durable) | Easy (press-fit or light tapping) | Exposed profile ends on racks, workbenches, or conveyors |
| Aluminum Profile Rubber Strip | Seals gaps, reduces vibration, adds grip | Rubber or silicone | Moderate (slides into T-slots, may need adhesive) | Workbench edges, conveyor rails, or where parts slide on profiles |
| Plastic End Cover (Disposable) | Temporary protection during shipping/installation | Thin plastic | Very easy (snaps on, but not reusable) | New profiles before permanent setup—replace with end caps later! |
As you can see, end caps are the go-to for long-term edge protection, while rubber strips excel at other jobs. For material racks, end caps are non-negotiable—rubber strips won't cover sharp ends, and plastic covers are too flimsy for daily use.
Troubleshooting Common End Cap Headaches
Even with careful installation, things can go wrong. Here are the most common issues and how to fix them:
Issue 1: End Caps Keep Popping Off
If end caps fall off shortly after installation, the problem is usually one of three things:
- Dirty Profile Ends: Did you skip cleaning? Dust or oil could be the culprit. Remove the end cap, clean the profile with alcohol, and reinstall.
- Wrong Size: Double-check that you're using 2020 end caps. If your rack uses 3030 profiles, 2020 end caps will be too small and fall off.
- Vibration: If the rack is near a machine that vibrates (like a conveyor), end caps can loosen over time. Use a small amount of adhesive to secure them.
Issue 2: End Cap Is Cracked or Damaged
Cracks usually happen from overzealous hammering. If an end cap cracks, replace it immediately—even a small crack can let debris in or weaken the fit. To avoid this, tap gently and stop if you feel resistance.
Issue 3: Can't Find End Caps for Odd-Sized Profiles
Most suppliers carry end caps for standard sizes (2020, 3030, 4040), but if you have a custom profile, you might need to get creative. Some people use rubber stoppers or even 3D-printed caps—just make sure they're heat-resistant and durable enough for your workspace.
Pro Tips for Long-Lasting End Caps
Want to make sure your end caps stay put for years? Follow these expert tips:
- Buy Extra: Always order 10-15% more end caps than you think you need. They're cheap, and having spares means you can replace a lost or damaged cap right away.
- Label Your Spares: Store extra end caps in a labeled container (e.g., "2020 Aluminum End Caps – Material Racks") so you don't mix them up with other sizes.
- Inspect Regularly: Add end caps to your monthly equipment check list. Tighten any that are loose and replace any that are cracked or missing.
- Use Adhesive for High-Traffic Areas: For racks near doorways, loading docks, or busy walkways, a little adhesive (like Loctite Clear Silicone) can add extra security.
- Clean with Mild Soap and Water: If end caps get dirty, wipe them down with a damp cloth and mild soap—avoid harsh chemicals that can degrade plastic or aluminum finishes.
Wrapping Up: Small Steps, Big Results
Installing 2020 aluminum profile end caps might seem like a minor task, but it's a perfect example of how attention to detail pays off. In less than an hour, you can transform a functional but unfinished material rack into a safe, durable, and professional-looking piece of equipment. And isn't that what we all want for our workspaces? A place where safety is prioritized, tools and materials are protected, and every component works together seamlessly.
So, grab your end caps, your rubber mallet, and get to work. Your hands (and your coworkers' hands) will thank you, your material rack will last longer, and you'll sleep better knowing you've taken care of the little things that make a big difference. Now, go out there and cap those profiles—you've got this!