- Company Articles
- Products and Technology
- Installation And Maintenance
- Video Tutorial: Installing Suction Cup Anti-Slip Foot Adjusters on Material Rack B

Video Tutorial: Installing Suction Cup Anti-Slip Foot Adjusters on Material Rack B
Related Product
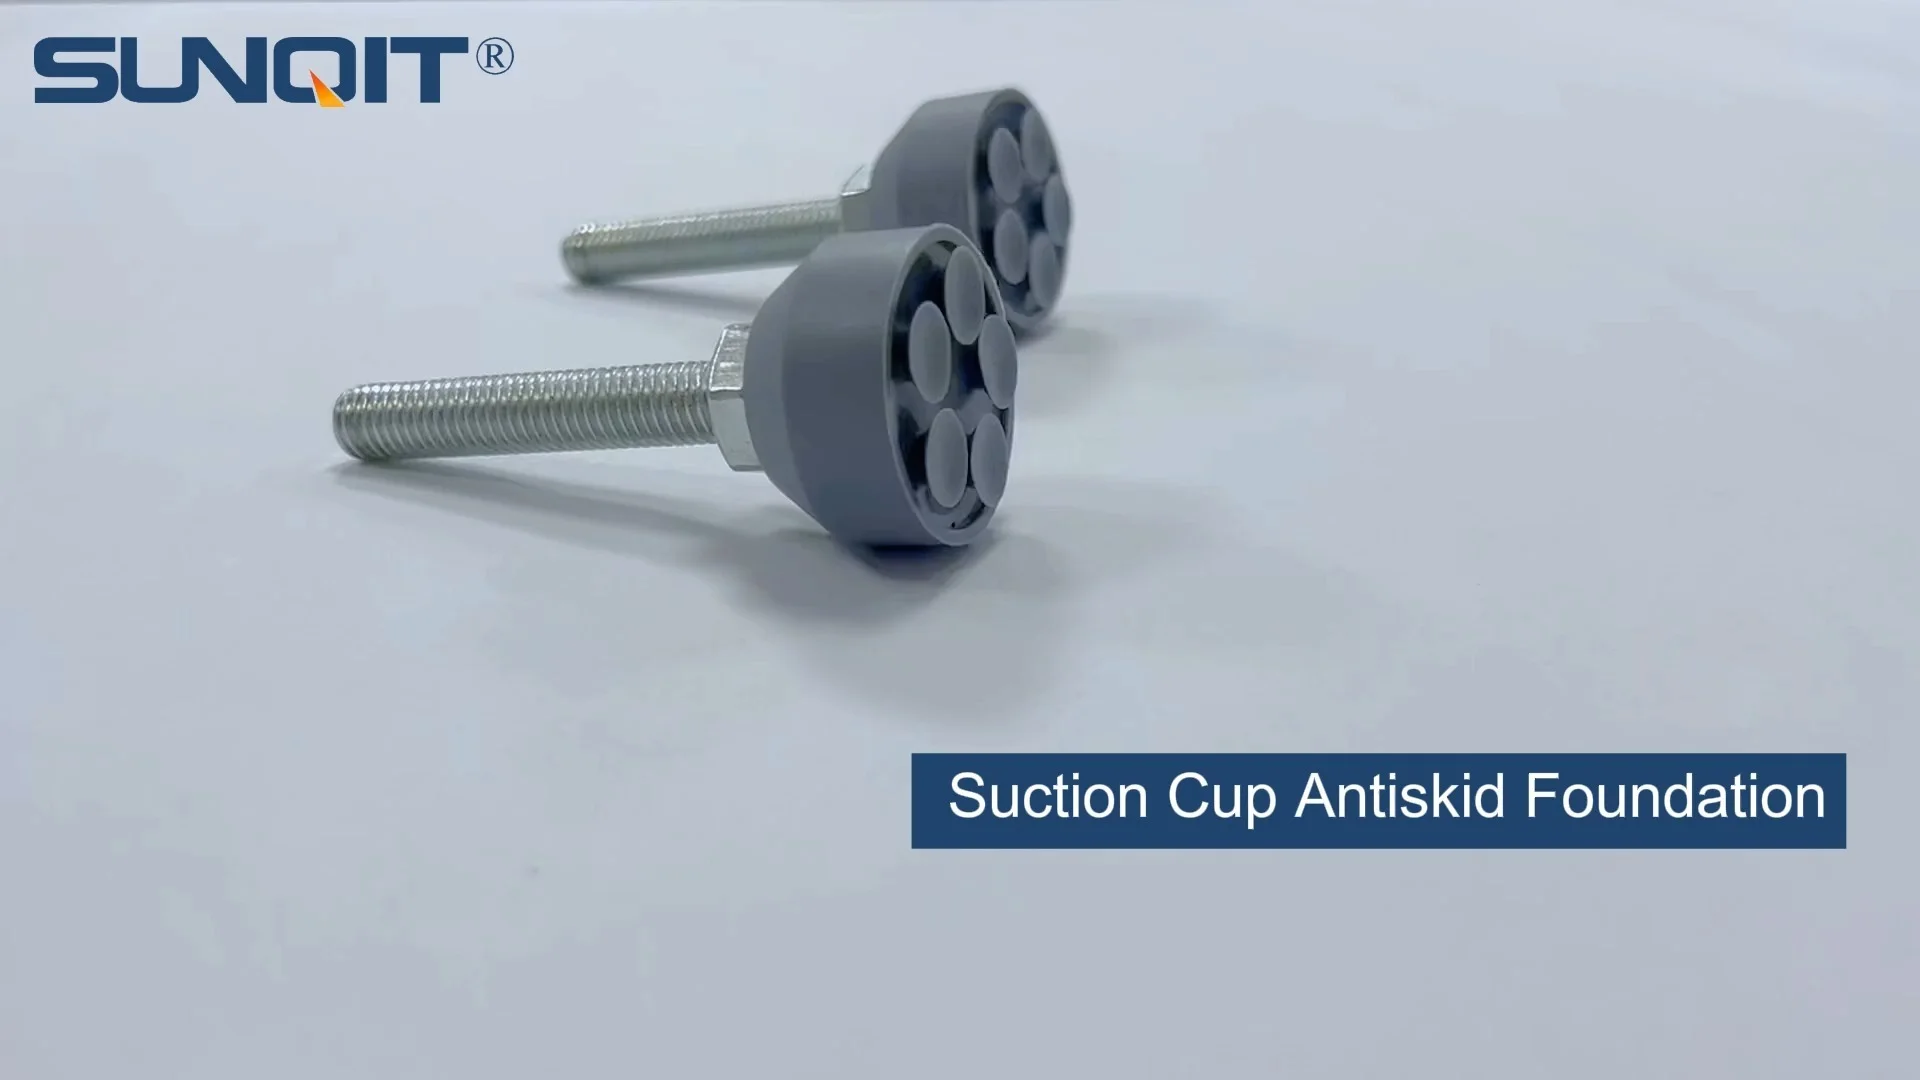
Suction Cup Anti-slip Foot Adjuster
D=35mm suction cup anti-slip foot adjusterï¼screw M10*55ï¼with a blot, used for workbench, flowrack pipe contact with groud.
If you've ever spent time in a busy warehouse or production floor, you've probably seen a Material Rack B (3 row and 3 floor) hard at work. These sturdy, multi-level racks are the unsung heroes of organization, holding everything from small parts to bulky materials with their 3-row, 3-floor design. But even the toughest workhorses need a little support—especially when it comes to stability. A wobbly rack isn't just a nuisance; it's a risk. Materials shift, tools slide, and over time, that instability can lead to damaged inventory or even accidents. That's where suction cup anti-slip foot adjusters come in. These small but mighty accessories are the secret to turning your Material Rack B from "good enough" to "rock-solid reliable"—and today, we're walking you through exactly how to install them. Plus, we'll dive into why this simple upgrade is a game-changer for your lean system, keeping your workspace efficient, safe, and true to lean principles of waste reduction and workflow optimization.
What You'll Need: Tools & Prep
Before we get our hands dirty, let's gather the tools. You won't need anything fancy—just a few basics to make the installation smooth. Here's your checklist:
| Tool Name | Purpose |
|---|---|
| Hex Key (Allen Wrench) | Tightening the adjuster bolts (most kits include the right size, but double-check!) |
| Measuring Tape | Ensuring even spacing between foot adjusters on the rack legs |
| Level (Bubble or Digital) | Checking if the rack is straight before and after installation |
| Rubber Mallet (Optional) | Gently seating the adjusters if they're tight (avoid metal hammers—you don't want to scratch the rack!) |
| Dry Cloth | Cleaning dust/grease off rack legs for better suction cup grip |
Pro tip: Lay out the suction cup anti-slip foot adjusters on a clean surface before starting. Check that each has a smooth suction cup (no cracks!) and that the threaded rod is straight—defects are rare, but better to catch them now than mid-installation.
Step-by-Step Installation: Let's Get Stable
Ready to upgrade your Material Rack B? Follow these steps, and you'll have rock-solid stability in under 30 minutes. Let's start!
Step 1: Prep Your Material Rack B (3 row and 3 floor)
First, clear off the rack. Even if it's empty, double-check the 3 rows and 3 floors for any loose debris—you don't want a stray bolt rolling into your workspace. Next, move the rack to its final position (or as close as possible). Installing the feet and then dragging the rack can twist the legs, so get it in place now. Once positioned, use your level to check if the rack is already wobbling. Place the level on the top shelf, front to back and side to side. Note which legs are lifting—those are the ones that'll need extra adjustment later.
Grab your dry cloth and wipe the bottom 4-6 inches of each rack leg. Dust, oil, or even old tape residue can prevent the suction cups from sticking. A clean surface = a strong grip—trust us, this step is worth the 2 minutes.
Step 2: Align the Foot Adjusters with the Rack Legs
Most Material Rack B models have pre-threaded holes at the bottom of each leg—these are for accessories like our suction cup adjusters. If your rack doesn't have holes (uncommon, but possible), stop here! You'll need to drill and tap threads first (we recommend a 10mm drill bit and M8 tap for standard adjusters). But assuming you have pre-threaded legs, let's move on.
Take your measuring tape and measure the distance from the floor to the bottom of the leg (this is just a rough estimate for now). Then, hold a foot adjuster up to the leg—threaded rod pointing up, suction cup facing down—and mark where the rod will enter the leg. You want the adjuster to extend 1-2 inches below the leg when fully tightened (this gives room to adjust height later). If your rack has adjustable leg levelers already, remove them first—these suction cup adjusters replace them.
Step 3: Attach the Suction Cup Anti-Slip Foot Adjusters
Now, grab a foot adjuster and screw it into the bottom of a leg by hand. Turn it clockwise until it's snug—don't use tools yet! Hand-tightening ensures you don't cross-thread the rod (a common mistake that strips the leg's threads). Repeat this for all four legs. Once all adjusters are hand-tightened, take a step back. Do they look evenly spaced? If one is sticking out way more than the others, unscrew it and readjust—even alignment now makes leveling easier later.
Pro tip: If the threads feel tight, apply a tiny drop of machine oil to the rod (not the suction cup!). This helps it screw in smoothly without binding. Wipe off excess oil with a cloth to avoid gunk buildup.
Step 4: Level the Rack (The "Lean System" Secret Sauce)
Here's where the magic happens. Place your level back on the top shelf. Let's start with front-to-back leveling: if the bubble leans toward the front legs, loosen the front adjusters (turn counterclockwise) to lower them, or tighten the back adjusters (clockwise) to raise the back. Go slow—small turns (1/4 rotation at a time) make a big difference. Once the bubble is centered front-to-back, move to side-to-side. Same logic: if the left side is low, tighten the left adjusters to raise them, or loosen the right to lower.
As you adjust, press down gently on the suction cups with your palm. This helps them "seal" to the floor—think of it like pressing a suction cup onto a window. You'll hear a soft "pop" when the air is squeezed out—that's the grip engaging! For uneven floors (we've all seen those warehouse cracks), don't stress if one adjuster needs to extend an inch more than the others. The goal is stability, not perfectly equal legs.
Once level, give the rack a gentle shake (side to side, front to back). No wobbling? Great! If it still moves, check which leg is lifting—tighten that adjuster 1/2 turn and test again. Repeat until the rack feels planted.
Step 5: Secure the Adjusters (And Avoid Stripping Threads!)
Now that everything's level, grab your hex key. Tighten each adjuster's bolt (the one where the rod meets the leg) to lock it in place. But don't overdo it! These are usually plastic or nylon bolts—cranking too hard will strip the threads. A good rule: tighten until you feel resistance, then add a 1/8 turn. That's "snug," not "vice-grip tight."
Double-check all four adjusters. Is any suction cup peeling up at the edges? If so, loosen that adjuster, reposition the cup to lay flat, press down again, and retighten. A warped cup won't grip—if it's damaged, swap it out for a spare (most kits include an extra, just in case).
Step 6: Test with Weight (Because "Good Enough" Isn't Lean)
Time for the final test: load the rack! Start with a few boxes or materials on the bottom shelf (heaviest items go low for balance, per lean system best practices). Let it sit for 5 minutes—this gives the suction cups time to fully adhere. Then, push gently on the top shelf from different angles. No sliding? No creaking? No wobbling? You're golden! If the rack shifts, check if a suction cup popped loose—just re-press it and retighten the adjuster.
Bonus test: Place a marble on the top shelf. If it rolls, the rack's still slightly unlevel—tweak the adjusters until the marble stays put. Trust us, this "marble test" has saved us from many a wobbly rack in the past!

Troubleshooting: When Things Don't Go Smoothly
Even with careful steps, hiccups happen. Here's how to fix the most common issues:
- Suction cups won't stick: Check the floor—if it's greasy (common in auto shops) or porous (like concrete with large cracks), the cups can't seal. Wipe the floor with isopropyl alcohol, or add a thin rubber (cut from an old tire) under the cup for extra grip.
- Rack still wobbles after leveling: The legs might be bent (it happens with heavy loads!). Place a straightedge along the leg—if it curves, gently bend it back (use a pipe wrench with a cloth to avoid scratches). Then re-level.
- Threads stripping: Stop turning! If the adjuster spins freely without tightening, the leg's threads are stripped. Solution: Wrap the threaded rod with Teflon tape (3-4 layers) to add thickness, then screw it in—this creates a temporary fix until you can replace the leg (rare, but doable).

Why This Matters for Your Lean System
You might be thinking, "It's just a foot adjuster—how does this tie into lean system principles?" Great question! Lean is all about creating value while eliminating waste, and stability plays a huge role in that. A wobbly Material Rack B (3 row and 3 floor) leads to:
- Wasted time: Stopping to pick up fallen materials or re-stack items that shifted.
- Damaged inventory: Scratched parts or crushed boxes from unstable storage.
- Safety risks: A rack that tips is a hazard for your team—lean systems prioritize people, too!
By installing suction cup anti-slip foot adjusters, you're eliminating these wastes. Your team can focus on their work instead of worrying about the rack, materials stay intact, and the workspace stays safe. It's lean in action—small change, big impact.

Maintenance Tips: Keep It Stable for Years
Your install is done, but a little upkeep goes a long way. Here's how to keep those adjusters working like new:
- Monthly check: Tighten the adjuster bolts (1/8 turn) and press the suction cups to re-seal them—floors settle, and vibrations can loosen things.
- Clean the cups: Every 3 months, wipe the suction cups with warm, soapy water to remove dirt buildup. Avoid harsh chemicals—they can degrade the rubber.
- replace when needed: If a cup cracks or loses its grip (no more "pop" sound), swap it out. Most suppliers sell replacement suction cups—no need to buy a whole new kit.
Wrapping Up: Your Material Rack B, Now Better Than Ever
Congratulations! You've just upgraded your Material Rack B (3 row and 3 floor) from "functional" to "lean system superstar." With suction cup anti-slip foot adjusters keeping it stable, you're not just protecting your materials—you're investing in a smoother, safer, more efficient workspace. Remember, lean isn't about perfection; it's about small, intentional improvements that add up. This install is exactly that: a simple fix with massive returns.
So go ahead—load up those 3 rows and 3 floors with confidence. Your rack's got this, and so do you. Here's to stable storage, happy teams, and a lean system that keeps winning!