- Company Articles
- Products and Technology
- Product knowledge
- Workbench E Assembly: Using Lean Pipe Clamp B for Adjustable, Stable Workstations

Workbench E Assembly: Using Lean Pipe Clamp B for Adjustable, Stable Workstations
Related Product
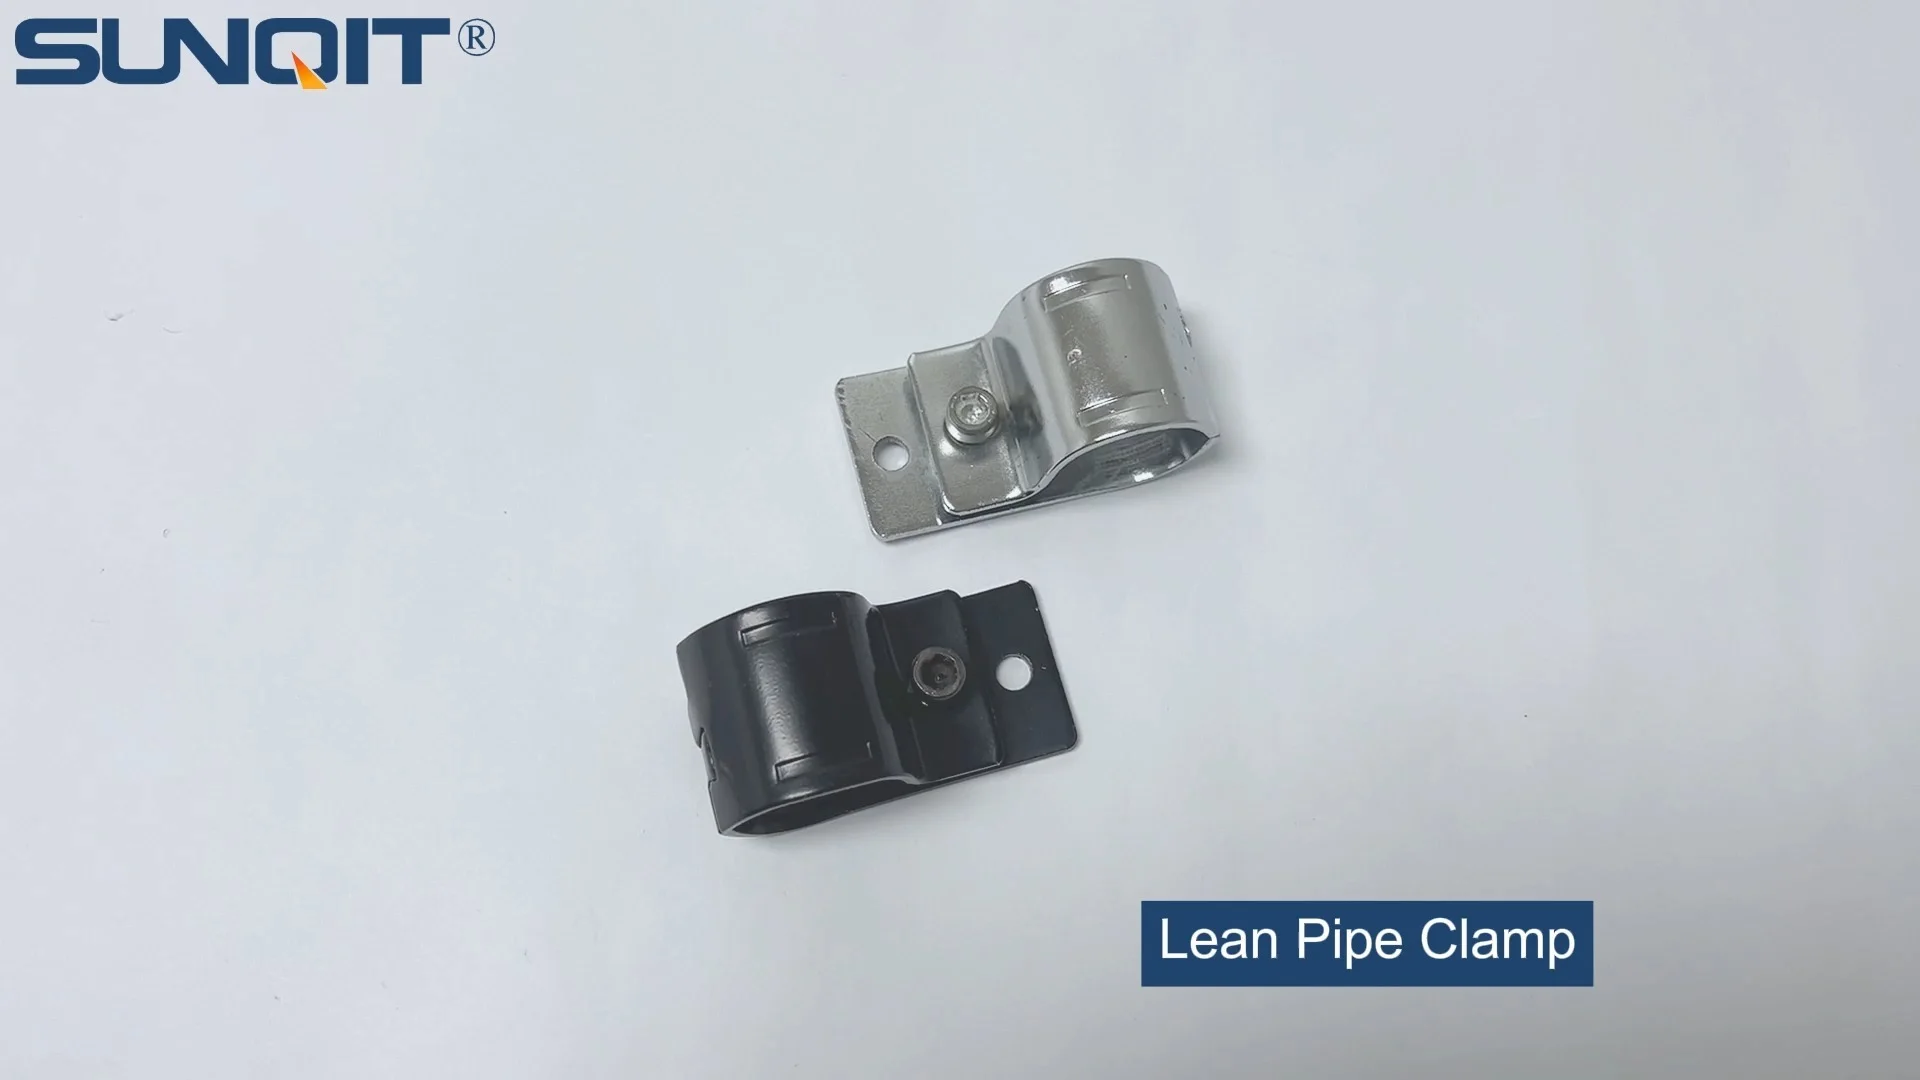
Lean Pipe Clamp
Lean pipe clamp is used for rack system hang monitor or other panel for workbenck, flowrack in production daily use.
In the world of manufacturing, workshops, and even home garages, the right workstation can make all the difference between chaos and productivity. Whether you're assembling electronics, building small parts, or organizing tools, a workspace that's sturdy, flexible, and tailored to your needs isn't just a luxury—it's a necessity. That's where Workbench E comes in. Designed with lean principles in mind, this single-deck workbench (without casters, but highly customizable) is built to adapt to how you work, not the other way around. And at the heart of its adjustability? A small but mighty component: the Lean Pipe Clamp B. In this guide, we'll walk through everything you need to know about assembling Workbench E, why Lean Pipe Clamp B is non-negotiable for stability, and how pairing it with aluminum profile and lean pipe can transform your workflow.
Meet Workbench E: More Than Just a Table
First things first: What exactly is Workbench E? Unlike generic workbenches that come in one size and stay that way, Workbench E is part of a modular system built around the idea of "lean manufacturing"—maximizing efficiency while minimizing waste. It's a single-deck workstation, meaning it has one flat surface, but don't let that simplicity fool you. What makes it special is its skeleton: a frame constructed from lean pipe (often aluminum or steel) and connected using components like Lean Pipe Clamp B. This design lets you tweak its height, add shelves, attach tools, or even reconfigure the entire structure as your needs change.
Let's break down the basics. Workbench E typically includes: a flat tabletop (wood, metal, or composite), a frame made of aluminum lean pipe, connectors (like Lean Pipe Clamp B), and adjustable feet to keep it level on uneven floors. Since it doesn't come with casters by default, it's meant to be a stationary hub—but that doesn't mean it's stuck in one place forever. With the right tools and clamps, you can disassemble and reassemble it elsewhere if your workspace shifts.
Who is Workbench E for? Small manufacturing teams, electronics assemblers, hobbyists, and anyone who needs a stable surface but hates the idea of being locked into a rigid setup. Imagine a startup that starts with a few workers and needs a compact bench, then grows and adds more tools—Workbench E can grow with them. Or a home workshop where one day you're working on small engine parts and the next, you need extra space for a 3D printer. Flexibility is key, and that's where the materials come into play.
The Unsung Hero: Lean Pipe Clamp B Explained
If Workbench E's frame is the bones, then Lean Pipe Clamp B is the muscle that holds everything together. You might not notice it at first glance, but this small connector is what makes the workbench both stable and adjustable. Let's get technical (but keep it simple): Lean Pipe Clamp B is a two-piece clamp designed to fasten lean pipes (or aluminum profile) together at various angles. It consists of a metal bracket and a screw that tightens to secure the pipes, creating a joint that's strong enough to hold weight but loose enough to loosen and reposition when you need to make changes.
Why is this better than, say, welding or glue? Welding is permanent—great for stability, terrible for flexibility. Glue weakens over time, especially under heavy use. Lean Pipe Clamp B strikes the perfect balance: it locks pipes in place firmly enough to support tools, materials, or even a person leaning on the bench, but you can still unscrew it with a hex key if you want to raise the tabletop by a few inches or add a side shelf. It's the reason Workbench E isn't just a "workbench" but a "workbench system."
Not all clamps are created equal, though. Lean Pipe Clamp B is specifically designed for lean pipe and aluminum profile, which are the building blocks of most modular workstations. Its shape matches the diameter of standard lean pipes (usually 28mm or 30mm), ensuring a snug fit that won't slip. It also has a smooth, low-profile design, so it doesn't stick out and catch on tools or materials—a small detail that makes a big difference in day-to-day use.

Parts List: What You'll Need for Assembly
Before diving into assembly, let's make sure you have all the right parts. Workbench E kits usually come with most components, but it's good to double-check. Here's a breakdown of the key pieces, including where Lean Pipe Clamp B and aluminum profile come into play:
| Part Name | Quantity | Purpose |
|---|---|---|
| Aluminum Lean Pipe (1.2mm thickness) | 4 (for legs) + 4 (for frame rails) | Forms the main structure of the workbench frame. |
| Lean Pipe Clamp B | 8–12 (depending on frame size) | Connects vertical legs to horizontal frame rails; secures joints. |
| Workbench Top (single deck) | 1 | Flat surface for working; typically 120cm x 60cm (adjustable). |
| Adjustable Leveling Feet | 4 | Attaches to the bottom of legs to level the bench on uneven floors. |
| Aluminum Profile Connectors | 4 | Reinforces corners where frame rails meet legs (optional but recommended). |
| Hex Key (2.5mm or 3mm) | 1 | Used to tighten/loosen Lean Pipe Clamp B screws. |
| Rubber Mallet | 1 | Gently taps pipes into place without damaging them. |
Pro tip: If you're buying parts separately (not as a kit), make sure the aluminum lean pipe and Lean Pipe Clamp B are compatible. Most suppliers sell them as a set, but double-check the pipe diameter (28mm is standard) and clamp size to avoid mismatches.

Step-by-Step Assembly: From Parts to Productivity
Now, let's get hands-on. Assembling Workbench E is straightforward, but taking your time with each step ensures it's stable and built to last. We'll walk through the process step by step, focusing on how to use Lean Pipe Clamp B correctly—since that's where most people go wrong (either over-tightening, under-tightening, or misaligning the pipes).
Step 1: Unpack and Organize Your Parts
Start by laying out all your components on a clean, flat surface (the floor works if you don't have another table). Separate the aluminum lean pipes by length: you'll have four longer pipes for the legs and four shorter ones for the frame rails (the top and bottom horizontal bars). Set aside the Lean Pipe Clamp Bs, leveling feet, and tools. This might seem tedious, but it prevents you from scrambling for a clamp halfway through assembly.
Step 2: Build the Frame Corners
The frame is a rectangle, so we'll start by building four "corner units"—each made of one vertical leg pipe and two horizontal frame rails (top and bottom). Take one vertical leg pipe and one horizontal rail. Slide a Lean Pipe Clamp B onto the vertical pipe, about 10cm from the top. Then, position the horizontal rail so it meets the vertical pipe at a 90-degree angle, and slide the clamp over the horizontal pipe as well. Now, use the hex key to tighten the clamp screw—snug, but not so tight that you strip the threads. You should feel resistance, but the clamp should still move slightly if you pull on it (we'll fully tighten later).
Repeat this for the other end of the horizontal rail, attaching another vertical leg. Now you have a "U" shape: two vertical legs connected by one horizontal rail. Do this twice to make two "U" frames (front and back of the workbench). Then, connect these two "U" frames with the remaining two horizontal rails (left and right sides), using Lean Pipe Clamp B at each joint. Now you have a rectangular frame with four legs—this is the skeleton of your workbench.
Pro Tip: Use a square tool to check that all corners are 90 degrees. If the frame is wobbly, loosen the clamps slightly, adjust the pipes, and retighten. A square frame is key to a stable workbench.
Step 3: Attach the Leveling Feet
Flip the frame upside down so the legs are pointing up. Screw the adjustable leveling feet into the bottom of each leg. Most feet have a threaded stem that twists into a hole at the end of the pipe—hand-tighten first, then use a wrench if needed (but be careful not to overtighten and crack the pipe). Once all feet are on, flip the frame right side up and set it on the floor. Adjust the feet until the frame is level—this might take a minute, but it's crucial for preventing the workbench from wobbling later.
Step 4: Secure the Frame with Final Tightening
Now it's time to make sure all Lean Pipe Clamp Bs are tight. Go around each joint with the hex key and give the screw a quarter-turn clockwise. Remember: "snug but not stripped." If you hear a creaking sound or the clamp starts to bend, you've gone too far. The goal is to lock the pipes in place so they don't rotate or slide, but still allow you to loosen them later if you need to adjust the frame.
Step 5: Add the Tabletop
Finally, place the tabletop on top of the frame. Most tabletops have pre-drilled holes that align with the frame rails, but if not, you can use additional Lean Pipe Clamp Bs to secure it. For a wood or composite top, you might also use screws (drilling pilot holes first to avoid splitting the material). Once the top is attached, give the workbench a gentle shake to test for stability. If it wobbles, check the leveling feet and clamp tightness—one loose clamp is often the culprit.

Customization Tips: Tailoring Workbench E to Your Needs
One of the best things about Workbench E is that it's a blank canvas. Once you've assembled the basic frame, you can add all sorts of accessories to make it work for your workflow. Here are some popular customizations, many of which rely on—you guessed it—Lean Pipe Clamp B and aluminum profile:
Add Shelves for Extra Storage
Need more space for tools or materials? Use short pieces of aluminum lean pipe and Lean Pipe Clamp B to add a lower shelf halfway up the legs. Measure the distance between the front and back legs, cut two pipes to that length, and attach them using clamps at the desired height. Then lay a plywood or metal sheet across them for a sturdy shelf.
Install a Tool Rail
Keep frequently used tools within arm's reach by adding a tool rail along the back of the workbench. Use a length of aluminum profile (thinner than the frame pipes) and attach it to the back legs with Lean Pipe Clamp B. Then add hooks, magnetic strips, or small baskets to hold screwdrivers, pliers, or tape.
Integrate a Flow Rack for Material Handling
If you're working with parts that need to move from one station to another, attach a small flow rack to the side of Workbench E. Flow racks use roller tracks to let bins or trays slide smoothly, and they can be mounted using—you guessed it—aluminum profile and Lean Pipe Clamp B. This is a game-changer for assembly lines, where keeping materials moving is key to efficiency.
Adjust Height for Ergonomics
Tall or short? No problem. Loosen the Lean Pipe Clamp Bs on the frame rails, slide the legs up or down to adjust the height, and retighten. Most people aim for a tabletop height that keeps their elbows at a 90-degree angle when standing, but experiment to find what's comfortable for you.
Long-Term Maintenance: Keeping Your Workstation Stable and Functional
A well-built Workbench E can last for years, but like any tool, it needs a little care to stay in top shape. Here's how to maintain it:
Check Clamp Tightness Monthly
Over time, vibrations from daily use can loosen Lean Pipe Clamp Bs. Once a month, go around the frame with a hex key and give each clamp a quick quarter-turn to tighten. This prevents the frame from wobbling and extends the life of the pipes (loose joints cause extra stress on the metal).
Clean the Tabletop and Frame
Wipe down the tabletop with a damp cloth to remove grease, dust, or spills—especially if you're working with chemicals or oils. For aluminum lean pipe, a mild soap and water solution works; avoid abrasive cleaners that scratch the surface (which can lead to rust on steel pipes).
replace Worn Parts Promptly
If a Lean Pipe Clamp B starts to strip (the screw won't tighten) or a leveling foot cracks, replace it immediately. Most suppliers sell these parts individually, so you don't need to buy a whole new frame. Keeping spares on hand (like extra clamps or feet) saves you from downtime when something breaks.
Why Lean Pipe and Aluminum Profile Matter: Durability Meets Flexibility
You might be wondering: Why use lean pipe and aluminum profile for Workbench E instead of, say, wood or solid steel? The answer lies in two words: durability and flexibility. Aluminum profile is lightweight but strong—strong enough to support hundreds of pounds, but light enough that you can move the frame if needed. It's also resistant to rust and corrosion, which is a big plus in humid workshops or garages.
Lean pipe, often made from aluminum or steel with a plastic coating, adds another layer of protection. The coating prevents scratches, reduces noise when parts are placed on it, and even resists static (important for electronics work, where ESD workbenches are a must). But the real magic is how it pairs with Lean Pipe Clamp B: the smooth surface of the pipe allows the clamp to grip tightly without damaging the material, even after multiple adjustments.
Compare this to wood, which can warp over time, or solid steel, which is heavy and hard to modify. With aluminum profile and lean pipe, you get the best of both worlds: a frame that's tough enough to handle daily use but flexible enough to grow with your workspace.
Real-World Applications: How Teams Benefit from Workbench E
Still not convinced? Let's look at a real example. A small electronics repair shop in Texas recently switched from generic workbenches to Workbench E. Before, their techs were crammed around a single large table, with tools scattered everywhere and no space for parts storage. They struggled with uneven surfaces (the old table wobbled) and couldn't adjust the height to fit taller and shorter team members.
After assembling two Workbench E stations, they added shelves using aluminum profile and Lean Pipe Clamp B, installed tool rails, and even attached small flow racks to hold replacement parts. The result? Techs reported a 20% increase in repair speed, and the shop owner noted fewer mistakes (no more dropping screws on the floor, thanks to the stable surface). Best of all, when they hired two new employees, they simply bought extra pipes and clamps to build two more workbenches—no need to redesign the entire layout.
Troubleshooting Common Issues: Quick Fixes for Smooth Operations
Even with careful assembly, you might run into a few hiccups. Here are the most common issues and how to fix them:
Issue: Workbench wobbles when you lean on it.
Solution: Check the leveling feet first—one might be loose or not adjusted properly. If the feet are fine, tighten all Lean Pipe Clamp Bs. If the wobble persists, add diagonal braces (using short aluminum pipes and clamps) between the legs for extra stability.
Issue: Tabletop feels uneven.
Solution: This is usually due to uneven legs. Use a level tool on the tabletop to find the low spot, then adjust the corresponding leveling foot until the bubble is centered.
Issue: Lean Pipe Clamp B won't tighten.
Solution: The screw might be stripped, or there could be debris in the clamp. Try cleaning the clamp with a dry cloth, then apply a drop of lubricant (like WD-40) to the screw. If it still won't tighten, replace the clamp.
Conclusion: Building a Workspace That Grows With You
Workbench E isn't just a piece of furniture—it's a tool for building a more efficient, adaptable workspace. By using Lean Pipe Clamp B to connect aluminum lean pipe and profile, you're not just assembling a table; you're creating a system that can evolve with your projects, your team, and your goals. Whether you're a small business owner looking to boost productivity or a hobbyist who wants a workspace that keeps up with your creativity, Workbench E proves that the best tools are the ones that work with you.
So, grab your pipes, clamps, and hex key—and start building. Your future self (and your productivity) will thank you.