- Company Articles
- Products and Technology
- Installation And Maintenance
- Workbench E Compatibility: Vertical Lean Pipe Joint Chrome Installation Tips

Workbench E Compatibility: Vertical Lean Pipe Joint Chrome Installation Tips
Related Product
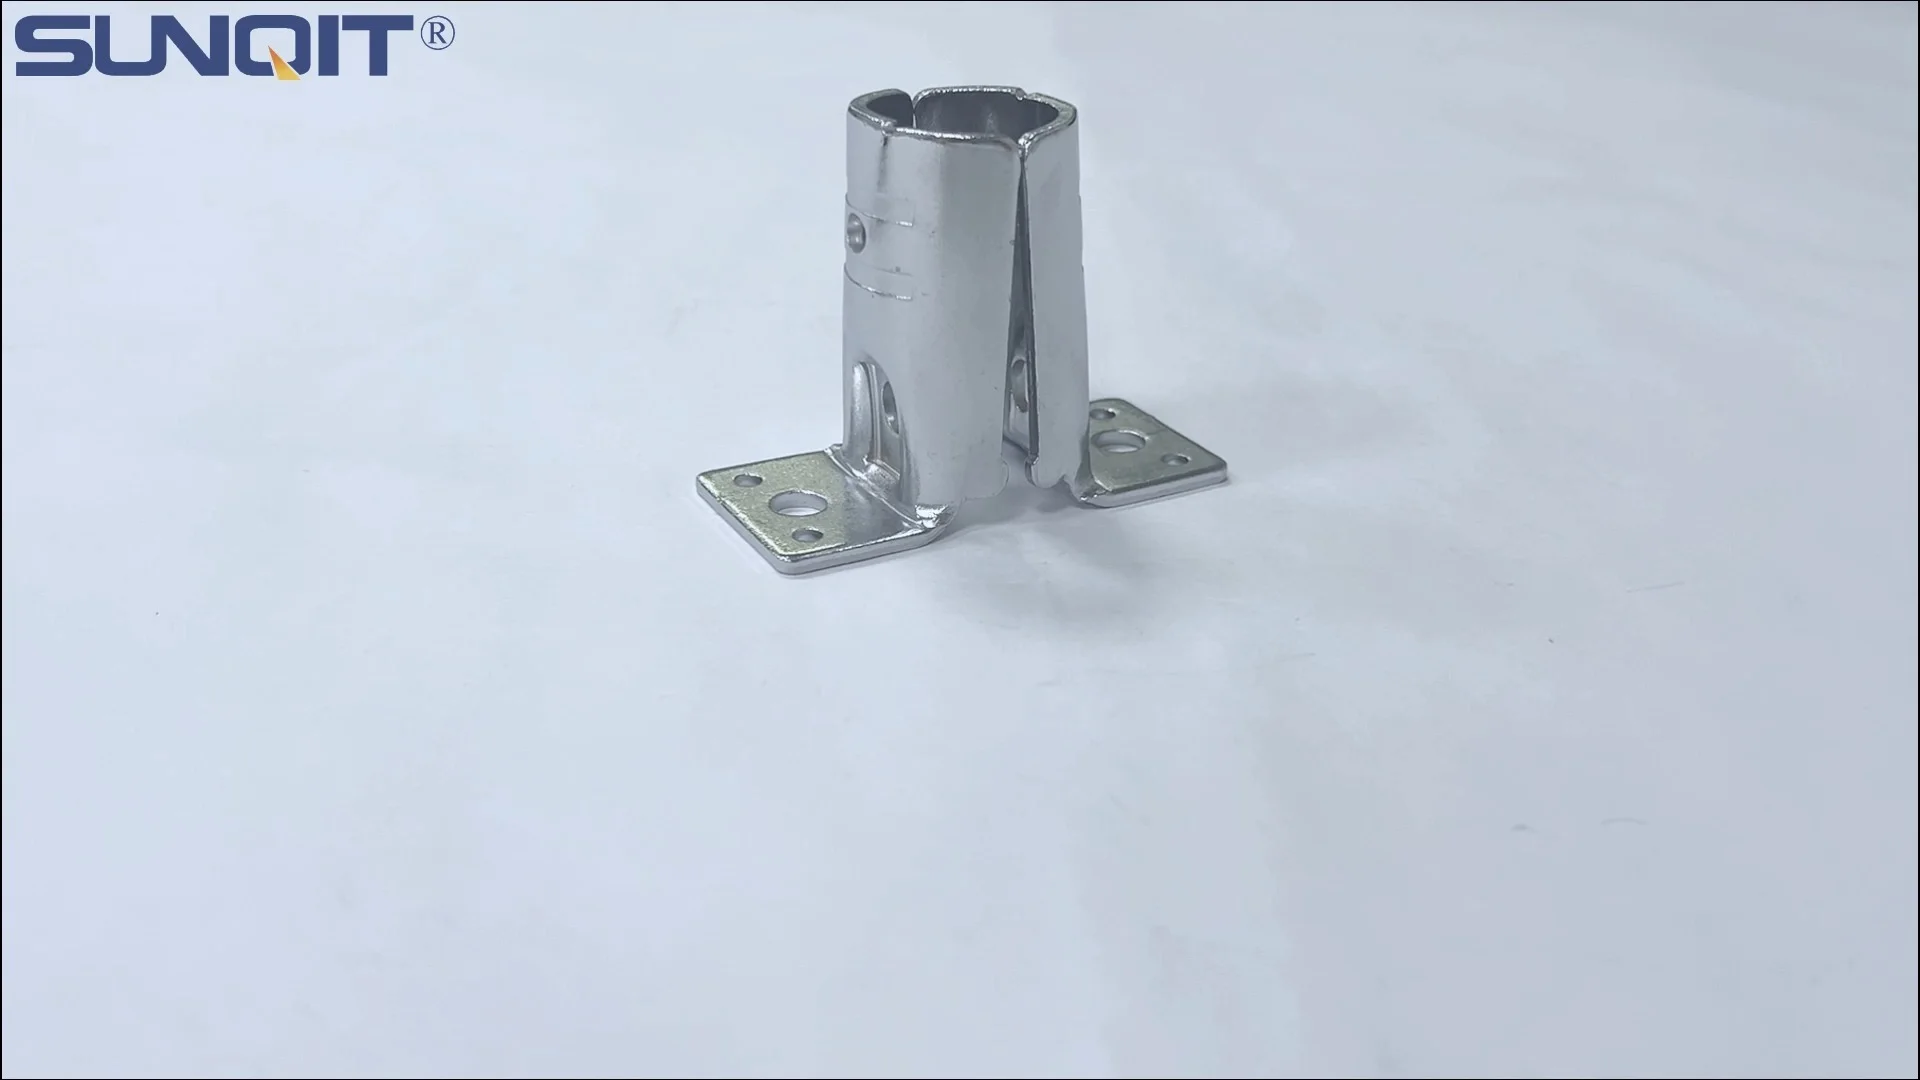
Vertical Lean Pipe Joint Chrome
Vertical lean pipe joint is used for 28mm lean pipe fixed on ground and keep it stable.
A practical guide to seamless assembly for lean manufacturing efficiency
Introduction: The Heart of Lean Workspaces
In the fast-paced world of manufacturing and production assembly, the right tools and workspaces aren't just equipment—they're the backbone of efficiency. Every component, from the sturdiest workbench to the smallest joint, plays a role in keeping operations running smoothly, reducing waste, and ensuring teams can focus on what matters most: creating quality products. Today, we're diving into a pairing that's become indispensable in lean systems worldwide: the Workbench E (single deck-without caster) and the Vertical Lean Pipe Joint Chrome . Whether you're setting up a new production line or upgrading an existing workspace, understanding how these two components work together can transform your workflow from chaotic to streamlined.
Workbench E, with its single-deck design and fixed structure (no casters), is a staple in environments where stability and simplicity are key. It's the kind of workbench that anchors a workstation, providing a reliable surface for assembly, testing, or material staging. But what makes it truly versatile is its compatibility with modular components—like the Vertical Lean Pipe Joint Chrome. This chrome-plated joint isn't just a connector; it's a bridge between rigidity and flexibility, allowing you to build custom shelving, tool racks, or material guides directly onto the workbench. In short, it turns a basic table into a tailored lean solution.
In this article, we'll walk through everything you need to know about installing Vertical Lean Pipe Joint Chrome on Workbench E. From understanding compatibility to step-by-step assembly, troubleshooting common issues, and maintaining long-term performance, we'll cover it all. Let's get started.
Understanding Workbench E: More Than Just a Table
Before we jump into installation, let's take a closer look at Workbench E (single deck-without caster). What sets it apart? Why is it a go-to choice for lean system setups? Let's break down its key features and why it's the perfect foundation for adding Vertical Lean Pipe Joint Chrome.
Key Features of Workbench E
1. Fixed Stability: Unlike mobile workbenches with casters, Workbench E stays put. This is critical for tasks that require precision—think electronics assembly or quality inspection—where even a small shift could disrupt workflow. Its solid base ensures tools, materials, and (work-in-progress) stay exactly where you place them.
2. Single-Deck Simplicity: With a single, flat work surface (typically made of durable materials like aluminum or steel), Workbench E avoids the clutter of multi-tiered designs. This simplicity aligns with lean principles, encouraging teams to keep only what's needed within arm's reach, reducing unnecessary movement and wasted time.
3. Modular Compatibility: While Workbench E itself is fixed, its frame is designed to play well with others. Pre-drilled holes, standardized railings, and a sturdy steel or aluminum frame make it easy to attach accessories—including lean pipes, shelves, and tool holders—using joints like the Vertical Lean Pipe Joint Chrome.
4. Load-Bearing Capacity: Don't let its simple design fool you. Workbench E is built to handle heavy loads, often supporting hundreds of pounds without bending or warping. This makes it ideal for production lines where materials, tools, and even small machinery need a reliable platform.
Pro Tip: When selecting Workbench E, check the manufacturer's specs for weight capacity and surface material. For ESD-sensitive environments (like electronics manufacturing), opt for an ESD workbench variant to prevent static damage to components.
Common Use Cases
Workbench E shines in a variety of settings, but it's particularly popular in:
- Production Assembly Lines: As a dedicated station for step-by-step assembly, where workers need a stable surface and easy access to tools.
- Quality Control Areas: For inspecting finished products, with space to lay out components and testing equipment.
- Material Staging Zones: Holding raw materials or semi-finished goods before they move to the next production step.
- Maintenance Workshops: Providing a fixed space for repairing machinery or tools, with room to organize parts.

Vertical Lean Pipe Joint Chrome: The Unsung Hero of Modularity
Now that we understand Workbench E, let's turn our attention to the star of the show: the Vertical Lean Pipe Joint Chrome. This small but mighty component is what makes it possible to customize your workbench into a fully functional lean workstation. Let's unpack its design, benefits, and why chrome-plated joints are a cut above the rest.
What Is a Vertical Lean Pipe Joint Chrome?
At its core, a Vertical Lean Pipe Joint Chrome is a connector designed to join lean pipes (hollow metal tubes, often steel or aluminum) to vertical surfaces—like the frame of Workbench E. Its "vertical" designation means it's engineered to attach securely to upright beams, allowing you to extend lean pipes horizontally or at angles, creating shelves, racks, or dividers. The "chrome" finish isn't just for looks; it adds a layer of corrosion resistance, making the joint durable in humid or industrial environments.
Most Vertical Lean Pipe Joint Chrome models feature a clamp-style design with set screws or bolts. This allows for quick assembly and disassembly, a hallmark of lean manufacturing, where adaptability is key. Unlike welded joints, which are permanent, these chrome joints let you reconfigure your workspace as needs change—no power tools or welding torches required.
Why Chrome-Plated?
You might be wondering: Why chrome? Why not painted or plain steel? Here's the breakdown:
- Corrosion Resistance: Chrome plating forms a barrier against moisture, chemicals, and rust. In factories where spills or humidity are common, this extends the joint's lifespan significantly.
- Strength: Chrome-plated steel is tough. It resists dents and scratches, even with regular use and heavy loads.
- Easy Cleaning: Unlike painted joints, chrome surfaces wipe clean with a damp cloth, making maintenance a breeze. This is especially important in cleanroom environments or food production facilities.
- Professional Aesthetic: Let's not overlook the visual appeal. Chrome adds a sleek, industrial look that fits well in modern manufacturing spaces, projecting a sense of order and professionalism.
Key Design Features
Not all vertical lean pipe joints are created equal. When shopping for Vertical Lean Pipe Joint Chrome, look for these critical features to ensure compatibility with Workbench E:
- Adjustable Grip: A good joint should have a clamp that can tighten around lean pipes of different diameters (common sizes include 28mm or 30mm). Some models even have rubberized inner liners to prevent slipping.
- Multi-Angle Rotation: While "vertical" refers to the mounting direction, the joint itself should swivel or pivot, allowing you to position lean pipes at 30°, 45°, 90°, or 180° angles. This flexibility is what makes custom setups possible.
- Secure Mounting Hardware: The joint should come with bolts or screws that fit Workbench E's frame holes. Most manufacturers use M6 or M8 bolts, but always check the workbench's specs to be sure.
- Load Rating: Look for the maximum weight the joint can support (e.g., 50kg or 100kg). This ensures it can handle the tools, materials, or shelves you plan to add.

Compatibility Check: Will It Fit? Workbench E and Vertical Lean Pipe Joint Chrome
The most common mistake during installation isn't in the assembly itself—it's assuming compatibility without checking the details. Workbench E and Vertical Lean Pipe Joint Chrome are designed to work together, but only if their specs align. Let's walk through the key factors to verify before you start tightening screws.
1. Frame Material and Thickness
Workbench E's frame is typically made of steel or aluminum. Vertical Lean Pipe Joint Chrome is designed for metal frames, but the thickness of the frame matters. Most joints clamp onto frames up to 2mm thick, but if your Workbench E has a thicker frame (e.g., 3mm), you'll need a joint with an adjustable clamp or longer bolts. Check the workbench's user manual or measure the frame with a caliper to confirm.
2. Hole Spacing and Size
Workbench E's frame likely has pre-drilled holes for attaching accessories. These holes are spaced at standard intervals (often 50mm or 100mm apart) and come in specific sizes (M6, M8, etc.). The Vertical Lean Pipe Joint Chrome's mounting plate must align with these holes. For example, if the workbench has M8 holes spaced 50mm apart, the joint's mounting holes should match that spacing and diameter. If they don't, you may need to drill new holes (not recommended, as it weakens the frame) or use adapter plates.
3. Lean Pipe Diameter
Lean pipes come in different diameters, and the Vertical Lean Pipe Joint Chrome is designed to fit a specific range. The most common lean pipe size is 28mm (1.1 inches), but some systems use 30mm or 40mm pipes. If your joint is sized for 28mm pipes but you're using 30mm, it won't grip properly—leading to instability. Always match the joint's pipe diameter rating to your lean pipes.
4. Load Capacity: Don't Overdo It
Workbench E has a maximum load rating (e.g., 500kg for the entire surface), and the Vertical Lean Pipe Joint Chrome has its own load limit (e.g., 80kg per joint). Even if the joint can handle 80kg, adding four joints to one side of the workbench could exceed the frame's capacity. Always calculate the total weight of the added components (shelves, tools, materials) and ensure it's within both the joint's and workbench's limits.
| Feature | Workbench E (Single Deck-Without Caster) Typical Specs | Vertical Lean Pipe Joint Chrome Typical Specs | Compatibility Notes |
|---|---|---|---|
| Frame Material | Steel or Aluminum | Chrome-Plated Steel | Compatible; chrome resists corrosion when in contact with steel/aluminum |
| Frame Thickness | 1.5mm–3mm | Clamp fits 1mm–2.5mm (adjustable) | For 3mm frames, use joints with extended clamp bolts |
| Mounting Hole Size | M6 or M8 | M6 or M8 (matching) | Check hole spacing (50mm or 100mm) for alignment |
| Lean Pipe Diameter | N/A (workbench surface) | 28mm–30mm (standard) | Match joint diameter to lean pipe size |
| Load Capacity | 300kg–600kg (total) | 50kg–100kg (per joint) | Total added load should not exceed workbench's limit |
Quick Compatibility Test: If you're unsure, grab a sample joint and hold it up to Workbench E's frame. Can the clamp fit around the frame? Do the mounting holes line up? If yes, you're good to go. If not, contact the supplier for an adapter or a different joint model.
Step-by-Step Installation: Putting It All Together
Now that we've confirmed compatibility, it's time to roll up our sleeves and install the Vertical Lean Pipe Joint Chrome on Workbench E. This process is straightforward, but attention to detail will ensure a secure, wobble-free setup. Let's break it down into 7 easy steps.
Tools You'll Need
Gather these tools before you start to avoid delays:
- Hex key set (most joints use 4mm, 5mm, or 6mm hex keys)
- Socket wrench or adjustable spanner (for tightening bolts)
- Measuring tape and pencil (for marking positions)
- Level (to ensure pipes are straight)
- Clean cloth (to wipe down the workbench frame and joint)
- Optional: Thread locker (like Loctite) for long-term stability
Step 1: Prep the Workbench Surface
1. Start with a clean slate. Wipe down Workbench E's frame with a dry cloth to remove dust, oil, or debris. Even small particles can prevent the joint from clamping tightly. If the frame is greasy (common in machine shops), use a mild degreaser and dry thoroughly.
Next, clear the workbench surface. Remove any tools, materials, or equipment to give yourself space to work. If the workbench is against a wall, you may need to pull it forward slightly to access the back frame—just remember to push it back when you're done!
Step 2: Mark Your Mounting Positions
2. Decide where you want to attach the Vertical Lean Pipe Joint Chrome. Will it hold a shelf above the workbench? A tool rack on the side? Measure twice, mark once! Use the measuring tape to find the center or desired height, then make a light pencil mark on the frame. For multiple joints (e.g., two joints for a shelf), measure the distance between them to ensure they're aligned (e.g., 600mm apart for a standard shelf).
Pro tip: Use a level to draw a straight horizontal line across the frame. This ensures all joints are at the same height, preventing your lean pipes from sloping.
Step 3: Attach the Joint to the Frame
3. Place the Vertical Lean Pipe Joint Chrome against the frame, aligning its mounting holes with the pre-drilled holes on Workbench E. insert the bolts (usually supplied with the joint) through the holes and hand-tighten them with a hex key or socket wrench. Don't fully tighten yet—we'll adjust for alignment first.
If the joint has a clamp-style design (instead of bolt-on), position the clamp around the frame, ensuring the mounting plate is flush. Tighten the clamp bolts just enough to hold the joint in place—again, leave room for adjustments.
Step 4: Level and Align the Joint
4. Place the level on top of the joint's pipe holder (the part where the lean pipe will go). Adjust the joint until the bubble is centered, ensuring it's straight vertically and horizontally. If you're installing multiple joints, check that they're aligned with each other using the level or a straight edge (like a long lean pipe).
Once aligned, fully tighten the mounting bolts or clamp. Use a socket wrench for bolts—you want them snug, but don't over-tighten (this can strip the threads or warp the joint). A good rule of thumb: tighten until you feel resistance, then give it a quarter-turn more.
Step 5: insert the Lean Pipe
5. Slide the lean pipe into the joint's pipe holder. Most joints have a set screw (or two) that tightens against the pipe to hold it in place. Loosen the set screw(s) with a hex key, insert the pipe to the desired length, then tighten the set screw(s) until the pipe doesn't rotate or slide. For extra security, some people add a drop of thread locker to the set screw threads—this prevents loosening from vibration over time.
If you're attaching a shelf or crossbar, cut the lean pipe to length first using a pipe cutter or hacksaw. Deburr the edges with a file to avoid sharp edges that could snag gloves or materials.
Step 6: Test Stability
6. Now it's time to put the joint to the test. Gently shake the lean pipe—there should be no wobble or movement. Try pushing down on the pipe (simulating the weight of tools or materials) to ensure the joint holds firm. If it shifts, check the mounting bolts and set screws—they may need a little more tightening.
For added peace of mind, leave the setup overnight and test again the next day. Sometimes bolts loosen slightly as materials settle, so a second check ensures long-term stability.
Step 7: Add Accessories (Optional)
7. With the Vertical Lean Pipe Joint Chrome securely installed, you can now add accessories to complete your lean workstation. Common additions include:
- Shelves: Attach wooden or metal shelves to the lean pipes using additional joints.
- Tool Hooks: Hang pliers, wrenches, or tape dispensers from S-hooks on the pipes.
- Material Guides: Add roller track or swivel roller balls to create a smooth surface for sliding materials onto the workbench.
- Lighting: Mount LED work lights to the pipes for better visibility.
Remember, the beauty of lean systems is adaptability—don't be afraid to experiment and reconfigure as your needs change!
Troubleshooting: Solving Common Installation Headaches
Even with careful planning, you might run into issues during installation. Here are the most common problems and how to fix them:
Issue 1: The Joint Wobbles or Slips
Cause: Loose mounting bolts, undersized lean pipes, or a dirty frame surface.
Solution: Tighten the mounting bolts with a socket wrench (not just a hex key—more torque is needed). If the pipe slips, check that it's the correct diameter for the joint (e.g., 28mm pipe in a 28mm joint). If the frame was dirty during installation, loosen the joint, clean the frame again, and re-clamp.
Issue 2: The Joint Won't Align with Workbench E's Holes
Cause: Hole spacing on the joint doesn't match the workbench's frame.
Solution: Use an adapter plate (available from most lean pipe suppliers) to bridge the gap between the joint and frame. Alternatively, drill new holes in the joint's mounting plate (if possible) to match the workbench's spacing. Note: Drilling new holes may void the joint's warranty, so check with the manufacturer first.
Issue 3: The Lean Pipe Is Crooked
Cause: The joint wasn't level during installation, or the pipe was cut unevenly.
Solution: Loosen the joint's set screw, adjust the pipe until it's straight (use the level), then retighten. If the pipe itself is bent, replace it with a new one—even a small bend can throw off alignment.
Issue 4: The Joint Rusts Over Time
Cause: Chrome plating was scratched during installation, exposing the steel underneath to moisture.
Solution: Sand the rusted area lightly with fine-grit sandpaper, then apply a chrome touch-up paint (available at hardware stores). To prevent future rust, avoid using abrasive cleaners on the joint—stick to mild soap and water.
Issue 5: The Workbench Frame Bends When Tightening the Joint
Cause: Over-tightening the clamp bolts, or the frame is too thin for the joint's pressure.
Solution: Loosen the bolts slightly—you need enough tension to hold the joint, but not so much that the frame warps. If the frame is very thin (less than 1.5mm), add a metal shim between the joint and frame to distribute pressure more evenly.
Maintenance: Keeping Your Setup Strong for Years
A well-installed Vertical Lean Pipe Joint Chrome on Workbench E can last for years—even decades—with minimal maintenance. Here's how to keep it in top shape:
Weekly Checks
Spend 5 minutes each week inspecting the joint and lean pipes:
- Tighten Loose Bolts: Use a hex key to snug up any mounting bolts or set screws that have loosened from vibration.
- Clean the Joint: Wipe away dust, oil, or debris with a dry cloth. For stubborn grime, use a damp cloth and mild soap—avoid harsh chemicals that can damage the chrome finish.
- Check for Rust: Look for signs of corrosion, especially in humid environments. Treat small spots immediately with chrome touch-up paint.
Monthly Deep Clean
Once a month, give the entire setup a deeper clean:
- Remove accessories (shelves, hooks) and wipe down the lean pipes with a cloth.
- Inspect the joint's clamp for wear—if the rubber liner (if present) is cracked or missing, replace it to prevent slipping.
- Lubricate moving parts (if the joint swivels) with a drop of machine oil to keep rotation smooth.
Yearly Overhaul
Every year, take the joint apart completely to check for hidden issues:
Conclusion: Building a Lean Workspace That Grows With You
Installing Vertical Lean Pipe Joint Chrome on Workbench E isn't just about connecting two pieces of hardware—it's about building a workspace that adapts to your needs, reduces waste, and empowers your team to work more efficiently. By understanding compatibility, following the step-by-step installation guide, and staying on top of maintenance, you'll create a lean system that stands the test of time.
Remember, lean manufacturing is a journey, not a destination. The modularity of Workbench E and Vertical Lean Pipe Joint Chrome means you can start small and expand as your business grows—adding more joints, pipes, and accessories to meet new challenges. Whether you're in production assembly, electronics manufacturing, or any industry that values efficiency, this pairing is a game-changer.
So go ahead—grab your tools, start installing, and watch as your once-basic workbench transforms into a hub of productivity. Your team (and your bottom line) will thank you.