- Company Articles
- Products and Technology
- Installation And Maintenance
- Workbench E Integration: 38 Aluminum Roller Track Yellow with Wheel Flange Setup Guide

Workbench E Integration: 38 Aluminum Roller Track Yellow with Wheel Flange Setup Guide
Related Product
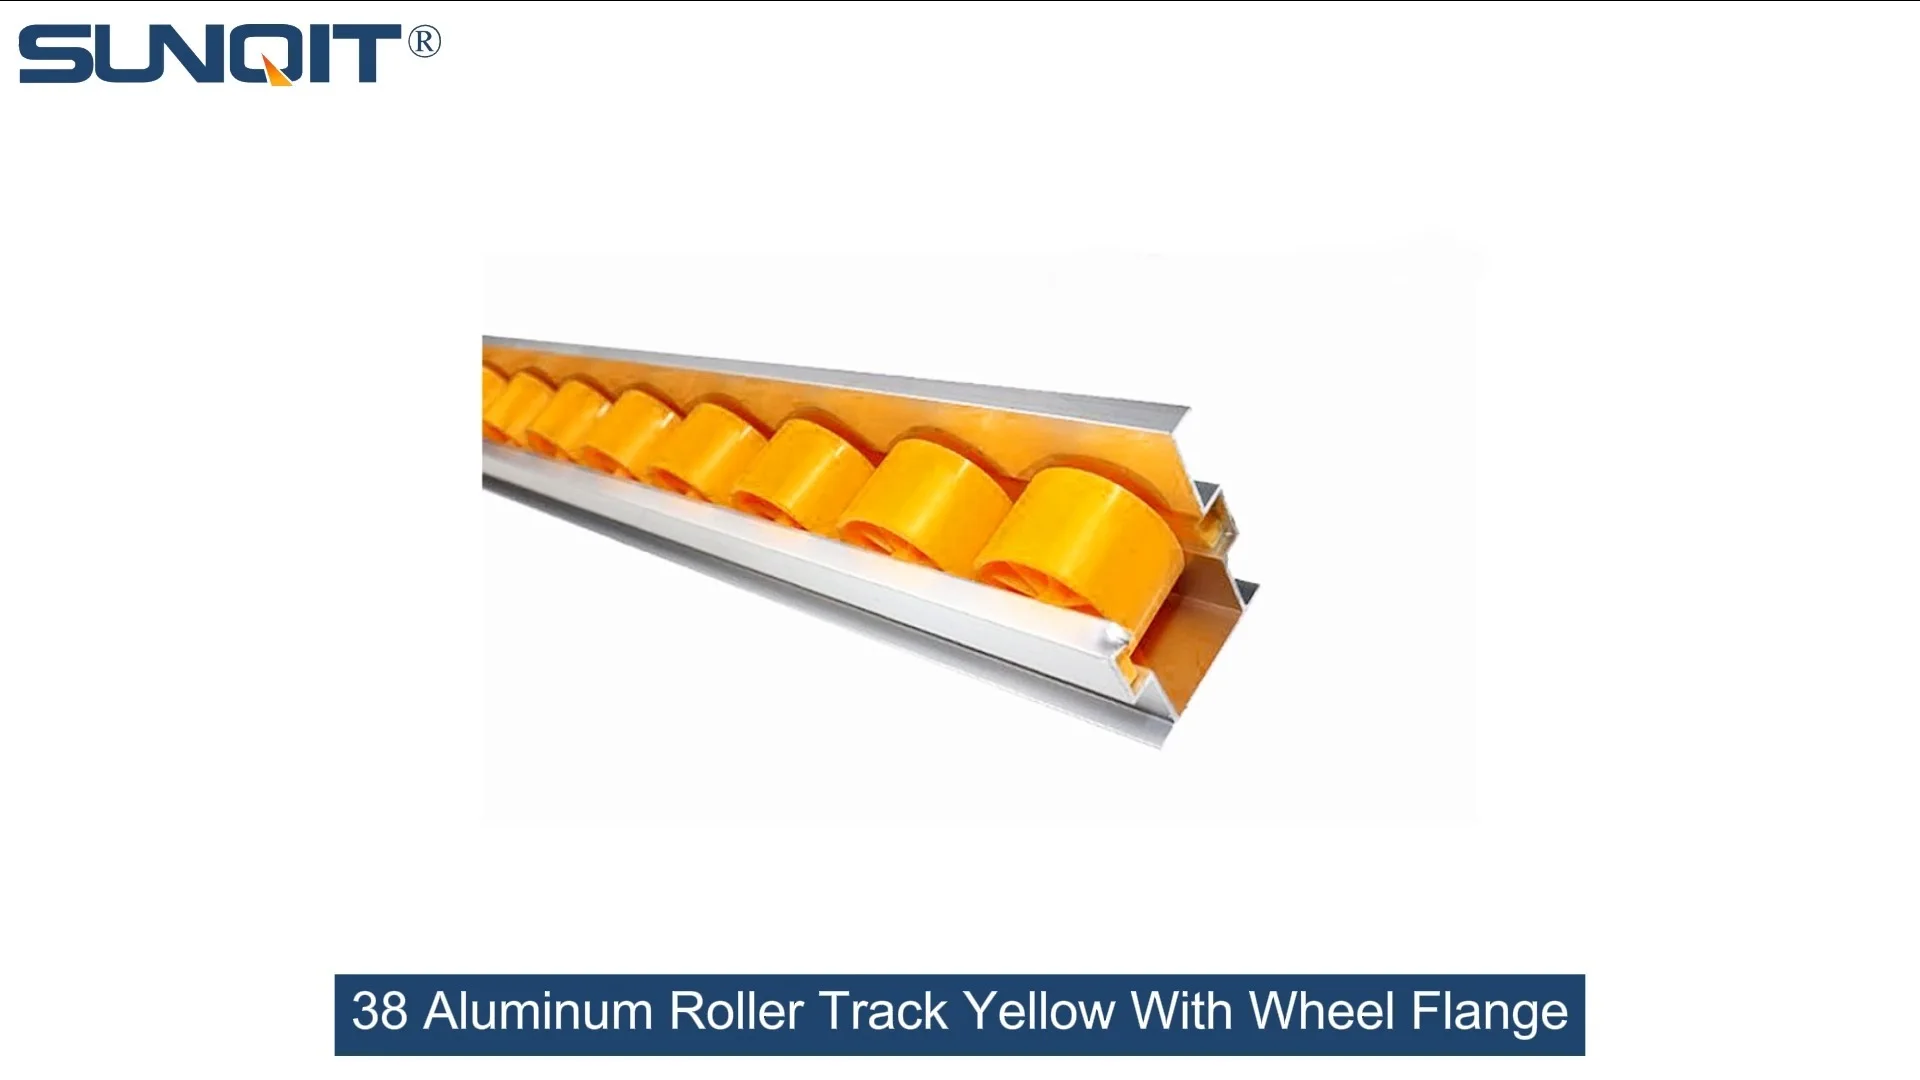
38 Aluminum Roller Track Yellow with Wheel Flange
Heavy duty roller tracks, aluminum frame with plastic wheel, one side with guide keeps goods and materials on the track to prevent bin move to other direction.Aluminum frame makes the rail ani-corrision when the environment are humid.
Introduction
If you've ever worked in a production line—whether it's 3C assembly, medical device manufacturing, or warehouse logistics—you know how much a cluttered, inefficient workspace can slow things down. Parts get lost, workers waste time moving items from one spot to another, and small delays add up to big productivity hits. That's where a well-designed lean setup comes in, and today we're focusing on one of the most impactful combinations: Sunqit's Workbench E paired with the 38 Aluminum Roller Track Yellow with Wheel Flange. This setup isn't just about putting parts together; it's about building a workspace that adapts to your needs, reduces waste, and keeps your team moving smoothly.
Workbench E is a staple in lean production environments for good reason. It's sturdy, modular, and designed to support heavy loads without compromising flexibility. The 38 Aluminum Roller Track Yellow with Wheel Flange adds another layer of efficiency: it lets parts glide from one station to the next, cutting down on manual handling and fatigue. And since both are part of a lean pipe system, you can rearrange or expand the setup whenever your workflow changes—no need to buy new equipment every time you adjust your processes.
Pre-Setup Preparation
Before you start assembling, let's gather all the tools and materials you'll need. This step saves you from running back and forth mid-project, so take a few minutes to check everything off your list:
| Item Name | Purpose | Recommended Quantity |
|---|---|---|
| Workbench E (Single Deck Without Caster) | Base workspace for the roller track setup | 1 |
| 38 Aluminum Roller Track Yellow with Wheel Flange | Core component for smooth part flow | 2-4 (depending on Workbench E length) |
| Internal Rotary Aluminum Joint | Connects aluminum tubes and adjusts angles | 8-12 |
| Basic Aluminum Tube | Builds support frame for the roller track | 6-10 (cut to desired lengths) |
| Lean Pipe Clamp | Secures roller tracks to the support frame | 4-8 per track |
| Allen Wrench Set (3mm, 4mm, 5mm) | Tightens joint screws and clamps | 1 set |
| Rubber Mallet | Gently taps joints into place without damaging parts | 1 |
| Tape Measure | Ensures alignment and correct lengths | 1 |
| Spirit Level | Checks track straightness and angle | 1 |
| Work Gloves | Protects hands from sharp edges and metal burrs | 1 pair per person |
Pro Tip: Lay all parts out on a clean, flat surface before starting. This helps you quickly spot missing components and avoid mixing up similar items (like different joint sizes).
Safety first: Always wear work gloves when handling aluminum tubes and joints—they can have sharp edges or burrs from manufacturing. Keep your workspace free of loose wires, tools, or debris to prevent tripping. If you're working with long tubes, ask a colleague to help you hold them steady to avoid accidents.

Step-by-Step Setup Guide
Now, let's dive into the assembly process. Each step is designed to be straightforward, but take your time—precision here will pay off in a stable, efficient setup.
Step 1: Unbox and Verify Components
Why this matters: Missing or damaged parts can derail your assembly, so it's critical to check everything before you start. Sunqit's packaging usually includes a detailed packing list—use it to cross-reference each item.
For Workbench E: Check the deck for scratches or dents, and ensure all legs are straight. For the roller tracks: Make sure the yellow wheel flanges are intact and the rollers spin freely (spin each one with your finger to test). For the internal rotary aluminum joints: Check that the rotating parts move smoothly without sticking. If any part is missing or damaged, reach out to your supplier right away—delays now are better than problems later.
Step 2: Build the Roller Track Support Frame
Why this matters: The support frame holds the roller tracks in place, so it needs to be sturdy and aligned with Workbench E's dimensions. The internal rotary aluminum joints are key here—they let you adjust angles later if needed.
Start by cutting your basic aluminum tubes to the right lengths. For a standard Workbench E (1500mm long), you'll need four vertical support tubes (each 300mm tall) and two horizontal tubes (each 1450mm long) to connect the vertical ones. Take two vertical tubes and one horizontal tube: insert the ends of the horizontal tube into two internal rotary joints, then attach the joints to the top of the vertical tubes. Use a rubber mallet to tap the joints into place (don't hit too hard—you just want a tight fit). Repeat this for the other side to make two vertical frames. Then, connect the two frames with two more horizontal tubes (one at the bottom, one at the top) using internal rotary joints. Tighten all joints with an Allen wrench—turn until you feel resistance, then stop (over-tightening can damage the threads).
Step 3: Attach the 38 Aluminum Roller Track Yellow with Wheel Flange
Why this matters: The wheel flanges prevent parts from sliding off the track, which is essential for small components like screws, circuit boards, or medical device parts. Proper attachment ensures the track doesn't shift during use.
Lay the roller tracks on top of the support frame's horizontal tubes. Align them so the yellow wheel flanges are on the outer edges (facing away from each other). For each track, place a lean pipe clamp every 300mm along the tube. insert the clamp's screw through the track's mounting hole and into the tube's T-slot. Tighten the screw with an Allen wrench—make sure the track is straight as you go (use a tape measure to check the distance from each end of the frame to the track). If the track is crooked, loosen the clamps and adjust it before re-tightening.
Step 4: Integrate with Workbench E
Why this matters: A secure integration between the roller track frame and Workbench E ensures stability during operation. You can choose to make it permanent or removable—depending on your workflow needs.
If you want a permanent setup: Place the roller track frame on Workbench E's deck. Mark the positions of the frame's legs on the deck, then drill small holes (if allowed) and use bolts to secure the legs to the deck. If you prefer a removable setup: Use heavy-duty lean pipe clamps to attach the frame's legs to Workbench E's side rails. Make sure the clamps are tight enough to hold the frame in place but loose enough to remove later. Once attached, use a spirit level to check that the track is at a slight angle (1-2 degrees) — this angle lets parts flow smoothly without being too fast.
Step 5: Adjust for Stability and Flow
Why this matters: A wobbly frame or a track that's too steep/flat will defeat the purpose of the setup. This step ensures everything works as intended.
Test stability: Gently shake the roller track frame. If it wobbles, check the internal rotary joints—tighten any that are loose. You can also add extra support tubes between the vertical legs for more rigidity. Test flow: Take a small component (like a 3C battery module or a medical device casing) and place it on the highest end of the track. It should roll down slowly and stop at the lowest end (or continue to the next station if connected). If it doesn't move, adjust the angle by loosening the internal rotary joints and tilting the frame slightly. If it rolls too fast, tilt it back a bit. Repeat this until you get the perfect flow.
Step 6: Final Checks
Why this matters: A quick final check can catch small issues before they become big problems.
Walk around the setup and inspect every joint and clamp. Make sure no screws are loose. Spin each roller wheel again—if any are stuck, wipe them with a dry cloth (avoid oil unless the manufacturer recommends it). Check the wheel flanges: Are they all facing the right direction? Do they have any cracks? If yes, replace the track. Finally, ask a colleague to test the setup—get their feedback on how easy it is to use and if any adjustments are needed.

Practical Applications & Benefits
Let's talk about how this setup works in real-world scenarios. For example, in a 3C assembly line: Workers use Workbench E to assemble smartphones. The 38 Aluminum Roller Track Yellow with Wheel Flange is attached to the back of the workbench, so when a worker finishes assembling a phone's motherboard, they place it on the track. The motherboard glides down to the next station where another worker adds the screen. This cuts down on the time workers spend walking between stations, and it keeps parts organized—no more searching for missing components.
Another example: Medical device manufacturing. The setup is used to move sterile parts from the packaging station to the assembly station. The yellow wheel flanges prevent parts from falling off and getting contaminated, which is critical for compliance with medical industry standards. And since the lean pipe system is reusable, if the manufacturer changes their assembly process, they can take apart the track frame and rebuild it in a new configuration—no need to buy new equipment.
The benefits of this setup are clear:
- Efficiency: Reduces manual handling time by up to 30% (based on Sunqit customer data).
- Flexibility: The lean pipe system lets you reconfigure the setup whenever your needs change.
- Durability: Aluminum parts are resistant to rust and wear, so the setup lasts for years.
- Safety: Wheel flanges prevent parts from falling, and the stable frame reduces the risk of accidents.
- Sustainability: Reusable parts mean less waste—aligning with lean manufacturing's "reduce, reuse, recycle" principles.
Sunqit's custom solutions take this even further. If you need a longer track, a different angle, or additional features (like ESD protection for 3C assembly), they can design a setup tailored to your specific industry and workflow. This level of customization is what sets Sunqit apart from other suppliers.

Maintenance Tips
To keep your setup running smoothly for years, follow these maintenance tips:
- Weekly Cleaning: Wipe the roller tracks with a dry cloth to remove dust and debris. For stubborn dirt, use a mild detergent (avoid harsh chemicals that can damage the aluminum).
- Monthly Checks: Inspect all internal rotary joints and lean pipe clamps—tighten any that are loose. Check the roller wheels for wear—replace any that are cracked or don't spin freely.
- Quarterly Adjustments: Recheck the track angle—over time, joints can loosen and the angle can change. Adjust it as needed.
- Annual Overhaul: Take apart the setup and clean all parts thoroughly. replace any worn or damaged components (like joints or clamps). Rebuild the setup and test it again.
Pro Tip: Keep a small stock of replacement parts (like roller wheels and internal rotary joints) on hand. This way, you can fix issues quickly without waiting for new parts to arrive.
Troubleshooting Common Issues
Even with proper setup and maintenance, you might run into small issues. Here's how to fix them:
Issue 1: Roller Wheels Are Sticky
Causes: Dust or debris stuck in the wheel housing, or oil buildup. Solution: Remove the track from the frame. Use a small brush (like a toothbrush) to clean the wheel housing. Wipe the wheels with a dry cloth. If oil is the problem, use a degreaser (follow the manufacturer's instructions) and then dry thoroughly.
Issue 2: Frame Is Wobbly
Causes: Loose internal rotary joints, missing support tubes, or uneven floor. Solution: Tighten all joints. Add extra support tubes. If the floor is uneven, use adjustable feet (like Sunqit's suction cup anti-slip foot adjuster) to level the setup.
Issue 3: Parts Don't Flow Smoothly
Causes: Track angle is wrong, wheels are stuck, or parts are too heavy. Solution: Adjust the track angle. Clean the wheels. If parts are too heavy, add more roller tracks or use a steeper angle (but be careful not to make it too steep).
Issue 4: Joints Keep Loosening
Causes: Over-tightening, or vibration from the production line. Solution: Use a thread locker (like Loctite Blue) on the joint screws—this keeps them tight but allows you to remove them later. If vibration is the problem, add rubber pads between the frame and Workbench E to absorb shock.
Conclusion
The Workbench E and 38 Aluminum Roller Track Yellow with Wheel Flange setup is more than just a collection of parts—it's a tool that can transform your production line. It's easy to assemble, flexible enough to adapt to your needs, and designed to boost efficiency and safety. Whether you're in 3C assembly, medical device manufacturing, or warehouse logistics, this setup will help you streamline your workflow and reduce waste.
And since it's part of a lean pipe system, you can always expand it—add more tracks, connect it to a conveyor, or pair it with Sunqit's Material Rack B for extra storage. The possibilities are endless. So, if you're looking to upgrade your workspace, this setup is a great place to start. It's not just an investment in equipment; it's an investment in your team's productivity and your business's success.