- Company Articles
- Products and Technology
- Installation And Maintenance
- Workbench E Setup: Using Lean Pipe Fixed Clamps for Secure Frame Construction

Workbench E Setup: Using Lean Pipe Fixed Clamps for Secure Frame Construction
Related Product
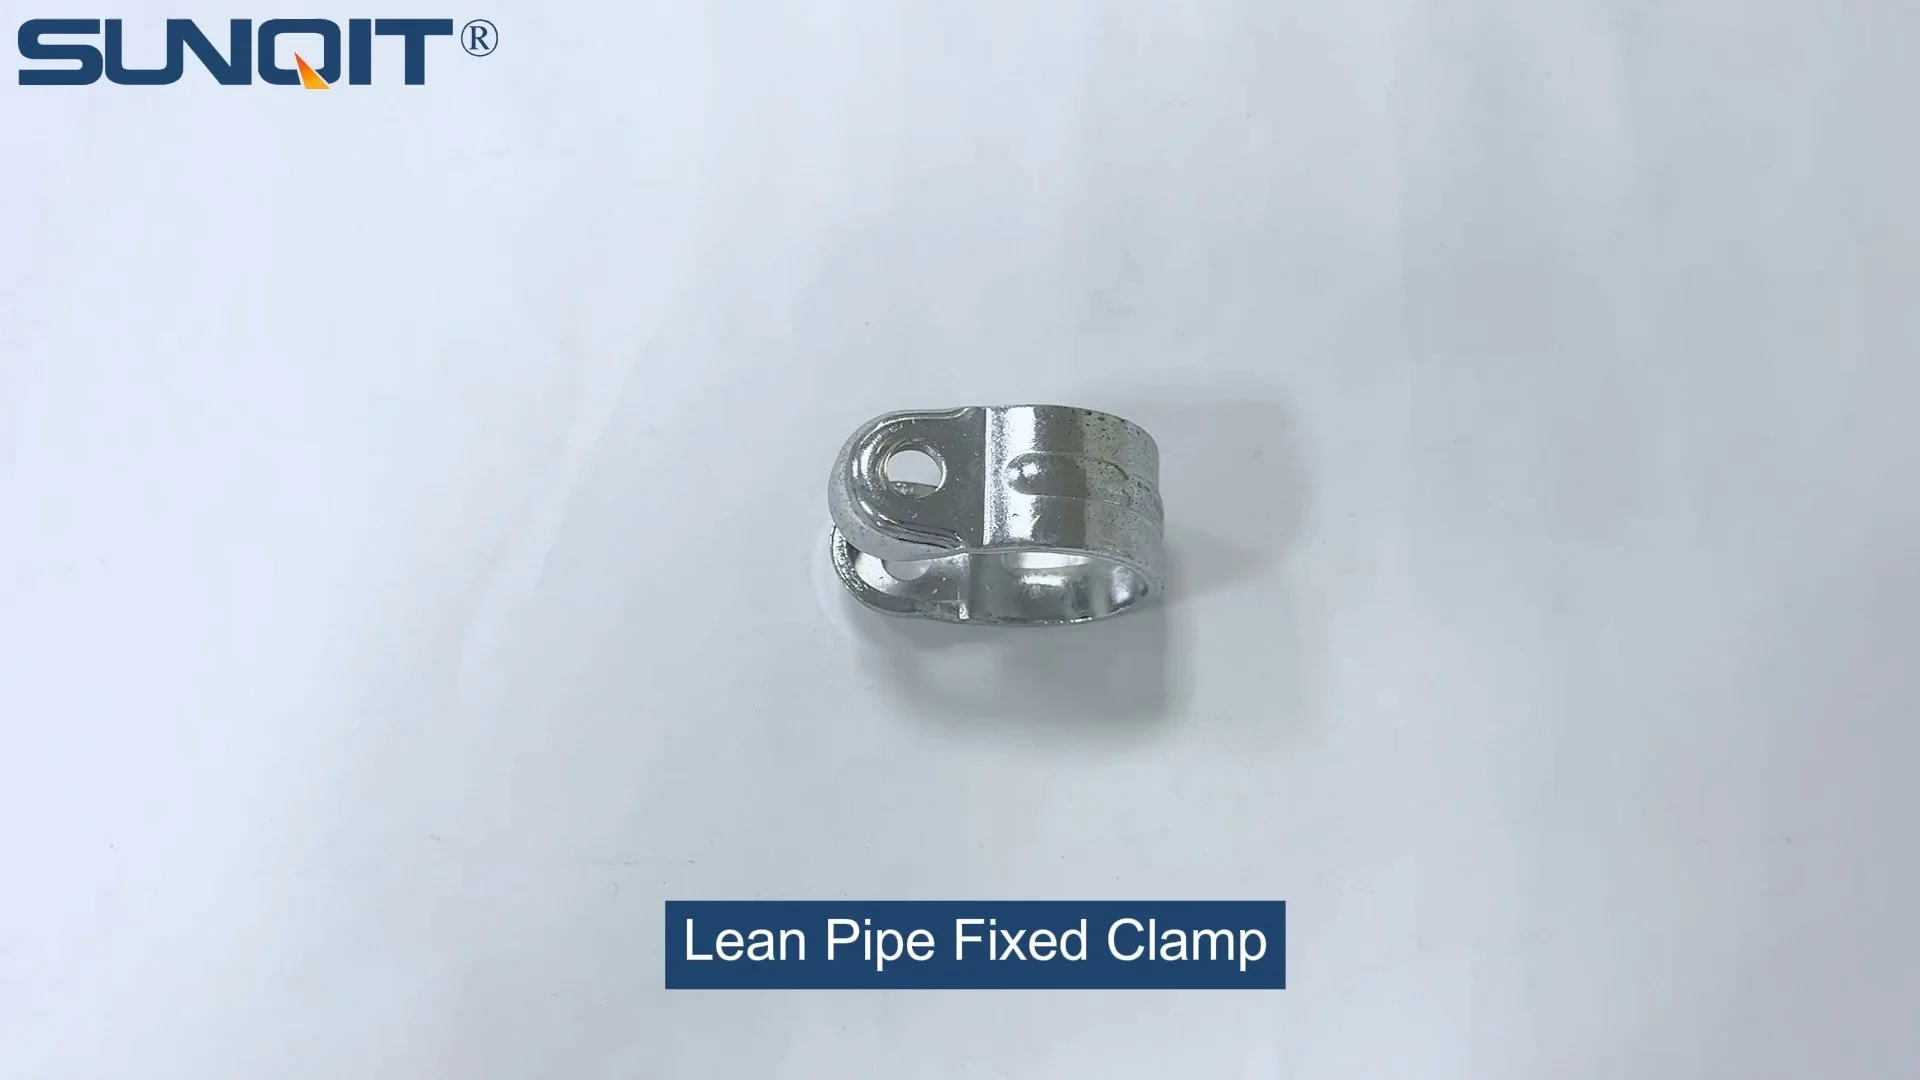
Lean Pipe Fixed Clamp
Lean pipe fixed clamp is used for pipe connector fixing the correct position during workbench flow rack hand trolley assemble work.
If you've ever spent hours hunched over a wobbly workbench, you know the frustration. Tools slide off, parts roll away, and every hammer strike sends a shudder through the frame. It's not just annoying—it's a productivity killer. But what if there was a way to build a workbench that stays solid, even when you're slamming down a wrench or stacking heavy components? Enter Workbench E (single deck-without caster) and the unsung hero of stable frame construction: lean pipe fixed clamps. In this guide, we'll walk through how to set up your Workbench E with precision, using these clamps to create a foundation that stands up to daily wear and tear. Whether you're a garage hobbyist, a small workshop owner, or a production floor manager, this step-by-step breakdown will turn your flimsy setup into a reliable workspace you can count on.
Understanding Workbench E: More Than Just a Table
First, let's get to know Workbench E (single deck-without caster). Unlike generic workbenches that come pre-assembled with flimsy legs and a thin plywood top, this model is designed for customization. The "single deck" refers to its flat, sturdy surface—no extra shelves or drawers to complicate things—and "without caster" means it's built to stay put, making it ideal for areas where mobility isn't needed (though we'll touch on adding casters later if your needs change). What really sets it apart is its compatibility with lean pipe and aluminum profile systems, which means you're not stuck with a one-size-fits-all frame. You can adjust the height, width, and depth to fit your space, and swap out components as your workflow evolves. But here's the catch: without the right hardware to hold it all together, even the most well-designed frame will sag, wobble, or worse—collapse under pressure. That's where lean pipe fixed clamps come in.
Why Lean Pipe Fixed Clamps Are Non-Negotiable
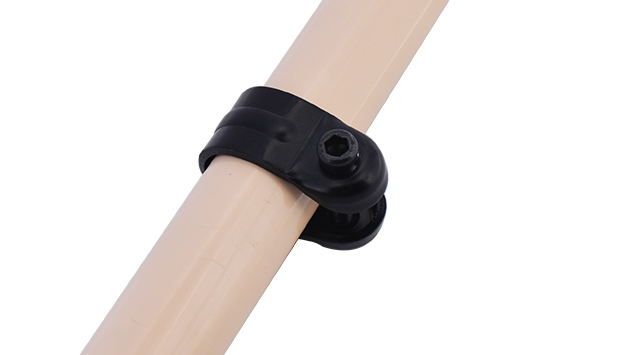
Lean pipe, also known as "flexible pipe," has been a staple in manufacturing and workshops for decades. Its beauty lies in its simplicity: lightweight yet strong, easy to cut to length, and compatible with a variety of joints and clamps. But lean pipe alone isn't enough to build a stable frame. Pipes can twist, joints can loosen, and over time, the constant stress of tools, materials, and daily use can turn a tight assembly into a wobbly mess. That's where fixed clamps step in. These small but mighty hardware pieces lock the lean pipe in place, creating a rigid connection that resists movement. Unlike adjustable clamps, which are great for temporary setups, fixed clamps are designed for permanence—once tightened, they stay put, ensuring your frame maintains its shape for years. Think of them as the glue that holds your workbench together, but stronger and more reliable.
But not all fixed clamps are created equal. Cheap plastic clamps might work for lightweight projects, but when you're dealing with a workbench that holds power tools, metal parts, or heavy machinery, you need something sturdier. Look for clamps made from zinc-plated steel or aluminum—they're resistant to rust, can handle higher torque when tightening, and won't crack under pressure. When paired with lean pipe, these clamps create a frame that's not just secure, but also adaptable. Need to add a shelf later? Simply loosen a few clamps, insert a new section of pipe, and re-tighten. It's that flexibility that makes lean pipe systems a favorite among DIYers and professionals alike.
Materials You'll Need: A Checklist for Success
Before diving into setup, let's gather your materials. Having everything on hand will save you trips to the hardware store and keep the process smooth. Here's a breakdown of what you'll need, along with why each item matters:
| Item | Quantity | Purpose |
|---|---|---|
| Workbench E (single deck-without caster) | 1 | The base unit, including the wooden or metal deck and pre-drilled mounting points for the frame. |
| Lean pipe (1.5mm PE coated) | 4-6 pieces (6ft each) | To build the frame legs and support rails; PE coating prevents scratches and adds grip. |
| Lean pipe fixed clamps | 16-20 | To secure pipe joints and attach the frame to the deck; opt for steel clamps with rubberized grips. |
| Aluminum profile (2020 EU standard) | 4 pieces (3ft each) | Lightweight alternative to lean pipe for cross-bracing; adds rigidity without extra weight. |
| Aluminum profile accessories (end caps, corner brackets) | 8-10 | To finish profile edges (end caps) and connect profiles at corners (brackets). |
| Adjustable leveling feet | 4 | To stabilize the workbench on uneven floors; essential for preventing wobble. |
| Rubber mallet | 1 | To gently tap pipes and profiles into place without damaging them. |
| Tape measure and carpenter's square | 1 each | To ensure frame dimensions are accurate and corners are perfectly square. |

Step-by-Step Setup: Building Your Frame the Right Way
Now that you have your materials, let's start building. This process takes about 2-3 hours, but take your time—rushing leads to mistakes, and a wobbly frame is harder to fix later. We'll break it down into five easy steps.
Step 1: Measure Your Space and Plan the Frame
First, clear the area where your workbench will go. Use the tape measure to mark the dimensions: standard Workbench E decks are 4ft wide by 2ft deep, but adjust based on your space. Once you have the footprint, decide on the height—most workbenches are 36in tall, but if you're taller or shorter, adjust accordingly. Write down your measurements: height (from floor to deck), width (left to right), and depth (front to back). This will be your guide for cutting the lean pipe.
Pro tip: Add 2in to the height if you plan to use the workbench for standing tasks—you'll thank yourself later for the extra legroom. Also, check for obstacles like outlets or door frames that might limit width or depth. It's better to trim an inch off now than to have a workbench that doesn't fit.
Step 2: Cut and Prepare the Lean Pipe
Using a pipe cutter or hacksaw, cut your lean pipe to the lengths you measured. For a standard 36in tall, 4ft wide, 2ft deep workbench, you'll need: 4 legs (36in each), 2 front/back rails (4ft each), and 2 side rails (2ft each). If you want extra stability, add 4 cross-braces (2ft each) to connect the legs diagonally—this prevents swaying when you lean on the bench.
After cutting, use sandpaper to smooth any rough edges on the pipe ends. The PE coating might fray a bit, but a quick sand will prevent splinters and ensure the fixed clamps grip tightly. Wipe the pipes down with a damp cloth to remove dust and debris—this helps the clamps adhere better.
Step 3: Assemble the Frame with Fixed Clamps
Lay out the pipes on a flat surface (like a garage floor) in the shape of your frame. Start with the legs: place two 36in pipes parallel to each other (front legs), and two more parallel behind them (back legs). Connect the front legs with a 4ft rail using two fixed clamps—one at each end. Do the same for the back legs. Now you have two rectangles: the front and back of the frame. Next, connect the front and back frames with the 2ft side rails, using clamps to attach each rail to the top of the legs. At this point, you should have a basic rectangular frame: 4 legs, 2 front/back rails, 2 side rails.
Now, add the cross-braces. Take a 2ft pipe and attach it diagonally from the top of the front-left leg to the bottom of the back-right leg, using fixed clamps at both ends. Repeat with another brace from the top of the front-right leg to the bottom of the back-left leg. These braces are critical—they turn a wobbly frame into a rigid one. Tighten all clamps by hand first, then use a wrench to give them an extra quarter-turn. Be careful not to over-tighten—you don't want to strip the threads or crack the pipe coating.
Step 4: Attach the Frame to the Workbench E Deck
Flip the frame upside down so the top rails are on the floor. Place the Workbench E deck on top of the frame, aligning the pre-drilled holes in the deck with the rails. Use 4-6 fixed clamps to secure the deck to the frame—one at each corner and one in the middle of each rail. This distributes weight evenly and prevents the deck from shifting. If your deck doesn't have pre-drilled holes, mark the rail positions with a pencil, then drill small pilot holes (1/8in) to guide the clamps. Avoid drilling through the deck entirely—you just need enough to anchor the clamp screws.
Once the deck is attached, flip the workbench right-side up. Give it a gentle shake—does it wobble? If yes, check the clamps: they might need a little more tightening. If the wobble is in one leg, use a level to see if the floor is uneven. That's where the adjustable leveling feet come in: screw them into the bottom of the legs, then turn them until the workbench is level. It might take a few minutes of tweaking, but a level workbench is worth the effort—no more rolling tools or spilled coffee.
Step 5: Add Aluminum Profile for Extra Support (Optional but Recommended)
For workshops that deal with heavy loads (think: automotive parts or metalworking), aluminum profile is a game-changer. It's lighter than steel but just as strong, and it pairs perfectly with lean pipe. Cut 4 pieces of 2020 aluminum profile to match your side rail length (2ft each). Attach them to the inside of the frame legs using aluminum profile accessories like corner brackets and screws. This creates a second layer of support for the deck, especially in the middle where sagging is most likely. Aluminum profile is also great for adding shelves later—just slide shelf brackets into the T-slots and you're good to go.
Pro tip: Use aluminum guide rail A to line the edges of the deck—it acts as a lip to keep tools from rolling off. Simply attach the guide rail to the deck with small screws or double-sided tape. It's a small addition, but it prevents countless "oops" moments when you're in a hurry.

Troubleshooting Common Issues: From Wobbles to Warps
Even with careful setup, you might run into problems. Let's tackle the most common ones and how to fix them:
Issue 1: The Frame Wobbles Side-to-Side
If your workbench sways when you push it, the cross-braces are probably missing or loose. Add diagonal cross-braces using lean pipe and fixed clamps—this is the easiest fix. If you already have cross-braces, check the clamps: they might have loosened during assembly. Tighten them in a crisscross pattern (top-left, bottom-right, then top-right, bottom-left) to evenly distribute pressure.
Issue 2: The Deck Is Uneven
A deck that slopes to one side is usually due to uneven leg lengths or misaligned rails. Use a level to check the deck: if it tilts left, the right legs are too short (or vice versa). Adjust the leveling feet to raise the shorter legs. If the rails are bent, replace them—lean pipe is affordable, and a warped rail will never straighten out. For aluminum profile frames, check that the corner brackets are tight; loose brackets can cause the profile to shift.
Issue 3: Clamps Keep Slipping
Slipping clamps are often the result of dirty pipes or low-quality clamps. Clean the pipe surface with rubbing alcohol to remove grease or dust, then re-tighten the clamps. If they still slip, upgrade to steel clamps with serrated jaws—they bite into the pipe better than smooth plastic clamps. Avoid over-tightening, though—this can strip the clamp threads or crack the PE coating.
Maintenance: Keeping Your Workbench in Top Shape
A well-built workbench is an investment—with a little care, it can last 10+ years. Here's how to maintain it:
- Tighten clamps monthly: Vibration from tools can loosen clamps over time. A quick once-over with a wrench takes 5 minutes and prevents big issues later.
- Clean clamps and pipes: Wipe down lean pipe with a damp cloth to remove oil and dirt. For steel clamps, spray with a light coat of WD-40 to prevent rust—especially if you work in a humid garage.
- Inspect the deck: Check for cracks or warping, especially if you use power tools. Sand down rough spots to prevent splinters, and seal wooden decks with polyurethane yearly to repel water.
- Lubricate leveling feet: If the feet start sticking, add a drop of oil to the threads—this makes adjustments smoother.
Remember: Small problems get bigger over time. A loose clamp today becomes a broken pipe tomorrow. Spend 10 minutes each month on maintenance, and your workbench will repay you with reliability.
Why This Setup Works: Real-World Results
Don't just take our word for it—ask Mike, a small engine mechanic in Ohio. He used to struggle with a rickety workbench that shook so badly, he could barely use his torque wrench. "I tried everything: adding more screws, gluing the legs, even nailing a plywood sheet to the bottom," he says. "Nothing worked until I switched to lean pipe and fixed clamps. Now my workbench is solid as a rock—I can stand on it, and it doesn't budge. I even added aluminum profile shelves for parts, and it still feels brand new after two years."
Mike's story isn't unique. Lean pipe systems are used in factories, garages, and workshops worldwide because they balance strength, flexibility, and affordability. When paired with fixed clamps and Workbench E, they create a workspace that adapts to your needs without sacrificing stability. Whether you're fixing cars, building furniture, or assembling electronics, a secure workbench makes every task easier—and safer.
Final Thoughts: Building More Than a Workbench
Setting up Workbench E with lean pipe fixed clamps isn't just about assembling a table—it's about investing in your productivity, safety, and peace of mind. A wobbly workbench isn't just an annoyance; it's a distraction that slows you down and increases the risk of mistakes. By taking the time to build a secure frame, you're creating a space where you can focus on the task at hand, not on keeping your tools from falling off.
So grab your lean pipe, fixed clamps, and aluminum profile, and get started. Follow the steps, troubleshoot as you go, and don't forget to customize—this workbench is yours, so make it fit your workflow. In a few hours, you'll have a setup that not only holds your tools but also holds up to the demands of your day. And when you're done, stand back and admire it—you didn't just build a workbench. You built a foundation for better work.