- Company Articles
- FAQ
- FAQ
- Common Issues with Lean Pipe Clamp B: Troubleshooting Guide

Common Issues with Lean Pipe Clamp B: Troubleshooting Guide
Related Product
Lean Pipe Clamp
Lean pipe clamp is used for rack system hang monitor or other panel for workbenck, flowrack in production daily use.
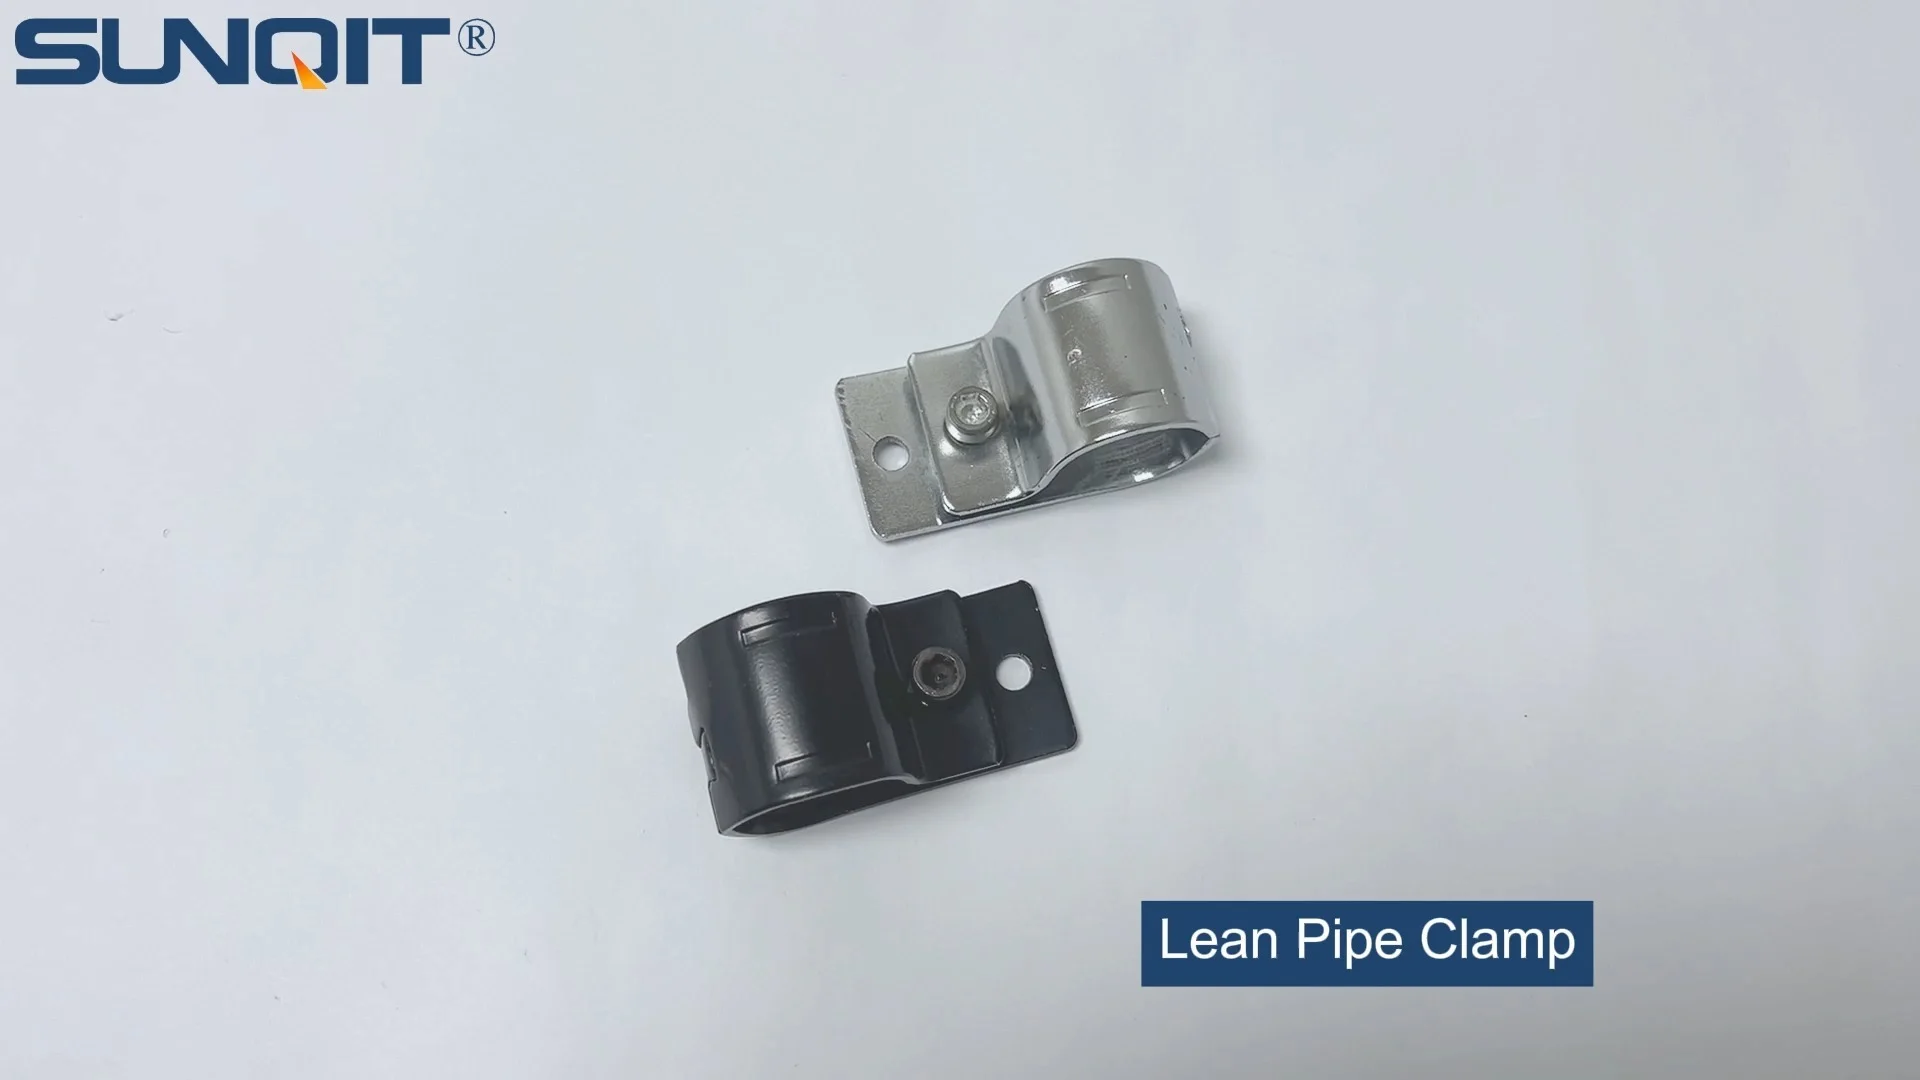
In the rhythm of a busy workshop, where every second counts and precision matters, the smallest components often play the biggest roles. Take the Lean Pipe Clamp B, for example. This unassuming piece of hardware is the silent glue that holds together aluminum lean pipes, workbenches, and material racks—keeping your workflow steady, your team efficient, and your operations running like clockwork. But when it fails? Suddenly, that reliable workbench wobbles, that material rack sags, and frustration creeps in. Let's dive into the most common issues with Lean Pipe Clamp B, why they happen, and how to fix them—so you can get back to what matters: building, creating, and thriving.
Why Lean Pipe Clamp B Matters in Your Lean System
Before we jump into problems, let's talk about why this clamp deserves your attention. Lean Pipe Clamp B is more than just a metal fastener. It's a critical link in your lean system, designed to connect lean pipe and accessories—like aluminum lean pipes, joints, and workbench frames—with strength and flexibility. Whether you're assembling a lightweight turnover trolley or a heavy-duty production workbench, this clamp ensures stability. When it works, you barely notice it. When it doesn't? It's a reminder of how even the smallest parts keep your operation on track.
Think about it: A loose clamp on a workbench isn't just an annoyance. It's a distraction for your team, a risk of damaging materials, and a hidden source of downtime. That's why understanding its common issues and how to troubleshoot them isn't just "maintenance work"—it's an investment in your team's productivity and peace of mind.
5 Common Issues with Lean Pipe Clamp B (and How to Fix Them)
1. Loose Connections: The Wobbly Workbench Problem
Symptoms: You notice your workbench or material rack shifting when bumped, or hear a faint "clinking" sound as parts move. On closer inspection, the Lean Pipe Clamp B feels loose when you wiggle the connected aluminum lean pipe.
Why it happens: Loose connections are the most frequent culprit, and they usually stem from one of three issues: under-tightening during installation , vibration over time , or using the wrong torque (too little, and it slips; too much, and you risk damaging the clamp or pipe).
How to fix it:
- Check the torque: Grab a torque wrench (not a regular wrench—precision matters here). Most manufacturers recommend 15-20 Nm for aluminum lean pipes. If the clamp is under-tightened, slowly increase torque until it's snug but not strained.
- Inspect for wear: If the clamp still loosens after tightening, look at the inner surface. Is there visible wear or deformation? Over time, constant vibration can wear down the clamp's grip. replace it with a new Lean Pipe Clamp B if the metal looks bent or the threads are worn.
- Add a lock washer: For high-vibration areas (like near conveyor belts), slip a small lock washer between the clamp and the lean pipe joint. This extra friction helps prevent loosening over time.
Pro tip: Mark the clamp with a permanent marker after tightening (a small line on the clamp and pipe). If the line shifts later, you'll know it's loosened again—no guesswork needed.
2. Stripped Threads: When the Clamp Just Spins
Symptoms: You try to tighten the clamp, but the bolt spins endlessly without gripping. The clamp feels "floppy" on the aluminum lean pipe, offering zero hold.
Why it happens: Stripped threads are usually a result of over-tightening (twisting the bolt past its limits) or repeated assembly/disassembly (like when you reconfigure a workbench). Low-quality clamps with soft metal threads are especially prone to this.
How to fix it:
- Stop twisting! If the bolt spins freely, continuing to turn it will only damage the clamp further. Remove the clamp immediately.
- replace the clamp: Stripped threads are rarely repairable in the field. Swap in a new Lean Pipe Clamp B—opt for one with hardened steel threads if you frequently reconfigure your setup.
- Use thread-locking fluid (temporarily): For a quick fix (e.g., to finish a urgent production run), apply a small drop of medium-strength thread-locking fluid to the new clamp's threads before installation. Let it dry 10 minutes, then tighten to spec. Note: This is a band-aid, not a permanent solution—replace the clamp properly later.
3. Corrosion: When Rust Eats Away at Grip
Symptoms: The clamp has orange or brown spots (rust), or the metal feels pitted. In severe cases, the clamp may stick to the aluminum lean pipe, making adjustment impossible without force.
Why it happens: Corrosion loves moisture, humidity, and chemical exposure. If your workshop is in a damp area (like near a wash station) or uses cleaning agents with harsh chemicals, uncoated or low-quality clamps are vulnerable. Even stainless steel pipe series can corrode if the clamp's coating is scratched.
How to fix it:
- Clean the corrosion: For light rust, mix baking soda and water into a paste, apply it to the clamp, and let it sit for 10 minutes. Scrub gently with a soft-bristle brush (avoid steel wool—it scratches). Rinse and dry thoroughly.
- Check for structural damage: If the rust has eaten pits into the clamp or weakened the threads, replace it. Corroded metal loses strength, and a "patched" clamp is a ticking time bomb.
- Prevent future rust: Apply a thin coat of anti-corrosion spray (like WD-40 Specialist Long-Term Corrosion Inhibitor) to the clamp and surrounding area. For high-moisture environments, upgrade to a stainless steel Lean Pipe Clamp B—worth the small extra cost to avoid repeat issues.
4. Improper Installation: When the Clamp Just "Doesn't Fit"
Symptoms: The clamp sits unevenly on the aluminum lean pipe, gaps between the clamp and pipe, or it takes excessive force to close the clamp around the pipe.
Why it happens: This usually boils down to using the wrong clamp size (e.g., a clamp for 28mm pipe on a 30mm aluminum lean pipe) or ignoring the lean pipe joint compatibility . Some clamps are designed for specific joint types—mixing and matching leads to poor fits.
How to fix it:
- Verify size: Measure your aluminum lean pipe's outer diameter with a caliper. Lean Pipe Clamp B typically comes in 28mm, 30mm, and 40mm sizes. If the pipe is 30mm and the clamp is labeled 28mm, that's the problem—swap in the correct size.
- Check joint type: Is your clamp paired with a standard lean pipe joint, or a specialized one (like an internal rotary aluminum joint)? Some joints have unique shapes that require matching clamps. Consult your supplier's compatibility chart—most post them online for free.
- Align before tightening: If the clamp is the right size but still misaligned, loosen it completely, reposition the pipe so it sits centered in the clamp, and tighten gradually (alternating sides if it's a two-bolt clamp) to avoid skewing.
5. Compatibility Issues with Lean Pipe and Accessories
Symptoms: The clamp works initially, but after a few weeks, it cracks, bends, or fails. This often happens when using the clamp with non-standard lean pipe and accessories, like low-quality plastic pipe sleeves or mismatched aluminum profile accessories.
Why it happens: Lean systems thrive on compatibility. If you mix components from different suppliers—say, a generic clamp with a premium aluminum lean pipe—or use off-brand accessories (like a plastic pipe cover that's too thick), the clamp is forced to bear extra stress. Over time, this leads to failure.
How to fix it:
- Stick to one supplier: The easiest fix is to source Lean Pipe Clamp B, aluminum lean pipe, and lean pipe joints from the same supplier. They engineer components to work together, reducing compatibility headaches.
- Avoid "Franken-systems": Resist the urge to substitute parts to save a few dollars. That cheap plastic pipe sleeve might seem harmless, but if it adds even 1mm of thickness, the clamp's grip weakens. Invest in genuine accessories—your future self (and your workbench) will thank you.
- Test before full installation: If you must mix parts, test the clamp on a spare pipe first. Apply pressure, wiggle the joint, and check for slipping or stress. If it holds for 24 hours of light use, it's probably safe; if not, backtrack.

Quick Reference: Lean Pipe Clamp B Issues & Solutions
| Issue | Key Symptom | Primary Cause | Quick Fix |
|---|---|---|---|
| Loose Connections | Wobbling workbench/pipe | Under-tightening or vibration | Tighten to 15-20 Nm with torque wrench; add lock washer if needed |
| Stripped Threads | Bolt spins without tightening | Over-tightening or repeated use | replace clamp; use thread-locking fluid temporarily |
| Corrosion | Rust spots or pitting | Moisture/chemical exposure | Clean with baking soda paste; replace if damaged; apply anti-corrosion spray |
| Improper Installation | Gaps or uneven fit | Wrong clamp size or joint type | Verify pipe diameter; use compatible lean pipe joint |
| Compatibility Issues | Clamp cracks/fails prematurely | Mixing parts from different suppliers | Source all components from one supplier; avoid off-brand accessories |

Preventing Issues: Keep Your Clamps (and Sanity) Intact
Fixing problems is important, but avoiding them in the first place? Even better. Here's how to keep your Lean Pipe Clamp B—and your lean system—happy for the long haul:
1. Invest in Quality from the Start
It's tempting to buy the cheapest clamp, but low-quality metal bends, strips, and corrodes faster. A premium Lean Pipe Clamp B costs a few dollars more upfront but lasts 3-5x longer. Think of it as insurance against downtime.
2. Train Your Team on Proper Installation
Most clamp issues start with human error. Hold a 15-minute training session: show your team how to measure pipe size, use a torque wrench, and check for compatibility with lean pipe and accessories. A little knowledge goes a long way.
3. Schedule Regular "Clamp Check-Ups"
Add a monthly 10-minute inspection to your routine. Walk around the workshop, wiggle clamps gently, and tighten any that feel loose. Catching a slightly loose clamp now prevents a broken one (and a frustrated team) later.
4. Store Spare Clamps (and Know Where They Are)
Keep 5-10 extra Lean Pipe Clamp B in a labeled bin near your tools. When a clamp fails, you won't waste time hunting for a replacement—just swap it and get back to work.

Final Thoughts: Small Clamps, Big Impact
At the end of the day, Lean Pipe Clamp B is a reminder that in lean systems, every part matters. It's not glamorous, but it's the quiet hero that keeps your workbench steady, your material racks secure, and your team focused. By understanding its quirks—loose connections, stripped threads, corrosion, and the rest—you're not just fixing hardware. You're protecting your workflow, your team's morale, and your bottom line.
So the next time you walk past that workbench, take a second to check the clamps. Give them a gentle wiggle. Tighten if needed. It's a small act, but it's how great teams stay great: by caring about the details that keep everything else moving forward.