- Company Articles
- FAQ
- FAQ
- Common Problems with Lean Pipe Clamps: Causes & Fixes

Common Problems with Lean Pipe Clamps: Causes & Fixes
Related Product
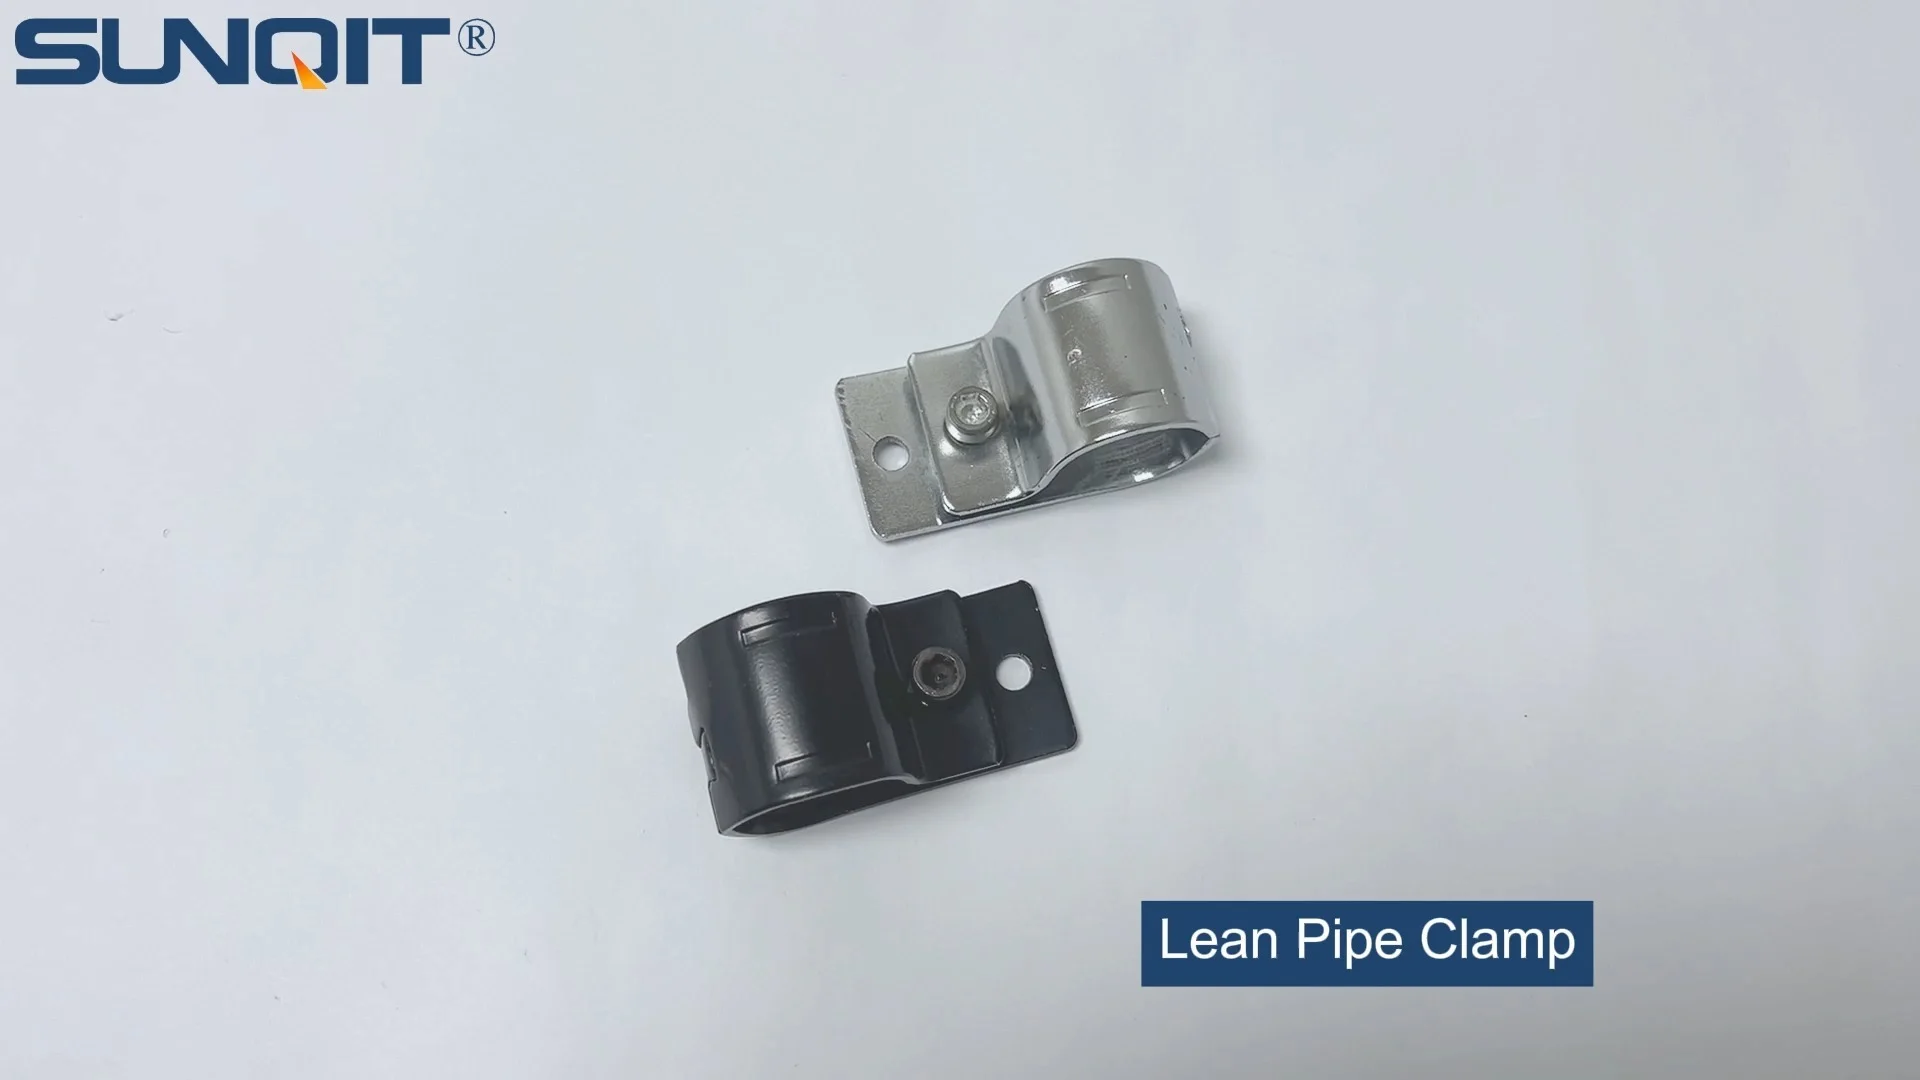
Lean Pipe Clamp
Lean pipe clamp is used for rack system hang monitor or other panel for workbenck, flowrack in production daily use.
In the bustling world of manufacturing and workshop management, lean pipe systems are the unsung workhorses that keep operations running smoothly. From assembly lines to material racks, these versatile structures—built with lean pipes, joints, and clamps—are prized for their flexibility, durability, and cost-effectiveness. But here's the thing: even the sturdiest system is only as strong as its weakest link. And more often than not, that weak link is a small but critical component: the lean pipe clamp. These unassuming connectors hold the entire structure together, and when they fail, the consequences can range from minor workflow hiccups to major safety hazards. In this article, we'll dive into the most common problems with lean pipe clamps, why they happen, and how to fix them—so you can keep your workspace efficient, safe, and frustration-free.
Understanding Lean Pipe Clamps: The Backbone of Your System
Before we jump into the problems, let's take a quick moment to appreciate what lean pipe clamps actually do. At their core, these clamps are designed to secure lean pipes (whether steel, aluminum, or plastic-coated) to joints, creating stable frameworks for workbenches, flow racks, turnover trolleys, and more. They come in various styles—from simple two-way clamps to multi-angle joints—and are often made from materials like zinc-plated steel, stainless steel, or high-grade plastic. The best clamps offer a tight, secure fit that can withstand the daily wear and tear of a busy workshop, while still allowing for easy adjustments when you need to reconfigure your setup.
But not all clamps are created equal. Factors like material quality, design precision, and compatibility with your lean pipe and accessories play a huge role in how well they perform. For example, aluminum lean pipe systems, which are lightweight yet strong, require clamps that can grip the metal without damaging it, while plastic-coated lean pipes might need clamps with softer edges to prevent stripping the coating. And let's not forget the lean pipe joint itself—if the joint is poorly made, even the best clamp won't save it from wobbling.
Common Problems with Lean Pipe Clamps (and How to Solve Them)
1. Loose Connections: The "Wobbly Rack" Syndrome
Walk into any workshop, and you'll likely spot at least one leaning material rack or wobbly workbench. Nine times out of ten, the culprit is a loose lean pipe clamp. This problem starts small—maybe a slight shake when you place a heavy box on a shelf—and gradually gets worse until the entire structure feels unstable. Left unchecked, loose clamps can lead to pipes slipping out of joints, materials falling, or even the whole system collapsing.
Causes: So why do clamps come loose? The most common reason is improper installation. Tightening a clamp too little leaves room for movement, while over-tightening can strip the threads or warp the clamp, making it lose grip over time. Vibration is another silent enemy. If your lean pipe system is near heavy machinery, the constant shaking can slowly loosen clamps, especially if they're not secured with lock washers or locking nuts. Low-quality clamps are also a major factor—cheap plastic or thin metal clamps simply don't have the strength to hold up under repeated stress, and their threads wear out quickly with even minor adjustments.
Fixes: The good news is that loose clamps are usually easy to fix. Start by inspecting the clamp and joint for damage. If the threads are stripped or the clamp is cracked, replace it immediately—don't try to "make do" with a damaged part. For clamps that are just loose, tighten them with the right tool: a hex key or wrench that fits the clamp's head snugly (using the wrong size can round off the edges, making future adjustments impossible). To prevent future loosening, add a lock washer between the clamp and the joint—this simple metal ring creates friction that resists vibration. For extra security, consider using thread-locking adhesive (like Loctite) on the threads, but be careful not to use too much—you still want to be able to adjust the clamp later if needed.
2. Corrosion: When Rust Becomes Your Worst Enemy
If your workshop is in a humid environment, near water, or handles chemicals, you've probably seen the telltale signs of corrosion on your lean pipe clamps: orange-brown rust, pitted metal, or a chalky white film. Corrosion doesn't just look unsightly—it weakens the clamp's structure, making it brittle and prone to breaking. In severe cases, a corroded clamp can snap under pressure, sending materials crashing down.
Causes: Corrosion is a chemical reaction between metal and its environment, and lean pipe clamps are particularly vulnerable if they're made from uncoated steel. Moisture in the air, spills (like oil or cleaning fluids), and even salt in coastal areas can accelerate this process. Plastic-coated clamps offer some protection, but if the coating is scratched or cracked, the metal underneath is exposed and starts to rust. Even stainless steel clamps aren't completely immune—low-grade stainless steel (with low chromium content) can still corrode in harsh environments.
Fixes: The first step is to remove the corroded clamp—if it's already cracked or too weak to hold, replace it with a new one. For clamps with minor rust, you can try cleaning them with a wire brush or sandpaper to remove the rust, then apply a coat of anti-corrosion spray (like WD-40 Specialist Long-Term Corrosion Inhibitor) to protect the surface. To prevent future corrosion, opt for clamps made from corrosion-resistant materials. Stainless steel pipe series clamps are a great choice for humid or wet environments, as they contain chromium which forms a protective oxide layer. If stainless steel is out of budget, look for zinc-plated or galvanized clamps—these have a protective coating that slows down rust. For the ultimate protection, consider switching to an aluminum lean pipe system: aluminum naturally resists corrosion, and aluminum lean pipe clamps are lightweight, strong, and perfect for environments where moisture is a concern.
3. Misalignment: When Pipes Just Don't "Click"
We've all been there: you're assembling a new workbench, and no matter how hard you try, the pipes won't line up properly. The clamp feels forced, the joint is at an awkward angle, and the whole structure looks lopsided. This misalignment isn't just a cosmetic issue—it puts extra stress on the clamps and joints, leading to premature wear and potential failure.
Causes: Misalignment usually happens for one of two reasons: either the lean pipe and accessories (clamps, joints) are mismatched, or the assembly process was rushed. If you're using a clamp designed for a 28mm pipe with a 30mm pipe, for example, the fit will be loose and the joint will wobble. Similarly, using a rigid 90-degree joint when you need a flexible angle can force the clamp into an unnatural position. Rushing assembly is another culprit—skipping measurements, forcing pipes into joints, or overtightening clamps before checking alignment can all throw the system off-kilter. Bent or damaged pipes are also a factor: if a pipe is warped from being dropped or overloaded, it will never align correctly with the clamps.
Fixes: The key to fixing misalignment is patience and precision. Start by disassembling the misaligned section and checking all components for damage—replace any bent pipes or cracked joints. Next, verify that your clamps, pipes, and joints are compatible. Most lean pipe suppliers provide specs (like pipe diameter and joint type) to ensure compatibility, so double-check these before reassembly. When putting the system back together, use a level to ensure pipes are straight and joints are at the correct angle. Tighten clamps just enough to hold the pipe in place, then adjust as needed before fully securing them. For systems that need flexibility (like assembly lines that change frequently), consider using internal rotatary aluminum joints—these allow pipes to rotate slightly, reducing stress on clamps and preventing misalignment.
4. Wear and Tear: When Clamps Start to Show Their Age
Lean pipe systems are built to be adjusted and reconfigured, which means clamps get a lot of use. Over time, this wear and tear can take a toll: threads get stripped, plastic components crack, and metal parts bend or deform. The result? Clamps that no longer grip tightly, joints that slip, and a system that feels "tired."
Causes: The main cause of wear and tear is simply overuse—especially if your system is frequently disassembled and reassembled. Each time you tighten or loosen a clamp, the threads rub against the joint, gradually wearing them down. Using the wrong tool (like a pair of pliers instead of a hex key) can also damage the clamp's head, making it harder to grip and increasing the risk of stripping. Heavy loads are another factor: if your material rack is holding more weight than it was designed for, the clamps bear the brunt of that stress, leading to deformation over time. Even environmental factors, like extreme temperatures or UV exposure, can degrade plastic clamps or weaken metal ones.
Fixes: When it comes to wear and tear, prevention is better than cure—but if your clamps are already showing signs of damage, here's what to do. For stripped threads, the only solution is to replace the clamp—damaged threads can't be repaired. For bent or deformed metal clamps, try gently bending them back into shape with pliers (but be careful—if the metal is brittle, it may snap). If the clamp's head is damaged (rounded edges, cracks), replace it immediately—using a damaged clamp is a safety risk. To extend the life of new clamps, train your team to use the correct tools and avoid over-tightening. For systems that see heavy use, invest in heavy-duty clamps made from high-grade steel or aluminum—they're more expensive upfront, but they'll save you money in the long run by lasting longer.
5. Compatibility Issues: When "One Size Fits All" Doesn't Apply
Picture this: you order a batch of new clamps from a different supplier to replace some old ones, only to find they don't fit your existing lean pipes or joints. The threads are the wrong size, the clamp is too loose or too tight, and now you're stuck with a box of useless parts. Compatibility issues are frustrating, time-consuming, and costly—but they're also avoidable.
Causes: The root cause of compatibility problems is simple: not all lean pipe systems are standardized. While many suppliers follow general guidelines (like 28mm diameter for steel pipes), there are subtle variations in thread pitch, clamp design, and joint size that can throw things off. Generic or off-brand clamps are especially risky—they may claim to be "universal," but in reality, they often cut corners on precision to keep costs low. Mixing materials can also be an issue: for example, aluminum lean pipes have slightly different tolerances than steel pipes, so a clamp designed for steel may not grip aluminum as securely.
Fixes: The easiest way to avoid compatibility issues is to buy all your lean pipe and accessories from the same supplier. Reputable suppliers design their clamps, pipes, and joints to work together seamlessly, so you won't have to worry about mismatched parts. If you do need to mix suppliers, always check the specs: pipe diameter, thread size (metric vs. imperial), and clamp type (fixed vs. swivel) should all match. When in doubt, ask the supplier for a sample clamp to test with your existing system before placing a bulk order. For aluminum lean pipe systems, look for clamps specifically labeled as "aluminum-compatible"—these often have softer gripping surfaces to prevent scratching the metal while still providing a tight hold.

Common Lean Pipe Clamp Problems: A Quick Reference Table
| Problem | Common Causes | Step-by-Step Fixes | Prevention Tips |
|---|---|---|---|
| Loose Connections | Improper tightening, vibration, low-quality clamps |
1. Inspect for damage; replace if cracked/stripped.
2. Tighten with the correct tool (hex key/wrench). 3. Add a lock washer or thread-locking adhesive. |
Use lock washers; avoid over-tightening; invest in high-quality clamps. |
| Corrosion | Moisture, chemical exposure, uncoated steel clamps |
1. Remove rust with a wire brush; apply anti-corrosion spray.
2. replace severely corroded clamps. 3. Switch to stainless steel or aluminum clamps. |
Choose corrosion-resistant materials (stainless steel/aluminum); clean clamps regularly. |
| Misalignment | Mismatched parts, rushed assembly, bent pipes |
1. Disassemble and check for damage; replace bent pipes.
2. Verify compatibility of clamps, pipes, and joints. 3. Reassemble with a level to ensure alignment. |
Buy from the same supplier; measure before assembly; avoid forcing parts. |
| Wear and Tear | Frequent reassembly, wrong tools, heavy loads |
1. replace clamps with stripped threads or cracked heads.
2. Gently bend deformed metal clamps back into shape. 3. Use heavy-duty clamps for high-stress areas. |
Train staff on proper tool use; avoid overloading; limit unnecessary disassembly. |
| Compatibility Issues | Non-standard parts, mixing suppliers, generic clamps |
1. Check specs (diameter, thread size) before buying.
2. Test sample clamps with existing system. 3. replace mismatched parts with compatible ones. |
Buy from a single supplier; prioritize branded over generic clamps. |

Preventing Clamp Problems: A Proactive Approach
Now that we've covered the common problems and fixes, let's talk about prevention. After all, the best way to deal with clamp issues is to stop them from happening in the first place. Here are a few simple steps to keep your lean pipe clamps (and your entire system) in top shape:
1. Schedule Regular Inspections: Make it a habit to check your lean pipe systems weekly. Look for loose clamps, signs of corrosion, or bent pipes. Catching a small issue early (like a slightly loose clamp) takes 5 minutes to fix, but ignoring it could lead to a system failure that takes hours to repair.
2. Train Your Team on Proper Assembly: Even the best clamps will fail if they're installed incorrectly. Take the time to show your staff how to tighten clamps properly, which tools to use, and why over-tightening is a bad idea. A 10-minute training session can save countless headaches down the line.
3. Choose the Right Materials for Your Environment: If your workshop is humid or exposed to chemicals, don't skimp on stainless steel or aluminum lean pipe clamps. Aluminum lean pipe, in particular, is a great choice for durability and corrosion resistance—it's also lighter, which puts less stress on clamps and joints.
4. Invest in Quality Parts: It's tempting to buy the cheapest clamps available, but trust us—you'll pay for it later. High-quality clamps (from a reputable lean pipe supplier) may cost a few dollars more, but they'll last longer, grip better, and save you from costly repairs.
5. Keep Spare Clamps on Hand: There's nothing worse than discovering a broken clamp in the middle of a project and having to halt work while you wait for a replacement. Keep a stock of common clamp sizes in your toolbox—you'll thank yourself later.

Final Thoughts: Small Clamps, Big Impact
At the end of the day, lean pipe clamps might seem like minor components, but they play a massive role in keeping your workspace safe and efficient. By understanding the common problems—loose connections, corrosion, misalignment, wear and tear, and compatibility issues—and how to fix them, you can avoid downtime, reduce frustration, and ensure your lean pipe system works as hard as you do. Remember: a little maintenance goes a long way. So take 10 minutes this week to check your clamps, tighten what's loose, replace what's damaged, and rest easy knowing your material racks, workbenches, and assembly lines are built to last. After all, in the world of manufacturing, the best workflow is one that never skips a beat—and that starts with strong, reliable lean pipe clamps.