- Company Articles
- FAQ
- FAQ
- Common Problems with M10*56 Rubber Leveling Feet & Troubleshooting

Common Problems with M10*56 Rubber Leveling Feet & Troubleshooting
Related Product
M10*56 Rubber Leveling Feet
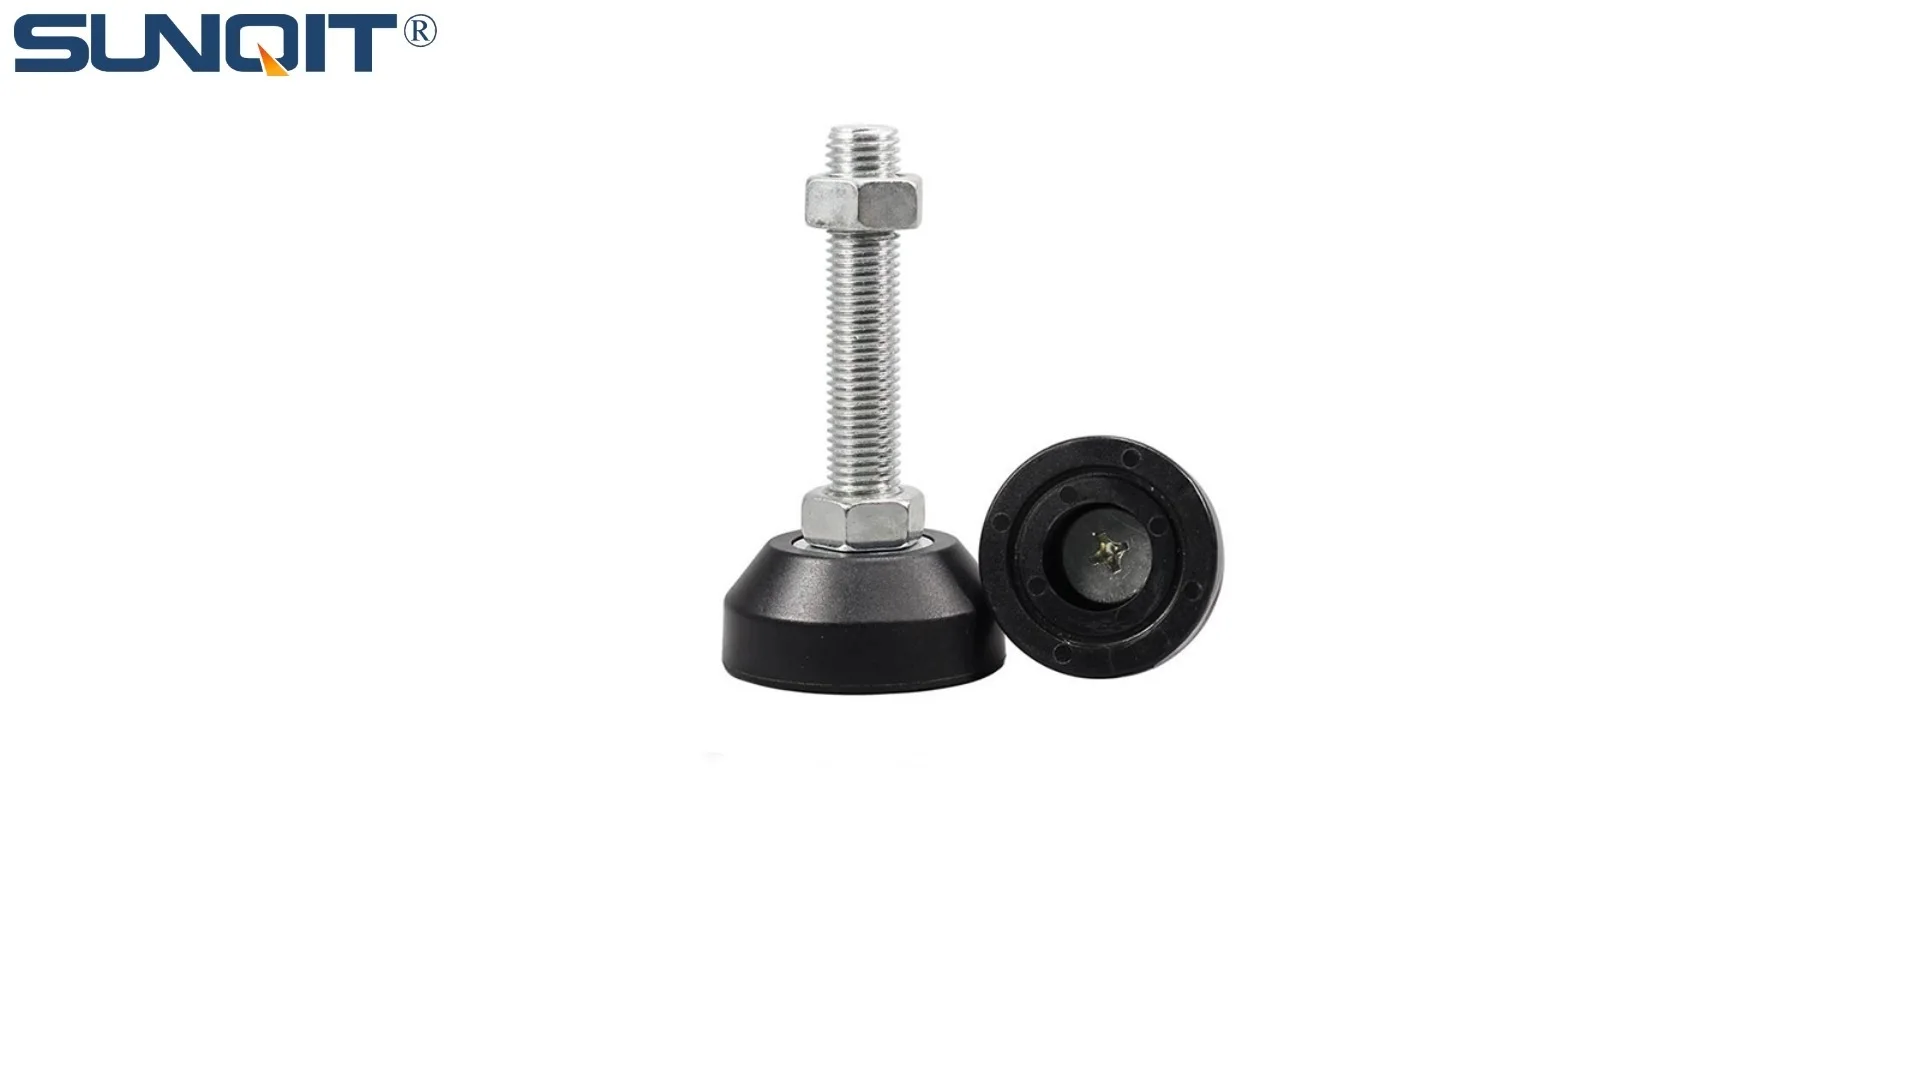
Adjustable leveling feet are designed to keep machines level when placed on uneven or sloped ground. Otherwise known as adjustable equipment feet, they are available to order in a wide variety of size and load capacity combinations.
Let's start with a scenario we've all faced: You're in the middle of setting up a new workbench in your workshop, or maybe organizing a material rack b (3 row and 3 floor) in the warehouse. You tighten the last bolt, step back, and… wobble . The whole structure teeters like a table with a missing leg, and no matter how much you push or adjust, that annoying shake just won't go away. Chances are, the culprit isn't the frame or the materials—it's the small but mighty components holding it all together: the M10*56 rubber leveling feet.
These unassuming parts might seem like afterthoughts, but they're the unsung heroes of stability in lean pipe workbenches, material racks, and even turnover trolleys. When they work well, you don't notice them. But when they fail? Suddenly, every task becomes a hassle—tools slide off the workbench, boxes tip on the rack, and that constant rattle starts to feel like a personal attack. In this article, we're diving deep into the common headaches that come with M10*56 rubber leveling feet, why they happen, and how to fix them for good. Let's get your workspace steady again.
What Are M10*56 Rubber Leveling Feet, Anyway?
Before we jump into the problems, let's make sure we're all on the same page about what these parts actually are. M10*56 rubber leveling feet are a type of adjustable leveling foot—a category that includes everything from simple plastic pads to heavy-duty metal stems. The "M10" refers to the thread size (10mm diameter), and "56" is the length of the threaded stem (56mm). The base is typically made of rubber, which gives it grip and a bit of shock absorption, while the stem is usually steel or zinc-plated metal for strength.
You'll find these feet in all sorts of places, but they're especially common in industrial and workshop settings. Lean pipe workbenches, for example, rely on them to stay level even on uneven concrete floors. Material rack b (3 row and 3 floor) units use them to distribute the weight of stacked boxes evenly, preventing the rack from tipping. Even basic workbenches or assembly stations depend on these feet to keep surfaces steady enough for precise work. In short, they're the bridge between your equipment and the ground, and if that bridge is shaky, everything else suffers.
The Usual Suspects: Common Problems with M10*56 Rubber Leveling Feet
Let's break down the most frequent issues people run into with these leveling feet. We'll start with the obvious ones and work our way to the sneakier culprits.
1. Wobbly Workbenches & Racks (Instability)
The number one complaint? Instability. You (tighten) the leveling feet, but the structure still rocks back and forth like a boat on calm water. What's going on here?
First, check the floor. Concrete floors in warehouses or workshops are rarely perfectly flat—cracks, dips, and uneven curing are par for the course. If the floor itself slopes, even the best leveling feet can't compensate if they're not adjusted properly. But more often than not, the issue is with the feet themselves. Maybe the rubber base has worn down unevenly, so one foot is shorter than the others. Or perhaps the stem is bent, causing the foot to sit at an angle instead of flat. Another possibility? You overtightened them. Yep—cranking the feet too hard can actually warp the frame of the workbench or rack, creating a new wobble where there wasn't one before.
Here's a quick test: Lift one corner of the workbench slightly and let it drop gently. If it lands with a "thud" and settles, the feet are probably just misadjusted. If it bounces or keeps rocking, there's likely uneven wear or a bent stem in the mix.
2. Rubber Deterioration (Cracking, Hardening, or Sticking)
Rubber is a durable material, but it's not invincible. Over time, you might notice the rubber base of your leveling feet starting to look… rough. Cracks, tiny splits, or a hard, brittle texture are all signs of deterioration. In some cases, the rubber might even start to stick to the floor, leaving behind black marks when you move the rack or workbench.
Why does this happen? A few reasons. If your workspace is exposed to oils, solvents, or chemicals (think machine shops or auto repair garages), the rubber can break down faster. UV light from windows or overhead lights can also dry out the rubber, leading to cracking. High temperatures—like near a furnace or in a poorly ventilated warehouse during summer—speed up this process too. Even heavy loads over time can compress the rubber unevenly, causing it to degrade in spots.
The problem with deteriorated rubber isn't just aesthetics. A cracked base loses its grip, so the workbench or rack is more likely to slide. Hardened rubber also stops absorbing vibrations, which means every tool drop or machine hum gets amplified through the structure. And if the rubber starts sticking? Moving the rack becomes a chore, and you risk tearing the base clean off the stem.
3. Thread Stripping or Damage (The "Spinning Stem" Problem)
Picture this: You try to adjust the height of your leveling foot by twisting the stem, and suddenly— snap . Or worse, the stem spins freely without moving up or down, like it's disconnected from the base. That's thread stripping, and it's one of the most frustrating issues with these feet.
Threads are the tiny ridges on the stem that let you screw the foot up or down to adjust height. When they get damaged, the whole system fails. How does this happen? Over-tightening is the biggest offender. It's easy to think, "If a little tight is good, a lot must be better!" But cranking the stem too hard can bend the threads or strip them right off the metal. Cross-threading is another culprit—starting to screw the foot in at an angle, which mangles the threads before you even realize it. Corrosion is a slower enemy: if the stem is exposed to moisture and not properly coated, rust can eat away at the threads, making them rough and prone to stripping.
Once the threads are stripped, adjusting the foot is impossible. You're stuck with a fixed height, which means if the floor unevenness changes (say, due to a new crack or a shim under another foot), you can't compensate. In severe cases, the stem might even break off entirely, leaving a hole in the frame where the foot used to be.
4. Height Adjustment Jamming (Stuck in One Position)
On the flip side of stripped threads is the opposite problem: the stem won't move at all. You twist and twist, but the foot stays stuck at the same height. This is usually caused by debris or rust gumming up the threads. Sawdust, metal shavings, or even dirt from the floor can work its way into the threads over time, creating a barrier that stops the stem from turning smoothly. If the workspace is humid, that debris can mix with moisture to form a gritty paste that acts like glue.
Another cause? Bent stems (we're back to that!). If the stem is even slightly curved, it might bind against the frame as you try to adjust it, making it feel "stuck" when it's really just misaligned. And let's not forget about over-tightening again—cranking the foot too hard can compress the rubber base so much that it puts pressure on the stem, making it hard to loosen later.
The frustration here is real: you need to raise the foot by 2mm to level the workbench, but no matter how much you struggle, it won't budge. You might end up using pliers or a wrench, which only makes things worse by scratching the stem or stripping the already-fragile threads.
5. Vibration Transmission (The "Rattle That Won't Quit")
You'd think rubber would absorb vibrations, right? After all, that's part of why it's used for the base. But sometimes, M10*56 rubber leveling feet end up transmitting vibrations instead of dampening them, turning your workbench into a mini earthquake zone.
Why does this happen? It often comes down to the rubber compound. Not all rubber is created equal—some types are harder and less flexible, which means they don't absorb shocks as well. If the manufacturer skimped on quality, the rubber might feel more like plastic, offering little to no vibration resistance. Another issue is the fit: if the foot is loose in the frame hole, or if the stem isn't tightened enough, the whole foot can rattle against the frame, amplifying any vibrations from the floor or nearby machinery. Even something as simple as a missing washer between the stem and the frame can cause extra movement, leading to that annoying buzz.
Over time, constant vibration isn't just annoying—it's damaging. Tools and parts on the workbench vibrate loose, labels peel off boxes, and repeated shaking can weaken the frame of the rack or workbench itself. In extreme cases, it might even affect the accuracy of sensitive work, like assembly or inspection tasks.

Troubleshooting Table: Quick Fixes for Common Issues
Not all problems require a deep dive—sometimes you just need a quick reference to figure out what's wrong and how to fix it. Use this table to diagnose and solve issues fast:
| Problem | Common Cause | Immediate Fix | Long-Term Solution |
|---|---|---|---|
| Wobbly workbench/rack | Uneven rubber wear or bent stem | Swap feet between corners to balance wear; check for bent stems with a straightedge | replace worn feet; use a torque wrench to avoid over-tightening |
| Cracked/hardened rubber base | Chemical exposure or UV damage | Clean base with mild soap; avoid harsh cleaners | Upgrade to chemical-resistant rubber feet; use covers if near windows |
| Stripped threads (stem spins freely) | Over-tightening or cross-threading | Use thread locker (temporary fix for minor damage) | replace the entire foot; use thread guides during installation to avoid cross-threading |
| Height adjustment jamming | Debris in threads or bent stem | Brush threads with a wire brush; apply WD-40 and twist gently | Regularly clean threads with compressed air; inspect stems for bends monthly |
| Excessive vibration | Hard rubber compound or loose fit | Add a rubber washer between stem and frame; tighten stem securely | Switch to soft rubber or urethane-base feet; ensure proper fit in frame holes |

Prevention: Keep Your Leveling Feet Happy (and Your Workspace Steady)
They say an ounce of prevention is worth a pound of cure, and that's definitely true for M10*56 rubber leveling feet. With a little regular maintenance, you can avoid most of these problems altogether. Here's how:
1. Inspect Regularly (Yes, Even the "Small" Parts)
Get in the habit of checking your leveling feet every month or so. Look for cracks in the rubber, rust on the stem, or signs of thread damage. If you notice uneven wear (one foot is flatter than the others), swap them around to distribute the load evenly. A quick 5-minute check can catch issues before they turn into full-blown problems.
2. Clean Threads and Bases
Dirt, dust, and metal shavings love to hide in the threads of leveling feet. Use a small wire brush or compressed air to clean them out every few weeks. For the rubber base, wipe it down with a damp cloth to remove oil or chemical spills—this simple step can drastically extend the life of the rubber.
3. Use the Right Tools (No, Pliers Don't Count)
Over-tightening is the biggest enemy, so stop using adjustable wrenches or pliers to crank the feet. Instead, use a torque wrench set to the manufacturer's recommended torque (usually around 15-20 Nm for M10 threads). If you don't have a torque wrench, tighten until you feel resistance, then give it a tiny extra turn—no more.
4. Match the Foot to the Environment
Not all M10*56 rubber leveling feet are the same. If your workspace has chemicals or oils, choose feet with nitrile rubber bases (they're more resistant than standard rubber). For outdoor or humid areas, go for stainless steel stems to prevent rust. In high-vibration zones, opt for soft rubber or urethane bases—they'll absorb shocks better than hard rubber.
5. Don't Overload the Structure
Even the best leveling feet can't compensate for a rack or workbench that's carrying more weight than it's designed for. Check the load rating of your lean pipe workbench or material rack, and stick to it. Overloading puts extra stress on the feet, leading to bent stems, compressed rubber, and stripped threads.

When to replace (Instead of Repair)
At some point, even with the best care, leveling feet need to be replaced. Here are the red flags that mean it's time to swap in new ones:
- Stripped threads beyond repair: If the stem spins freely or the threads are visibly mangled, no amount of thread locker will fix it.
- Rubber base is more than 50% worn: If the base is cracked, hard, or has chunks missing, it's lost its grip and shock absorption.
- Bent stem: A bent stem will never sit flat, leading to constant wobbling no matter how you adjust it.
- Corrosion that won't clean off: Rust that eats through the stem or thread coating weakens the entire foot, making it unsafe.
Replacing a leveling foot is usually cheap and easy—most hardware stores or lean pipe suppliers carry them, and installation takes 5 minutes with a wrench. Don't put it off: a $10 part could save you from a $500 repair if your rack collapses or workbench warps.
Final Thoughts: Small Parts, Big Impact
M10*56 rubber leveling feet might be small, but they're the foundation of a stable, efficient workspace. Whether you're building a lean pipe workbench, setting up a material rack b (3 row and 3 floor), or just trying to keep your tools from sliding around, these little components do the heavy lifting. By understanding the common problems, troubleshooting quickly, and maintaining them regularly, you can avoid the frustration of wobbly racks, stripped threads, and vibrating workbenches.
Remember: a steady workspace is a productive workspace. So take 10 minutes this week to check your leveling feet. Clean the threads, inspect the rubber, and tighten them properly. Your back (and your sanity) will thank you later.