- Company Articles
- FAQ
- FAQ
- Common Problems with Parallel Fixation Aluminum Pipe Joints & Solutions

Common Problems with Parallel Fixation Aluminum Pipe Joints & Solutions
Related Product
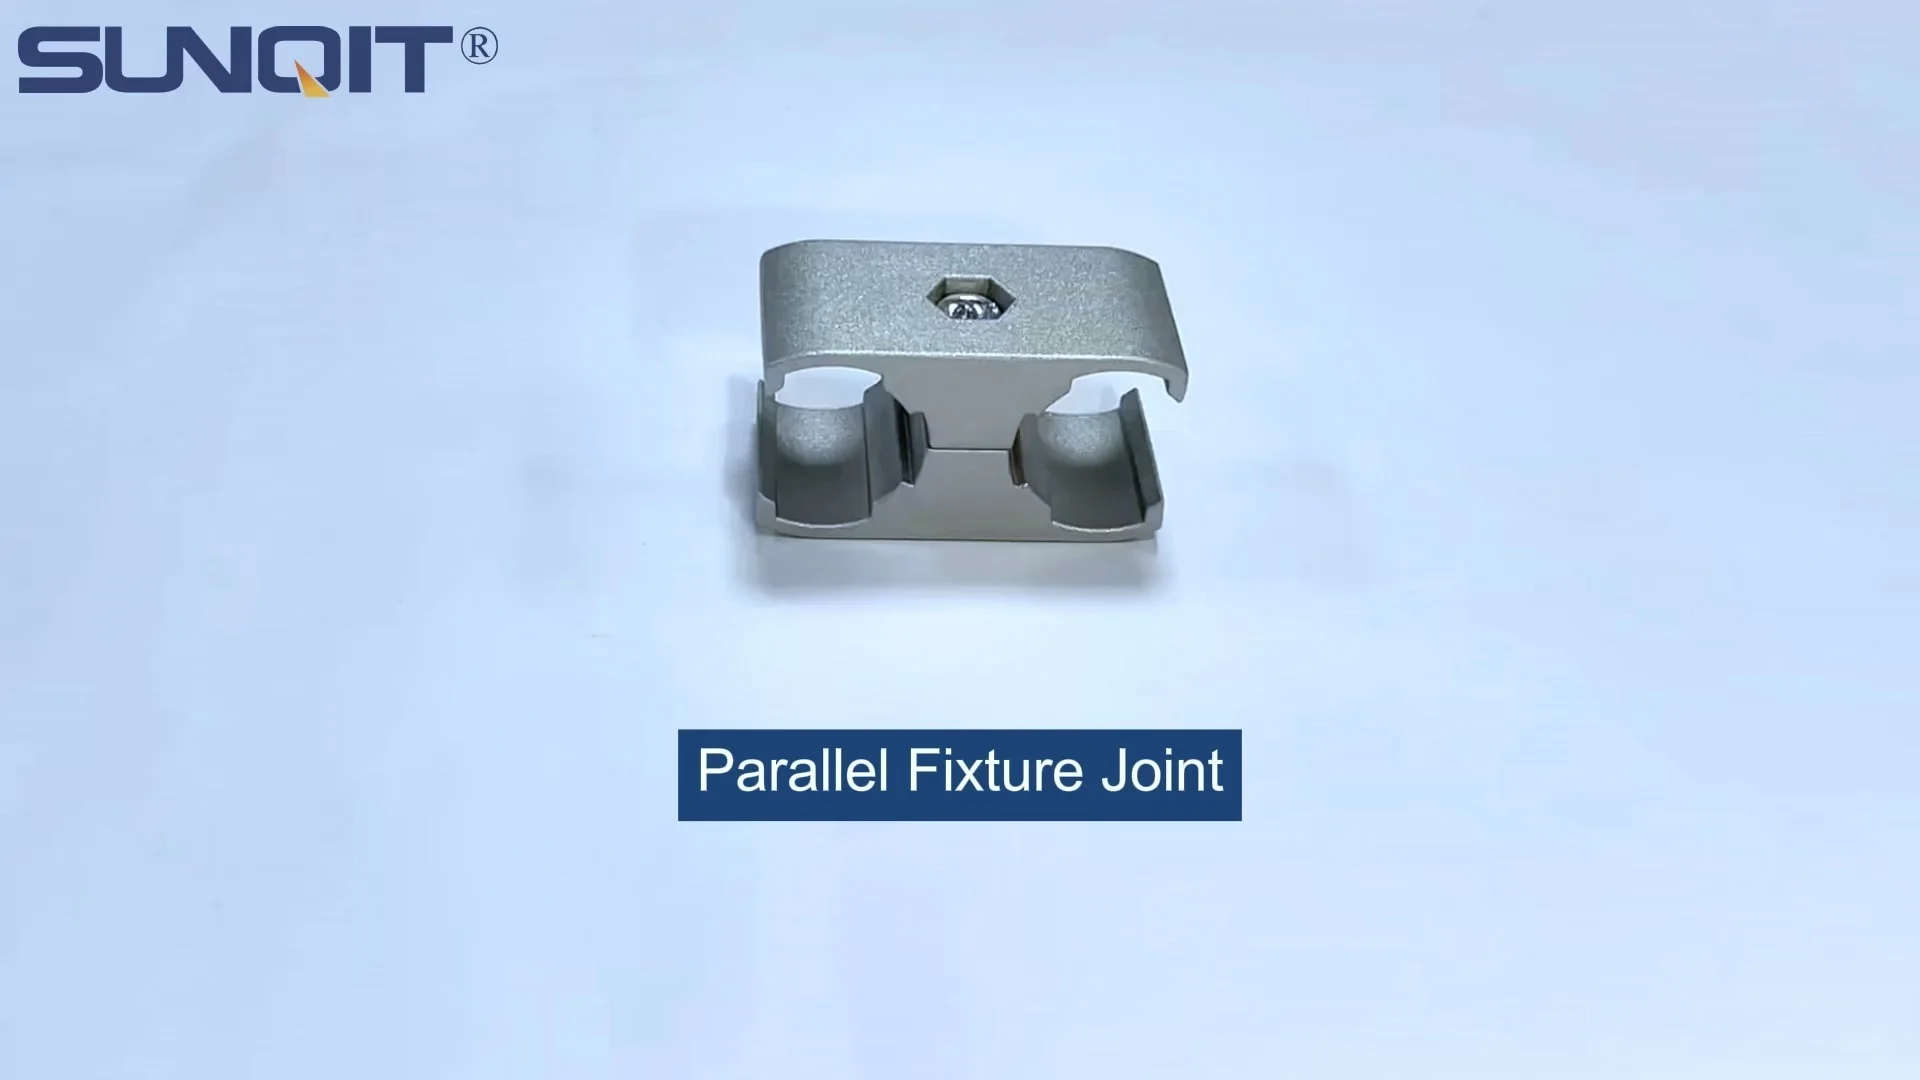
Parallel Fixation Aluminum Pipe Joint
Aluminum parallel joint for two pcs 28mm aluminum pipe connected by parallel direction.
It's 7:30 AM on a Tuesday at PrecisionWorks Manufacturing, and the morning shift is gearing up. Maria, the production supervisor, walks the floor, clipboard in hand, checking that everything's ready for the day's run. The assembly line hums to life, conveyor belts starting to roll, and workers take their positions. But within minutes, a halt—parts are jamming on the flow rack leading to Station 3. "Again?" Maria sighs, radioing maintenance. When the team arrives, they spot the issue: a loose parallel fixation aluminum pipe joint has caused two sections of the rack to misalign, creating a bottleneck. "We just tightened these last week," grumbles Jake, the maintenance lead. This small, unassuming component—the joint holding aluminum pipes together—has once again thrown a wrench in the works.
If you've ever worked in manufacturing, warehousing, or any industry that relies on modular workbenches, flow racks, or conveyor systems, you know the drill. These systems are the backbone of daily operations, and at their core lie aluminum pipes and the joints that keep them stable. Aluminum's lightweight, corrosion-resistant properties make it ideal for these setups, but even the strongest pipes are only as reliable as the joints securing them. In this article, we'll dive into the world of parallel fixation aluminum pipe joints—what they are, why they matter, the common headaches they cause in real-world use, and most importantly, how to solve them.
Understanding Parallel Fixation Aluminum Pipe Joints: The Unsung Heroes of Modular Systems
Before we jump into problems and solutions, let's get clear on what we're dealing with. Parallel fixation aluminum pipe joints are specialized connectors designed to secure two or more aluminum pipes in a parallel arrangement. Think of them as the "glue" that holds together workbenches, material racks, roller conveyors, and even custom storage solutions. Unlike rigid welds, these joints allow for flexibility—you can disassemble, reconfigure, or expand systems as needs change, which is why they're a staple in lean manufacturing and agile workspaces.
Most are made from aluminum alloy (often 6063-T5, prized for its strength-to-weight ratio) and feature a clamping mechanism—typically screws or bolts that tighten around the pipes, creating friction. They're often used with aluminum profiles (like T-slot aluminum pipes), which have grooves that let accessories like shelves, brackets, or guides slide into place. When paired with the right aluminum pipe accessories —washers, lock nuts, end caps—these joints create sturdy, adaptable structures that can handle everything from light tool storage to heavy-duty part transport.
But here's the thing: while aluminum pipes themselves are durable, joints are the weak link. They're subject to constant stress—vibration from machinery, weight from stored items, even temperature fluctuations. And when they fail, the consequences range from minor delays (like Maria's flow rack jam) to major safety hazards (think a collapsing workbench). Let's break down the most common issues and how to fix them.
Common Problems Faced in Real-World Applications
1. Loosening Over Time: The Silent Saboteur
Walk into any busy workshop, and you'll hear it—the steady buzz of drills, the rhythmic thump of assembly tools, the whir of conveyor belts. All that motion creates vibration, and over weeks or months, that vibration can slowly loosen even the tightest joints. It's a gradual process: a screw here works its way loose, a bolt there loses tension, until one day, the joint can't hold anymore. Thermal expansion adds another layer—aluminum expands when heated and contracts when cooled. In a facility with temperature swings (like a warehouse that gets hot in summer and cold in winter), this expansion-contraction cycle can create tiny gaps between the joint and pipe, weakening the grip.
The kicker? Often, the problem starts long before the joint visibly fails. Maybe the initial installation skipped a step—using a regular washer instead of a lock washer, or guessing at torque instead of using a wrench. "We see this all the time," says Lisa Chen, a sales engineer at a leading aluminum profile supplier. "A team sets up a workbench, tightens the joints 'good and snug' by hand, and figures it's done. But without proper torque or anti-loosening measures, vibration does the rest."
2. Misalignment During Installation: When "Close Enough" Isn't Enough
Imagine building a bookshelf: if the vertical posts aren't perfectly parallel, the shelves won't sit flat, and the whole thing wobbles. The same goes for aluminum pipe systems. Misaligned joints—where pipes aren't parallel or sit at an angle—create uneven stress, leading to premature wear, bent pipes, or even collapse. How does this happen? More often than not, it's human error. Maybe the installer eyeballed measurements instead of using a level, or rushed through the dry-fit (the step where you assemble parts without tightening to check alignment). Or, worse, they mixed and matched parts—using a joint designed for 30mm pipes on a 28mm aluminum profile , which leaves gaps and prevents a secure clamp.
Jake, from the earlier example at PrecisionWorks, once dealt with a particularly frustrating case: a roller conveyor that kept jamming because the rollers weren't level. "We checked the rollers, the frame, everything," he recalls. "Turns out, the installer had used a 90-degree joint where a parallel one was needed, so the pipes sat at a slight angle. The rollers were straight, but the frame wasn't—parts would ride up the slope and get stuck."
3. Corrosion in Harsh Environments: When Moisture and Chemicals Strike
Aluminum is naturally corrosion-resistant, thanks to a thin oxide layer that forms on its surface. But joints are often more vulnerable. Why? Because they have crevices—between the clamp and pipe, or around the screw head—where moisture, dust, or chemicals can accumulate. In humid environments (like food processing plants that use steam cleaning), coastal facilities (with salt in the air), or workshops with chemical cleaners, this can lead to "crevice corrosion." You might notice white, powdery deposits (aluminum oxide) or even pitting on the joint's surface. Over time, corrosion weakens the metal, making the joint brittle and prone to cracking.
Sarah Lopez, a plant manager at a seafood processing facility, learned this the hard way. "We have to hose down our workbenches daily to meet," she explains. "After a few months, the joints started getting crusty, and some even snapped when we tried to adjust the shelves. We thought aluminum was 'rust-proof,' but we didn't account for the constant moisture trapped in the joints."
4. Insufficient Load-Bearing: When Joints Can't Keep Up with the Weight
Here's a common scenario: A team builds a material rack using parallel fixation joints, stacks it with heavy parts, and assumes it'll hold. Then, one day, the middle sags, or a joint bends. The problem? Underestimating the load. Every joint has a maximum weight rating (e.g., 50kg per joint for light-duty, 150kg for heavy-duty), but users often ignore these specs. Maybe they overcrowd a shelf, or place a concentrated load (like a 100kg machine) on a single joint instead of distributing it across multiple. Even if the joint itself is rated for the weight, improper spacing can be an issue—spreading joints too far apart creates leverage, putting extra stress on each one.
"I once visited a warehouse where they'd built a custom rack for car batteries using standard joints," says Lisa Chen. "Each battery weighs 25kg, and they had 10 on a shelf—250kg total. The joints were rated for 50kg each, but they only used four per shelf. Math-wise, 4 x 50 = 200kg, which is less than 250kg. The shelf started sagging within a week."
5. Stuck Joints During Reconfiguration: When "Lean" Becomes "Stuck"
One of the biggest perks of modular systems is flexibility. Need to rearrange a workbench for a new product? Disassemble the old one and build a new layout. But that flexibility goes out the window when joints get stuck. Over-tightening is a common culprit—cranking down too hard on the bolts can strip threads or deform the joint's clamping surface, making it impossible to loosen. Corrosion is another factor: if moisture seeps into the threads, it can cause them to seize. Even something as simple as using the wrong tool (like a Phillips screwdriver on a hex bolt) can round off the head, leaving you stuck.
Maria, the production supervisor, remembers a time when PrecisionWorks tried to switch from assembling smartphones to tablets. "We needed to widen the workbenches by 12 inches," she says. "But half the joints were so stuck, we had to cut the pipes with a hacksaw. We wasted two hours and a perfectly good set of pipes—all because the last team to adjust them had over-tightened the bolts."

Solutions: Fixing (and Preventing) Joint Headaches
Now that we've covered the problems, let's talk solutions. The good news? Most joint issues are preventable with a little know-how, the right tools, and proactive maintenance. Below, we'll break down fixes for each problem, plus tips to keep joints working smoothly long-term.
1. Stopping Loosening: Lock It In (Literally)
The key to preventing loose joints is twofold: secure initial installation and ongoing maintenance. Start with the basics: always use lock washers. Split lock washers (with a split that "bites" into the joint) or toothed lock washers (with serrations that grip the surface) are cheap insurance against vibration. For high-vibration environments (like near stamping machines), add thread-locking fluid (e.g., medium-strength Loctite) to the bolts—it seeps into threads and hardens, preventing backspin. Just avoid permanent thread locker unless you never plan to disassemble the joint!
Torque matters too. "A lot of people think 'tighter is better,' but that's not true," says Jake. "Over-tightening can strip threads or warp the joint. Check the manufacturer's specs—most joints recommend 8-12 Nm of torque for M8 bolts. Use a torque wrench to get it right." Finally, schedule regular inspections. In high-use areas, check joints weekly; in low-traffic zones, monthly. Tighten any that feel loose, and replace worn washers or bolts immediately.
2. Ensuring Alignment: Measure Twice, Tighten Once
Misalignment is easy to fix before it becomes a problem—just slow down during installation. Start with a dry fit: assemble the pipes and joints without tightening, then use a spirit level or laser level to check that pipes are parallel and level. If something's off, adjust before clamping. For longer runs (like a 10-foot conveyor), use string lines to ensure straightness—stretch a string along the intended path and align pipes to it.
Match parts correctly: always use joints designed for your pipe size. If you're unsure, check the product label—most joints list compatible pipe diameters (e.g., "For 30mm Aluminum Profiles"). And invest in alignment tools: a small carpenter's square can check 90-degree angles, while a parallel clamp (used temporarily during installation) holds pipes steady while you tighten joints. "We keep a tool kit with levels, squares, and torque wrenches on every installation cart now," says Maria. "It adds 10 minutes to setup, but saves hours of headaches later."
3. Fighting Corrosion: Protect the Joints
In humid or chemical-heavy environments, corrosion-resistant joints are a must. Look for joints with anodized finishes—anodizing thickens the oxide layer on aluminum, making it more resistant to moisture and chemicals. For extreme cases (like coastal areas with salt spray), choose joints with nickel plating or stainless steel components. Even better, pair them with corrosion-resistant aluminum pipe accessories —stainless steel bolts, plastic end caps to seal pipe ends, and rubber gaskets to prevent water from seeping into joints.
Regular cleaning helps too. Wipe down joints with a damp cloth monthly to remove dust and grime, which can trap moisture. In food processing or pharmaceutical settings, use mild soap and water (avoid harsh chemicals that can damage anodizing). If you spot early corrosion (white spots), gently scrub with a soft brush and baking soda paste, then rinse and dry thoroughly. For stubborn spots, use a specialized aluminum cleaner (never steel wool, which scratches the oxide layer).
4. Boosting Load-Bearing: Know Your Limits
To avoid overloading joints, start by checking the load rating. Manufacturers usually list this on the product page or packaging (e.g., "Max Load: 80kg per joint"). As a rule of thumb, never exceed 80% of the rated load—this leaves a safety buffer for unexpected stress (like someone leaning on a workbench). For heavy loads, use multiple joints: instead of spacing joints 3 feet apart on a shelf, try 2 feet. And distribute weight evenly—avoid piling all items in one corner. If you're storing irregularly shaped objects, add cross-braces or extra supports to spread the load.
When in doubt, consult an engineer. "If you're building something custom—like a rack for 500kg machinery—don't guess," advises Lisa Chen. "Most suppliers have technical teams that can help calculate how many joints you need and where to place them. It's free, and it beats rebuilding a collapsed structure."
5. Making Reconfiguration Easy: Loosen Up (Strategically)
To keep joints easy to disassemble, start with proper tightening—follow torque specs, and avoid "gorilla strength." Apply anti-seize lubricant to bolt threads during installation (especially in humid areas)—it prevents corrosion and makes loosening easier later. For joints that will be reconfigured often, use reusable thread locker (e.g., low-strength Loctite) instead of permanent. And label joints that need to stay tight vs. those that might need adjustment—tape a small "adjustable" sticker on joints you'll likely loosen later.
If a joint does get stuck, don't panic. Spray the bolts with penetrating oil (like WD-40 or PB Blaster) and let it sit for 15-20 minutes—this dissolves rust and eases friction. Use the right tool for the job: a six-point socket or box-end wrench (which grips better than an open-end wrench) to avoid rounding bolts. If all else fails, carefully heat the joint with a heat gun (aluminum conducts heat well, so the bolt will expand and loosen). Just be cautious—don't overheat plastic components!

Problem-Solution Quick Reference Table
| Common Problem | Causes | Solutions |
|---|---|---|
| Loosening over time | Vibration, thermal expansion, improper initial tightening, missing lock washers | Use lock washers and thread-locking fluid; torque bolts to specs; schedule regular inspections |
| Misalignment during installation | Eyeballed measurements, skipped dry fit, mismatched pipe/joint sizes | Dry fit first; use levels/string lines for alignment; match joint size to pipe diameter |
| Corrosion in harsh environments | Moisture, salt, chemicals trapped in crevices; uncoated joints | Choose anodized or stainless steel joints; clean regularly; use plastic end caps to seal pipes |
| Insufficient load-bearing | Underestimating weight, overcrowding, wide joint spacing | Check load ratings; use multiple joints; distribute weight evenly; add cross-braces |
| Stuck joints during reconfiguration | Over-tightening, corrosion, stripped threads, wrong tools | Follow torque specs; use anti-seize lubricant; label adjustable joints; use penetrating oil on stuck bolts |
Case Study: How PrecisionWorks Fixed Their Joint Issues
After the flow rack incident, Maria decided to tackle PrecisionWorks' joint problems head-on. She started by training the maintenance team on proper torque and alignment, and invested in a set of torque wrenches and laser levels. They switched to toothed lock washers and low-strength thread locker on all joints, and created a weekly inspection checklist for high-use areas. For the seafood processing line (prone to moisture), they replaced standard joints with anodized models and added plastic end caps to pipe ends.
The results? In three months, downtime due to joint issues dropped from 4 hours per week to less than 30 minutes. Workers reported fewer near-misses (like shelves tilting), and the team saved money by reusing pipes during reconfigurations instead of cutting them. "We used to see joints as just 'another part,'" Maria says. "Now we treat them like the critical component they are. It's made a world of difference."

Conclusion: Small Joints, Big Impact
Parallel fixation aluminum pipe joints might not be the flashiest part of your workflow, but they're undeniably essential. Loose, misaligned, or corroded joints don't just cause delays—they risk safety, waste materials, and derail productivity. But with the right knowledge, tools, and habits, these problems are easy to prevent. Remember: measure twice, tighten to specs, protect against corrosion, and inspect regularly. Whether you're building a simple workbench or a complex conveyor system, the joints holding it all together deserve attention. After all, in manufacturing, the smallest components often have the biggest impact.
So the next time you walk past a flow rack or workbench, take a second to appreciate the joints. They might not get the glory, but they're the quiet heroes keeping your operation moving—one tight, aligned, corrosion-free connection at a time.